


【摘要】
实时掌握服务器运行状态对系统管理员来说非常重要,服务器出现问题是第一时间知道可以保证及时处理,将意外损失降到最小。利用powershell可简单实现监控功能,并在服务器掉线或关键服务停止时发出邮件通知管理员,使管理员可以及时处理故障。
【正文】
一脚本组成

如图,除powershell脚本文件外,需要创建3个txt文件,分别为Servers.txt、Services.txt、Urls.txt。三个文件都是以csv格式导入,第一行内容需要保留,添加内容由第二行开始
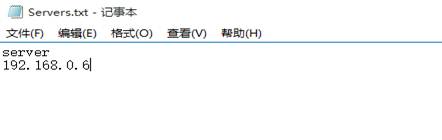
Servers.txt添加服务器名用于监控服务器在线情况
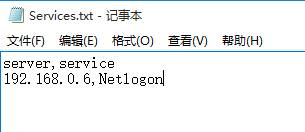
Services.txt添加服务器名及服务名用于监控关键服务运行情况
Urls.txt添加网站用于监控网页是否能正常打开

二脚本内容
$Urls = import-csv Urls.txt
$Servers = import-csv Servers.txt
$Services = import-csv Services.txt
$mailcontent = $null
$mailFrom = "XXX@canway.net"
$mailTo = "XXX@canway.net"
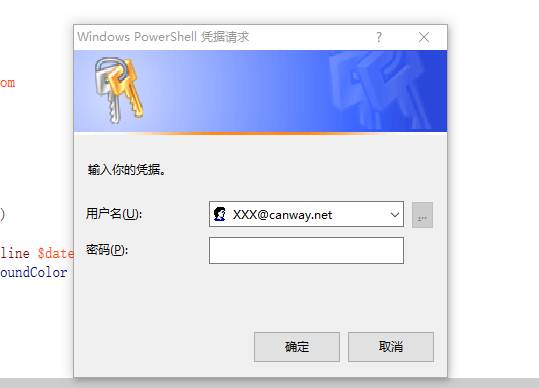
$Credential = Get-Credential -Credential $mailFrom
While($true)
{
Foreach ($server in $Servers)
{
$hostname = $server.server
if (!(test-connection $hostname -count 2 -quiet))
{$date = Get-Date
$mailcontent = $mailcontent + "$hostname is offline $date `n"
Write-Host "$hostname is offline $date" -ForegroundColor Red}
}
Foreach ($service in $Services)
{
$Server = $Service.server
$ServiceName = $Service.service
If (!(test-connection $Server -count 2 -quiet))
{$date = Get-Date
$mailcontent = $mailcontent + "$Server is offline $date `n"
Write-Host "$Server is offline $date" -ForegroundColor Red}
Else
{$Servicestate = (Get-WmiObject -Class win32_service -ComputerName $Server|Where-Object{$_.Name -eq $ServiceName}).State
If($Servicestate -ne "Running")
{$date = Get-Date
$mailcontent = $mailcontent + "$ServiceName in $Server is not running! $date `n"
Write-Host "$ServiceName in $Server is not running! $date" -ForegroundColor Red}
}
}
Foreach($url in $Urls)
{
$Website = $url.website
Invoke-WebRequest $Website
If(!$?)
{$date = Get-Date
$mailcontent = $mailcontent + "$Website 无法连接 $date `n"
Write-Host "$Website 无法连接 $date" -ForegroundColor Red}
}
If($mailcontent -ne $null)
{
Send-MailMessage -Body $mailcontent -SmtpServer smtp.partner.outlook.cn -From $mailFrom -To $mailTo -Subject "Warning" -UseSsl -Credential $Credential -Port 587
}
$mailcontent = $null
sleep 3600
}
三脚本使用
用1.2所列出的脚本内容创建powershell脚本,与Servers.txt、Services.txt、Urls.txt放在同一路径下,用有权限的账户运行
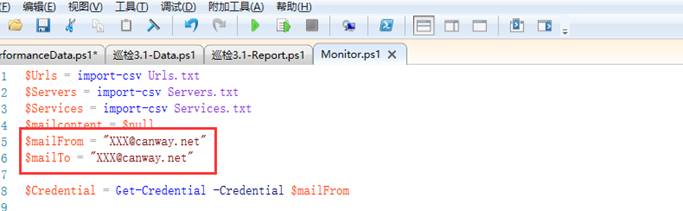
当有任意一项检查不通过时,会发邮件通知管理员。如图,修改以下位置可以自定义收件人和发件人。
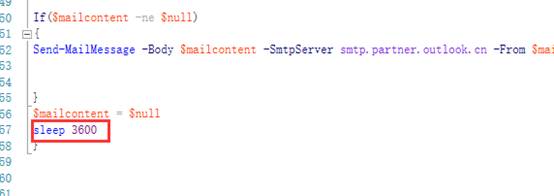
运行脚本后会让你填入邮箱密码,之后脚本就会每个小时检查一次,检查不通过时发邮件到设定的收件人,脚本检查间隔可自定义,如图,初始设置为3600s
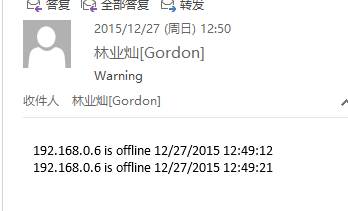
收到邮件如图
选择发件人邮箱后需要在下面的命令里修改Smtp服务器和端口号
Send-MailMessage-Body$mailcontent-SmtpServersmtp.partner.outlook.cn-From$mailFrom-To$mailTo-Subject"Warning"-UseSsl-Credential$Credential-Port587


 1273
1273


 被折叠的 条评论
为什么被折叠?
被折叠的 条评论
为什么被折叠?
 到【灌水乐园】发言


