


因为一些原因,我断更了几天时间,因为要准备面试 + 不在家,抱歉大家!
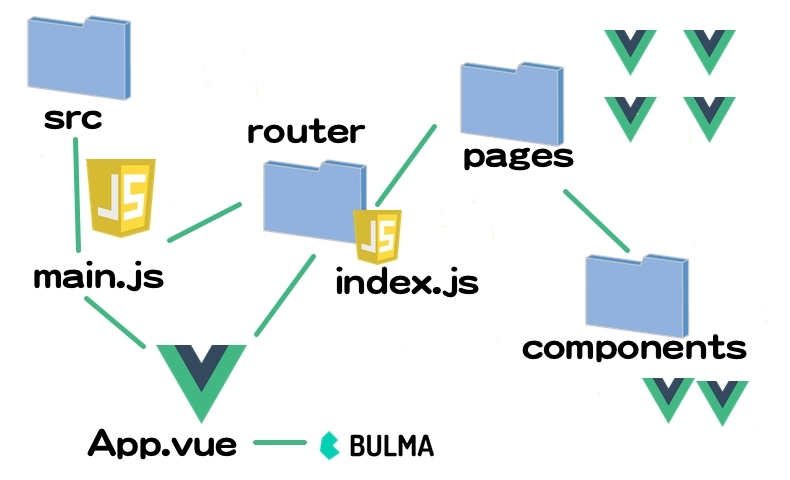
题图是一个大概的 Vue 模块化项目组成,当然因为我从网上找的,所以可以忽略当中的 Bulma,这其实是一个 CSS 框架,往简单来说就是为了美化界面用的。
今天的内容,继续来看看路由的部分,主要是嵌套路由、导航以及命名这些稍稍细节的部分。
1 嵌套路由
实际生活中的应用界面,通常由多层嵌套的组件组合而成。同样地,URL 中各段动态路径也按某种结构对应嵌套的各层组件,例如:
/user/foo/profile                     /user/foo/posts
+------------------+                  +-----------------+
| User             |                  | User            |
| +--------------+ |                  | +-------------+ |
| | Profile      | |  +------------>  | | Posts       | |
| |              | |                  | |             | |
| +--------------+ |                  | +-------------+ |
+------------------+                  +-----------------+
实际一点的例子就是,一个网站或者应用的选项卡:在选项卡中,顶部有多个导航栏,中间的主体显示的是内容;这个时候,整个页面是一个路由,然后点击选项卡切换不同的路由来展示不同的内容,就是中间的主体显示的是内容就是页面路由下的子路由,这就是路由中嵌套路由。
借助 vue-router,使用嵌套路由配置,就可以很简单地表达这种关系。
接着上节的范例,还是使用如下 HTML:
<div id="app">
  <router-view></router-view>
</div>Vue:
const User = {
  template: '<div>User {{ $route.params.id }}</div>'
};

const router = new VueRouter({
  routes: [
    { path: '/user/:id', component: User }
  ]
});
这里的 <router-view> 是最顶层的出口,渲染最高级路由匹配到的组件,同样地,一个被渲染组件同样可以包含自己的嵌套 <router-view>;例如,在 User 组件的模板添加一个 <router-view>:
const User = {
  template: `
    <div class="user">
      <h2>User {{ $route.params.id }}</h2>
      <router-view></router-view>
    </div>
  `
};
要在嵌套的出口中渲染组件,需要在 VueRouter 的参数中使用 children 配置:
const router = new VueRouter({
  routes: [
    { path: '/user/:id', component: User,
      children: [
        {
          // 当 /user/:id/profile 匹配成功,
          // UserProfile 会被渲染在 User 的 <router-view> 中
          path: 'profile',
          component: UserProfile
        },
        {
          // 当 /user/:id/posts 匹配成功
          // UserPosts 会被渲染在 User 的 <router-view> 中
          path: 'posts',
          component: UserPosts
        }
      ]
    }
  ]
});
要注意,以 / 开头的嵌套路径会被当作根路径, 这可以让我们充分的使用嵌套组件而无须设置嵌套的路径。
children 配置就是像 routes 配置一样的路由配置数组,所以可以嵌套多层路由。
此时,基于上面的配置,当我们访问 /user/foo 时,User 的出口是不会渲染任何东西,这是因为没有匹配到合适的子路由;如果想要渲染点什么,可以提供一个空的子路由:
const router = new VueRouter({
  routes: [
    {
      path: '/user/:id', component: User,
      children: [
        // 当 /user/:id 匹配成功,
        // UserHome 会被渲染在 User 的 <router-view> 中
        { path: '', component: UserHome },

        // ...其他子路由
      ]
    }
  ]
});
完整范例如下(这是一个非常基础的范例,没有做子路由的动态,也是固定的):
<!DOCTYPE html>
<html>
  <head>
    <title>hello</title>
    <script src="https://unpkg.com/vue"></script>
    <script src="https://unpkg.com/vue-router"></script>
  </head>
  <body>
    <div id="app">
      <p>
          <router-link :to="{ name: 'user', params: { id: 'foo11', profile: 'test1', posts: 'test11' }}">foo</router-link>
          <router-link :to="{ name: 'user', params: { id: 'bar11', profile: 'test2', posts: 'test21' }}">bar</router-link>
      </p>
      <router-view></router-view>
    </div>
    <script>
      const User = {
        template: `
          <div class="user">
            <h2>User {{ $route.params.id }}</h2>
            <router-link :to="{ name: 'profile', params: { profile: 'test1'}}">profile</router-link>
            <router-link :to="{ name: 'posts', params: { posts: 'test2'}}">posts</router-link>
            <router-view></router-view>
          </div>
        `
      };
      const UserProfile = {
        template: `
          <div class="user-profile">
            <h3>User Profile {{ $route.params.profile }}</h3>
          </div>
        `
      };
      const UserPosts = {
        template: `
          <div class="user-posts">
            <h3>User Posts {{ $route.params.posts }}</h3>
          </div>
        `
      };
      const router = new VueRouter({
        routes: [
          {
            path: '/user/:id',
            name: 'user',
            component: User,
            children: [
              {
                path: 'profile',
                name: 'profile',
                component: UserProfile
              },
              {
                path: 'posts',
                name: 'posts',
                component: UserPosts
              },
              {
                path: '',
                component: UserProfile
              }
            ]
          }
        ]
      });
      const app = new Vue({ router }).$mount("#app");
    </script>
  </body>
</html>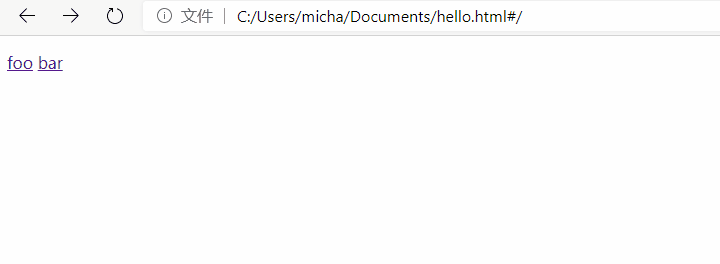
当然这里还有一个模块化的范例,HTML 部分非常简单:
<!DOCTYPE html>
<link rel="stylesheet" href="/global.css">
<style>
.parent {
border: 1px solid #f66;
padding: 10px;
}
.child {
border: 1px solid #f66;
padding: 10px 20px;
}
</style>
<a href="/">← Examples index</a>
<div id="app"></div>
<script src="/__build__/shared.chunk.js"></script>
<script src="/__build__/nested-routes.js"></script>Vue:
import Vue from 'vue';
import VueRouter from 'vue-router';
Vue.use(VueRouter);
// A route component can also contain <router-view> to render
// nested children route components
const Parent = {
template: `
<div class="parent">
<h2>Parent</h2>
<router-view class="child"></router-view>
</div>
`
};
const Default = { template: '<div>default</div>' };
const Foo = { template: '<div>foo</div>' };
const Bar = { template: '<div>bar</div>' };
const Baz = { template: '<div>baz</div>' };
const Qux = {
template: `
<div class="nested-parent">
<h3>qux</h3>
<router-link :to="{ name: 'quux' }">/quux</router-link>
<router-view class="nested-child"></router-view>
</div>
`
};
const Quy = {
template: `
<div class="nested-parent-other">
<h3>quy</h3>
<pre>{{ JSON.stringify(Object.keys($route.params)) }}</pre>
</div>
`
};
const Quux = {
template: `<div>quux<router-link :to="{ name: 'quuy' }">go to quuy</router-link></div>`
}
const Quuy = { template: '<div>quuy</div>' }
const Zap = {
template: '<div><h3>zap</h3><pre>{{ $route.params.zapId }}</pre></div>'
};
const router = new VueRouter({
mode: 'history',
base: __dirname,
routes: [
{ path: '/', redirect: '/parent' },
{
path: '/parent',
component: Parent,
children: [
// an empty path will be treated as the default, e.g.
// components rendered at /parent: Root -> Parent -> Default
{ path: '', component: Default },
// components rendered at /parent/foo: Root -> Parent -> Foo
{ path: 'foo', component: Foo },
// components rendered at /parent/bar: Root -> Parent -> Bar
{ path: 'bar', component: Bar },
// NOTE absolute path here!
// this allows you to leverage the component nesting without being
// limited to the nested URL.
// components rendered at /baz: Root -> Parent -> Baz
{ path: '/baz', component: Baz },
{
path: 'qux/:quxId',
component: Qux,
children: [
{ path: 'quux', name: 'quux', component: Quux },
{ path: 'quuy', name: 'quuy', component: Quuy }
]
},
{ path: 'quy/:quyId', component: Quy },
{ name: 'zap', path: 'zap/:zapId?', component: Zap }
]
}
]
});
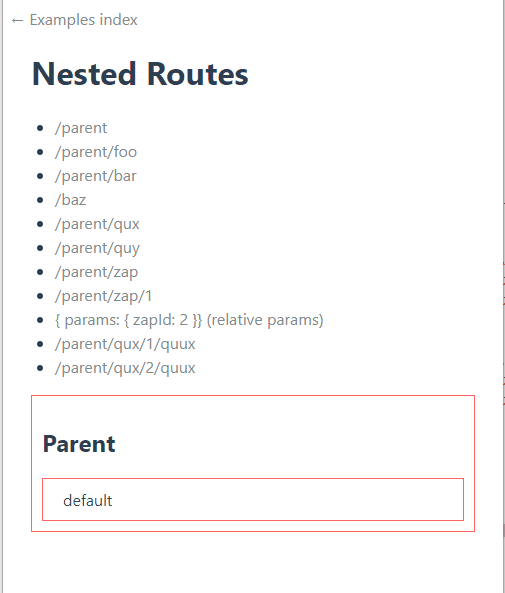
new Vue({
router,
template: `
<div id="app">
<h1>Nested Routes</h1>
<ul>
<li><router-link to="/parent">/parent</router-link></li>
<li><router-link to="/parent/foo">/parent/foo</router-link></li>
<li><router-link to="/parent/bar">/parent/bar</router-link></li>
<li><router-link to="/baz">/baz</router-link></li>
<li><router-link to="/parent/qux/123">/parent/qux</router-link></li>
<li><router-link to="/parent/quy/123">/parent/quy</router-link></li>
<li><router-link :to="{name: 'zap'}">/parent/zap</router-link></li>
<li><router-link :to="{name: 'zap', params: {zapId: 1}}">/parent/zap/1</router-link></li>
<li><router-link :to="{ params: { zapId: 2 }}">{ params: { zapId: 2 }} (relative params)</router-link></li>
<li><router-link to="/parent/qux/1/quux">/parent/qux/1/quux</router-link></li>
<li><router-link to="/parent/qux/2/quux">/parent/qux/2/quux</router-link></li>
</ul>
<router-view class="view"></router-view>
</div>
`
}).$mount('#app');
2 编程式导航
除了使用 <router-link> 创建 a 标签来定义导航链接,我们还可以借助 router 的实例方法,通过编写代码来实现。
2.1 跳转到新 URL
router.push(location, onComplete?, onAbort?);
注意:在 Vue 实例内部,我们可以通过 $router 访问路由实例,因此可以调用 this.$router.push。
想要导航到不同的 URL,则使用 router.push 方法,这个方法会向 history 栈添加一个新的记录,所以,当用户点击浏览器后退按钮时,则回到之前的 URL。
当点击 <router-link> 时,这个方法会在内部调用,所以说,点击 <router-link :to="..."> 等同于调用 router.push(...)。
| 声明式 | 编程式 |
|---|---|
| <router-link :to="..."> | router.push(...) |
该方法的参数可以是一个字符串路径,或者一个描述地址的对象,例如:
// 字符串
router.push('home');

// 对象
router.push({ path: 'home' });

// 命名的路由
router.push({ name: 'user', params: { userId: '123' }});

// 带查询参数,变成 /register?plan=private
router.push({ path: 'register', query: { plan: 'private' }});
注意:如果提供了 path, params 会被忽略,上述例子中的 query 并不属于这种情况。
取而代之的是下面例子的做法,需要提供路由的 name 或手写完整的带有参数的 path:
const userId = '123';
router.push({ name: 'user', params: { userId }}); // -> /user/123
router.push({ path: `/user/${userId}` }); // -> /user/123
// 这里的 params 不生效
router.push({ path: '/user', params: { userId }}); // -> /user
同样的规则也适用于 router-link 组件的 to 属性。
我们可以选择在 router.push 或 router.replace 中提供 onComplete 和 onAbort 回调作为第二个和第三个参数,这些回调将会在导航成功完成 (在所有的异步钩子被解析之后) 或终止 (导航到相同的路由、或在当前导航完成之前导航到另一个不同的路由) 的时候进行相应的调用。
在 3.1.0+,可以省略第二个和第三个参数,此时如果支持 Promise,router.push 或 router.replace 将返回一个 Promise。
注意: 如果目的地和当前路由相同,只有参数发生了改变 (比如从一个用户资料到另一个 /users/1 -> /users/2),需要使用 beforeRouteUpdate 来响应这个变化 (比如抓取用户信息)。
2.2 替换当前 URL
router.replace(location, onComplete?, onAbort?);
跟 router.push 很像,唯一的不同就是,它不会向 history 添加新记录,而是跟它的方法名一样 —— 替换掉当前的 history 记录。
| 声明式 | 编程式 |
|---|---|
| <router-link :to="..." replace> | router.replace(...) |
2.3 前进或后退 n 步
router.go(n);
这个方法的参数是一个整数,意思是在 history 记录中向前或者后退多少步,类似 window.history.go(n)。
例子:
// 在浏览器记录中前进一步,等同于 history.forward()
router.go(1);

// 后退一步记录,等同于 history.back()
router.go(-1);

// 前进 3 步记录
router.go(3);

// 如果 history 记录不够用,就默默地失败
router.go(-100);
router.go(100);
2.4 操作 History
我们可以发现 router.push、 router.replace 和 router.go 跟 window.history.pushState、 window.history.replaceState 和 window.history.go好像, 实际上这些 Vue Router API 确实是效仿 window.history API 的。
因此,如果已经熟悉 Browser History APIs,那么在 Vue Router 中操作 history 就是超级简单的。
还有值得提及的,Vue Router 的导航方法 (push、 replace、 go) 在各类路由模式 (history、 hash 和 abstract) 下表现一致——学会一种,其他的也就不用发愁了,哈哈。
3 命名路由
有时候,通过一个名称来标识一个路由显得更方便一些,特别是在链接一个路由,或者是执行一些跳转的时候;我们可以在创建 Router 实例的时候,在 routes 配置中给某个路由设置名称,比如:
const router = new VueRouter({
  routes: [
    {
      path: '/user/:userId',
      name: 'user',
      component: User
    }
  ]
});
要链接到一个命名路由,可以给 router-link 的 to 属性传一个对象:
<router-link :to="{ name: 'user', params: { userId: 123 }}">User</router-link>这跟代码调用 router.push() 是一回事:
router.push({ name: 'user', params: { userId: 123 }})
这两种方式都会把路由导航到 /user/123 路径。
这里有个相对简单的范例(模块化的):
HTML:
<!DOCTYPE html>
<link rel="stylesheet" href="/global.css">
<a href="/">← Examples index</a>
<div id="app"></div>
<script src="/__build__/shared.chunk.js"></script>
<script src="/__build__/named-routes.js"></script>Vue:
import Vue from 'vue';
import VueRouter from 'vue-router';
Vue.use(VueRouter);
const Home = { template: '<div>This is Home</div>' };
const Foo = { template: '<div>This is Foo</div>' };
const Bar = { template: '<div>This is Bar {{ $route.params.id }}</div>' };
const router = new VueRouter({
mode: 'history',
base: __dirname,
routes: [
{ path: '/', name: 'home', component: Home },
{ path: '/foo', name: 'foo', component: Foo },
{ path: '/bar/:id', name: 'bar', component: Bar }
]
});
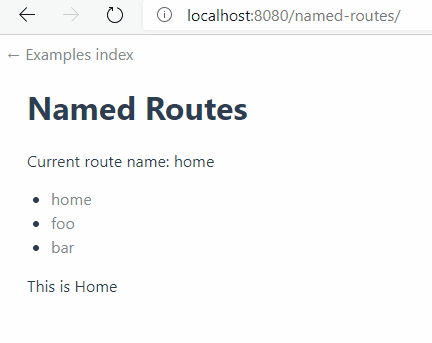
new Vue({
router,
template: `
<div id="app">
<h1>Named Routes</h1>
<p>Current route name: {{ $route.name }}</p>
<ul>
<li><router-link :to="{ name: 'home' }">home</router-link></li>
<li><router-link :to="{ name: 'foo' }">foo</router-link></li>
<li><router-link :to="{ name: 'bar', params: { id: 123 }}">bar</router-link></li>
</ul>
<router-view class="view"></router-view>
</div>
`
}).$mount('#app');
4 命名视图
有时候想同时 (同级) 展示多个视图,而不是嵌套展示,例如创建一个布局,有 sidebar (侧导航) 和 main (主内容) 两个视图,这个时候命名视图就派上用场了;我们可以在界面中拥有多个单独命名的视图,而不是只有一个单独的出口,如果 router-view 没有设置名字,那么默认为 default:
<router-view class="view one"></router-view>
<router-view class="view two" name="a"></router-view>
<router-view class="view three" name="b"></router-view>
一个视图使用一个组件渲染,因此对于同个路由,多个视图就需要多个组件,确保正确使用 components 配置 (带上 s):
const router = new VueRouter({
  routes: [
    {
      path: '/',
      components: {
        default: Foo,
        a: Bar,
        b: Baz
      }
    }
  ]
});
其实在上面的完整范例当中,我已经使用了命名,不过是在配置路由的时候在 JavaScript 当中进行的,可以留意一下。
嵌套命名视图
我们也有可能使用命名视图创建嵌套视图的复杂布局,这时也需要命名用到的嵌套 router-view 组件;我们以一个设置面板为例:
/settings/emails                                       /settings/profile
+-----------------------------------+                  +------------------------------+
| UserSettings                      |                  | UserSettings                 |
| +-----+-------------------------+ |                  | +-----+--------------------+ |
| | Nav | UserEmailsSubscriptions | |  +------------>  | | Nav | UserProfile        | |
| |     +-------------------------+ |                  | |     +--------------------+ |
| |     |                         | |                  | |     | UserProfilePreview | |
| +-----+-------------------------+ |                  | +-----+--------------------+ |
+-----------------------------------+ +------------------------------+- Nav 只是一个常规组件
- UserSettings 是一个视图组件
- UserEmailsSubscriptions、UserProfile、UserProfilePreview 是嵌套的视图组件
注意: 我们可以先忽略 HTML/CSS 具体的布局的样子,只专注在用到的组件上。
UserSettings 组件的 <template> 部分应该是类似下面的这段代码:
<!-- UserSettings.vue -->
<div>
  <h1>User Settings</h1>
  <NavBar/>
  <router-view/>
  <router-view name="helper"/>
</div>
然后我们就可以用这个路由配置完成该布局:
{
  path: '/settings',
  // 也可以在顶级路由就配置命名视图
  component: UserSettings,
  children: [{
    path: 'emails',
    component: UserEmailsSubscriptions
  }, {
    path: 'profile',
    components: {
      default: UserProfile,
      helper: UserProfilePreview
    }
  }]
}
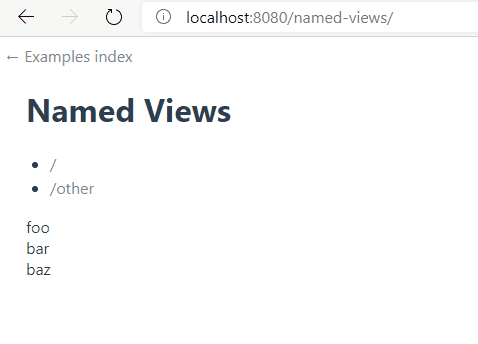
完整范例如下(模块化):
HTML:
<!DOCTYPE html>
<link rel="stylesheet" href="/global.css">
<a href="/">← Examples index</a>
<div id="app"></div>
<script src="/__build__/shared.chunk.js"></script>
<script src="/__build__/named-views.js"></script>Vue:
import Vue from 'vue';
import VueRouter from 'vue-router';

Vue.use(VueRouter);

const Foo = { template: '<div>foo</div>' };
const Bar = { template: '<div>bar</div>' };
const Baz = { template: '<div>baz</div>' };

const router = new VueRouter({
  mode: 'history',
  base: __dirname,
  routes: [
    { path: '/',
      // a single route can define multiple named components
      // which will be rendered into <router-view>s with corresponding names.
      components: {
        default: Foo,
        a: Bar,
        b: Baz
      }
    },
    {
      path: '/other',
      components: {
        default: Baz,
        a: Bar,
        b: Foo
      }
    }
  ]
});

new Vue({
  router,
  template: `
    <div id="app">
      <h1>Named Views</h1>
      <ul>
        <li><router-link to="/">/</router-link></li>
        <li><router-link to="/other">/other</router-link></li>
      </ul>
      <router-view class="view one"></router-view>
      <router-view class="view two" name="a"></router-view>
      <router-view class="view three" name="b"></router-view>
    </div>
  `
}).$mount('#app');


 1万+
1万+


 被折叠的 条评论
为什么被折叠?
被折叠的 条评论
为什么被折叠?
 到【灌水乐园】发言


