


在上一篇中及就写了自定义view中的onMeausre()和onDraw()两个方法。在这里就用简单的流式布局来介绍一下onLayout()方法。
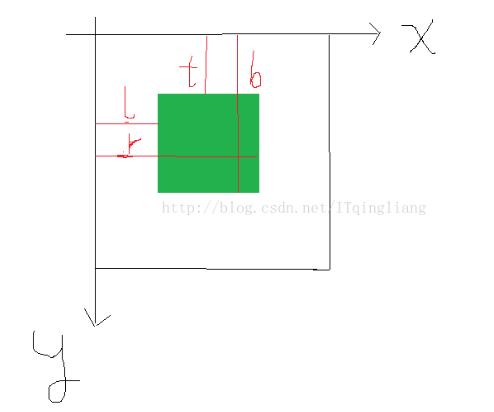
在onLayout方法中有四个参数,我画了一个简单的图来分清楚值哪里。
好啦,现在就直接看代码吧。
FlowLayout.Java
package com.example.my_view;
import android.content.Context;
import android.util.AttributeSet;
import android.view.View;
import android.view.ViewGroup;
/**
* 自定义布局 流布局
*/
public class FlowLayout extends ViewGroup {
public FlowLayout(Context context) {
super(context);
}
public FlowLayout(Context context, AttributeSet attrs) {
super(context, attrs);
}
/**
*
* @param changed
* @param l 左
* @param t 上
* @param r 右
* @param b 下
*/
@Override
protected void onLayout(boolean changed, int l, int t, int r, int b) {
//获得子控件的数量
int childCount = getChildCount();
//当前子控件的左边坐标
int cl = 0;
//当前子控件的上边坐标
int ct = 0;
//ViewGroup整体宽度
int width = r - l;
//行高
int lineHeight = 0;
//遍历所有子控件
for(int i = 0; i < childCount; i++){
//获取当前控件
View childAt = getChildAt(i);
//获取宽度
int cw = childAt.getMeasuredWidth();
//获取高度
int ch = childAt.getMeasuredHeight();
//当前控件右边
int cr = cl + cw;
//当前控件下边
int cb = ct + ch;
//判断是否换行
if(cr > width){
//如果换行重新计算上下左右地值
cl = 0;
cr = cl + cw;
ct += lineHeight;
cb = ct + ch;
//换行后,第一个控件作为最大行高
lineHeight = ch;
}else{
//如果不换行,需要计算最大高度
lineHeight = Math.max(lineHeight,ch);
}
childAt.layout(cl,ct,cr,cb);
//横向向后移动一个,前面控件的右边作为后面控件的左边
cl = cr;
}
}
@Override
protected void onMeasure(int widthMeasureSpec, int heightMeasureSpec) {
super.onMeasure(widthMeasureSpec, heightMeasureSpec);
//测量所有子控件
measureChildren(widthMeasureSpec, heightMeasureSpec);
}
}
activity_main.xml
xmlns:android="http://schemas.android.com/apk/res/android"
xmlns:app="http://schemas.android.com/apk/res-auto"
xmlns:tools="http://schemas.android.com/tools"
android:layout_width="match_parent"
android:layout_height="match_parent"
tools:context="com.example.my_view.MainActivity">
android:layout_width="200dp"
android:layout_height="50dp"
android:text="button1"/>
android:layout_width="100dp"
android:layout_height="100dp"
android:text="button2"/>
android:layout_width="180dp"
android:layout_height="60dp"
android:text="button3"/>
android:layout_width="100dp"
android:layout_height="50dp"
android:text="button4"/>
android:layout_width="80dp"
android:layout_height="100dp"
android:text="button5"/>
android:layout_width="100dp"
android:layout_height="50dp"
android:text="button6"/>
android:layout_width="120dp"
android:layout_height="70dp"
android:text="button7"/>
android:layout_width="100dp"
android:layout_height="50dp"
android:text="button8"/>
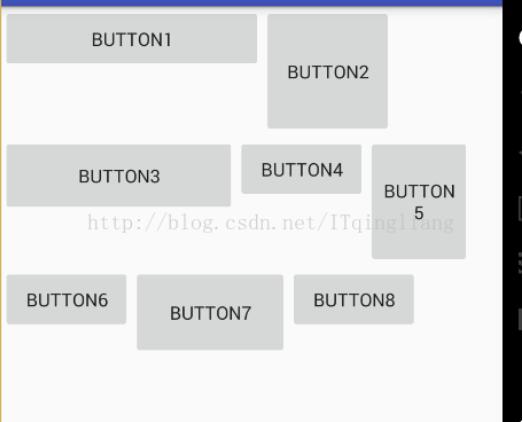
效果图:
以上就是本文的全部内容,希望对大家的学习有所帮助,也希望大家多多支持脚本之家。


 3596
3596


 被折叠的 条评论
为什么被折叠?
被折叠的 条评论
为什么被折叠?
 到【灌水乐园】发言


