


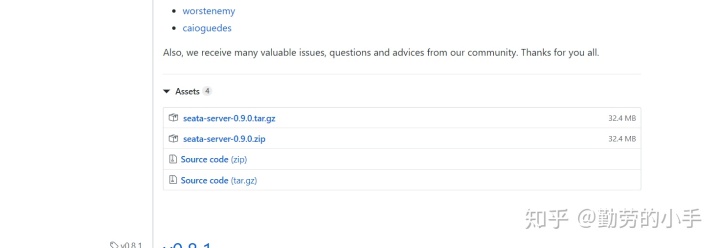
1、下载安装seata服务
1.1、下载 地址:https://github.com/seata/seata/releases
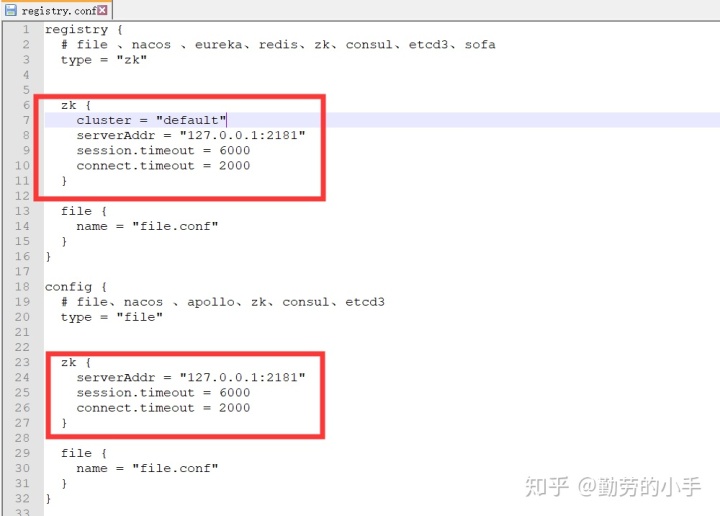
1.2、解压后修改 seataconf 目录下的 register.conf ,file.conf,数据库地址、zookeeper地址
配置 register.conf,我的注册中心是 zk,去掉多余的配置,只需要修改zk的地址即可;
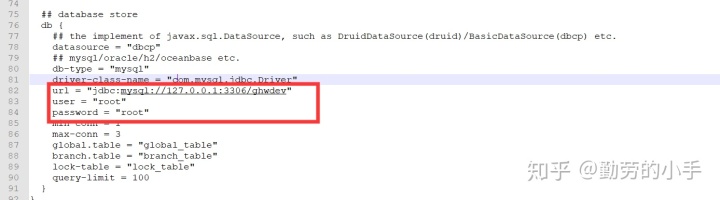
配置file.conf,只需要修改数据库部分
1.3、在对应数据库添加 seata所需要的事务信息表
执行 seataconf 目录下的 db_store.sql 和 db_undo_log.sql 把表添加到数据库里。
1.4、启动seata服务
在这之前首先保证seata所在服务器能正常连接数据库,和zookeeper;
根据系统环境执行seatabin 目录下的 seata-server.bat 或者seata-server.sh 启动后默认访问端口为8091
2、项目集成seata
1、加依赖
 <dependency>
            <groupId>io.seata</groupId>
            <artifactId>seata-all</artifactId>
            <version>0.9.0</version>
        </dependency>
            <dependency>
                <groupId>com.fasterxml.jackson.core</groupId>
                <artifactId>jackson-databind</artifactId>
                <version>2.7.4</version>
            </dependency>
            <dependency>
                <groupId>com.fasterxml.jackson.core</groupId>
                <artifactId>jackson-core</artifactId>
                <version>2.7.4</version>
            </dependency>
            <dependency>
                <groupId>com.fasterxml.jackson.core</groupId>
                <artifactId>jackson-annotations</artifactId>
                <version>2.7.4</version>
            </dependency>
2、把seata配置文件(registry.conf,file.conf在git案例中有,可直接拷贝过来) 放到项目资源目录
registry.conf
registry {
# file nacos
type = "file"
file {
name = "file.conf"
}
}
config {
# file、nacos 、apollo、zk、consul
type = "file"
file {
name = "file.conf"
}
}file.conf 只需修改seata服务提供地址,就是我们上面下载安装的seata,
transport {
# tcp udt unix-domain-socket
type = "TCP"
#NIO NATIVE
server = "NIO"
#enable heartbeat
heartbeat = true
#thread factory for netty
thread-factory {
boss-thread-prefix = "NettyBoss"
worker-thread-prefix = "NettyServerNIOWorker"
server-executor-thread-prefix = "NettyServerBizHandler"
share-boss-worker = false
client-selector-thread-prefix = "NettyClientSelector"
client-selector-thread-size = 1
client-worker-thread-prefix = "NettyClientWorkerThread"
# netty boss thread size,will not be used for UDT
boss-thread-size = 1
#auto default pin or 8
worker-thread-size = 8
}
shutdown {
# when destroy server, wait seconds
wait = 3
}
serialization = "seata"
compressor = "none"
}
service {
#vgroup->rgroup
vgroup_mapping.my_test_tx_group = "default"
#only support single node
default.grouplist = "127.0.0.1:8091"
#degrade current not support
enableDegrade = false
#disable
disable = false
#unit ms,s,m,h,d represents milliseconds, seconds, minutes, hours, days, default permanent
max.commit.retry.timeout = "-1"
max.rollback.retry.timeout = "-1"
}
client {
async.commit.buffer.limit = 10000
lock {
retry.internal = 10
retry.times = 30
}
report.retry.count = 5
tm.commit.retry.count = 1
tm.rollback.retry.count = 1
}
transaction {
undo.data.validation = true
undo.log.serialization = "jackson"
undo.log.save.days = 7
#schedule delete expired undo_log in milliseconds
undo.log.delete.period = 86400000
undo.log.table = "undo_log"
}
support {
## spring
spring {
# auto proxy the DataSource bean
datasource.autoproxy = false
}
}3、配置maven扫描 .conf尾缀的文件
这里需要配置下,刚开始我没配置一直找不到配置文件,导致regist type 为null的错误。
 <resources>
            <resource>
                <directory>src/main/resources</directory>
                <includes>
                    <include>**/*.properties</include>
                    <include>**/*.xml</include>
                    <include>**/*.yml</include>
                    <include>**/*.conf</include>
                </includes>
                <filtering>false</filtering>
            </resource>
            <resource>
                <directory>src/main/java</directory>
                <includes>
                    <include>**/*.properties</include>
                    <include>**/*.xml</include>
                </includes>
                <filtering>false</filtering>
            </resource>
        </resources>
4、添加seata spring配置 DBConfig 可直接使用seata-samples 案例中的。
@Configuration
public class DBConfig {
@Value("${spring.application.name}")
private String applicationId;
@Bean(initMethod = "init")
@ConditionalOnMissingBean
@ConfigurationProperties(prefix = "spring.datasource")
public DruidDataSource druidDataSource() {
return new DruidDataSource();
}
@Primary
@Bean
@ConditionalOnMissingBean
public DataSourceProxy dataSource(DataSource dataSource)
{
return new DataSourceProxy(dataSource);
}
/**
* 初始化分布式全局事务扫描
*
* @return
*/
@Bean
public GlobalTransactionScanner globalTransactionScanner() {
return new GlobalTransactionScanner(applicationId.toLowerCase(), "my_test_tx_group");
}
}5、在事务的入口方法添加 seata注解,被调用方不需要加注解
服务A代码
@Service
public class TestSeataServiceImpl implements TestSeataService{
@Autowired
private TestSeataMapper testSeataMapper;
@Reference
private BaseSeataService baseSeataService;
@Override
@GlobalTransactional(timeoutMills = 300000, name = "my_test_tx_group")
public Json testSeataTransAction(Integer status) {
TestSeata testSeata=new TestSeata();
testSeata.setName("张3");
testSeataMapper.insert(testSeata);
baseSeataService.insertSeata("李4");
return Json.CODE_200;
}
}服务B代码
@Service
public class BaseSeataServiceImpl implements BaseSeataService{
@Autowired
private TestSeataMapper testSeataMapper;
@Override
public void insertSeata(String name) {
TestSeata testSeata=new TestSeata();
testSeata.setName(name);
testSeataMapper.insert(testSeata);
throw new RuntimeException();
}
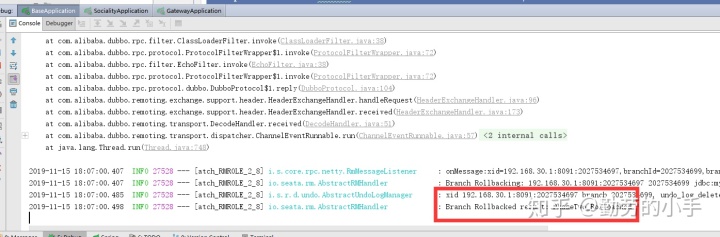
}测试:调用服务A 发现服务A和服务B都对事务进行了回滚


 603
603

 被折叠的 条评论
为什么被折叠?
被折叠的 条评论
为什么被折叠?
 到【灌水乐园】发言


