


介绍
样式用于控制表格内容在屏幕上显示时的外观。它们还用于确定数字的格式。
样式可以应用于以下方面:
- 字体设置字体大小、颜色、下划线等。
- 填充以设置图案或颜色渐变
- border在单元格上设置边框
- 单元格对齐
- 保护
以下是默认值
 1     from openpyxl.styles import PatternFill, Border, Side, Alignment, Protection, Font
 2     font = Font(name='Calibri',
 3    ...                 size=11,
 4    ...                 bold=False,
 5    ...                 italic=False,
 6    ...                 vertAlign=None,
 7    ...                 underline='none',
 8    ...                 strike=False,
 9    ...                 color='FF000000')
10     fill = PatternFill(fill_type=None,
11    ...                 start_color='FFFFFFFF',
12    ...                 end_color='FF000000')
13     border = Border(left=Side(border_style=None,
14    ...                           color='FF000000'),
15    ...                 right=Side(border_style=None,
16    ...                            color='FF000000'),
17    ...                 top=Side(border_style=None,
18    ...                          color='FF000000'),
19    ...                 bottom=Side(border_style=None,
20    ...                             color='FF000000'),
21    ...                 diagonal=Side(border_style=None,
22    ...                               color='FF000000'),
23    ...                 diagonal_direction=0,
24    ...                 outline=Side(border_style=None,
25    ...                              color='FF000000'),
26    ...                 vertical=Side(border_style=None,
27    ...                               color='FF000000'),
28    ...                 horizontal=Side(border_style=None,
29    ...                                color='FF000000')
30    ...                )
31     alignment=Alignment(horizontal='general',
32    ...                     vertical='bottom',
33    ...                     text_rotation=0,
34    ...                     wrap_text=False,
35    ...                     shrink_to_fit=False,
36    ...                     indent=0)
37     number_format = 'General'
38     protection = Protection(locked=True,
39    ...                         hidden=False)
单元格样式和命名样式
有两种类型的样式:单元样式和命名样式,以及样式模板。
单元格样式
单元格样式在对象之间共享。在分配样式后,单元格样式对象属性无法更改。这样可以避免不必要的副作用,例如当只有一个单元格发生更改时,更改许多单元格的样式。
 1     from openpyxl.styles import colors
 2     from openpyxl.styles import Font, Color
 3     from openpyxl import Workbook
 4     wb = Workbook()
 5     ws = wb.active
 6
 7     a1 = ws['A1']
 8     d4 = ws['D4']
 9     ft = Font(color=colors.RED)
10     a1.font = ft
11     d4.font = ft
12
13     a1.font.italic = True # is not allowed
14
15     # If you want to change the color of a Font, you need to reassign it::
16
17     a1.font = Font(color=colors.RED, italic=True) # the change only affects A1
复制样式
也可以复制样式
 1     from openpyxl.styles import Font
 2     from copy import copy
 3
 4     ft1 = Font(name='Arial', size=14)
 5     ft2 = copy(ft1)
 6     ft2.name = "Tahoma"
 7     ft1.name
 8    'Arial'
 9     ft2.name
10    'Tahoma'
11     ft2.size # copied from the
12    14.0
颜色
字体、背景、边框等颜色可以通过三种方式设置:索引、aRGB或主题。索引颜色本身取决于工作簿或应用程序默认提供的索引。主题颜色对于颜色的互补色调很有用,但也取决于工作簿中的主题。因此,建议使用aRGB颜色。
aRGB颜色
RGB颜色使用十六进制值的代表红、绿、蓝三种颜色的数值来设置。
1>>> from openpyxl.styles import Font
2>>> font = Font(color="FF0000")
a值理论上指的是颜色的透明度,但这与单元格样式无关。默认值00将附加到RGB值前。
1>>> from openpyxl.styles import Font
2>>> font = Font(color="00FF00")
3>>> font.color.rgb
4'0000FF00'
openpyxl还支持传统索引颜色以及主题和色调。
1>>> from openpyxl.styles.colors import Color
2>>> c = Color(indexed=32)
3>>> c = Color(theme=6, tint=0.5)
索引颜色
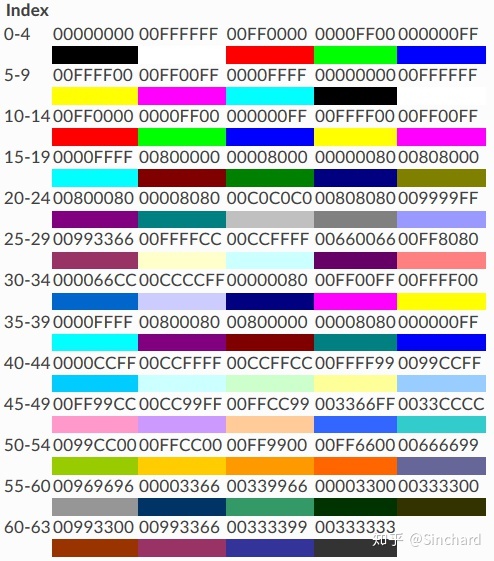
索引64和65不能设置,分别为系统前景和背景色保留。
应用样式
样式直接应用于单元格
1     from openpyxl.workbook import Workbook
2     from openpyxl.styles import Font, Fill
3     wb = Workbook()
4     ws = wb.active
5     c = ws['A1']
6     c.font = Font(size=12)
样式也可以应用于列和行。但请注意,此项仅适用于在Excel中创建单元格后保存关闭的文件。如果要将样式应用于整行和整列,则必须自己将样式应用于每个单元格。这是对文件格式的限制:
1     col = ws.column_dimensions['A']
2     col.font = Font(bold=True)
3     row = ws.row_dimensions[1]
4     row.font = Font(underline="single")
设置合并单元格的样式
合并的单元格的行为与其他单元格对象类似。它的值和格式在左上角的单元格中定义。要更改整个合并单元格的边框,请更改其左上角单元格的边框。
 1     from openpyxl.styles import Border, Side, PatternFill, Font, GradientFill, Alignment
 2     from openpyxl import Workbook
 3
 4     wb = Workbook()
 5     ws = wb.active
 6     ws.merge_cells('B2:F4')
 7
 8     top_left_cell = ws['B2']
 9     top_left_cell.value = "My Cell"
10
11     thin = Side(border_style="thin", color="000000")
12     double = Side(border_style="double", color="ff0000")
13
14     top_left_cell.border = Border(top=double, left=thin, right=thin, bottom=double)
15     top_left_cell.fill = PatternFill("solid", fgColor="DDDDDD")
16     top_left_cell.fill = fill = GradientFill(stop=("000000", "FFFFFF"))
17     top_left_cell.font  = Font(b=True, color="FF0000")
18     top_left_cell.alignment = Alignment(horizontal="center", vertical="center")
19
20     wb.save("styled.xlsx")
编辑页面设置
1     from openpyxl.workbook import Workbook
2
3     wb = Workbook()
4     ws = wb.active
5
6     ws.page_setup.orientation = ws.ORIENTATION_LANDSCAPE
7     ws.page_setup.paperSize = ws.PAPERSIZE_TABLOID
8     ws.page_setup.fitToHeight = 0
9     ws.page_setup.fitToWidth = 1
命名样式
与单元格样式相反,命名样式是可变的。当你想一次将格式应用到许多不同的单元格时,它们是有意义的。注意如果已将命名样式分配给单元格,对样式的其他更改不会影响单元格样式。
一旦命名样式注册到工作簿中,就可以简单地按名称将其重新命名。
创建命名样式
1     from openpyxl.styles import NamedStyle, Font, Border, Side
2     highlight = NamedStyle(name="highlight")
3     highlight.font = Font(bold=True, size=20)
4     bd = Side(style='thick', color="000000")
5     highlight.border = Border(left=bd, top=bd, right=bd, bottom=bd)
创建命名样式后,可以将其注册到工作簿中:
1 wb.add_named_style(highlight)
但命名样式也将在第一次分配给单元格时自动注册:
1 ws['A1'].style = highlight
注册后,仅使用名称指定样式:
1 ws['D5'].style = 'highlight'
使用内置样式
该规范包括一些内置样式,这些样式还可以使用。很不幸,这些样式的名称存储在它们的本地化文件中。openpyxl将只识别英文名称,并且只识别以下名称:
- ‘Normal’ # same as no style
Number formats
- ‘Comma’
- ‘Comma [0]’
- ‘Currency’
- ‘Currency [0]’
- ‘Percent’
Informative
- ‘Calculation’
- ‘Total’
- ‘Note’
- ‘Warning Text’
- ‘Explanatory Text’
Text styles
- ‘Title’
- ‘Headline 1’
- ‘Headline 2’
- ‘Headline 3’
- ‘Headline 4’
- ‘Hyperlink’
- ‘Followed Hyperlink’
- ‘Linked Cell’
Comparisons
- ‘Input’
- ‘Output’
- ‘Check Cell’
- ‘Good’
- ‘Bad’
- ‘Neutral’
Highlights
- ‘Accent1’
- ‘20 % - Accent1’
- ‘40 % - Accent1’
- ‘60 % - Accent1’
- ‘Accent2’
- ‘20 % - Accent2’
- ‘40 % - Accent2’
- ‘60 % - Accent2’
- ‘Accent3’
- ‘20 % - Accent3’
- ‘40 % - Accent3’
- ‘60 % - Accent3’
- ‘Accent4’
- ‘20 % - Accent4’
- ‘40 % - Accent4’
- ‘60 % - Accent4’
- ‘Accent5’
- ‘20 % - Accent5’
- ‘40 % - Accent5’
- ‘60 % - Accent5’
- ‘Accent6’
- ‘20 % - Accent6’
- ‘40 % - Accent6’
- ‘60 % - Accent6’
- ‘Pandas’
有关内置样式的更多信息,请参阅:mod:openpyxl.styles.builtins


 1309
1309

 被折叠的 条评论
为什么被折叠?
被折叠的 条评论
为什么被折叠?
 到【灌水乐园】发言


