


------安装---------
测试使用centos7安装
1.安装依赖
# install etcd
wget https://github.com/etcd-io/etcd/releases/download/v3.4.13/etcd-v3.4.13-linux-amd64.tar.gz
tar -xvf etcd-v3.4.13-linux-amd64.tar.gz && \
cd etcd-v3.4.13-linux-amd64 && \
sudo cp -a etcd etcdctl /usr/bin/
# add OpenResty source
sudo yum install yum-utils
sudo yum-config-manager --add-repo https://openresty.org/package/centos/openresty.repo
# install OpenResty and some compilation tools
sudo yum install -y openresty curl git gcc openresty-openssl111-devel unzip
# install LuaRocks
curl https://raw.githubusercontent.com/apache/apisix/master/utils/linux-install-luarocks.sh -sL | bash -
# start etcd server
nohup etcd &
2.安装apisix
mkdir apisix-2.4
wget https://downloads.apache.org/apisix/2.4/apache-apisix-2.4-src.tgz
tar zxvf apache-apisix-2.4-src.tgz -C apisix-2.4
编译
make deps
查看版本
./bin/apisix version
启动服务
./bin/apisix start
3.安装apisix-dashboard
centos7 RPM
sudo yum install -y https://github.com/apache/apisix-dashboard/releases/download/v2.4/apisix-dashboard-2.4-0.x86_64.rpm
sudo nohup manager-api -p /usr/local/apisix/dashboard/ &
访问127.0.0.1:9000
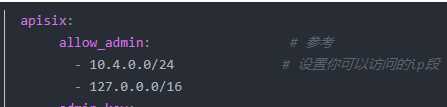
默认只能本机访问,可在/apisix-dashboard/api/conf/conf.yaml中修改
登陆密码默认
admin admin

控制台新建api


配置路由

启用插件

浏览器测试

显示代理成功
4.测试使用
设置 Upstream
curl "http://127.0.0.1:9080/apisix/admin/upstreams/50" -H 'X-API-KEY: edd1c9f034335f136f87ad84b625c8f1' -X PUT -d '
{
"type": "roundrobin",
"nodes": {
"192.168.208.209:5301": 1
}
}'
添加 Route
curl "http://127.0.0.1:9080/apisix/admin/routes/5" -H 'X-API-KEY: edd1c9f034335f136f87ad84b625c8f1' -X PUT -d '
{
"uri": "/getinfo",
"host": "www.zx.com",
"upstream_id": 50
}'
使用插件proxy-rewrite
访问http://127.0.0.1:9080/api/v1/info/getchapterinfo 代理至192.168.209.152:5301/api/v1/info/getchapterinfo
curl http://127.0.0.1:9080/apisix/admin/routes/299 -H 'X-API-KEY: edd1c9f034335f136f87ad84b625c8f1' -X PUT -d '
{
"name": "/api/v1/info/getchapterinfo",
"methods": ["GET"],
"uri": "/api/v1/info/getchapterinfo",
"plugins": {
"proxy-rewrite": {
"uri": "/api/v1/info/getchapterinfo",
"host": "www.zx.com"
}
},
"upstream": {
"type": "roundrobin",
"nodes": {
"192.168.209.152:5301": 1
}
}
}'
5.k8s 接入apisix-ingress-controller使用

cd /path/to/apisix-helm-chart
# install apisix-ingress-controller
helm install apisix-ingress-controller apisix/apisix-ingress-controller \
  --set image.tag=dev \
  --set config.apisix.baseURL=http://apisix-admin:9180/apisix/admin \
  --set config.apisix.adminKey=edd1c9f034335f136f87ad84b625c8f1 \
  --namespace ingress-apisix
简单使用
kubectl run httpbin --image kennethreitz/httpbin --port 80
kubectl expose pod httpbin --port 80
# httpbin-route.yaml
apiVersion: apisix.apache.org/v1
kind: ApisixRoute
metadata:
  name: httpserver-route
spec:
  rules:
  - host: local.httpbin.org
    http:
      paths:
      - backend:
          serviceName: httpbin
          servicePort: 80
        path: /*
kubectl apply -f httpbin-route.yaml
kubectl exec -it -n ${namespace of Apache APISIX} ${Pod name of Apache APISIX} -- curl http://127.0.0.1:9180/apisix/admin/routes -H 'X-API-Key: edd1c9f034335f136f87ad84b625c8f1'
kubectl exec -it -n ${namespace of Apache APISIX} ${Pod name of Apache APISIX} -- curl http://127.0.0.1:9080/headers -H 'Host: local.httpbin.org'
{
  "headers": {
    "Accept": "*/*",
    "Host": "httpbin.org",
    "User-Agent": "curl/7.64.1",
    "X-Amzn-Trace-Id": "Root=1-5ffc3273-2928e0844e19c9810d1bbd8a"
  }
}
参考:
http://apisix.apache.org/zh/docs/apisix/
https://github.com/apache/apisix
https://github.com/apache/apisix-dashboard


 2828
2828


 被折叠的 条评论
为什么被折叠?
被折叠的 条评论
为什么被折叠?
 到【灌水乐园】发言


