第二章 IOC容器
1. IOC概念和原理
- 控制反转,把对象创建和对象之间的调用过程,交给Spring管理。
- 主要目的:降低耦合。
2. IOC底层原理
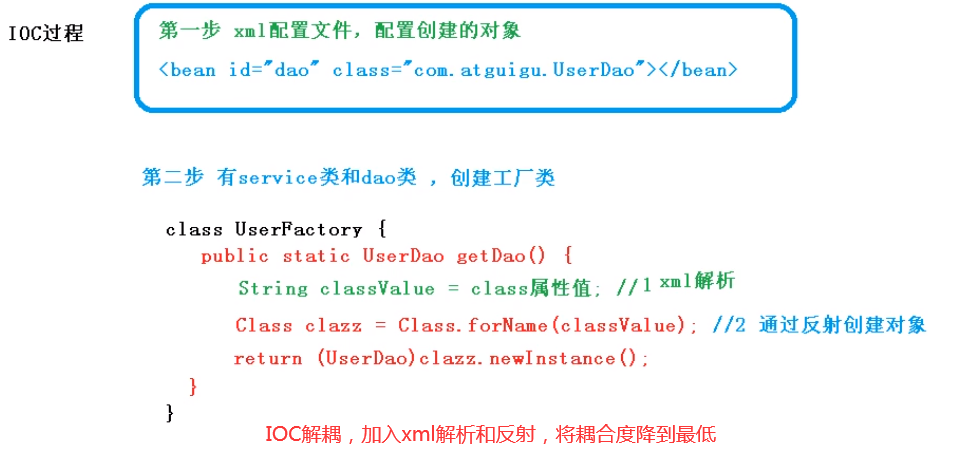
IOC主要使用了xml解析、工厂模式、反射


这种情况下,虽然降低了UserService和UserDao的耦合度,但是却增加了UserFactory和他们的耦合度。
3. IOC接口
3.1 概念结构
BeanFactory:IOC容器基本实现,是Spring的内部接口,不提供开发人员使用。加载配置文件的时候,不会创建对象,使用的时候才会创建;即1不创建,2创建。

ApplicationContext:BeanFactory接口的子接口,功能更强大,提供开发人员实现。1的时候就已经创建好了。

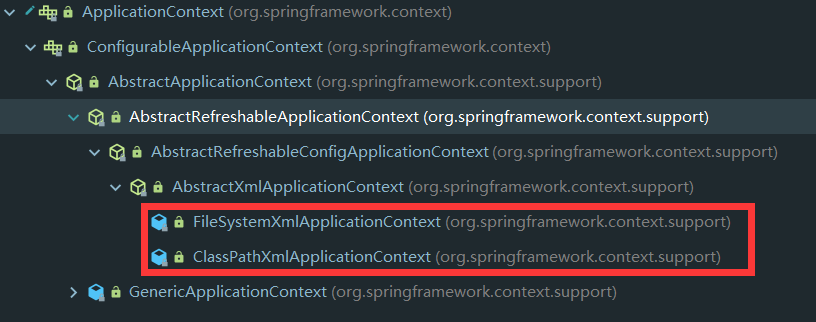
基本实现类(Ctrl+H):
FileSystemXmlApplicationContext文件的绝对路径
ClassPathXmlApplicationContext类路径
3.2 Bean管理
3.2.1 基于xml配置文件方式
创建对象

bean中的属性:
id、class、name(较少使用,里边可以由特殊字符)、
id属性:唯一标识,给创建的对象起别名。class属性:类全路径。
步骤
- 在spring配置文件中,使用bean标签,标签中添加相应的属性。
- 创建对象时,默认执行无参构造方法创建对象。
注入属性
DI:依赖注入,注入属性。DI是IOC中一种具体实现,他表示注入属性。两种注入方式:
(1) set方法注入(类比传统使用set给函数赋值)
(2)构造函数注入(类比在构造函数中给属性赋值)
-
set方法注入。(1) 创建类,定义属性和
set方法。public class User { private String name; private Integer age; public void setName(String name) { this.name = name; } public void setAge(Integer age) { this.age = age; } @Override public String toString() { return "User{" + "name='" + name + '\'' + ", age=" + age + '}'; } }(2) 在spring配置对象创建,配置属性注入。
<!-- 2. set方法注入属性 -->
<bean id="user" class="com.wit.entity.User">
    <!-- 使用property注入属性
        name:类里边属性的名字
        value:向属性注入的值
     -->
    <property name="name" value="张三"/>
    <property name="age" value="15"/>
</bean>
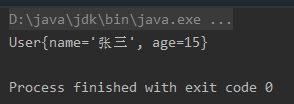
(3) 结果测试
@Test
public void testUser(){

    // 1. 加载配置文件
    ApplicationContext context = new ClassPathXmlApplicationContext("bean.xml");

    // 2. 获取创建的对象
    User user = context.getBean("user", User.class);

    System.out.println(user.toString());
}
-
构造方法注入
(1) 创建类,定义属性,创建属性对应的构造方法。
public class Order {
    private Integer number;
    private String name;

    public Order(Integer number, String name) {
        this.number = number;
        this.name = name;
    }

    @Override
    public String toString() {
        return "Order{" +
                "number=" + number +
                ", name='" + name + '\'' +
                '}';
    }
}
(2) 在spring配置文件中配置。
<!-- 3. constructor注入属性 -->
<bean id="order" class="com.wit.entity.Order">
    <constructor-arg name="number" value="1"/>
    <constructor-arg name="name" value="张三"/>
</bean>
(3) 结果测试
@Test
public void testUser(){

    // 1. 加载配置文件
    ApplicationContext context = new ClassPathXmlApplicationContext("bean.xml");
    // 2. 获取创建的对象
    Order order = context.getBean("order", Order.class);
    System.out.println(order.toString());
}
-
p名称空间注入。创建属性和
set方法之后。(1) 在配置文件中添加
p名称空间。
(2) 属性注入,在
bean标签中使用。<!-- 3. p名称空间注入属性 --> <bean id="user" class="com.wit.entity.User" p:name="张三" p:age="15"/>(3) 结果测试
@Test
public void testUser(){

    // 1. 加载配置文件
    ApplicationContext context = new ClassPathXmlApplicationContext("bean.xml");
    // 2. 获取创建的对象
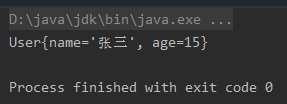
    User user = context.getBean("user", User.class);
    System.out.println(user.toString());
}
注入其他类型属性
字面量
null值
<property name="address">
    <null/>
</property>

- 属性值中包含特殊符号
<!--
1. 使用转义字符。
2. 带特殊符号的写入CDATA
-->
<property name="address" value="<北京>"/>
<property name="address">
<value><![CDATA[<北京>]]></value>
</property>

外部
bean
(1) 创建两个类service类和dao类
public class UserService {
    public void add(){
        System.out.println("UserService add...........");
    }
}
public interface UserDao {
    void update();
}
public class UserDaoImpl implements UserDao {
    public void update(){
        System.out.println("UserDao update......");
    }
}
(2) 在service中调用dao里面的方法
public class UserService {
    // 创建UserDao类型属性,生成set方法
    private UserDao userDao;

    public void setUserDao(UserDao userDao) {
        this.userDao = userDao;
    }

    public void add(){
        System.out.println("UserService add...........");
        userDao.update();
    }
}
(3) 在spring配置文件中进行配置
<!-- service和dao对象的创建 -->
<bean id="userService" class="com.wit.service.UserService">
    <!--
        name:类中的属性名称
        ref:userDao对象bean的id值
     -->
    <property name="userDao" ref="userDao"/>
</bean>

<bean id="userDao" class="com.wit.dao.UserDaoImpl"/>
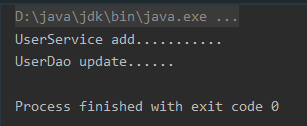
(4) 测试
@Test
public void testService(){
    ApplicationContext context = new ClassPathXmlApplicationContext("bean.xml");
    UserService service = context.getBean("userService",UserService.class);
    service.add();
}
内部bean
(1) 一对多关系:部门跟员工。
(2) 在员工中加一个部门属性。
public class Emp {
    private String name;
    private String gender;
    private Dept dept;

    public void setName(String name) {
        this.name = name;
    }

    public void setGender(String gender) {
        this.gender = gender;
    }

    public void setDept(Dept dept) {
        this.dept = dept;
    }

    @Override
    public String toString() {
        return "Emp{" +
                "name='" + name + '\'' +
                ", gender='" + gender + '\'' +
                ", dept=" + dept +
                '}';
    }
}
public class Dept {
    private String dname;

    public void setDname(String dname) {
        this.dname = dname;
    }

    @Override
    public String toString() {
        return "Dept{" +
                "dname='" + dname + '\'' +
                '}';
    }
}
(3) 在spring配置文件中进行配置。
<bean id="emp" class="com.wit.entity.Emp">
    <property name="name" value="张三"/>
    <property name="gender" value="男"/>
    <property name="dept">
        <bean id="dept" class="com.wit.entity.Dept">
            <property name="dname" value="安保部"/>
        </bean>
    </property>
</bean>
(4) 测试
@Test
public void testInnerBean(){
    ApplicationContext context = new ClassPathXmlApplicationContext("bean.xml");
    Emp emp = context.getBean("emp", Emp.class);
    System.out.println(emp.toString());
}

级联赋值
法一:
<bean id="emp" class="com.wit.entity.Emp">
    <property name="name" value="张三"/>
    <property name="gender" value="男"/>
    <property name="dept" ref="dept"/>
</bean>
<bean id="dept" class="com.wit.entity.Dept">
    <property name="dname" value="安保部"/>
</bean>
法二:需要把emp的getDept和dept的getDname写出来
<bean id="emp" class="com.wit.entity.Emp">
    <property name="name" value="张三"/>
    <property name="gender" value="男"/>
    <property name="dept" ref="dept"/>
    <property name="dept.dname" value="财务部"/>
</bean>
<bean id="dept" class="com.wit.entity.Dept"/>
注入集合属性
Array、List、Map、Set
(1) 创建类
public class Student {
    // 1. 数组类型
    private String[] array;
    // 2. 集合类型
    private List<String> list;
    // 3. map类型
    private Map<String,String> map;
    // 4. set类型
    private Set<String> set;

    public void setArray(String[] array) {
        this.array = array;
    }

    public void setList(List<String> list) {
        this.list = list;
    }

    public void setMap(Map<String, String> map) {
        this.map = map;
    }

    public void setSet(Set<String> set) {
        this.set = set;
    }

    @Override
    public String toString() {
        return "Student{" +
                "array=" + Arrays.toString(array) +
                ", list=" + list +
                ", map=" + map +
                ", set=" + set +
                '}';
    }
}
(2) 配置属性
<bean id="student" class="com.wit.coll.Student">
    <property name="array">
        <array>
            <value>1</value>
            <value>2</value>
            <value>3</value>
        </array>
    </property>
    <property name="list">
        <list>
            <value>1</value>
            <value>2</value>
            <value>3</value>
        </list>
    </property>
    <property name="map">
        <map>
            <entry key="1" value="1"/>
            <entry key="2" value="2"/>
            <entry key="3" value="3"/>
        </map>
    </property>
    <property name="set">
        <set>
            <value>1</value>
            <value>2</value>
            <value>3</value>
        </set>
    </property>
</bean>
(3) 测试
@Test
public void testColl(){
    ApplicationContext context = new ClassPathXmlApplicationContext("bean.xml");
    Student student = context.getBean("student",Student.class);
    System.out.println(student.toString());
}

在集合里边设置对象类型
(1) 创建Course类,并在Student类加入List<Course>类型
public class Course {
    private String name;

    public void setName(String name) {
        this.name = name;
    }

    @Override
    public String toString() {
        return "Course{" +
                "name='" + name + '\'' +
                '}';
    }
}
(2) 配置bean.xml
<bean id="student" class="com.wit.coll.Student">
    <property name="array">
        <array>
            <value>1</value>
            <value>2</value>
            <value>3</value>
        </array>
    </property>
    <property name="list">
        <list>
            <value>1</value>
            <value>2</value>
            <value>3</value>
        </list>
    </property>
    <property name="map">
        <map>
            <entry key="1" value="1"/>
            <entry key="2" value="2"/>
            <entry key="3" value="3"/>
        </map>
    </property>
    <property name="set">
        <set>
            <value>1</value>
            <value>2</value>
            <value>3</value>
        </set>
    </property>
    <property name="courses">
        <list>
            <ref bean="course1"/>
            <ref bean="course2"/>
        </list>
    </property>
</bean>
<bean id="course1" class="com.wit.coll.Course">
    <property name="name" value="MySQL高级"/>
</bean>
<bean id="course2" class="com.wit.coll.Course">
    <property name="name" value="Spring5"/>
</bean>
(3) 测试

把集合注入部分提取出来
(1) 引入util名称空间
<beans xmlns="http://www.springframework.org/schema/beans"
       xmlns:xsi="http://www.w3.org/2001/XMLSchema-instance"
       xmlns:p="http://www.springframework.org/schema/p"
       xmlns:util="http://www.springframework.org/schema/util"
       xsi:schemaLocation="http://www.springframework.org/schema/beans http://www.springframework.org/schema/beans/spring-beans.xsd
                           http://www.springframework.org/schema/util http://www.springframework.org/schema/util/spring-util.xsd">
(2) 配置bean.xml
<!-- 抽取部分 -->
<util:list id="courses">
    <ref bean="course1"/>
    <ref bean="course2"/>
</util:list>

<!-- 使用部分 -->
<bean id="student" class="com.wit.coll.Student">
    <property name="courses" ref="courses"/>
</bean>

<bean id="course1" class="com.wit.coll.Course">
    <property name="name" value="MySQL高级"/>
</bean>
<bean id="course2" class="com.wit.coll.Course">
    <property name="name" value="Spring5"/>
</bean>
(3) 测试

3.2.2 基于注解方式
什么是注解?
注解是代码中的特殊标记,格式:@注解名称(属性名称=属性值,属性名称=属性值)
可以作用在类上面,方法上面,属性上面
简化XML配置
创建对象
常用注解:
@Component、@Service、@Controller、@Repository。功能是一样的,提示不同文件承担不同的责任。
@Component:普通注解,创建任何对象。
@Service:使用在业务逻辑层。Service层
@Controller:web层。Controller层
@Repository:持久层。Dao层
(1) 创建新的项目 spring5-02-annocation 。
(2) 引入依赖。使用注解需要引入aop相关的包。
<!-- parent项目中引入 -->
<dependency>
    <groupId>org.springframework</groupId>
    <artifactId>spring-aop</artifactId>
    <version>${wit.spring.version}</version>
</dependency>
<!-- annocation项目中引入 -->
<dependencies>
    <dependency>
        <groupId>org.springframework</groupId>
        <artifactId>spring-beans</artifactId>
    </dependency>
    <dependency>
        <groupId>org.springframework</groupId>
        <artifactId>spring-core</artifactId>
    </dependency>
    <dependency>
        <groupId>org.springframework</groupId>
        <artifactId>spring-context</artifactId>
    </dependency>
    <dependency>
        <groupId>org.springframework</groupId>
        <artifactId>spring-expression</artifactId>
    </dependency>
    <dependency>
        <groupId>org.springframework</groupId>
        <artifactId>spring-aop</artifactId>
    </dependency>
    <dependency>
        <groupId>commons-logging</groupId>
        <artifactId>commons-logging</artifactId>
    </dependency>
    <dependency>
        <groupId>junit</groupId>
        <artifactId>junit</artifactId>
        <version>4.12</version>
        <scope>compile</scope>
    </dependency>
</dependencies>
(3) bean.xml 中开启组件扫描。需要context名称空间。
<beans xmlns="http://www.springframework.org/schema/beans"
       xmlns:xsi="http://www.w3.org/2001/XMLSchema-instance"
       xmlns:context="http://www.springframework.org/schema/context"
       xsi:schemaLocation="http://www.springframework.org/schema/beans http://www.springframework.org/schema/beans/spring-beans.xsd
                           http://www.springframework.org/schema/context http://www.springframework.org/schema/context/spring-context.xsd">

    <!-- 开启组件扫描
         如果多个包,多个包之间逗号隔开
         或者扫描这些包的上层目录
     -->
    <context:component-scan base-package="com.wit.service" />
</beans>
(4) 创建类,在类上边添加注解。
@Service(value = "userService")
//等同于bean的写法,id是value的值,class是当前类的全限定类名
//value可以省略不写,不写默认值是类名的首字母小写
public class UserService {
    public void add(){
        System.out.println("UserService add 执行了.....");
    }
}
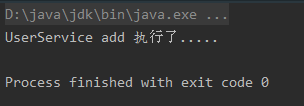
(5) 测试。
@Test
public void testService(){
    ApplicationContext context = new ClassPathXmlApplicationContext("bean.xml");
    UserService userService = context.getBean("userService", UserService.class);
    userService.add();
}
开启组件扫描细节配置
当前配置扫描包默认扫描包内的全部文件,可以配置哪些需要扫描,哪些不需要扫描。
<!-- spring有默认的filter,使用use-default-filters取消默认的filter,自己配置filter
     context:include-filter,配置扫描的包,配置扫描所有的@Service
 -->
<context:component-scan base-package="com.wit.service" use-default-filters="false">
    <context:include-filter type="annotation" expression="org.springframework.stereotype.Service"/>
</context:component-scan>

<!-- 配置不进行扫描的包
-->
<context:component-scan base-package="com.wit.service">
    <context:exclude-filter type="annotation" expression="org.springframework.stereotype.Controller"/>
</context:component-scan>
注入属性
常用注解:
@AutoWired、@Qualifier、@Resource`
@AutoWired:自动根据属性类型注入。
@Qualifier:根据属性的名称注入。
@Resource:可以根据类型,也可以根据名称注入。
@Value:注入普通类型属性。
@AutoWired
(1) 创建service和dao对象创建,在Service和Dao类上添加创建对象的注解。
@Service(value = "userService")
public class UserService {

    // 不需要set方法
    @Autowired
    private UserDao userDao;

    public void add(){
        System.out.println("UserService add 执行了.....");
        userDao.update();
    }
}
public interface UserDao {
    void update();
}
@Repository
public class UserDaoImpl implements UserDao {
    public void update(){
        System.out.println("UserDao update......");
    }
}
(2) 在service注入dao对象
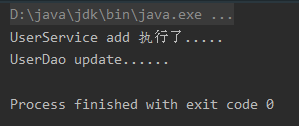
(3) 测试
@Qualifier:和@AutoWired一起使用。
(1) 创建UserDao的实现类UserDaoImpl2。使用@AutoWired测试报错。
@Repository("userDao2")
public class UserDaoImpl2 implements UserDao {
    public void update(){
        System.out.println("UserDao update......");
    }
}

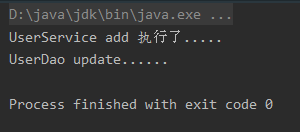
(2) 使用@Qualifier,测试无误。
@Service(value = "userService")
public class UserService {

    // 不需要set方法
    @Autowired
    @Qualifier("userDao")
    private UserDao userDao;

    public void add(){
        System.out.println("UserService add 执行了.....");
        userDao.update();
    }
}
@Resource:不带任何参数根据类型注入。@Resource(name = “userDao”) 根据名称注入。
@Value:注入普通属性。
@Value("abc")
private String name;
完全注解开发
(1) 创建配置类,替代XML配置文件
@Configuration // 配置类,用来取代配置文件
@ComponentScan(basePackages = {"com.wit"})
public class SpringConfig {

}
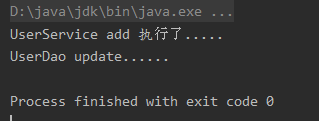
(2) 编写测试方法。
@Test
public void testAnno(){
    ApplicationContext context = new AnnotationConfigApplicationContext(SpringConfig.class);
    UserService userService = context.getBean("userService", UserService.class);
    userService.add();
}
3.2.3 FactoryBean
Spring中有两种类型的bean,一种是
普通的bean,另外一种是FactoryBean
普通bean:在配置文件中配置什么类,就得到什么类的对象。
FactoryBean:在配置文件中国配置的类和得到的对象类型不一致。
(1) 创建类,作为工厂bean,实现接口FactoryBean。
(2) 实现接口中的方法,在实现的方法中定义返回的类型。
public class MyBean implements FactoryBean<Course> {

    // 定义返回bean对象,返回什么类型,即使用getbean将得到什么类型的对象
    public Course getObject() throws Exception {
        Course course = new Course();
        course.setName("大学英语");
        return course;
    }

    public Class<?> getObjectType() {
        return null;
    }

    public boolean isSingleton() {
        return false;
    }
}
<bean id="myBean" class="com.wit.factorybean.MyBean"/>
@Test
public void testFactoryBean(){
    ApplicationContext context = new ClassPathXmlApplicationContext("bean.xml");
    Course course = context.getBean("myBean", Course.class);
    System.out.println(course);
}
3.2.4 bean的作用域
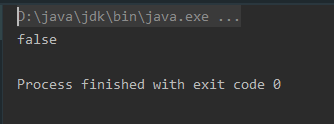
Spring默认bean是单实例(即两次获取同名bean,地址值相同),可设置单实例或多实例。
@Test
public void testColl(){
    ApplicationContext context = new ClassPathXmlApplicationContext("bean.xml");
    Student student = context.getBean("student",Student.class);
    Student student1 = context.getBean("student",Student.class);
    System.out.println(student == student1);
}

设置单实例还是多实例
在bean中属性
scope,取值常用的有:singleton、prototype。此外还有request、session。
singleton是单实例的,prototype是多实例的。singleton加载配置文件时创建对象,prototype在调用getBean是创建对象。
(1) singleton:默认值,单实例的。
(2) prototype:多实例的。修改为多实例,并重新测试地址是否相等。
<!-- 使用部分 -->
<bean id="student" class="com.wit.coll.Student" scope="prototype">
    <property name="courses" ref="courses"/>
</bean>
(3) request和session:每次创建对象之后放在request域中或session域中,了解。
3.2.5 bean的生命周期
对象从创建到销毁的过程
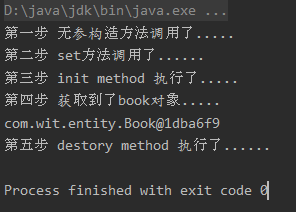
(1) 通过构造器创建bean实例(无参构造器)。
(2) 为bean属性设置对应的值,调用set方法。
(3) 调用bean中的初始化(需要进行相应的配置)。
(4) bean可以使用了(对象获取到了)。
(5) 当容器关闭时,调用bean的销毁方法(需要进行配置)。
生命周期演示
public class Book {
    private String name;

    public Book() {
        // 1. 调用无参构造方法
        System.out.println("第一步 无参构造方法调用了.....");
    }

    public void setName(String name) {
        // 2. 调用set方法
        System.out.println("第二步 set方法调用了......");
        this.name = name;
    }

    public void initMethod(){
        // 3. 初始化方法,名字任起
        System.out.println("第三步 init method 执行了.....");
    }

    public void destpryMethod(){
        // 5. 销毁方法,名字任起。调用之后,需要手动销毁一下对象。
        System.out.println("第五步 destory method 执行了......");
    }
}
<!-- 3. 配置初始化方法,Book中的initMethod方法 -->
<!-- 5. 配置销毁方法,Book中的destoryMethod方法 -->
<bean id="book" class="com.wit.entity.Book" init-method="initMethod" destroy-method="destpryMethod">
    <property name="name" value="三体"/>
</bean>
@Test
public void testLife(){
    ClassPathXmlApplicationContext context = new ClassPathXmlApplicationContext("bean.xml");
    Book book = context.getBean("book", Book.class);
    // 4. 获取到对象
    System.out.println("第四步 获取到了book对象.....");
    System.out.println(book);

    // 手动销毁对象
    context.close();
}
后置处理器
bean的生命周期除了上边三种,还有两种。分别在第三步之前和第三步之后。
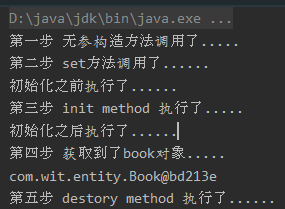
(1) 通过构造器创建bean实例(无参构造器)。
(2) 为bean属性设置对应的值,调用set方法。
(3) 把bean实例传递bean后置处理器方法。postProcessBeforeInitialization
(4) 调用bean中的初始化(需要进行相应的配置)。
(5) 把bean实例传递bean后置处理器方法。postProcessAfterInitialization
(6) bean可以使用了(对象获取到了)。
(7) 当容器关闭时,调用bean的销毁方法(需要进行配置)。
演示带后置处理器
后置处理器会为所有的bean都添加方法。即如果还有其他bean,也会执行后置处理器的方法。
创建BookProcessor
public class BookProcessor implements BeanPostProcessor {
    public Object postProcessBeforeInitialization(Object bean, String beanName) throws BeansException {
        System.out.println("初始化之前执行了......");
        return bean;
    }

    @Nullable
    public Object postProcessAfterInitialization(Object bean, String beanName) throws BeansException {
        System.out.println("初始化之后执行了......");
        return bean;
    }
}
<bean id="bookProcessor" class="com.wit.entity.BookProcessor"/>
3.2.6 XML自动装配
根据指定装配规则(属性值或者属性类型),Spring自动将匹配的属性进行注入。
装配过程
-
根据名称自动注入。
<!-- 实现自动装配
     autowire常用两个值:
        byName根据属性名称注入:注入bean的id值和类属性值一致。
        byType根据属性类型注入:
-->
<bean id="emp" class="com.wit.entity.Emp" autowire="byName">
    <property name="name" value="张三"/>
    <property name="gender" value="男"/>
</bean>
<bean id="dept" class="com.wit.entity.Dept">
    <property name="dname" value="财务部"/>
</bean>
-
根据类型自动注入。
注意根据类型时,如果有多个相同类型,将会报错。系统不知道选择哪个进行注入。
<!-- 实现自动装配
     autowire常用两个值:
        byName根据属性名称注入:注入bean的id值和类属性值一致。
        byType根据属性类型注入:
-->
<bean id="emp" class="com.wit.entity.Emp" autowire="byType">
    <property name="name" value="张三"/>
    <property name="gender" value="男"/>
</bean>
<bean id="dept" class="com.wit.entity.Dept">
    <property name="dname" value="财务部"/>
</bean>

3.2.7 外部属性文件
注入的属性过多时,书写起来或者更改起来比较麻烦,把相关的值写到外部文件中。常用在数据库配置中。
(1) 创建spring.properties外部配置文件
dept.dname=财务部
(2) 引入context命名空间
<beans xmlns="http://www.springframework.org/schema/beans"
       xmlns:xsi="http://www.w3.org/2001/XMLSchema-instance"
       xmlns:context="http://www.springframework.org/schema/context"
       xsi:schemaLocation="http://www.springframework.org/schema/beans http://www.springframework.org/schema/beans/spring-beans.xsd
                           http://www.springframework.org/schema/context http://www.springframework.org/schema/context/spring-context.xsd">
(3) 配置bean.xml。
<!-- 引入外部文件 -->
<context:property-placeholder location="classpath:spring.properties" file-encoding="utf-8"/>

<bean id="dept" class="com.wit.entity.Dept">
    <property name="dname" value="${dept.dname}"/>
</bean>
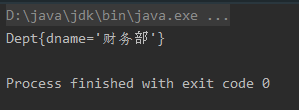
(4) 测试。这里如果读出乱码,File——>settings——>Editor——>File Encodings Properties Files修改编码为utf-8
@Test
public void testProperties(){
    ApplicationContext context = new ClassPathXmlApplicationContext("bean.xml");
    Dept dept = context.getBean("dept", Dept.class);
    System.out.println(dept);
}


 1万+
1万+


 被折叠的 条评论
为什么被折叠?


