


关注我!更多精彩文章第一时间推送给你

IDEA版
环境准备
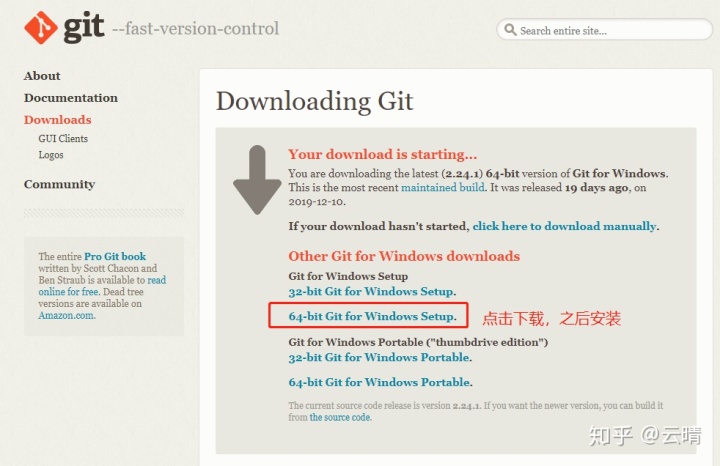
1.Git官网下载安装git https://git-scm.com/download/win
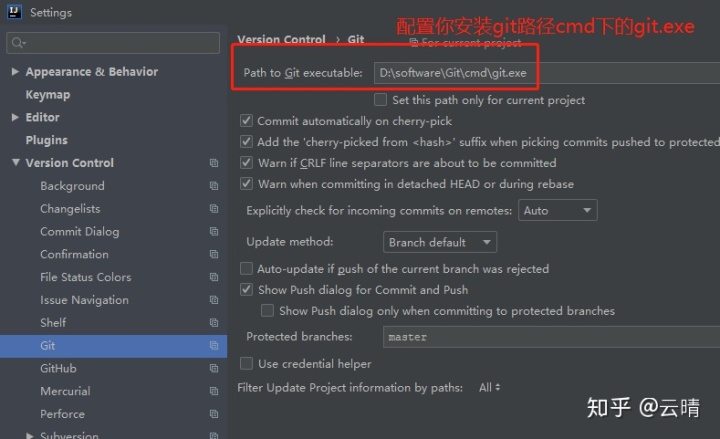
2.idea中配置git路径
setting→version control → git
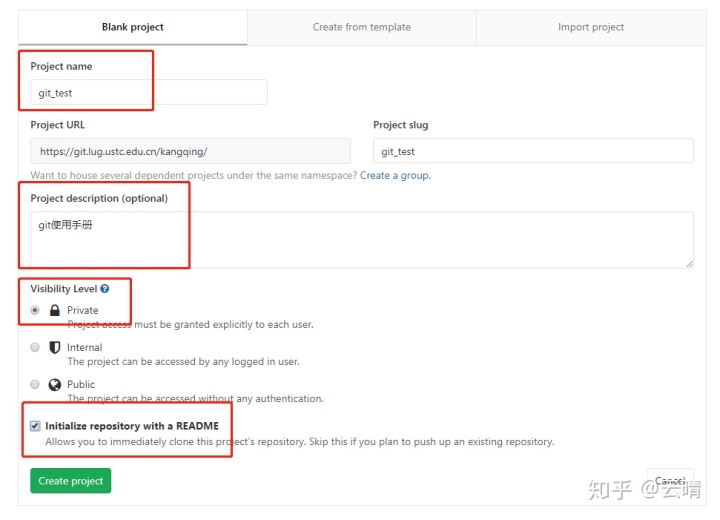
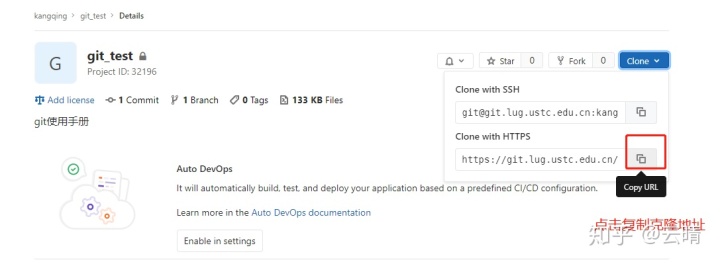
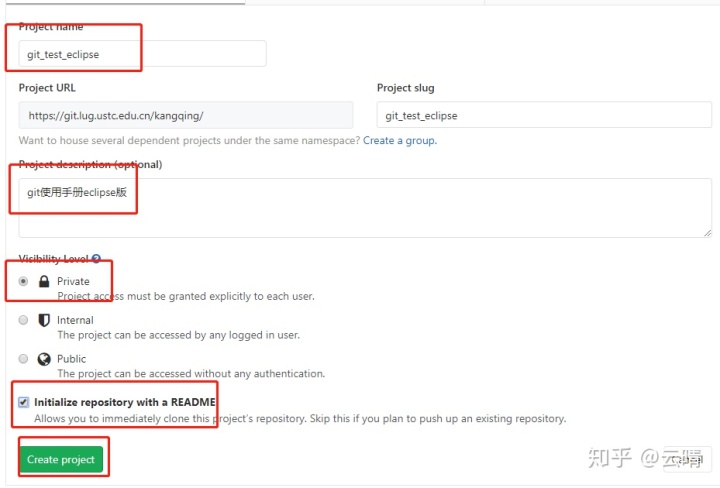
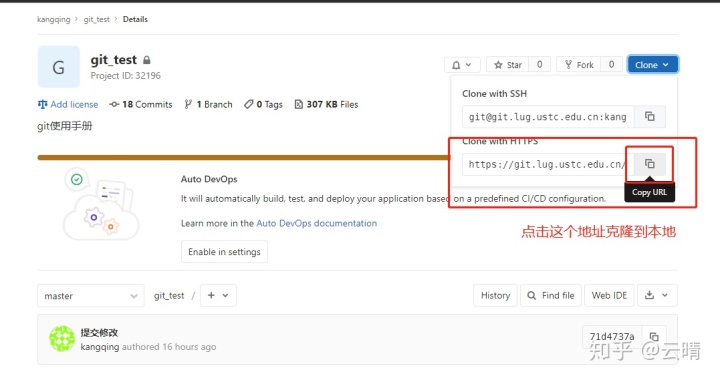
3.在git仓库(github、码云、gitlab等)上创建一个项目,我这里以gitlab为例
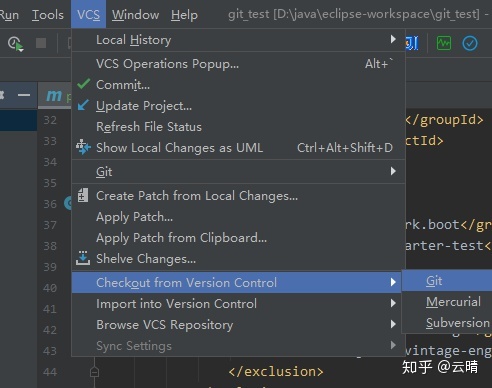
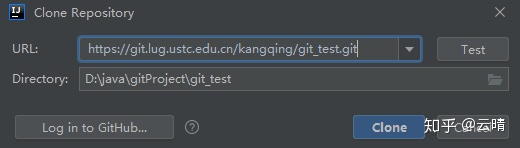
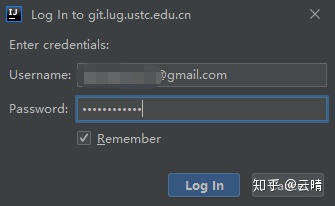
4.idea从gitlab上检出项目
输入gitlab的账户进行登录
5.注意选择no因为还没上传初始化项目

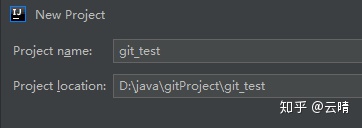
6.idea在git_test目录下创建springboot项目
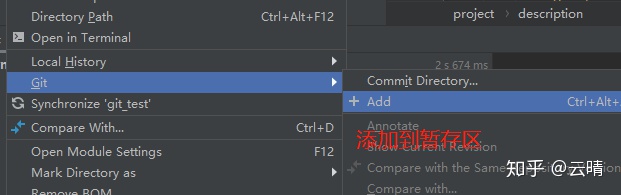
7.右键项目,添加所有修改到暂存区
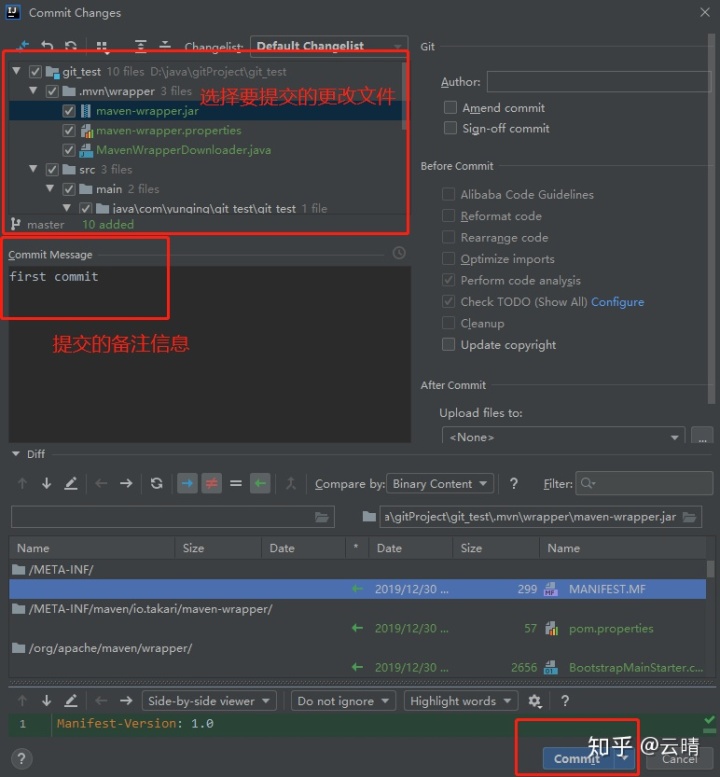
8.提交改变到本地仓库

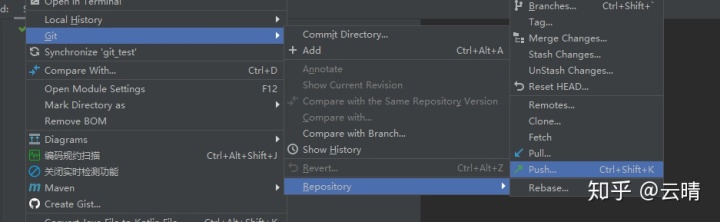
9.右键项目,push到远程gitlab仓库

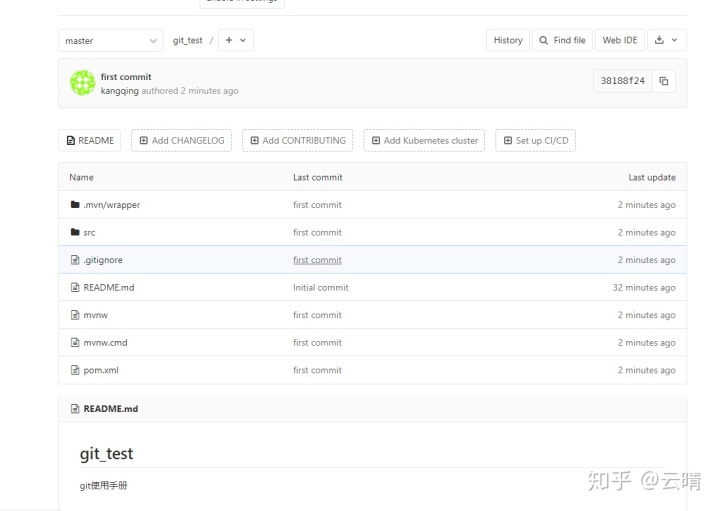
10.到gitlab上发现已经推送到远程仓库
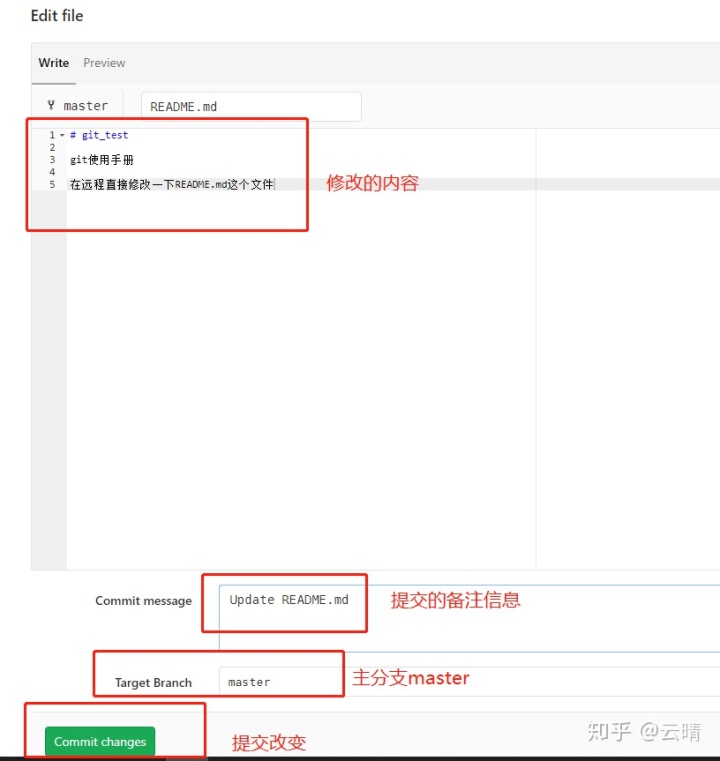
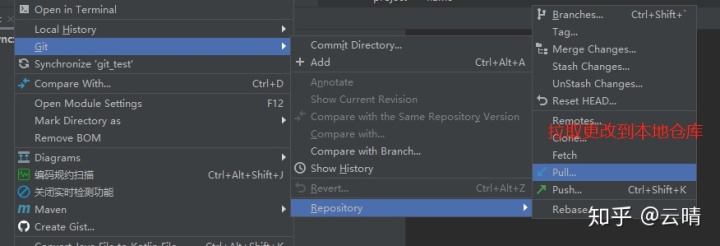
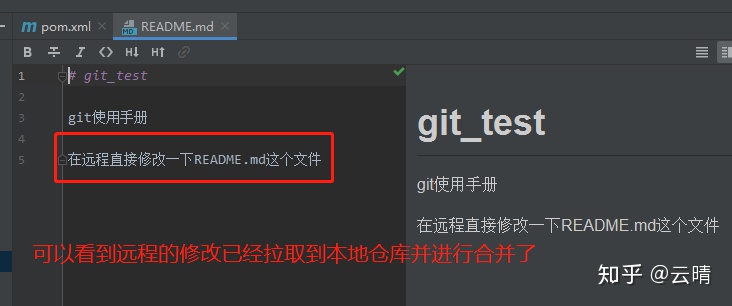
11.直接在远程master做出更改然后拉取更新到本地

12.代码出现冲突怎么解决?
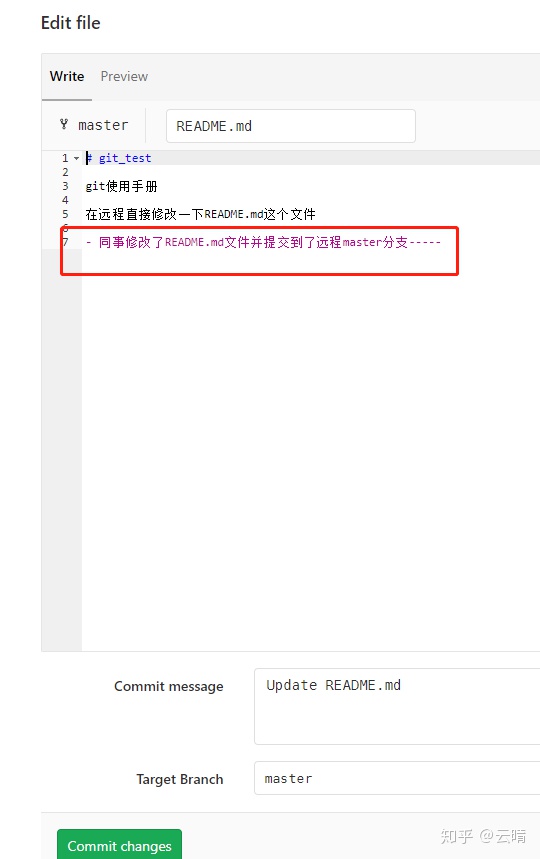
- 首先同事提交修改README.md文件到远程主分支
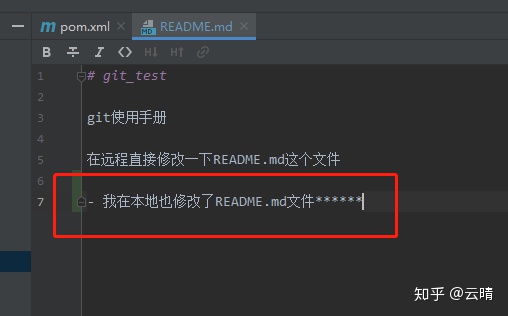
- 然后我在本地也修改README.md文件
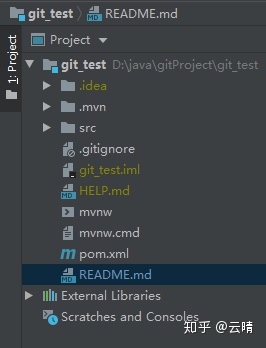
- 提交修改到本地仓库,注意提交之前应先把代码添加到暂存区,因为这里idea自动帮我加入了暂存区,所以就不用添加了,可以项目树是红色代表没添加暂存区,蓝色代表添加暂存区未提交,白色代表已提交到本地仓库,黄色是.gitignore规定不用提交的文件。
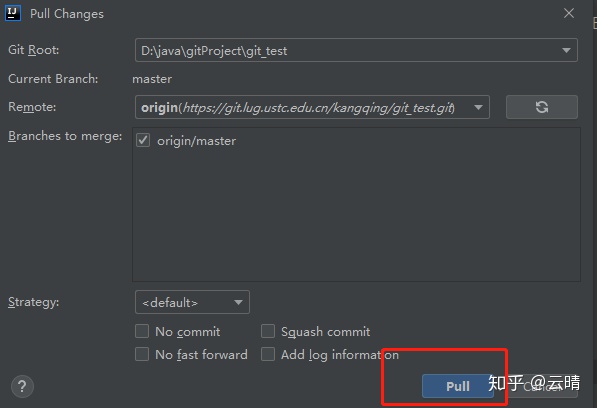
- 拉取远程仓库代码到本地仓库合并,因为本地也修改并提交了README.md文件,所以冲突就产生了。

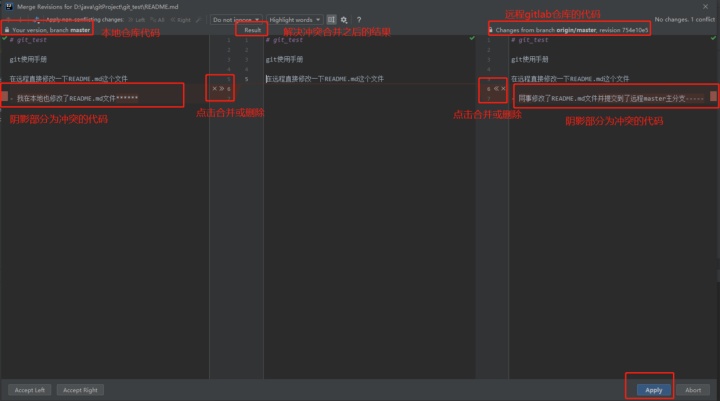
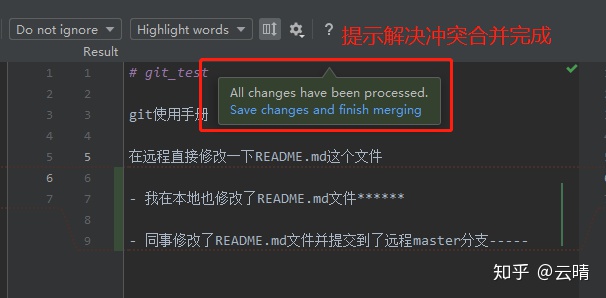
- 在本地仓库解决冲突合并之后,就可以推送push到远程分支了。
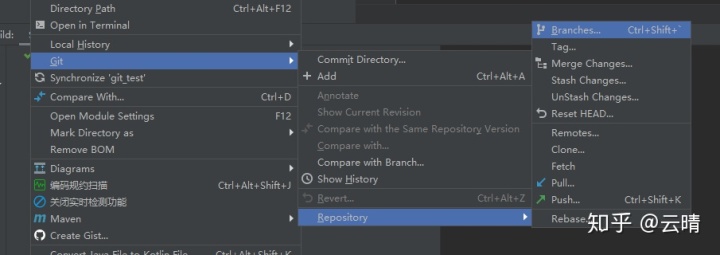
13.在本地创建分支并推送到远程gitlab仓库
- 右键项目选择分支
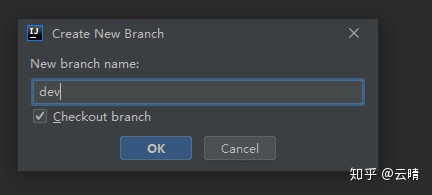
- 新建分支
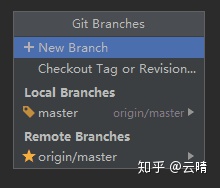
- 新分支为开发分支 dev
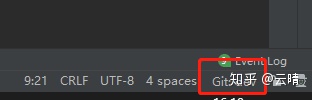
- 看右下角,当前分支已经切换到dev分支了
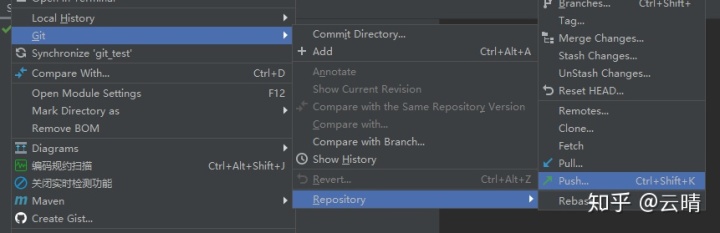
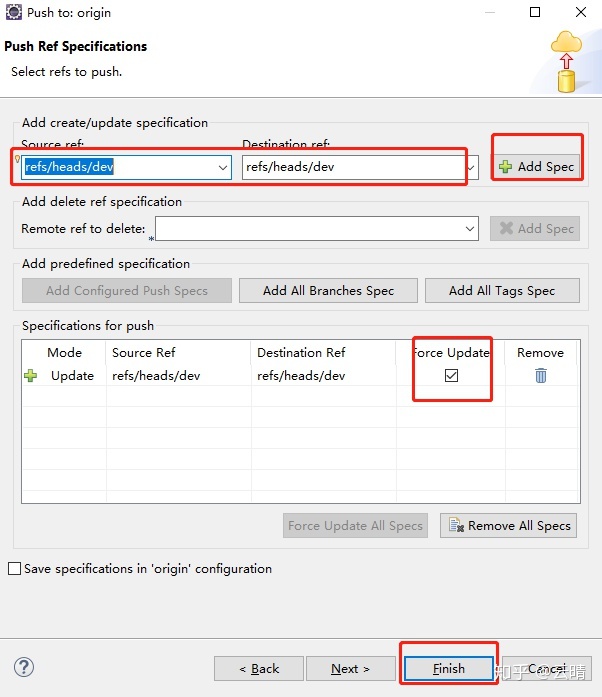
- 将dev分支 推送到gitlab
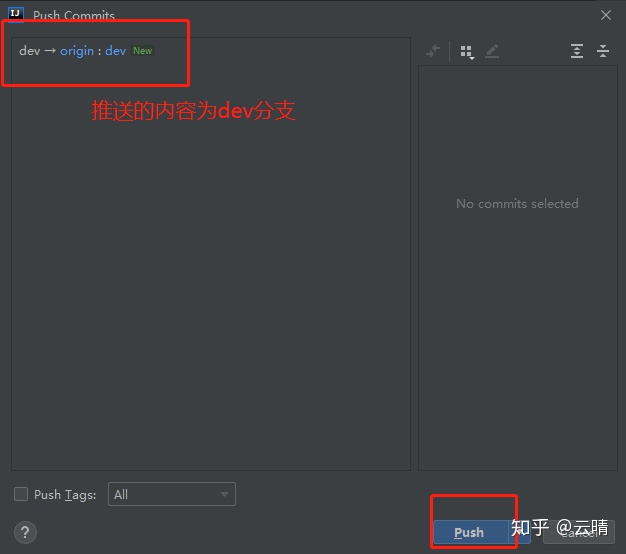
- gitlab上刷新可以看到推送dev分支成功

14.如何切换分支?
- 如上图可以看到Local Branches是本地分支, Remote Branches是远程gitlab上的分支。
15.如何合并dev分支代码到master分支?
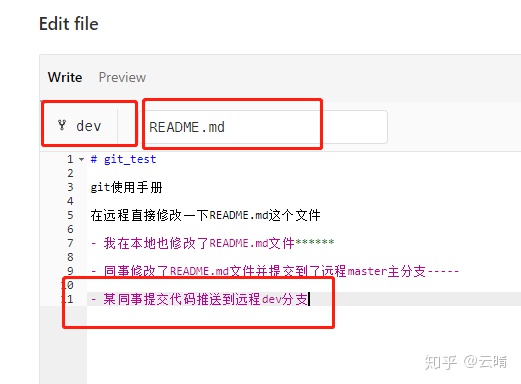
- 首先在远程dev分支修改代码
- 在本地仓库master分支拉取代码,选择从dev分支拉取并进行合并
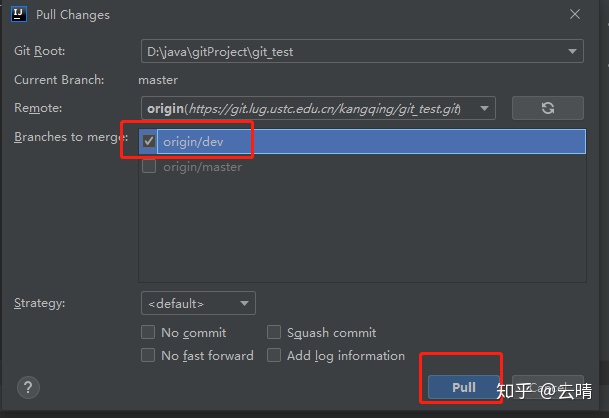
-注意:如果出现冲突,解决后推送到远程仓库即可。
16.如何删除用不到的分支?
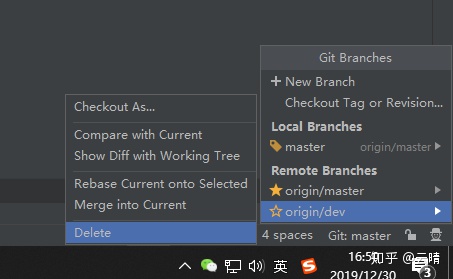
- 假如dev分支是为了修改某个bug创建的分支,bug修改完成,合并到主分支之后,dev没用了,就可以进行分支删除
- 如下,删除本地和远程的dev分支

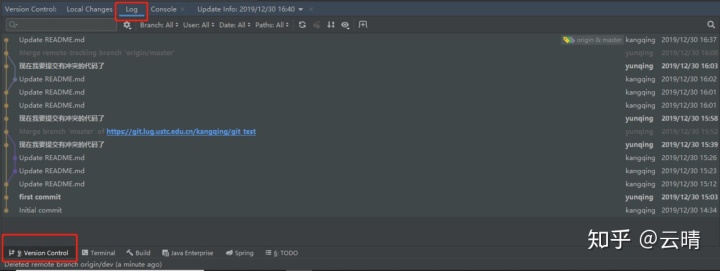
17.如何查看提交历史?
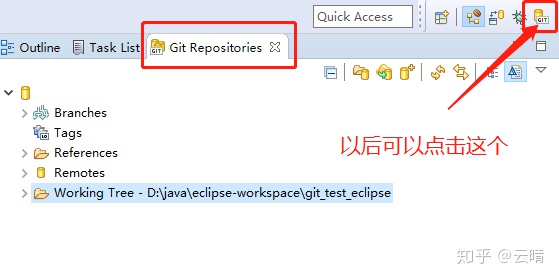
eclipse版
1.在gitlab上创建一个新的项目git_test_eclipse
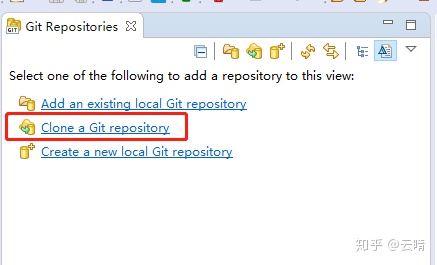
2.在eclipse上git clone代码

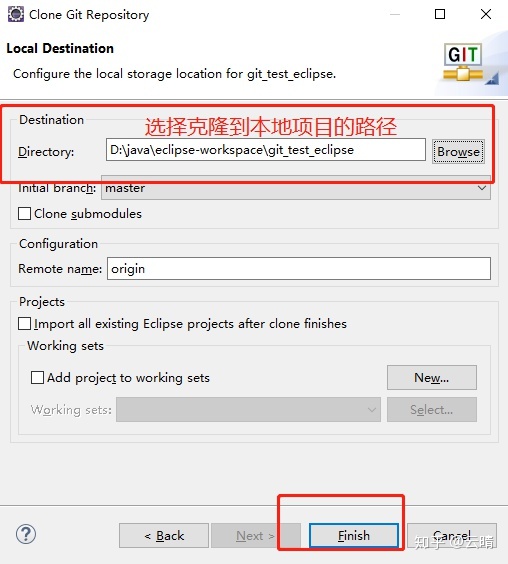
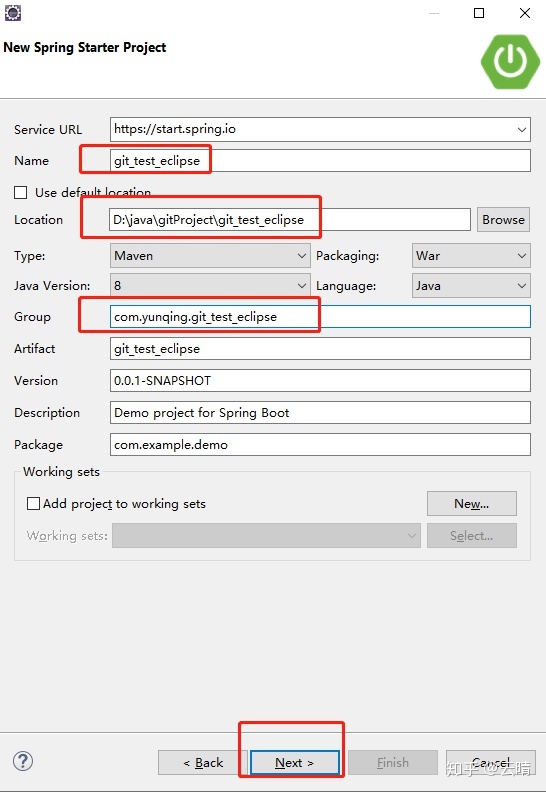
- 因为是在gitlab创建的空项目,所以先在其他路径创建一个springboot项目
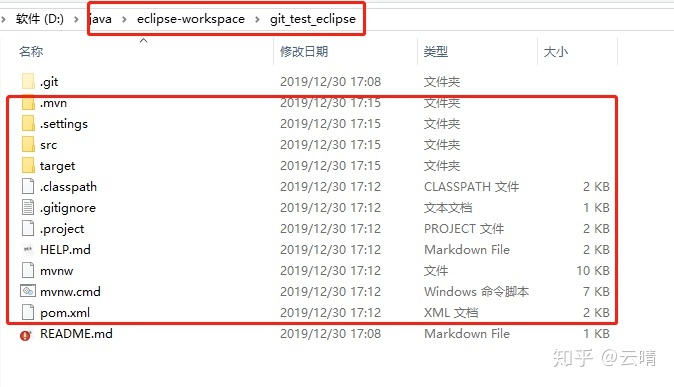
- 复制新创建项目文件夹下的内容到git clone下来的目录里。
- 导入maven项目,即git clone的项目

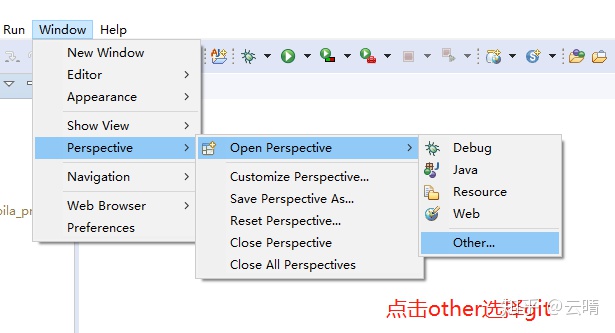
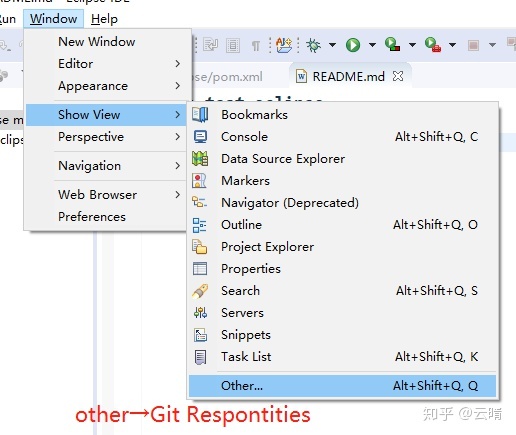
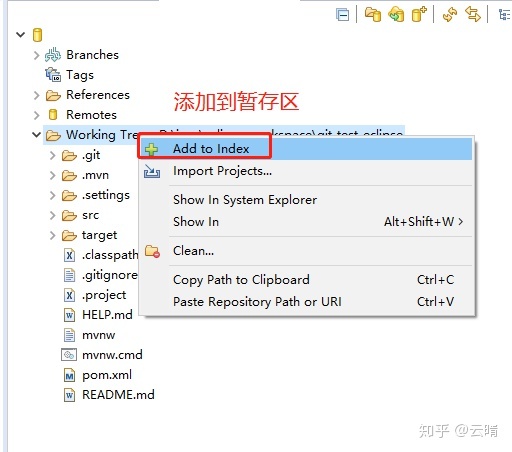
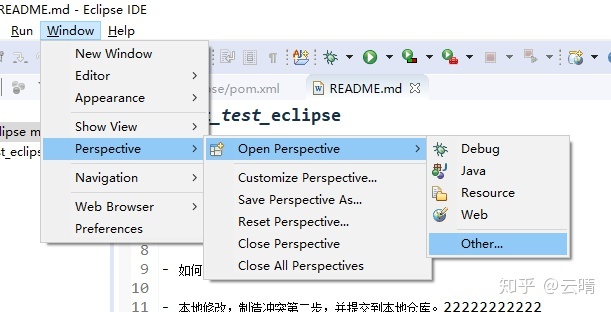
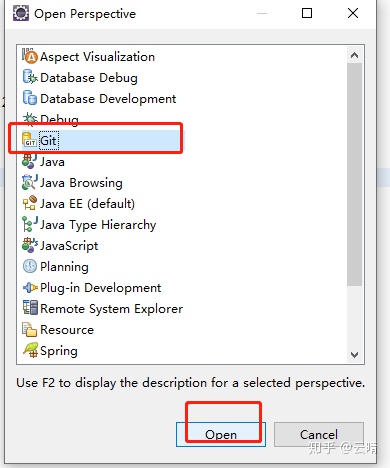
3.eclipse上进行首次提交,打开git操作页面
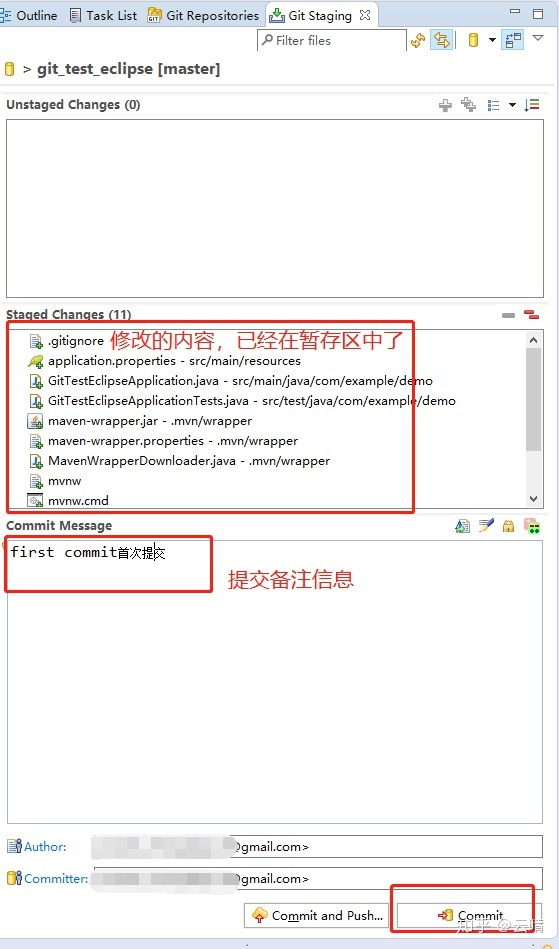
- 添加修改到暂存区
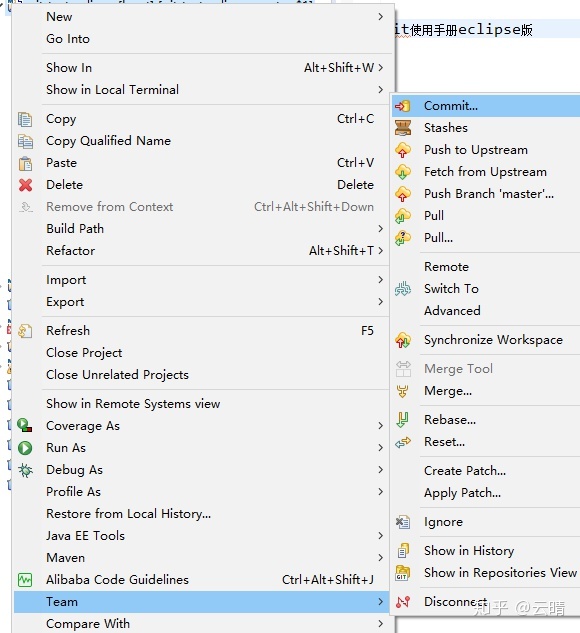
- 添加到暂存区后,可提交到本地git仓库,右键→Team→commit
- push推送到远程仓库,右键→Team→remote→push

- 注意:选择下一步做如下选择,提交主分支
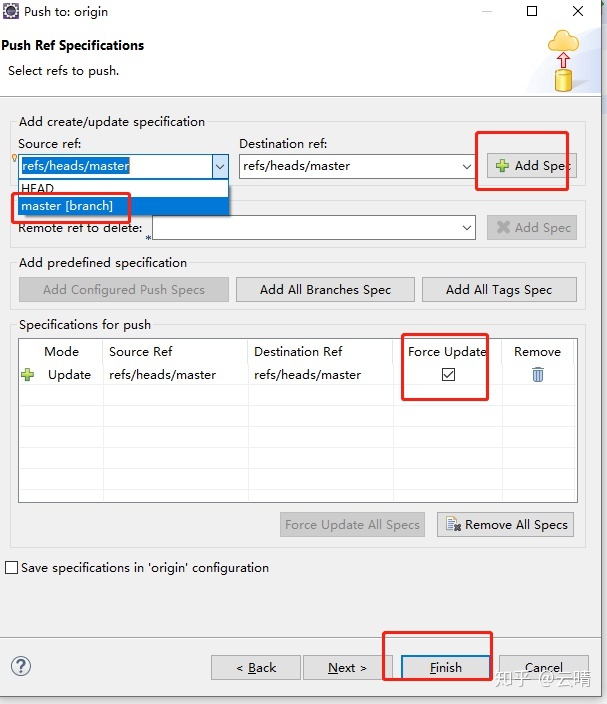
- 再下一步 → finish

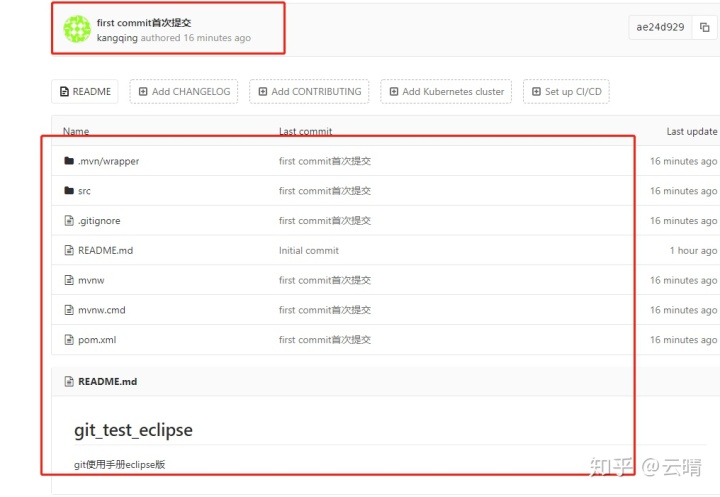
- 查看远程仓库gitlab发现已被提交到远程
4.eclipse如何拉取远程仓库的更新到本地?
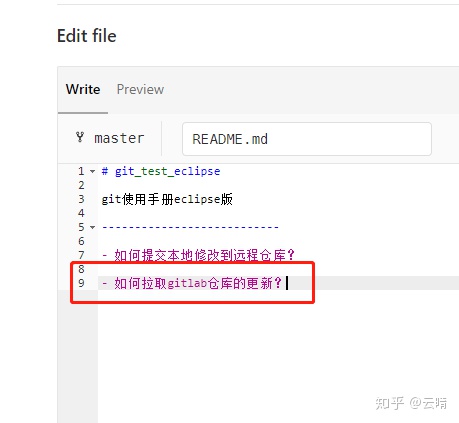
- 先在gitlab更新一下README.md文件,模拟同事修改提交后,我本地进行拉取更新。
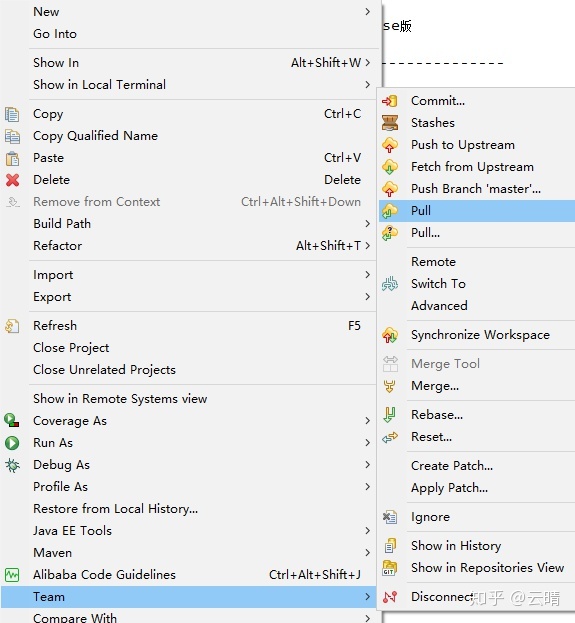
- 直接右键→Team→Pull拉取并合并

5.如何解决冲突?
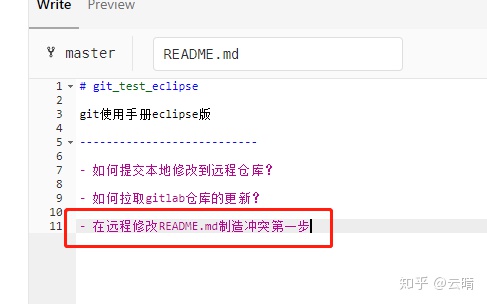
- 首先在远程仓库修改README.md文件
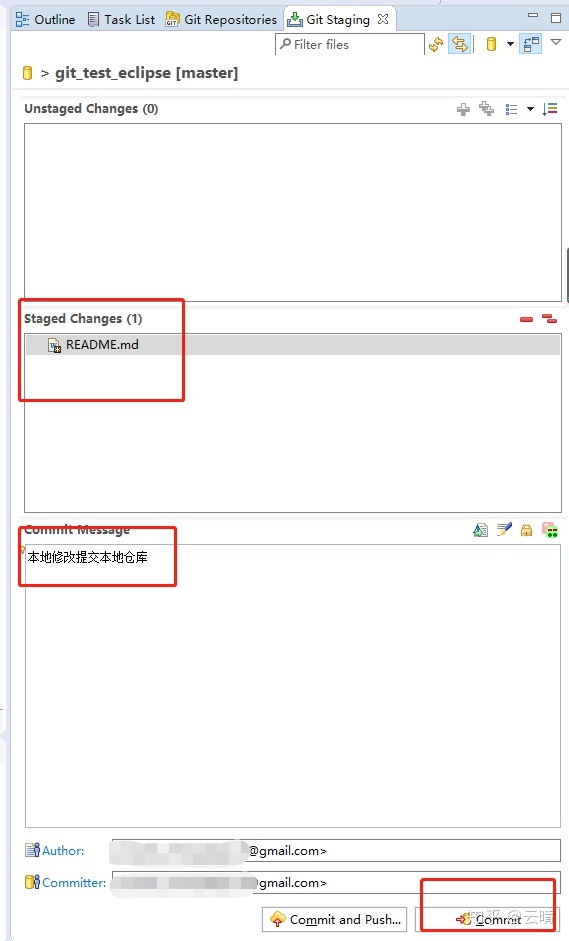
- 其次在本地修改README.md并提交到本地仓库

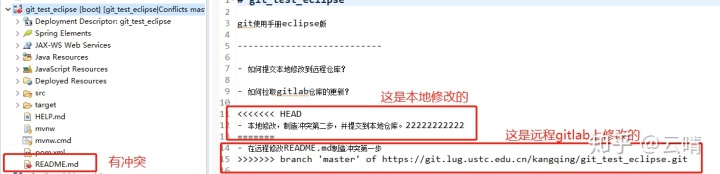
- 然后进行拉取远程合并右键→Team→Pull之后冲突就产生了
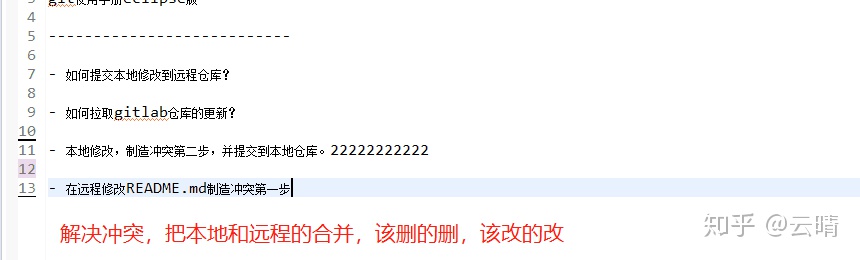
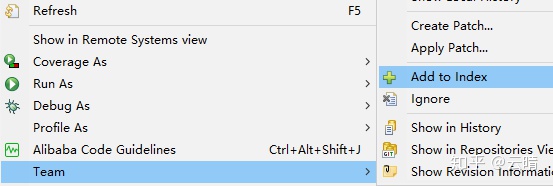
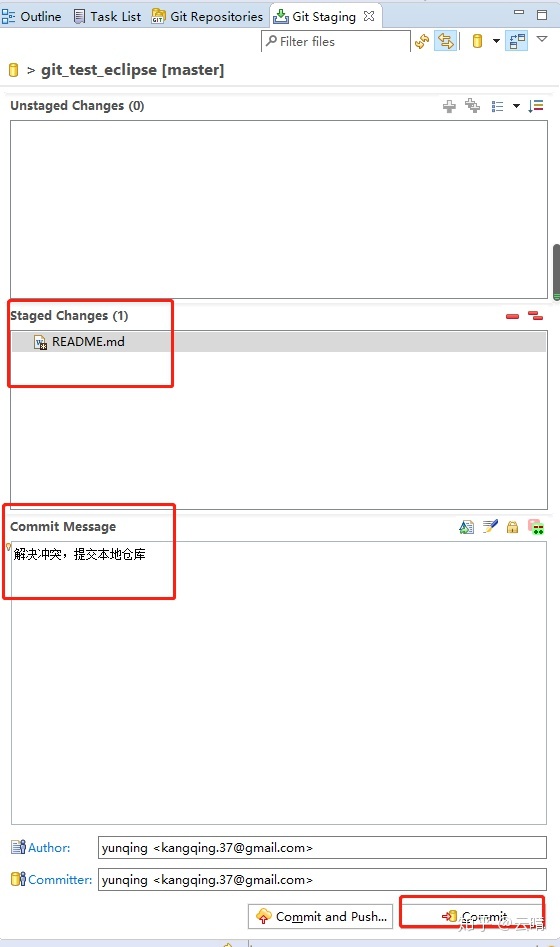
- 然后右键→Team→add to inde添加到暂存区,之后就可以commit提交本地,romote→push推送远程。

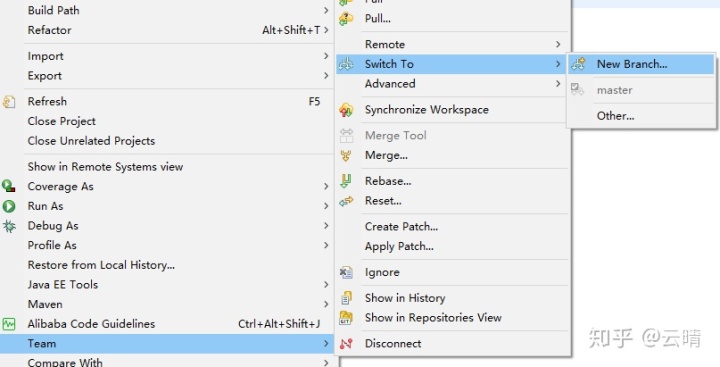
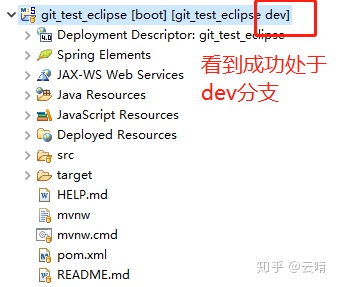
6.创建新的分支dev并推送到远程仓库

- push推送dev分支到远程仓库


7.如何切换分支
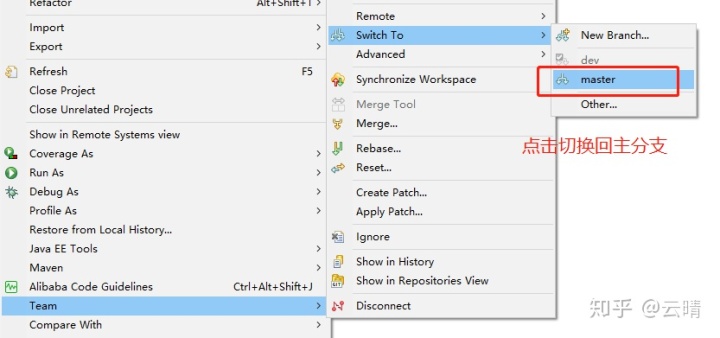
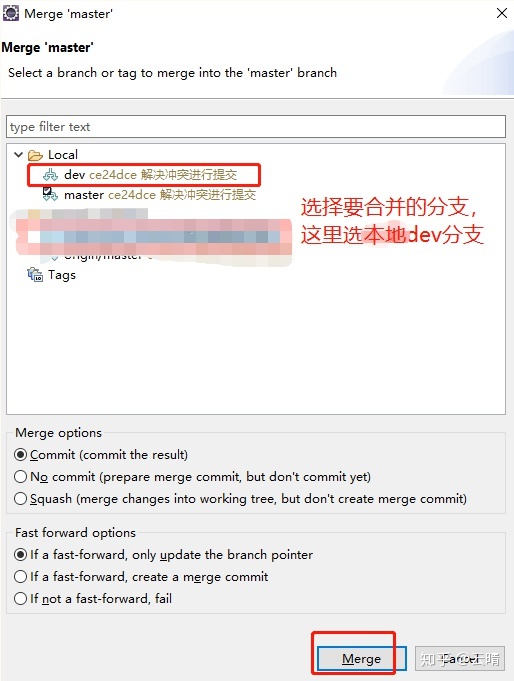
8.如何把dev分支合并到主分支?
- 首先切换dev分支,把远程dev分支的pull到本地
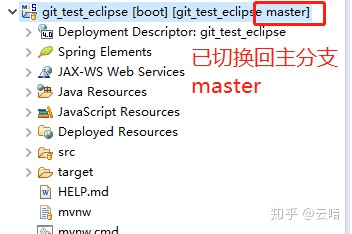
- 切换到主分支
- 然后点击右键→Team→Merge
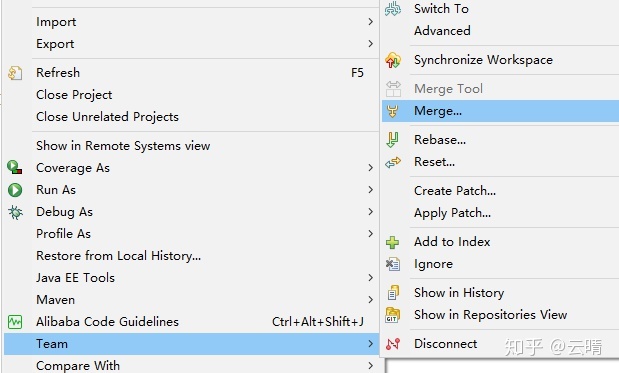
- 选择要合并到主分支的分支,这里选择本地Local的dev分支
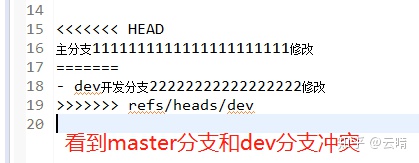
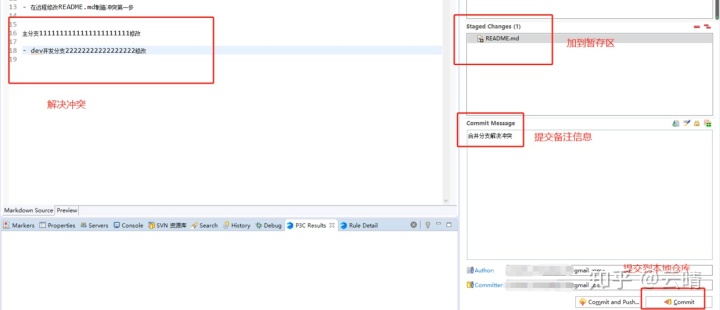
- 解决冲突
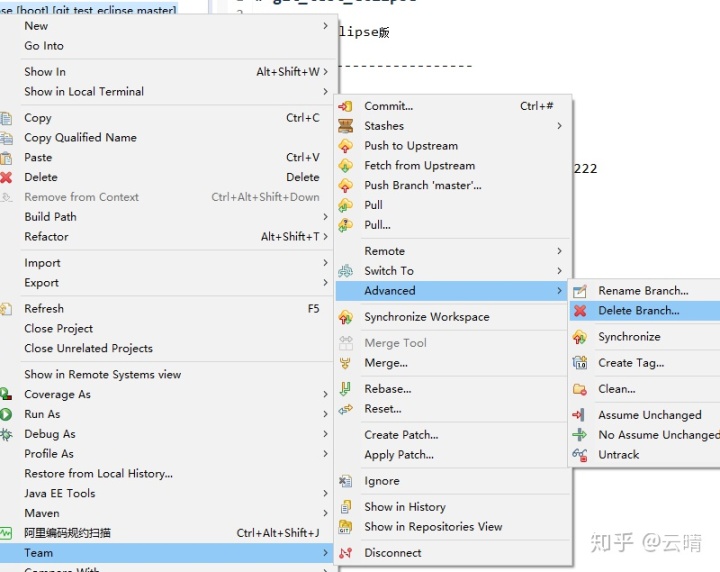
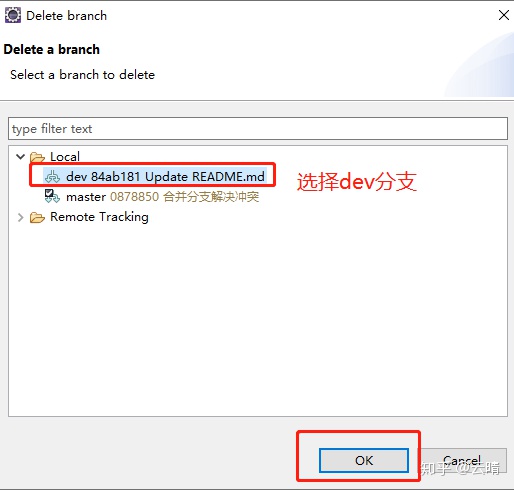
9.如何删除用不到的分支dev?
- 切换到主分支master
- 按照如下图中点击删除分支
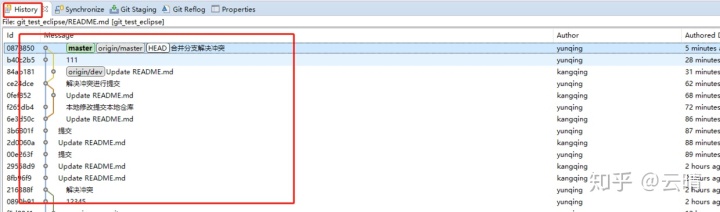
10.如何查看提交历史?
Terminal命令行版
讲解Terminal使用Git我还是以上面讲idea的git_test工程为例。
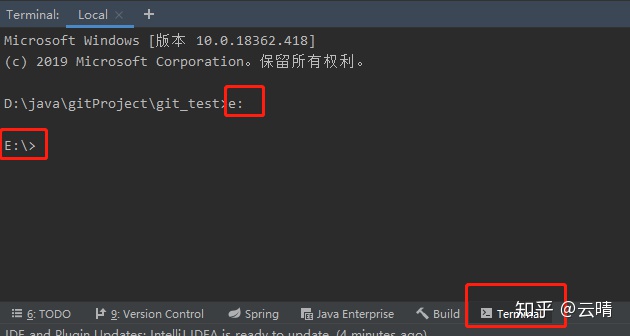
1.克隆git_test工程到本地
- 直接在命令行cmd或者powerShell都可以,我更喜欢在idea的Terminal命令行操作 - 打开idea的命令行Terminal,切换到E盘
- 克隆项目到本地
git clone https://git.lug.ustc.edu.cn/kangqing/git_test.git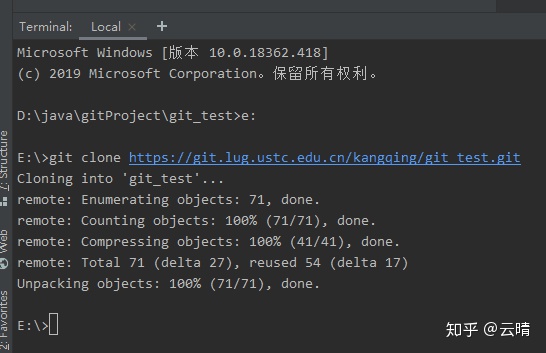
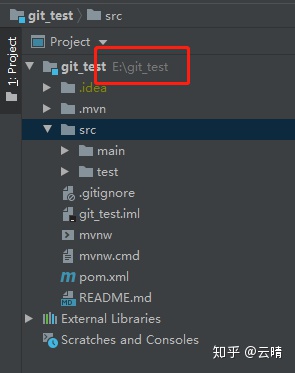
- idea打开e:/git_test项目
2.如何提交代码?
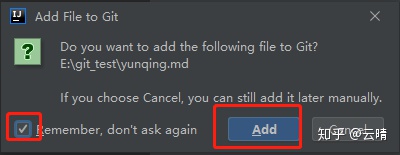
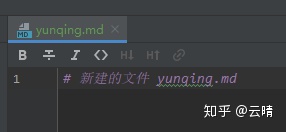
- 我们新添加一个文件,yunqing.md
- 选择记住,以后新建文件都加到git
- 查看更改的信息
git status- 添加所有修改文件到暂存区(注意所有文件是最后的点),也可指定添加具体文件到暂存区
git add .- 提交暂存区中的更改到本地仓库,并添加提交备注信息
git commit -m '第一次提交'- 推送到远程gitlab仓库
git push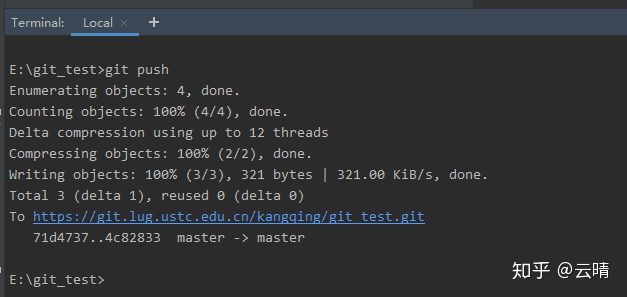
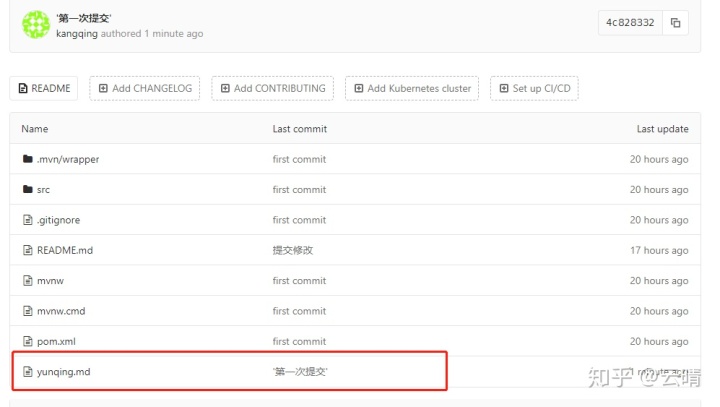
- 在远程gitlab上可以看到推送成功
3.如何拉取远程仓库的代码?
- 在远程上修改yunqing.md文件,模拟同事提交推送的修改

- 本地直接git pull拉取并合并代码
git pull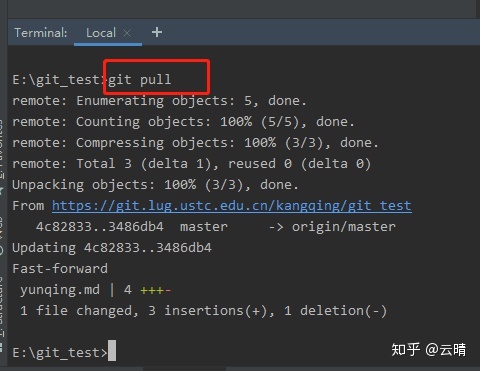
4.如何解决冲突?
- 在本地修改yunqing.md并提交本地仓库
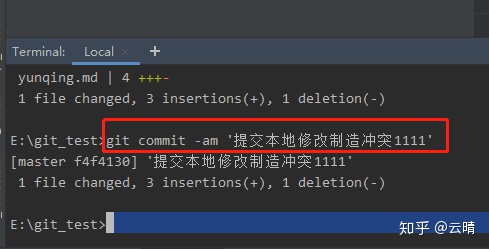
注意上图中并没有提交暂存区就提交成功了,因为提交的时候加了-a,就代表先提交暂存区
git commit -am '提交本地修改制造冲突1111'- 在远程修改yunqing.md文件

- git pull拉取合并代码,出现冲突
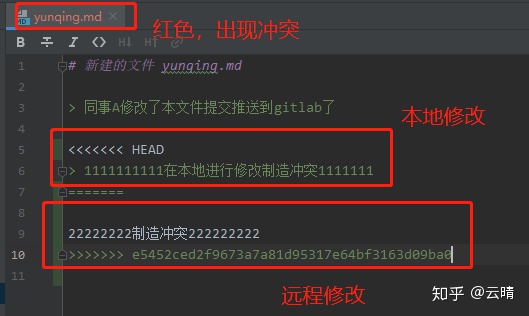
- 该删的删,该改的改
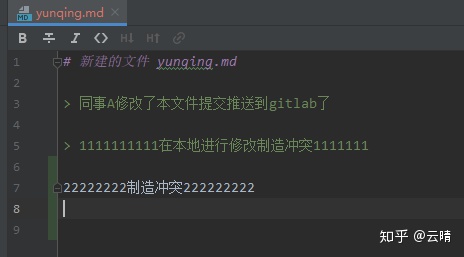
- 解决冲突之后提交本地仓库,然后推送到远程gitlab
git commit -am '冲突解决提交本地仓库'

git push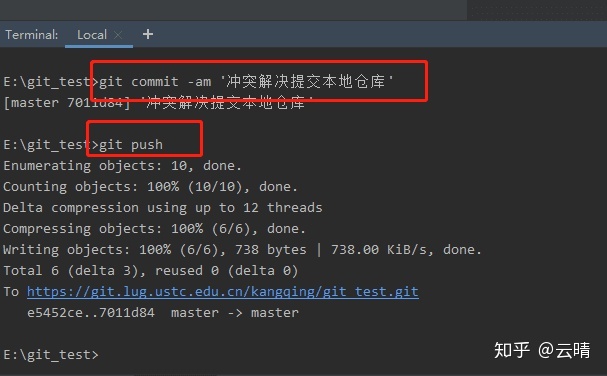
5.如何新建分支?
git branch dev6.查看分支?
git branch -a
7.如何切换分支?
git checkout master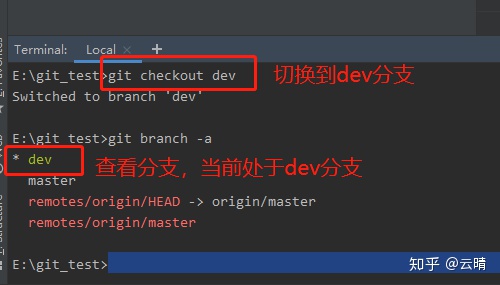
8.如何创建并切换分支?创建并切换到test分支
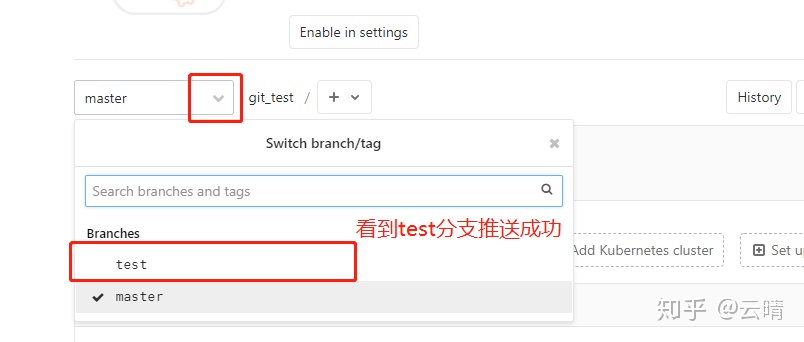
git checkout -b test9.如何推送test分支到远程gitlab?
- 首先切换到test分支
- 执行推送
git push- 发现提示推送分支应该执行的语句,按照提示的执行
git push --set-upstream origin test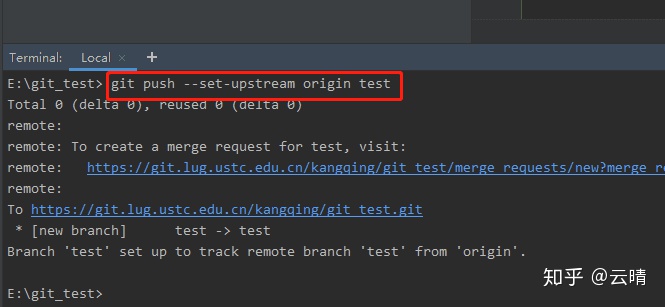
10.如何删除分支?例如删除dev分支
git branch -d dev11.如何合并分支?例如为了修改一个紧急bug创建的test分支,修改内容后要合并到主分支。
- 切换到test分支修改
- 提交
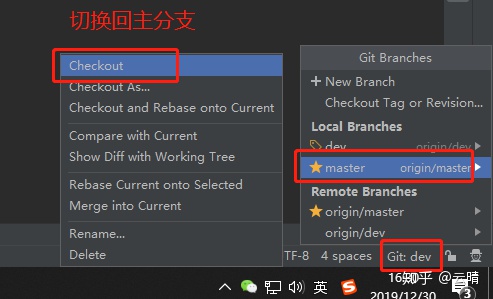
git commit -am 'test分支上修改一个bug'- 切换回主分支
git checkout master- 合并test分支到主分支
git merge test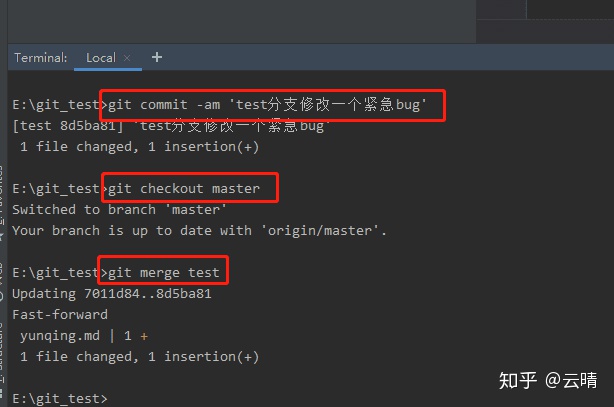
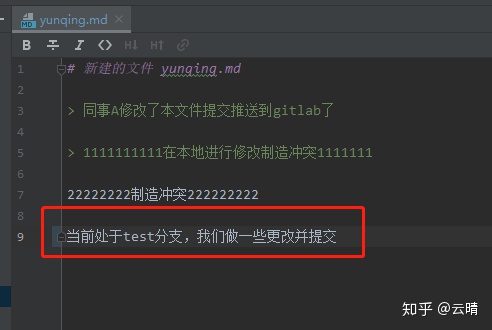
12.合并分支的之后遇到冲突怎么办? - 切换到test分支
git checkout test- 修改yunqing.md文件
- 提交到本地仓库
git commit -am 'test分支上作了修改,制造冲突1111'- 切换回主分支
git checkout master- 在主分支上更改yunqing.md制造冲突222222
- 提交到本地仓库
git commit -am '在主分支上更改yunqing.md制造冲突222222'- 合并test到主分支
git merge test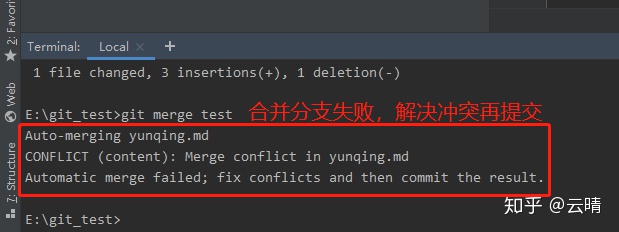

- 直接把有冲突的地方改正然后提交。
git commit -am '合并解决冲突'- 最后推送到远程仓库
git push13.如何查看提交历史?
git log注意,git log命令查看提交历史没有图形化界面看起来看舒服,可直接按下英文状态下q退出
- 或者直接gitk调出git默认提交历史图形界面
gitk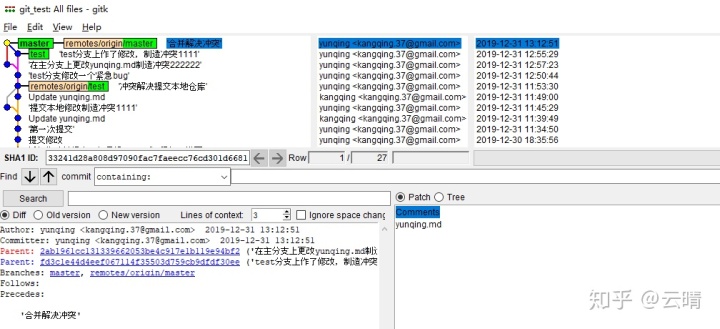
更多git相关命令行教程请看http://iissnan.com/progit/


 570
570

 被折叠的 条评论
为什么被折叠?
被折叠的 条评论
为什么被折叠?
 到【灌水乐园】发言


