


1. SSM整合
1.1 基本步骤
- 准备数据库和表记录
- 创建web项目
- 编写mybatis在ssm环境中可以单独使用
- 编写spring在ssm环境中可以单独使用
- spring整合mybatis
- 编写springMVC在ssm环境中可以单独使用
- spring整合springMVC
1.2 环境搭建
1.2.1 准备数据库表
CREATE TABLE `account` (
    `id` int(11) NOT NULL AUTO_INCREMENT,
    `name` varchar(32) DEFAULT NULL,
    `money` double DEFAULT NULL,
    PRIMARY KEY (`id`) )
    ENGINE=InnoDB AUTO_INCREMENT=3 DEFAULT CHARSET=utf8;
    insert into `account`(`id`,`name`,`money`) values (1,'tom',1000), (2,'jerry',1000);
1.2.2 添加 maven配置
-
创建web项目 : 从零开始SpringMVC项目
-
添加 mybatis maven 配置
        <!--mybatis坐标-->
        <dependency>
            <groupId>mysql</groupId>
            <artifactId>mysql-connector-java</artifactId>
            <version>5.1.47</version>
        </dependency>
        <dependency>
            <groupId>com.alibaba</groupId>
            <artifactId>druid</artifactId>
            <version>1.1.15</version>
        </dependency>
        <dependency>
            <groupId>org.mybatis</groupId>
            <artifactId>mybatis</artifactId>
            <version>3.5.1</version>
        </dependency>
        <dependency>
            <groupId>junit</groupId>
            <artifactId>junit</artifactId>
            <version>4.12</version>
        </dependency>
1.3 添加代码
1.3.1 Account实体
public interface AccountDao {

    /**
     * 查找所有账户信息
     * @return
     */
    public List<Account> findAll();
}
1.3.2 AccountMapper接口
public interface AccountMapper {

    /**
     * 查找所有账户信息
     * @return
     */
    public List<Account> findAll();
}
1.3.3 AccountMapper.xml
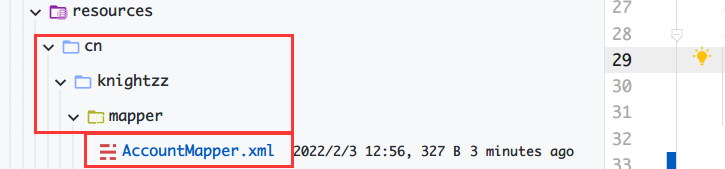
- 在 resource 目录下的 mapper 创建 AccountMapper.xml 文件
- 添加如下内容
<?xml version="1.0" encoding="UTF-8" ?>
<!DOCTYPE mapper PUBLIC "-//mybatis.org//DTD Mapper 3.0//EN" "http://mybatis.org/dtd/mybatis-3-mapper.dtd">
<mapper namespace="cn.knightzz.mapper.AccountMapper">
    <select id="findAll" resultType="cn.knightzz.entity.Account">
        select * from account
    </select>
</mapper>
1.3.4 Mybatis核心配置
-
jdbc.properties
jdbc.driver=com.mysql.jdbc.Driver jdbc.url=jdbc:mysql://localhost:3306/spring_db jdbc.username=root jdbc.password=123456 -
sqlMapConfig.xml
<?xml version="1.0" encoding="UTF-8" ?> <!DOCTYPE configuration PUBLIC "-//mybatis.org//DTD Config 3.0//EN" "http://mybatis.org/dtd/mybatis-3-config.dtd"> <configuration> <!--加载properties--> <properties resource="jdbc.properties"/> <!--类型别名配置--> <typeAliases> <package name="cn.knightzz.entity"/> </typeAliases> <!--环境配置--> <environments default="mysql"> <!--使用MySQL环境--> <environment id="mysql"> <transactionManager type="JDBC"/> <dataSource type="POOLED"> <property name="driver" value="${jdbc.driver}"/> <property name="url" value="${jdbc.url}"/> <property name="username" value="${jdbc.username}"/> <property name="password" value="${jdbc.password}"/> </dataSource> </environment> </environments> <!--加载映射--> <mappers> <mapper resource="mapper/AccountMapper.xml"></mapper> </mappers> </configuration> -
特别注意一定要加载映射
<mapper resource="mapper/AccountMapper.xml"></mapper>
1.3.5 测试代码
-
AccountMapperTest
package cn.knightzz.mapper;

import cn.knightzz.entity.Account;
import org.apache.ibatis.io.Resources;
import org.apache.ibatis.session.SqlSession;
import org.apache.ibatis.session.SqlSessionFactory;
import org.apache.ibatis.session.SqlSessionFactoryBuilder;
import org.junit.Test;

import java.io.IOException;
import java.io.InputStream;
import java.util.List;

public class AccountMapperTest {


    @Test
    public void findAll() throws IOException {
        // 加载配置文件
        InputStream resourceAsStream = Resources.getResourceAsStream("sqlMapConfig.xml");
        SqlSessionFactory sqlSessionFactory = new SqlSessionFactoryBuilder().build(resourceAsStream);
        SqlSession sqlSession = sqlSessionFactory.openSession();

        AccountMapper mapper = sqlSession.getMapper(AccountMapper.class);
        List<Account> accountList = mapper.findAll();
        for (Account account : accountList) {
            System.out.println(account);
        }

        sqlSession.close();
    }
}
1.4 整合Spring
1.4.1 添加Maven配置
- 在 maven 中添加如下配置
 <!--spring坐标-->
        <dependency>
            <groupId>org.springframework</groupId>
            <artifactId>spring-context</artifactId>
            <version>5.1.5.RELEASE</version>
        </dependency>
        <dependency>
            <groupId>org.aspectj</groupId>
            <artifactId>aspectjweaver</artifactId>
            <version>1.8.13</version>
        </dependency>
        <dependency>
            <groupId>org.springframework</groupId>
            <artifactId>spring-jdbc</artifactId>
            <version>5.1.5.RELEASE</version>
        </dependency>
        <dependency>
            <groupId>org.springframework</groupId>
            <artifactId>spring-tx</artifactId>
            <version>5.1.5.RELEASE</version>
        </dependency>
        <dependency>
            <groupId>org.springframework</groupId>
            <artifactId>spring-test</artifactId>
            <version>5.1.5.RELEASE</version>
        </dependency>
		<!--mybatis整合spring坐标-->
        <dependency>
            <groupId>org.mybatis</groupId>
            <artifactId>mybatis-spring</artifactId>
            <version>1.3.1</version>
        </dependency>
1.4.2 AccountService接口
-
AccountService
public interface AccountService { /** * 查询所有用户信息 * @return */ public List<Account> findAll(); } -
AccountServiceImpl
@Service("accountService")
public class AccountServiceImpl implements AccountService {


    @Resource
    AccountMapper accountMapper;

    @Override
    public List<Account> findAll() {
        return accountMapper.findAll();
    }
}
1.4.3 Spring核心配置
-
修改 AccountMapper.xml 文件的位置
-
和 AccountMapper.java 文件所在的包名一致, 这样 build 的时候会在一起
-
添加 spring-context.xml 文件配置
<?xml version="1.0" encoding="UTF-8"?> <beans xmlns="http://www.springframework.org/schema/beans" xmlns:xsi="http://www.w3.org/2001/XMLSchema-instance" xmlns:context="http://www.springframework.org/schema/context" xmlns:tx="http://www.springframework.org/schema/tx" xmlns:aop="http://www.springframework.org/schema/aop" xsi:schemaLocation="http://www.springframework.org/schema/beans http://www.springframework.org/schema/beans/spring-beans.xsd http://www.springframework.org/schema/context http://www.springframework.org/schema/context/spring-context.xsd http://www.springframework.org/schema/tx http://www.springframework.org/schema/tx/spring-tx.xsd http://www.springframework.org/schema/aop http://www.springframework.org/schema/aop/spring-aop.xsd"> <!--注解组件扫描--> <context:component-scan base-package="cn.knightzz.service"/> <!--spring整合mybatis--> <context:property-placeholder location="classpath:jdbc.properties"/> <bean id="dataSource" class="com.alibaba.druid.pool.DruidDataSource"> <property name="driverClassName" value="${jdbc.driver}"/> <property name="url" value="${jdbc.url}"/> <property name="username" value="${jdbc.username}"/> <property name="password" value="${jdbc.password}"/> </bean> <!--SqlSessionFactory创建交给spring的IOC容器--> <bean id="sqlSessionFactory" class="org.mybatis.spring.SqlSessionFactoryBean"> <!--数据库环境配置--> <property name="dataSource" ref="dataSource"/> <!--类型别名配置--> <property name="typeAliasesPackage" value="cn.knightzz.entity"/> <!--如果要引入mybatis主配置文件,可以通过如下配置--> <!--<property name="configLocation" value="classpath:sqlMapConfig.xml"/>--> </bean> <!--映射接口扫描配置,由spring创建代理对象,交给IOC容器--> <bean class="org.mybatis.spring.mapper.MapperScannerConfigurer"> <property name="basePackage" value="cn.knightzz.mapper"/> </bean> </beans> -
sqlMapConfig.xml 文件可以直接删除了
1.4.4 测试代码
@RunWith(SpringJUnit4ClassRunner.class)
@ContextConfiguration("classpath:spring-context.xml")
public class AccountServiceTest {

    @Resource
    private AccountService accountService;

    @Test
    public void findAll() {
        List<Account> accountList = accountService.findAll();
        for (Account account : accountList) {
            System.out.println(account);
        }
    }
}
1.5 整合 SpringMVC
1.5.1 添加maven配置
  <!--springMVC坐标-->
        <dependency>
            <groupId>org.springframework</groupId>
            <artifactId>spring-webmvc</artifactId>
            <version>5.1.5.RELEASE</version>
        </dependency>
        <dependency>
            <groupId>javax.servlet</groupId>
            <artifactId>javax.servlet-api</artifactId>
            <version>3.1.0</version>
            <scope>provided</scope>
        </dependency>
        <dependency>
            <groupId>javax.servlet.jsp</groupId>
            <artifactId>jsp-api</artifactId>
            <version>2.2</version>
            <scope>provided</scope>
        </dependency>
        <dependency>
            <groupId>jstl</groupId>
            <artifactId>jstl</artifactId>
            <version>1.2</version>
        </dependency>
1.5.2 添加前端控制器
-
在 web.xml 文件中添加如下配置
<?xml version="1.0" encoding="UTF-8"?>
<web-app xmlns="http://xmlns.jcp.org/xml/ns/javaee"
         xmlns:xsi="http://www.w3.org/2001/XMLSchema-instance"
         xsi:schemaLocation="http://xmlns.jcp.org/xml/ns/javaee http://xmlns.jcp.org/xml/ns/javaee/web-app_4_0.xsd"
         version="4.0">

    <!--前端控制器-->
    <servlet>
        <servlet-name>DispatcherServlet</servlet-name>
        <servlet-class>org.springframework.web.servlet.DispatcherServlet</servlet-class>
        <init-param>
            <param-name>contextConfigLocation</param-name>
            <param-value>classpath:spring-mvc.xml</param-value>
        </init-param>
        <load-on-startup>2</load-on-startup>
    </servlet>
    <servlet-mapping>
        <servlet-name>DispatcherServlet</servlet-name>
        <url-pattern>/</url-pattern>
    </servlet-mapping>

    <!--post中文处理-->
    <filter>
        <filter-name>CharacterEncodingFilter</filter-name>
        <filter-class>org.springframework.web.filter.CharacterEncodingFilter</filter-class>
        <init-param>
            <param-name>encoding</param-name>
            <param-value>UTF-8</param-value>
        </init-param>
    </filter>
    <filter-mapping>
        <filter-name>CharacterEncodingFilter</filter-name>
        <url-pattern>/*</url-pattern>
    </filter-mapping>

    <!--配置spring的监听器-->
    <listener>
        <listener-class>org.springframework.web.context.ContextLoaderListener</listener-class>
    </listener>
    <context-param>
        <param-name>contextConfigLocation</param-name>
        <param-value>classpath:spring-context.xml</param-value>
    </context-param>
</web-app>
1.5.3 添加mvc配置
-
在 spring-mvc.xml 添加如下配置
<beans xmlns="http://www.springframework.org/schema/beans"
       xmlns:mvc="http://www.springframework.org/schema/mvc"
       xmlns:context="http://www.springframework.org/schema/context"
       xmlns:xsi="http://www.w3.org/2001/XMLSchema-instance"
       xsi:schemaLocation="http://www.springframework.org/schema/beans
       http://www.springframework.org/schema/beans/spring-beans.xsd
       http://www.springframework.org/schema/mvc
       http://www.springframework.org/schema/mvc/spring-mvc.xsd
       http://www.springframework.org/schema/context
       http://www.springframework.org/schema/context/spring-context.xsd">
    <!--配置注解扫描-->
    <context:component-scan base-package="cn.knightzz"/>

    <bean id="viewResolver" class="org.springframework.web.servlet.view.InternalResourceViewResolver">
        <!-- 用于解析视图名, /pages/success.jsp => 直接使用 success 即可-->
        <property name="prefix" value="/pages/"></property>
        <property name="suffix" value=".jsp"></property>
    </bean>

    <!-- 处理器适配器, 增强了功能, 支持 json 的读写-->
    <mvc:annotation-driven></mvc:annotation-driven>

    <!--在springmvc配置文件中开启DefaultServlet处理静态资源-->
    <mvc:default-servlet-handler/>
</beans>
1.5.4 添加事务控制
-
在 spring-context.xml
    <!--spring的声明式事务-->
    <!--1.事务管理器-->
    <bean id="transactionManager" class="org.springframework.jdbc.datasource.DataSourceTransactionManager">
        <property name="dataSource" ref="dataSource"></property>
    </bean>

    <!--2.开始事务注解的支持-->
    <tx:annotation-driven/>
1.5.5 AccountController
-
AccountController
@Controller
public class AccountController {

    @Resource
    AccountService accountService;

    @RequestMapping("/findAll")
    public String findAll(Model model){
        List<Account> accountList = accountService.findAll();
        System.out.println(accountList);
        model.addAttribute("list", accountList);
        return "list";
    }
}
1.5.6 list.jsp
-
在 pages 目录下面创建 list.jsp
<%-- Created by IntelliJ IDEA. User: knightzz98 Date: 2022/2/3 Time: 18:03 To change this template use File | Settings | File Templates. --%> <%@ page contentType="text/html;charset=UTF-8" language="java" %> <%@ taglib prefix="c" uri="http://java.sun.com/jsp/jstl/core" %> <!DOCTYPE html> <!-- 网页使用的语言 --> <html lang="zh-CN"> <head> <!-- 指定字符集 --> <meta charset="utf-8"> <!-- 使用Edge最新的浏览器的渲染方式 --> <meta http-equiv="X-UA-Compatible" content="IE=edge"> <!-- viewport视口:网页可以根据设置的宽度自动进行适配,在浏览器的内部虚拟一个容器,容器的宽度与设备的宽度相同。 width: 默认宽度与设备的宽度相同 initial-scale: 初始的缩放比,为1:1 --> <meta name="viewport" content="width=device-width, initial-scale=1"> <!-- 上述3个meta标签*必须*放在最前面,任何其他内容都*必须*跟随其后! --> <title>账户列表</title> <!-- 1. 导入CSS的全局样式 --> <link href="${pageContext.request.contextPath}/css/bootstrap.min.css" rel="stylesheet"> <!-- 2. jQuery导入,建议使用1.9以上的版本 --> <script src="${pageContext.request.contextPath}/js/jquery-2.1.0.min.js"></script> <!-- 3. 导入bootstrap的js文件 --> <script src="${pageContext.request.contextPath}/js/bootstrap.min.js"></script> <style type="text/css"> td, th { text-align: center; } </style> </head> <body> <div class="container"> <div class="row"> <h3 style="text-align: center">账户信息列表</h3> <div class="col-lg-2"></div> <div class="col-lg-8"> <form action="${pageContext.request.contextPath}/account/deleteBatch" method="post" id="deleteBatchForm"> <table border="1" class="table table-bordered table-hover"> <tr class="success"> <th> <input type="checkbox" id="checkAll"> <%--实现全选全不选效果--%> <script> $('#checkAll').click(function () { $('input[name="ids"]').prop('checked',$(this).prop('checked')); }) </script> </th> <th>编号</th> <th>姓名</th> <th>余额</th> <th>操作</th> </tr> <c:forEach items="${list}" var="account"> <tr> <td> <input type="checkbox" name="ids" value="${account.id}"> </td> <td>${account.id}</td> <td>${account.name}</td> <td>${account.money}</td> <td><a class="btn btn-default btn-sm" href="${pageContext.request.contextPath}/account/findById?id=${account.id}">修改</a> <a class="btn btn-default btn-sm" href="">删除</a></td> </tr> </c:forEach> <tr> <td colspan="9" align="center"> <a class="btn btn-primary" href="${pageContext.request.contextPath}/add.jsp">添加账户</a> <input class="btn btn-primary" type="button" value="删除选中" id="deleteBatchBtn"> </td> </tr> </table> </form> </div> <div class="col-lg-2"></div> </div> </div> </body> <script> /*给删除选中按钮绑定点击事件*/ $('#deleteBatchBtn').click(function () { if(confirm('您确定要删除吗')){ if($('input[name=ids]:checked').length > 0){ /*提交表单*/ $('#deleteBatchForm').submit(); } }else { alert('想啥呢,没事瞎操作啥') } }) </script> </html> -
index.jsp
<a href="${pageContext.request.contextPath}/findAll">findAll</a>


 1652
1652


 被折叠的 条评论
为什么被折叠?
被折叠的 条评论
为什么被折叠?
 到【灌水乐园】发言


