antd5:图片上传接口参数

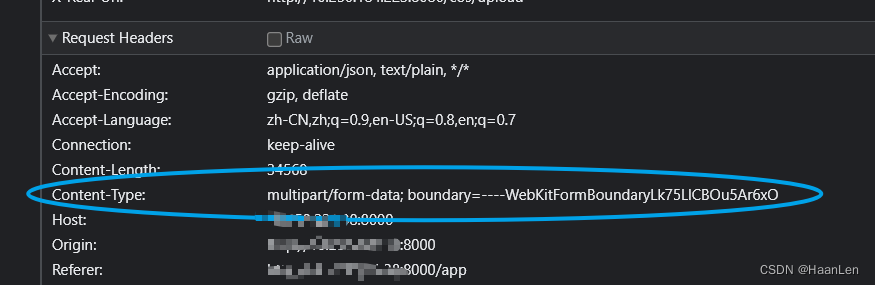
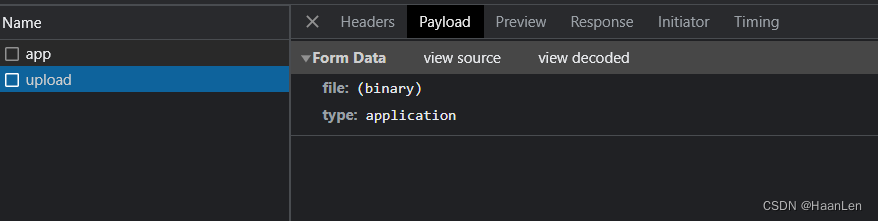
使用场景,后端给了一个上传文件的接口/api/file/upload,方法类型为post,参数为{file: binary,type:string}.
上传文件需要设置请求头content-type.
在这里插入图片描述

项目使用的是umi4+antd5
请求拦截便在app.ts文件写。

export const request: RequestConfig = {
  baseURL: '/api',
  timeout: 5000,
  // other axios options you want
  errorConfig: {

    errorHandler () {
    },
    errorThrower () { },
  },
  requestInterceptors: [
    (url, options) => {
      if (options.contentType) {
      //修改请求头
        options.headers['Content-Type'] = options.contentType;
      }
      return { url, options };
    }
  ],
  responseInterceptors: [],
};

上传参数示意
在这里插入图片描述

接口函数

import { request } from '@umijs/max';
export const fileUpload = (
  params: any,
  options?: { [key: string]: any },
) => request(
  '/file/upload',
  {
    method: 'POST',
    data: params,
    ...(options || {}),
    contentType: 'multipart/form-data'
  },
);
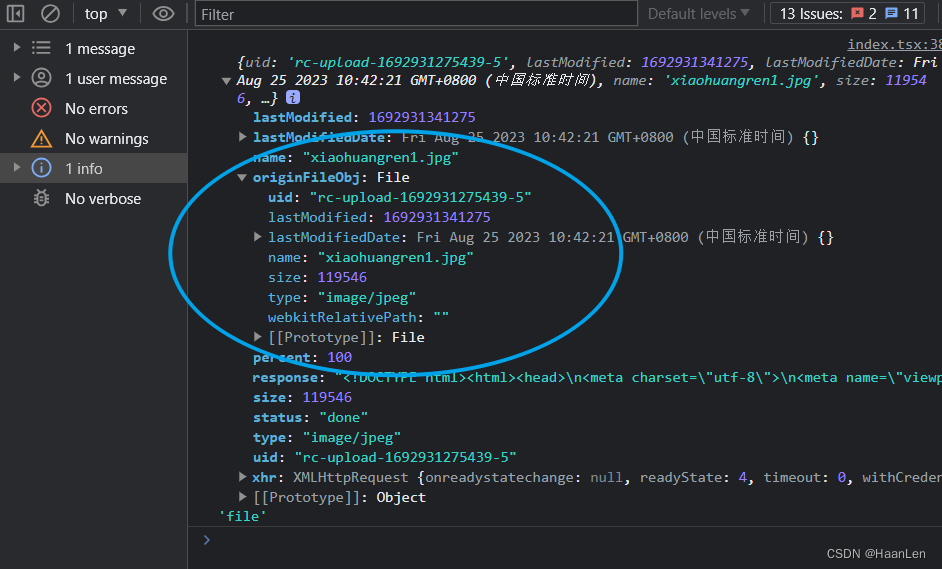
  console.log(file, 'file');
  cosUpload({
    file: file.originFileObj,//文件对象
    type: 'application'
  }).then((res) => {
    res?.data && setImageUrl(res.data);
  }).finally(() => {
    setLoading(false);
  });

在这里插入图片描述

  • 0
    点赞
  • 0
    收藏
    觉得还不错? 一键收藏
  • 0
    评论
Antd Vue 提供了一个 Upload 组件,可以用于上传图片。 使用方法如下: 1. 安装 antd-vue 和 axios: ``` npm install antd-vue axios --save ``` 2. 引入 antd-vue 和 axios: ```js import Vue from 'vue' import Antd from 'ant-design-vue' import 'ant-design-vue/dist/antd.css' import axios from 'axios' Vue.use(Antd) Vue.prototype.$axios = axios ``` 3. 在组件中使用 Upload 组件: ```html <template> <div> <a-upload :action="uploadUrl" :before-upload="beforeUpload" :on-success="onSuccess" :on-error="onError" :show-upload-list="false" > <a-button> <a-icon type="upload"></a-icon> Click to Upload </a-button> </a-upload> </div> </template> <script> export default { data() { return { uploadUrl: '/api/upload', } }, methods: { beforeUpload(file) { const isJpgOrPng = file.type === 'image/jpeg' || file.type === 'image/png' if (!isJpgOrPng) { this.$message.error('You can only upload JPG/PNG file!') } const isLt2M = file.size / 1024 / 1024 < 2 if (!isLt2M) { this.$message.error('Image must smaller than 2MB!') } return isJpgOrPng && isLt2M }, onSuccess(response) { this.$message.success('Upload success') console.log(response) }, onError(error) { this.$message.error('Upload failed') console.log(error) }, }, } </script> ``` 上面的代码中,Upload 组件的 action 属性指定了上传图片的 URL,before-upload 属性用于校验上传的文件类型和大小,on-success 和 on-error 属性分别用于处理上传成功和上传失败的情况。 在 beforeUpload 方法中,我们校验了上传的文件类型和大小,如果不符合要求,则会弹出错误提示。 在 onSuccess 方法中,我们打印了上传成功后返回的数据,可以根据实际需求进行处理。 在 onError 方法中,我们打印了上传失败的错误信息,可以根据实际需求进行处理。

“相关推荐”对你有帮助么?

  • 非常没帮助
  • 没帮助
  • 一般
  • 有帮助
  • 非常有帮助
提交
评论
添加红包

请填写红包祝福语或标题

红包个数最小为10个

红包金额最低5元

当前余额3.43前往充值 >
需支付:10.00
成就一亿技术人!
领取后你会自动成为博主和红包主的粉丝 规则
hope_wisdom
发出的红包
实付
使用余额支付
点击重新获取
扫码支付
钱包余额 0

抵扣说明:

1.余额是钱包充值的虚拟货币,按照1:1的比例进行支付金额的抵扣。
2.余额无法直接购买下载,可以购买VIP、付费专栏及课程。

余额充值