


背景
日常开发中,项目启动会在不同环境加载不同的配置,比如:开发环境(dev)、测试环境(test)、预发环境(pre)、生产环境(prod)会加载各自的配置呢。这个是项目设计初期需要考虑的,为此就需要多环境配置文件。
三种配置方式
1、spring.profile.active方式
● 在springboot中有默认的配置文件application.properties/application.yml文件,且application.properties文件的优先级高于application.yml文件。
● resources目录下新建application-dev.properties、application-test.properties、application-pre.propertie、application-prod.properties四个配置文件,必须符合的文件格式application-${profiles}.properties/yml。
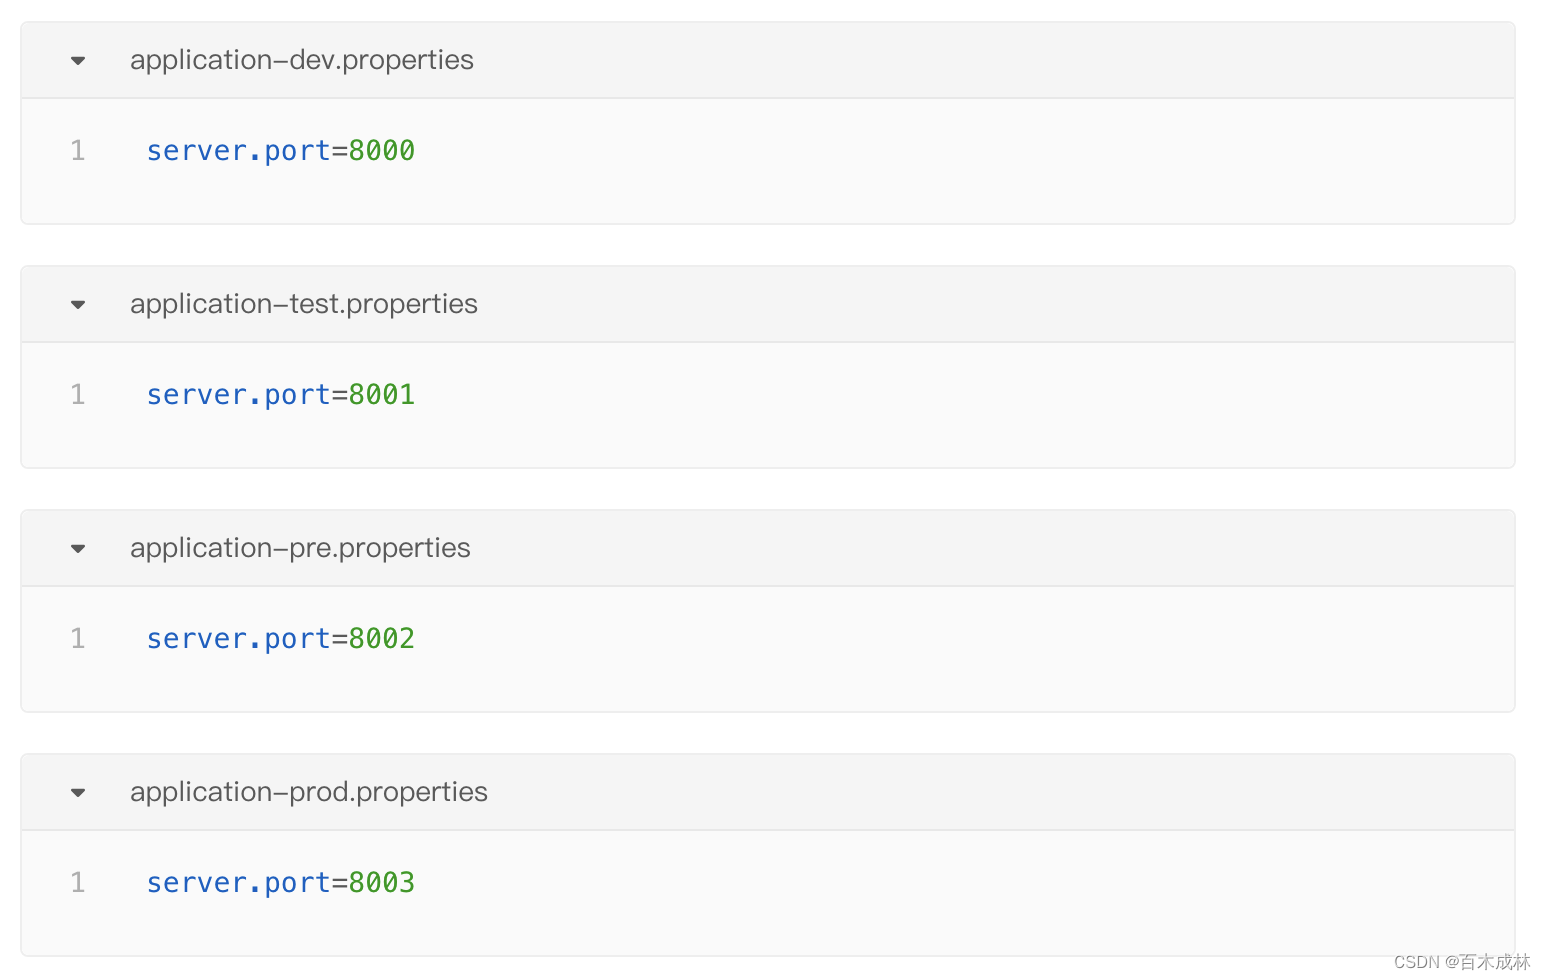
● 且application.properties必须存在,在该配置文件中配置环境值。
## 如果为 开发环境
spring.profile.active=dev
## 如果为 测试环境
spring.profile.active=test
## 如果为 预发环境
spring.profile.active=pre
## 如果为 生产环境
spring.profile.active=prod
至此项目启动就会加载对应的配置文件
这里配置为:spring.profile.active=test

2、spring.config.name
除了上面的方式,还可以用spring.config.name的方式,可以在JVM中配置参数 -Dspring.config.name=application-prod
## 如果为 开发环境
-Dspring.config.name=application-dev
## 如果为 测试环境
-Dspring.config.name=application-test
## 如果为 预发环境
-Dspring.config.name=application-pre
## 如果为 生产环境
-Dspring.config.name=application-prod
说明
以上两种都可以配置在JVM或环境变量里,且JVM参数的优先级大于环境变量的。
3、pom中的profiles方式
● 在resource下新建如下配置文件
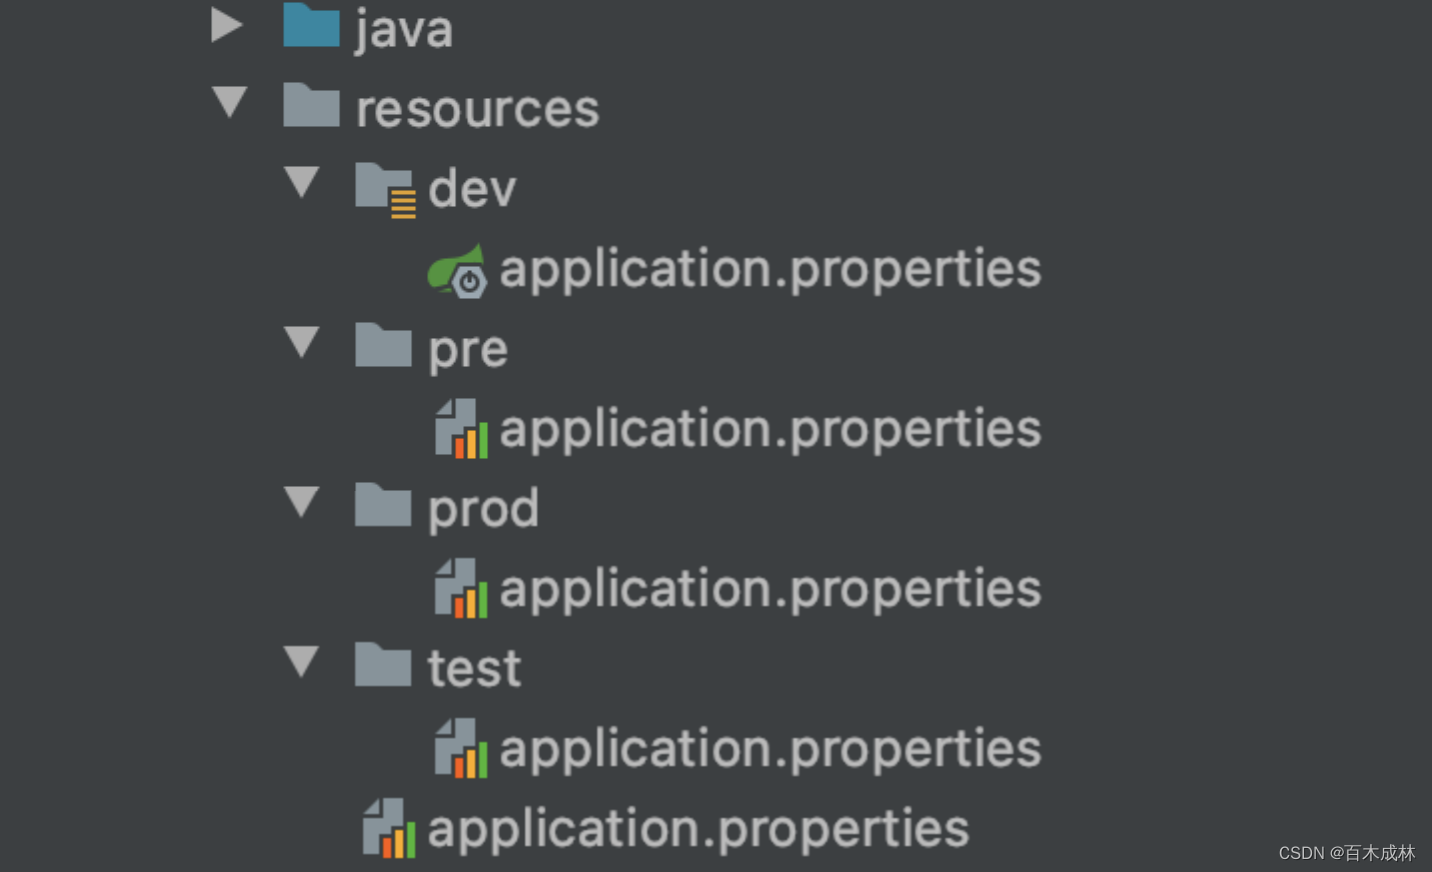
● 通过不同的文件夹来区分不同的环境,每个文件夹下的配置文件的内容分别是dev(9091)、test(9092)、pre(9093)、prod(9004),那么要如何加载不同的文件,这里要结合pom.xml文件。
<?xml version="1.0" encoding="UTF-8"?>
<project xmlns="http://maven.apache.org/POM/4.0.0"
         xmlns:xsi="http://www.w3.org/2001/XMLSchema-instance"
         xsi:schemaLocation="http://maven.apache.org/POM/4.0.0 http://maven.apache.org/xsd/maven-4.0.0.xsd">
  <parent>
    <artifactId>study-demo</artifactId>
    <groupId>com.example</groupId>
    <version>0.0.1-SNAPSHOT</version>
  </parent>
  <modelVersion>4.0.0</modelVersion>

  <artifactId>designpattern</artifactId>

  <profiles>
    <!--dev环境-->
    <profile>
      <id>dev</id>
      <properties>
        <profiles.active>dev</profiles.active>
      </properties>
      <activation>
        <activeByDefault>true</activeByDefault>
      </activation>
    </profile>
    <!--test环境-->
    <profile>
      <id>test</id>
      <properties>
        <profiles.active>test</profiles.active>
      </properties>
    </profile>
    <!--pre环境-->
    <profile>
      <id>pre</id>
      <properties>
        <profiles.active>pre</profiles.active>
      </properties>
    </profile>
    <!--prod环境-->
    <profile>
      <id>prod</id>
      <properties>
        <profiles.active>prod</profiles.active>
      </properties>
    </profile>
  </profiles>
  <build>
    <plugins>
      <plugin>
        <groupId>org.springframework.boot</groupId>
        <artifactId>spring-boot-maven-plugin</artifactId>
        <executions>
          <execution>
            <goals>
              <goal>repackage</goal>
            </goals>
          </execution>
        </executions>
      </plugin>
    </plugins>
    <resources>
      <resource>
        <directory>src/main/resources/${profiles.active}</directory>
      </resource>
    </resources>
  </build>
</project>
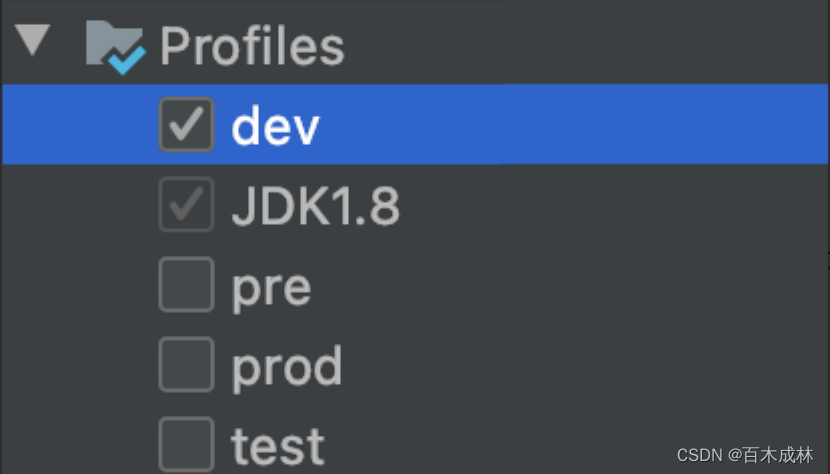
● 重新执行 mvn clean install后,这里就可以根据不同的profile打包对应的环境了
总结
1、使用application-${profiles}.properties/yml的格式,和spring.profile.active来加载不同环境(推荐)
2、spring.config.name的简单介绍使用
3、通过pom的profiles标签打包不同的环境配置(推荐)


 1239
1239


 被折叠的 条评论
为什么被折叠?
被折叠的 条评论
为什么被折叠?
 到【灌水乐园】发言


