


前言:
项目需求,需要做一个手势识别的项目,目标对标旷视
数据集在这里,我自己已经购买了, 12W+张图片,12G+,代标注。
https://mp.weixin.qq.com/s/_VrxGzOiFJsnXgRbQ7t7hw
ref blog:https://blog.csdn.net/guyuealian/article/details/126750433
这个项目做好了,可以对标旷视的算法: https://console.faceplusplus.com.cn/documents/10065685
step1:初始化数据集
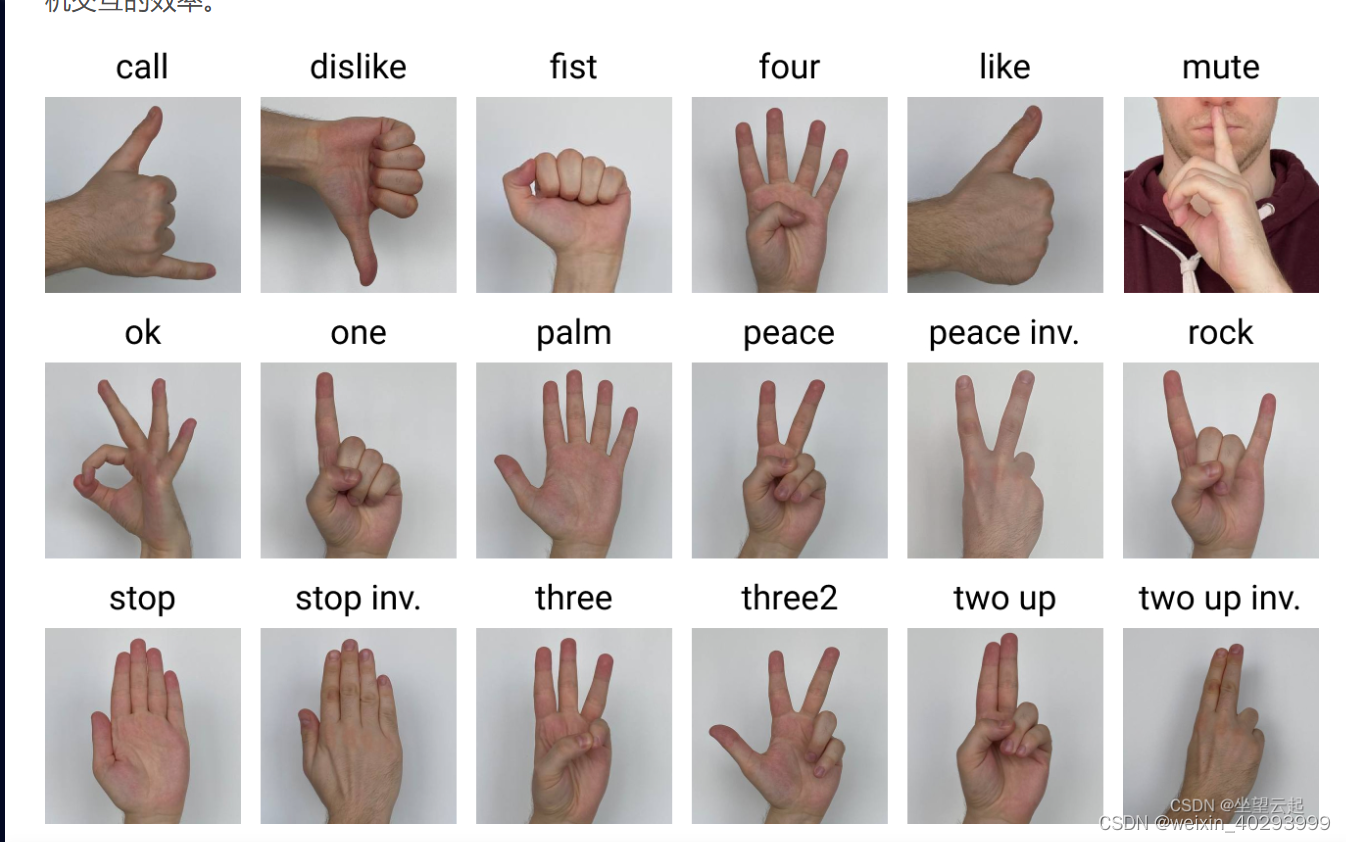
整理好的数据集,12W+ 19种手势, train:val=9:1
效果图例:
names:
  0:one
  1:two_up
  2:two_up_inverted
  3:three
  4:three2
  5:four
  6:fist
  7:palm
  8:ok
  9:peace
  10:peace_inverted
  11:like
  12:dislike
  13:stop
  14:stop_inverted
  15:call
  16:mute
  17:rock
  18:no_gesture
数据集:
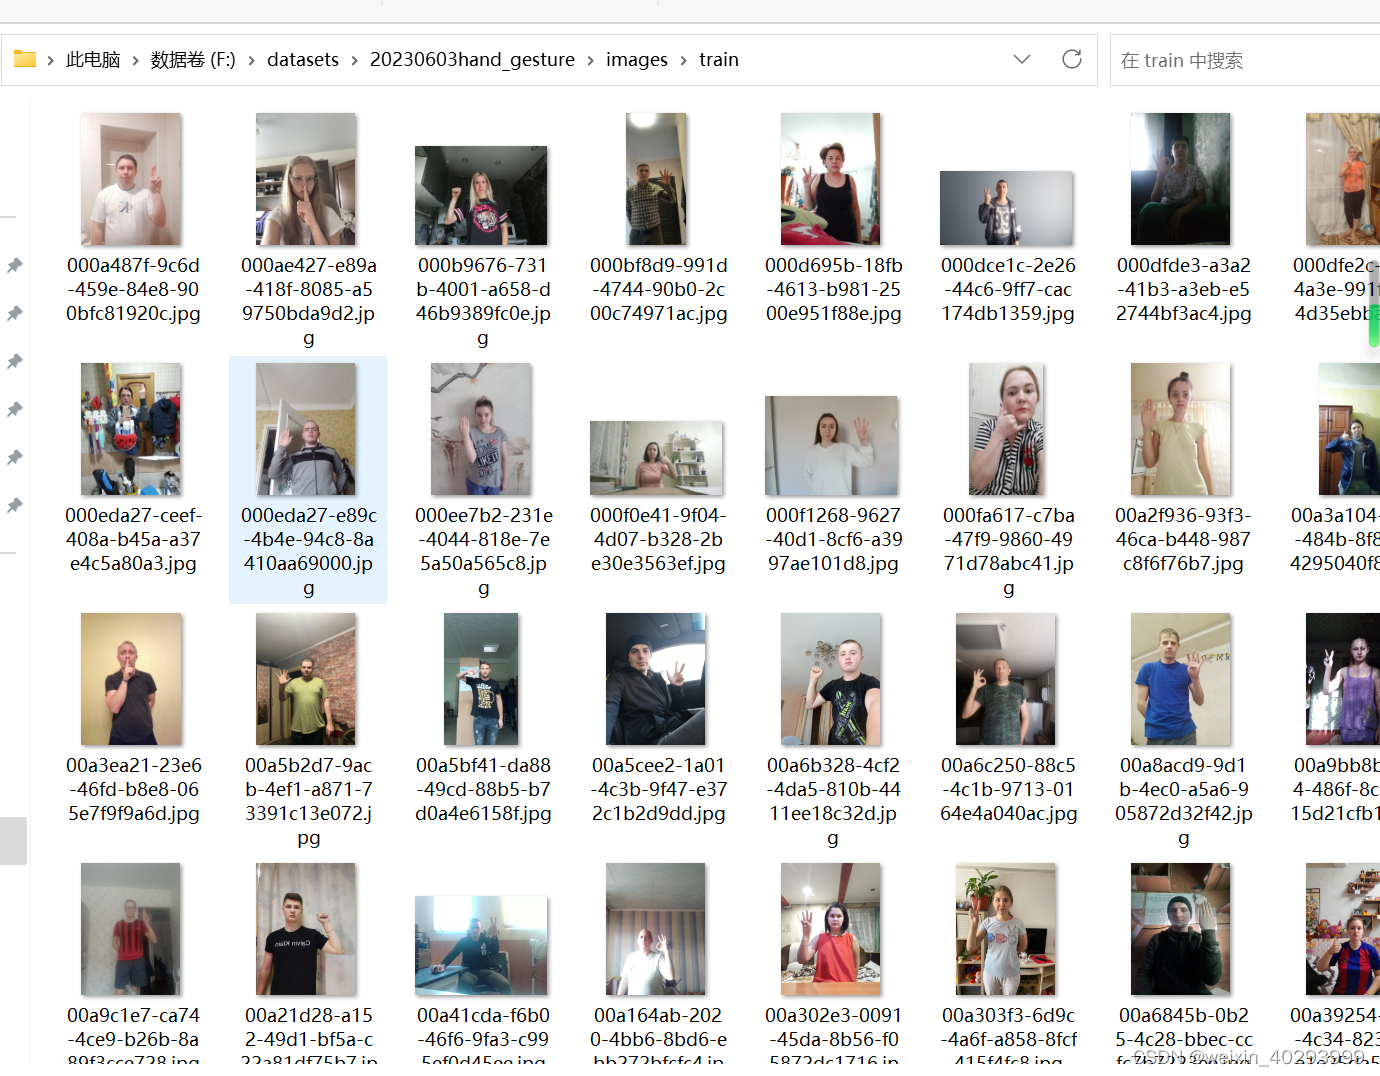
下载后的数据集比较乱,有一份coco的标注,
一份voc的标注,图片也有至少两份,一份是大图片,一份小图片:
大图片如上图,
小图片是这种:
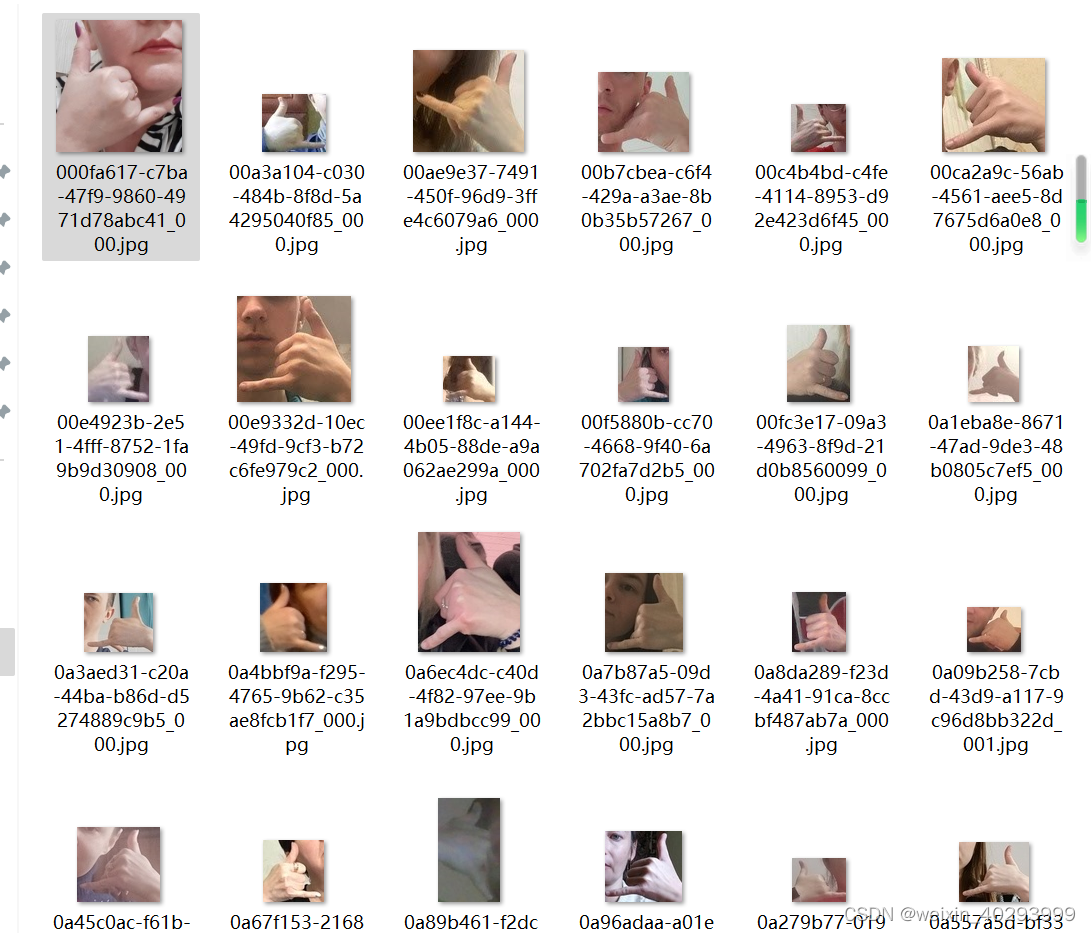
是对大图片的裁剪,整理数据集整理了大半天才找到规律,主要是在验证。
xml标注和大图片能够契合。 就用这个组合,生成了一份yolo格式的标注。
原图片和标注我都没动,把生成好的,放到了另外的目录。
19个类别
打电话的大图,打电话的大图叫 xxxxx.jpg, 小图是 xxxx-0000.jpg, 看到这个我的心情瞬间就不好了,好几套标注,好几套图片。
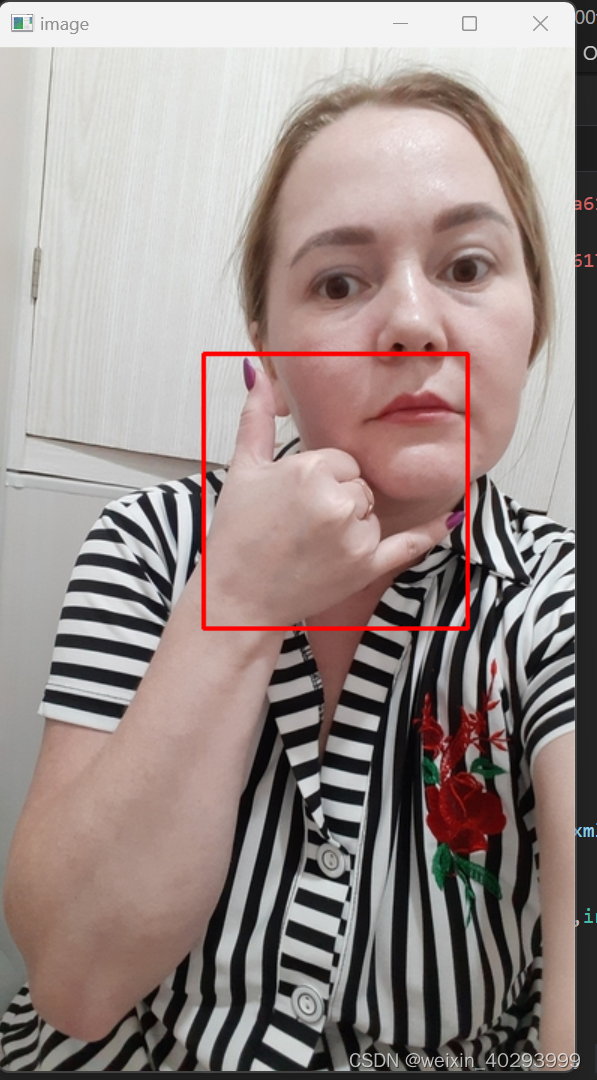
验证图片和配对的关系代码。
image_path = r"D:\BaiduNetdiskDownload\Light-HaGRID\trainval\call\JPEGImages\000fa617-c7ba-47f9-9860-4971d78abc41.jpg"
xml_path = r"D:\BaiduNetdiskDownload\Light-HaGRID\trainval\call\Annotations\000fa617-c7ba-47f9-9860-4971d78abc41.xml"

in_file = open(xml_path)
basename = os.path.basename(image_path)
basename_no_ext = os.path.splitext(basename)[0]
# in_file,basename,basename_no_ext
out_file = open(basename_no_ext + '.txt', 'w')
tree = ET.parse(in_file)
root = tree.getroot()
size = root.find('size')
w = int(size.find('width').text)
h = int(size.find('height').text)
for obj in root.iter('object'):
    difficult = obj.find('difficult').text
    cls = obj.find('name').text
    print(cls)
    if cls not in classes or int(difficult)==1:
        continue
    cls_id = classes[cls]
    xmlbox = obj.find('bndbox')
    b = (float(xmlbox.find('xmin').text), float(xmlbox.find('xmax').text), float(xmlbox.find('ymin').text), float(xmlbox.find('ymax').text))
    print(b)
    x_top_left, y_top_left, x_bottom_right, y_bottom_right = int(b[0]), int(b[2]),int(b[1]),int(b[3])
    # bb = convert((w,h), b)
    # print(bb)
    # out_file.write(str(cls_id) + " " + " ".join([str(a) for a in bb]) + '\n')
    img = cv2.imread(image_path)
    cv2.rectangle(img, (x_top_left, y_top_left), (x_bottom_right, y_bottom_right), (0, 0, 255), thickness=2)
cv2.imshow("image", img)
cv2.waitKey(0)
cv2.destroyAllWindows()
然后我有抽样,看看我的猜测对不对
def show_pic(xml_path,image_path):
    in_file = open(xml_path)
    basename = os.path.basename(image_path)
    basename_no_ext = os.path.splitext(basename)[0]
    # in_file,basename,basename_no_ext
    out_file = open(basename_no_ext + '.txt', 'w')
    tree = ET.parse(in_file)
    root = tree.getroot()
    size = root.find('size')
    w = int(size.find('width').text)
    h = int(size.find('height').text)
    img = cv2.imread(image_path)
    for obj in root.iter('object'):
        difficult = obj.find('difficult').text
        cls = obj.find('name').text
        # print(cls)
        if cls not in classes or int(difficult)==1:
            continue
        cls_id = classes[cls]
        xmlbox = obj.find('bndbox')
        b = (float(xmlbox.find('xmin').text), float(xmlbox.find('xmax').text), float(xmlbox.find('ymin').text), float(xmlbox.find('ymax').text))
        # print(b)
        x_top_left, y_top_left, x_bottom_right, y_bottom_right = int(b[0]), int(b[2]),int(b[1]),int(b[3])
        # bb = convert((w,h), b)
        # print(bb)
        # out_file.write(str(cls_id) + " " + " ".join([str(a) for a in bb]) + '\n')
        cv2.rectangle(img, (x_top_left, y_top_left), (x_bottom_right, y_bottom_right), (0, 0, 255), thickness=2)
    cv2.imshow("image", img)
    cv2.waitKey(0)
    cv2.destroyAllWindows()

gen_img_path = glob.glob(r"D:\BaiduNetdiskDownload\Light-HaGRID\trainval\*\JPEGImages\*.jpg")

# 验证图片是否好使
def check_img():
    count_num = 0
    for img_path in gen_img_path:
        if count_num%50000 == 0:
            xml_path = img_path.replace("JPEGImages","Annotations").replace("jpg","xml")
            print(xml_path,img_path)
            show_pic(xml_path,img_path)
        count_num += 1

check_img()
classes = { 'one': 0, 'two_up': 1, 'two_up_inverted': 2, 'three': 3, 'three2': 4,
         'four': 5, 'fist': 6, 'palm': 7, 'ok': 8, 'peace': 9,
         'peace_inverted': 10, 'like': 11, 'dislike': 12, 'stop': 13, 'stop_inverted': 14,
         'call': 15, 'mute': 16, 'rock': 17, 'no_gesture': 18 }
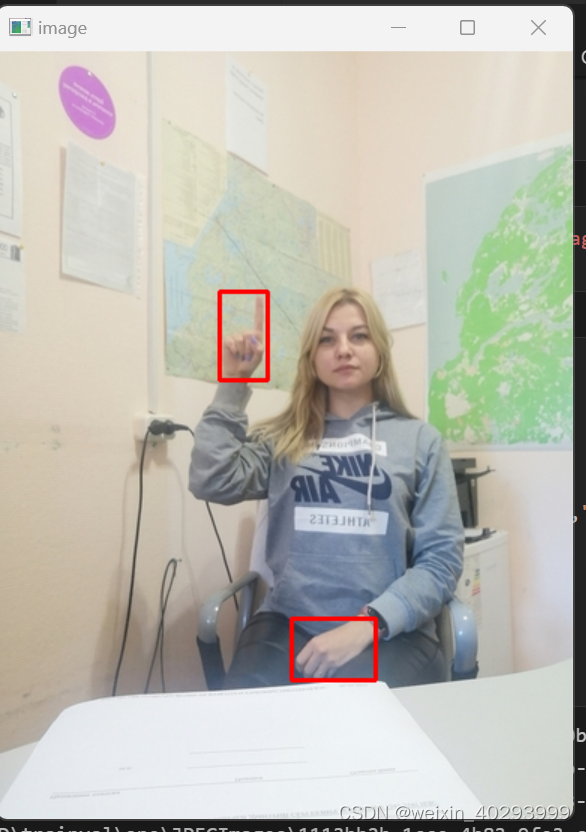
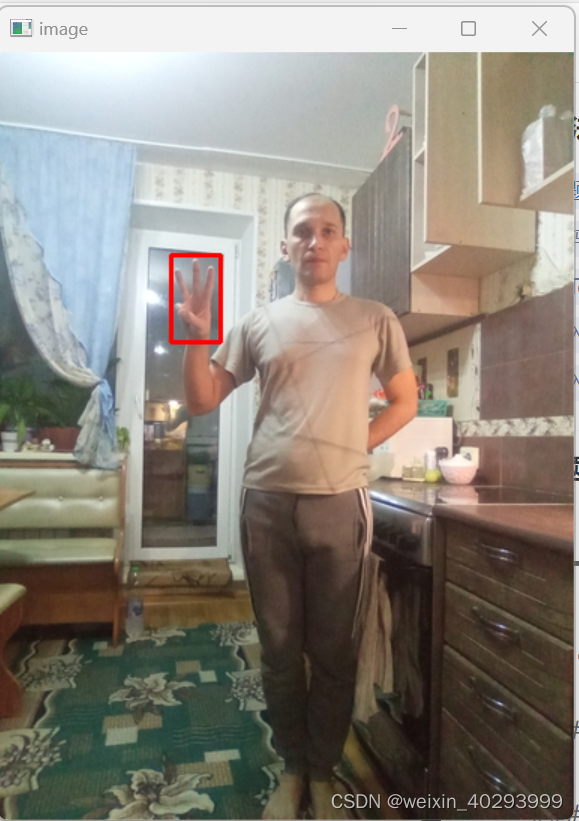
证明配对关系没错。
这里面我是
···
if count_num%50000 == 0:
xml_path = img_path.replace(“JPEGImages”,“Annotations”).replace(“jpg”,“xml”)
print(xml_path,img_path)
show_pic(xml_path,img_path)
···
首次抽样的时候给的是count_num%10000或者1000张,看着标注都对,就放心了。
然后就是生成yolov 格式的标注文件,
# 构建图片和标注的位置
base_dist_dir = r"F:\\datasets\\20230603hand_gesture"
img_train_dir = os.path.join(base_dist_dir,"images","train")
img_val_dir = os.path.join(base_dist_dir,"images","val")
lable_train_dir = os.path.join(base_dist_dir,"labels","train")
label_val_dir = os.path.join(base_dist_dir,"labels","val")
def make_dir(img_train_dir,img_val_dir,lable_train_dir,label_val_dir):
    os.makedirs(img_train_dir,exist_ok=True)
    os.makedirs(img_val_dir,exist_ok=True)
    os.makedirs(lable_train_dir,exist_ok=True)
    os.makedirs(label_val_dir,exist_ok=True)
make_dir(img_train_dir,img_val_dir,lable_train_dir,label_val_dir)

# 1.根据xml生成yolov的txt文件,并将图片和txt放置到指定位置
# 2.写check脚本,每隔5k张图片
def create_txt_label(xml_path,img_path,dst_img_dir,dst_label_dir):
    in_file = open(xml_path)
    basename = os.path.basename(img_path)
    basename_no_ext = os.path.splitext(basename)[0]
    dst_img_path = os.path.join(dst_img_dir,basename)
    # 移动图片
    shutil.copy(img_path,dst_img_path)
    # 转化成txt
    dst_txt_path = os.path.join(dst_label_dir,basename_no_ext+".txt")
    tree = ET.parse(in_file)
    root = tree.getroot()
    size = root.find('size')
    w = int(size.find('width').text)
    h = int(size.find('height').text)
    with open(dst_txt_path,"w") as f:
        for obj in root.iter('object'):
            difficult = obj.find('difficult').text
            cls = obj.find('name').text
            # print(cls)
            if cls not in classes or int(difficult)==1:
                continue
            cls_id = classes[cls]
            xmlbox = obj.find('bndbox')
            b = (float(xmlbox.find('xmin').text), float(xmlbox.find('xmax').text), float(xmlbox.find('ymin').text), float(xmlbox.find('ymax').text))
            # print(b)
            x_top_left, y_top_left, x_bottom_right, y_bottom_right = int(b[0]), int(b[2]),int(b[1]),int(b[3])
            bb = convert((w,h), b)
            ## print(bb)
            f.write(str(cls_id) + " " + " ".join([str(a) for a in bb]) + '\n')

    in_file.close()
    return dst_txt_path,dst_img_path
def show_img_with_label(dst_txt_path,dst_img_path):
    cv2_img = cv2.imread(dst_img_path)
    height, width, _ = cv2_img.shape
    with open(dst_txt_path) as f:
        line_list = f.readlines()
        print(line_list)
        for line_str in line_list:
            info_list = line_str.strip().split(" ")
            print(info_list)
            idx = int(info_list[0])
            keys = [k for k, v in classes.items() if v == idx]
            print("idx",idx, keys)
            assert len(keys)==1, print(dst_txt_path,dst_img_path)
            label_name = keys[0]
            x, y, w, h = map(float, info_list[1:])  # 目标中心点坐标和宽高比例
            print("---------------",x,y,w,h)

            # 计算出左上角和右下角坐标
            left = int((x - w / 2) * width)
            top = int((y - h / 2) * height)
            right = int((x + w / 2) * width)
            bottom = int((y + h / 2) * height)
            print("--===---",(left, top), (right, bottom))
            # 绘制矩形框和类别标签
            cv2.rectangle(cv2_img, (left, top), (right, bottom), (0, 255, 0), 2)
            label = label_name
            cv2.putText(cv2_img, label, (left, top), cv2.FONT_HERSHEY_SIMPLEX, 1, (0, 0, 255), 2)
    cv2.imshow('image', cv2_img)
    cv2.waitKey(0)
    cv2.destroyAllWindows()
count_num = 0
for img_path in gen_img_path:
    if count_num != 0:
        pass
    xml_path = img_path.replace("JPEGImages","Annotations").replace("jpg","xml")

    label_name = xml_path.split('\\')[4]
    if count_num%10000==0:
        print(xml_path)
        print(img_path)
        print(label_name)
    idx_class = classes[label_name]
    if count_num%10 == 0:
        dst_img_dir = img_val_dir
        dst_label_dir = label_val_dir
    else:
        dst_img_dir = img_train_dir
        dst_label_dir = lable_train_dir
    dst_txt_path,dst_img_path = create_txt_label(xml_path,img_path,dst_img_dir,dst_label_dir)
    # copy_pic_and_create_txt(xml_path,img_path)
    if count_num%10000 == 0:
        show_img_with_label(dst_txt_path,dst_img_path)
    count_num += 1
云淡清风的贴了这几个代码,其实是我在jypter写的,好多打印并没有采样,所以12W张,输出他就崩溃了,这是后来改的。
总之数据集,就处理好了

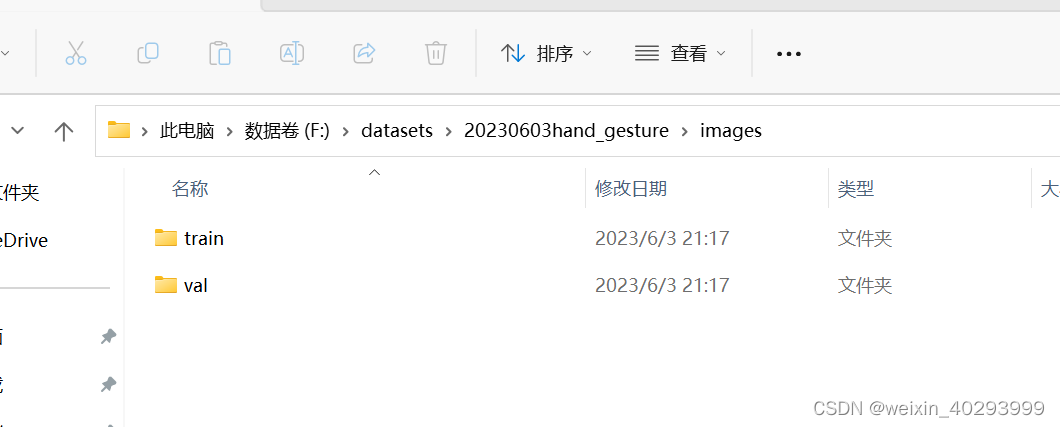
images 下面是 train和val的image
labels下面是train和val的label 他们两者是一一对应的。
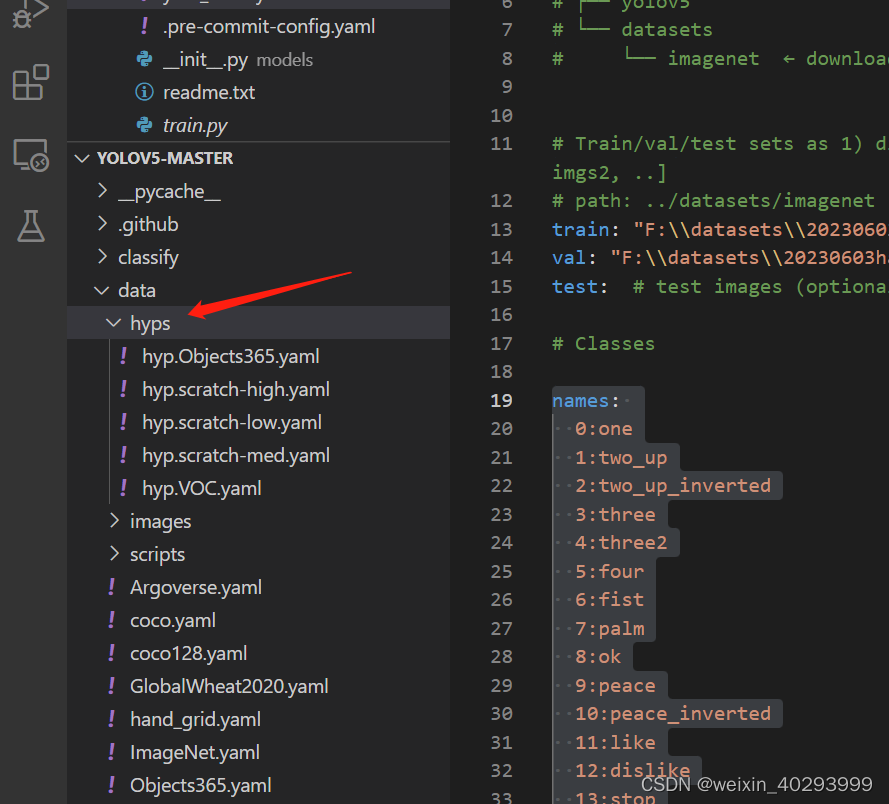
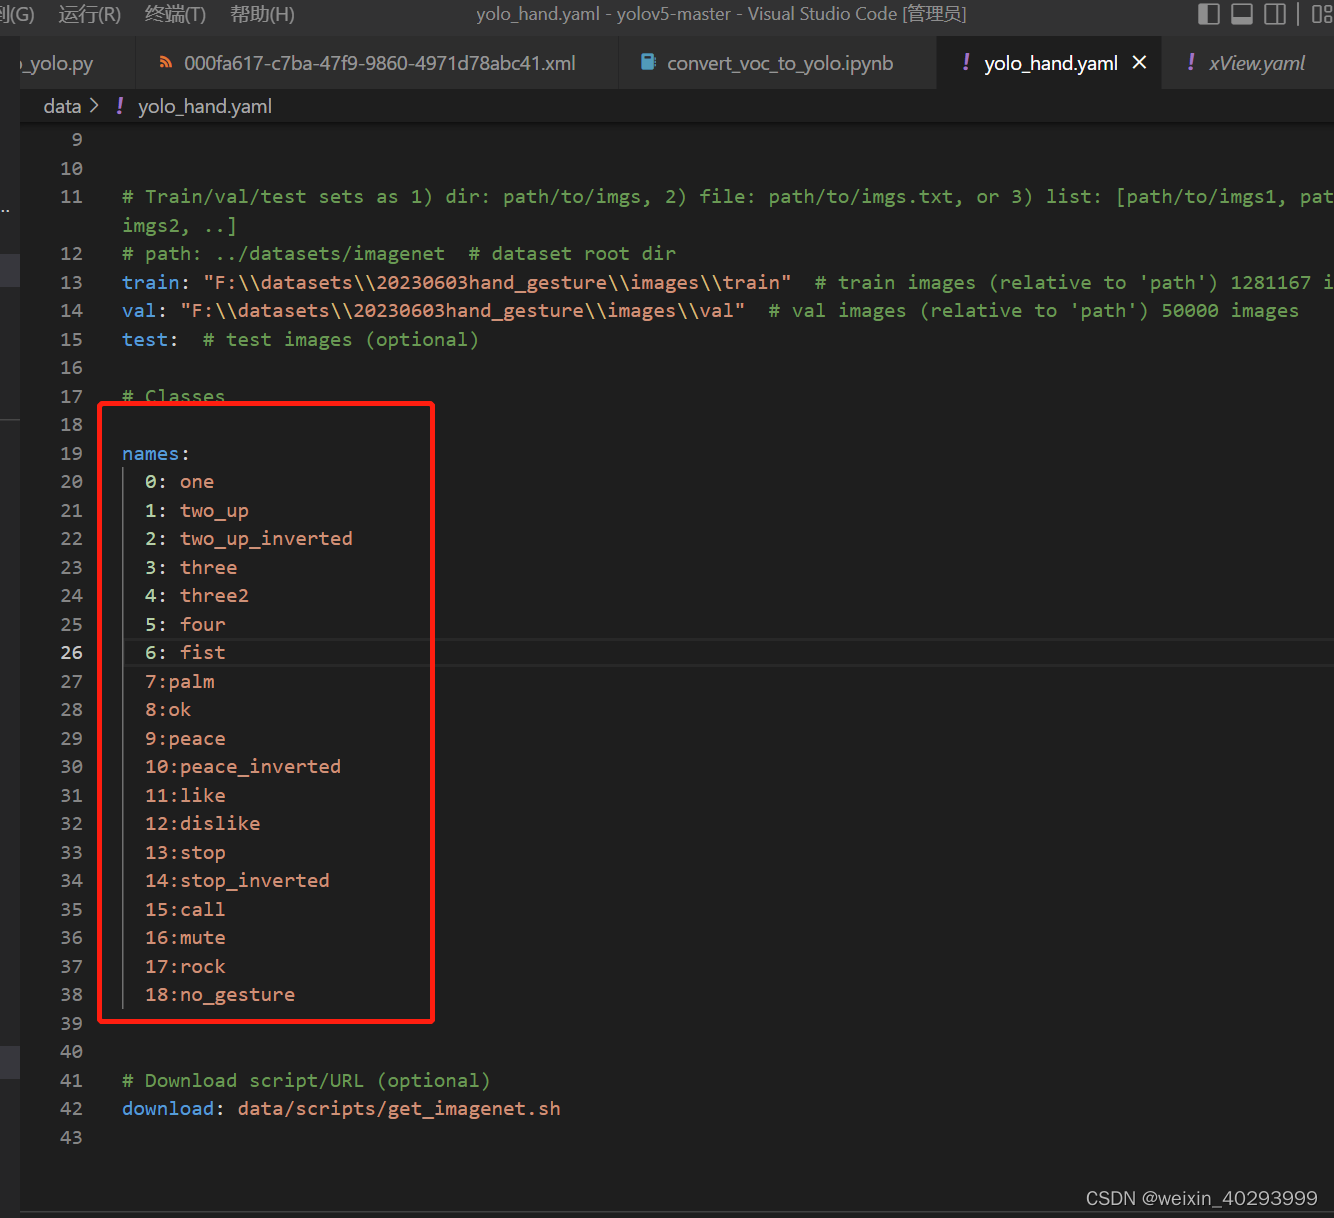
数据集的配置文件我也给一下:
# YOLOv5 🚀 by Ultralytics, GPL-3.0 license
# ImageNet-1k dataset https://www.image-net.org/index.php by Stanford University
# Simplified class names from https://github.com/anishathalye/imagenet-simple-labels
# Example usage: python classify/train.py --data imagenet
# parent
# ├── yolov5
# └── datasets
#     └── imagenet  ← downloads here (144 GB)


# Train/val/test sets as 1) dir: path/to/imgs, 2) file: path/to/imgs.txt, or 3) list: [path/to/imgs1, path/to/imgs2, ..]
# path: ../datasets/imagenet  # dataset root dir
train: "F:\\datasets\\20230603hand_gesture\\images\\train"  # train images (relative to 'path') 1281167 images
val: "F:\\datasets\\20230603hand_gesture\\images\\val"  # val images (relative to 'path') 50000 images
test:  # test images (optional)

# Classes

names:
  0:one
  1:two_up
  2:two_up_inverted
  3:three
  4:three2
  5:four
  6:fist
  7:palm
  8:ok
  9:peace
  10:peace_inverted
  11:like
  12:dislike
  13:stop
  14:stop_inverted
  15:call
  16:mute
  17:rock
  18:no_gesture


# Download script/URL (optional)
download: data/scripts/get_imagenet.sh
step2:超参数
其实就是训练参数喽,因为我并没有设置这里, 在后面进阶的blog,我会研究一下这里。在这先挖个坑。
step3: 训练
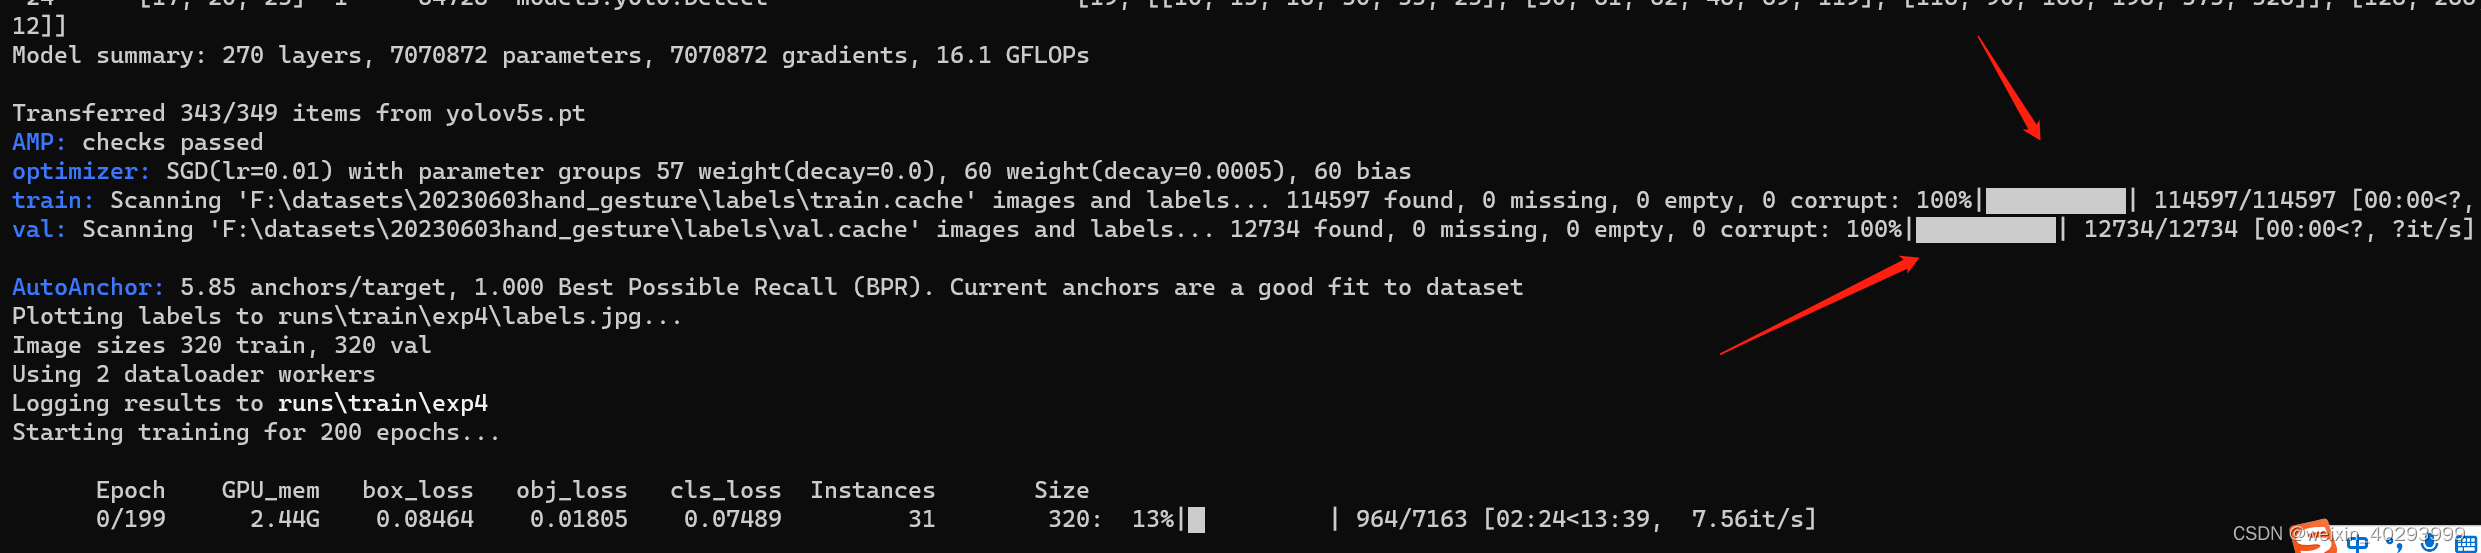
C:\ProgramData\Anaconda3\python.exe train.py --data data\yolo_hand.yaml --weights yolov5s.pt --batch-size 12 --imgsz 320 --workers 4 --epochs 200 --save-period 50
翻车了
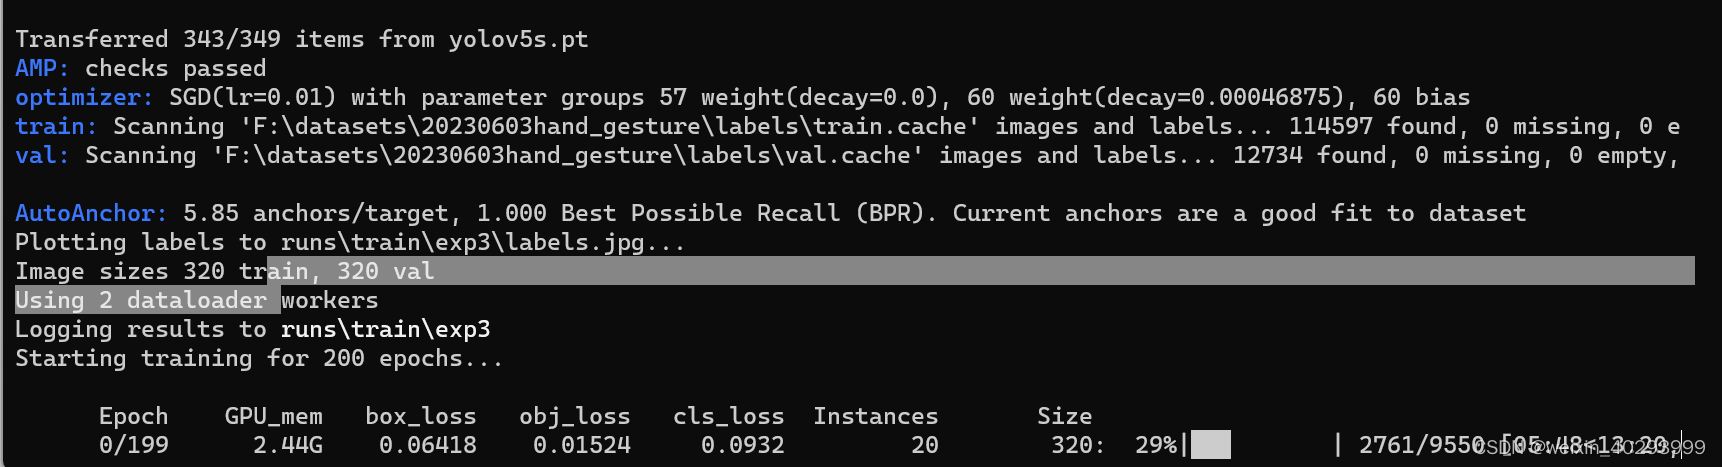
AMP: checks passed
optimizer: SGD(lr=0.01) with parameter groups 57 weight(decay=0.0), 60 weight(decay=0.00046875), 60 bias
train: Scanning 'F:\datasets\20230603hand_gesture\labels\train.cache' images and labels... 114597 found, 0 missing, 0 e
val: Scanning 'F:\datasets\20230603hand_gesture\labels\val.cache' images and labels... 12734 found, 0 missing, 0 empty,
Traceback (most recent call last):
  File "<string>", line 1, in <module>
  File "C:\ProgramData\Anaconda3\lib\multiprocessing\spawn.py", line 116, in spawn_main
    exitcode = _main(fd, parent_sentinel)
  File "C:\ProgramData\Anaconda3\lib\multiprocessing\spawn.py", line 125, in _main
    prepare(preparation_data)
  File "C:\ProgramData\Anaconda3\lib\multiprocessing\spawn.py", line 236, in prepare
    _fixup_main_from_path(data['init_main_from_path'])
  File "C:\ProgramData\Anaconda3\lib\multiprocessing\spawn.py", line 287, in _fixup_main_from_path
    main_content = runpy.run_path(main_path,
  File "C:\ProgramData\Anaconda3\lib\runpy.py", line 268, in run_path
    return _run_module_code(code, init_globals, run_name,
  File "C:\ProgramData\Anaconda3\lib\runpy.py", line 97, in _run_module_code
    _run_code(code, mod_globals, init_globals,
  File "C:\ProgramData\Anaconda3\lib\runpy.py", line 87, in _run_code
    exec(code, run_globals)
  File "D:\code\python_project\yolov5-master\train.py", line 29, in <module>
    import torch
  File "C:\ProgramData\Anaconda3\lib\site-packages\torch\__init__.py", line 129, in <module>
    raise err
OSError: [WinError 1455] 页面文件太小,无法完成操作。 Error loading "C:\ProgramData\Anaconda3\lib\site-packages\torch\lib\shm.dll" or one of its dependencies.
方法1:调整虚拟内存 搜索关键词 win11, 虚拟内存
并无卵用
方法2:
缩减 workers = 2
结论:
翻车在生成数据集的 cache文件上,设置的workers 和 batchsizes 都有关系。
设置过大,就会造成莫名其妙的问题,比如 说找不到图片啥的
另外调整虚拟内存后要开关机,所以(20230604)今天我上一直在开关机。
小马拉大车太难受了, 我的电脑是32G内存, 8G的显卡 3070。
trick:
用它来生成数据集的cache文件
C:\ProgramData\Anaconda3\python.exe train.py --data data\yolo_hand.yaml --weights yolov5s.pt --batch-size 1 --imgsz 320 --workers 0 --epochs 200 --save-period 50
杀死进程,用它来训练
C:\ProgramData\Anaconda3\python.exe train.py --data data\yolo_hand.yaml --weights yolov5s.pt --batch-size 12 --imgsz 320 --workers 4 --epochs 200 --save-period 50
稳定后感觉设置小了,可是,在scan数据集的时候经常崩溃,感觉在scan数据集的阶段也比较吃显存和内存。当然 吃这两个,就肯定吃cpu了。。。。
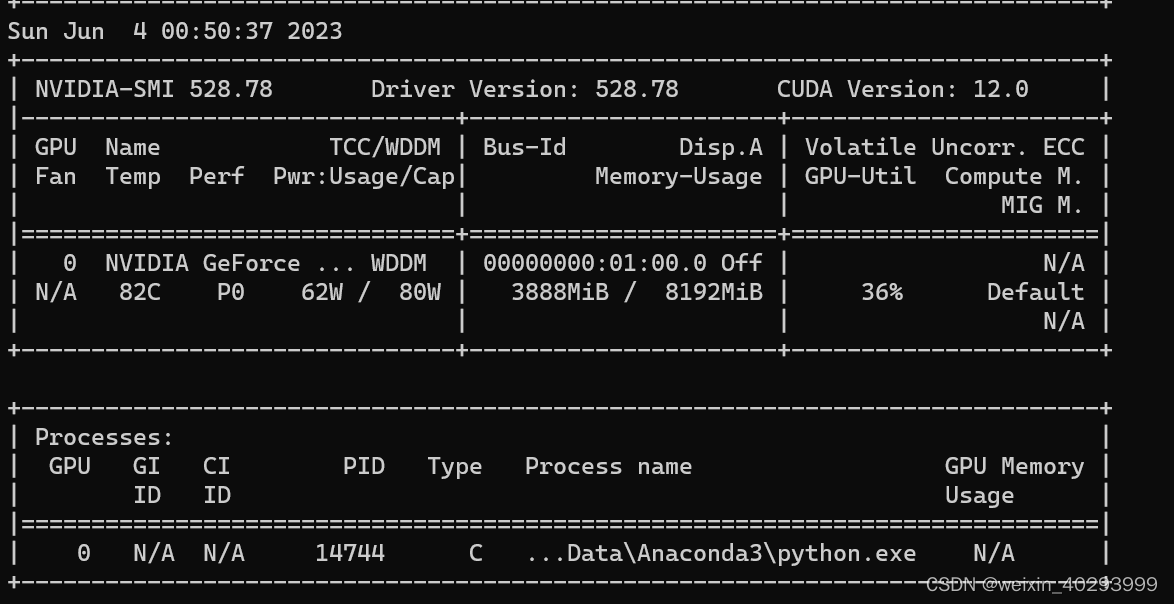
资源消耗情况,我设置了4个线程,应该是1个主线程,4个worker。
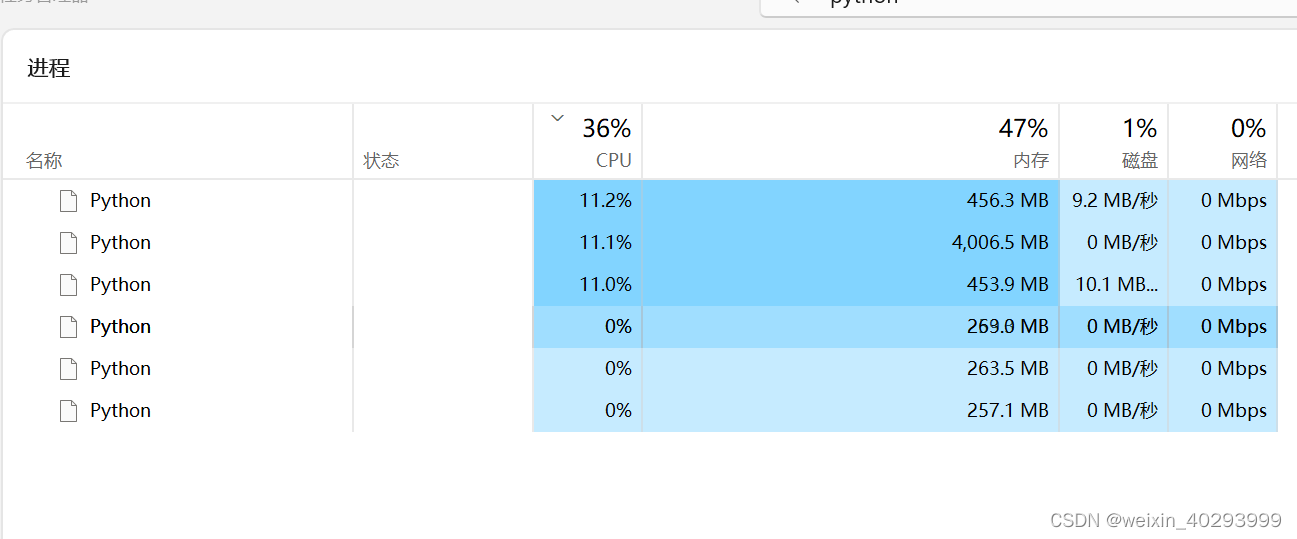
其实出这个问题,就一个原因:穷!!!! 来个牛叉的内存和显卡,什么事就都没了。贫贱夫妻百事哀的伤感。。。。
训练1 epoch,报错了
Traceback (most recent call last):
  File "D:\code\python_project\yolov5-master\train.py", line 630, in <module>
    main(opt)
  File "D:\code\python_project\yolov5-master\train.py", line 526, in main
    train(opt.hyp, opt, device, callbacks)
  File "D:\code\python_project\yolov5-master\train.py", line 349, in train
    results, maps, _ = validate.run(data_dict,
  File "C:\ProgramData\Anaconda3\lib\site-packages\torch\autograd\grad_mode.py", line 27, in decorate_context
    return func(*args, **kwargs)
  File "D:\code\python_project\yolov5-master\val.py", line 268, in run
    tp, fp, p, r, f1, ap, ap_class = ap_per_class(*stats, plot=plots, save_dir=save_dir, names=names)
  File "D:\code\python_project\yolov5-master\utils\metrics.py", line 83, in ap_per_class
    names = [v for k, v in names.items() if k in unique_classes]  # list: only classes that have data
AttributeError: 'str' object has no attribute 'items'
原因在这里,少空格了。。。!!!!!, 我记得1年多前,犯过一次这个错误。
既然重新开始训练,我把bz=16 试试能不能跑动
这里是训练集和测试集的比例。
能跑起来,显卡使用率也不多 3000MB load, 40%的使用。 很奇怪为啥之前老报错页面文件太小。
页面太小用虚拟内存的方式解决的话,要确保C盘有足够大的容量,这是我导师说的,
之前咱也不懂,因为是置换的,要确保至少内存1.5倍C盘的空闲硬盘。否则很容易黑屏。
最终效果:

问题:
20230604-------------------------------
训练一晚上,第二天8点一看,卡在了第二轮,老老实实把bz 和worker 放小一点开整把。
C:\ProgramData\Anaconda3\python.exe train.py --data data\yolo_hand.yaml --weights yolov5s.pt --batch-size 2 --imgsz 320 --workers 0 --epochs 10 --save-period 1
ref:https://zhuanlan.zhihu.com/p/383522113
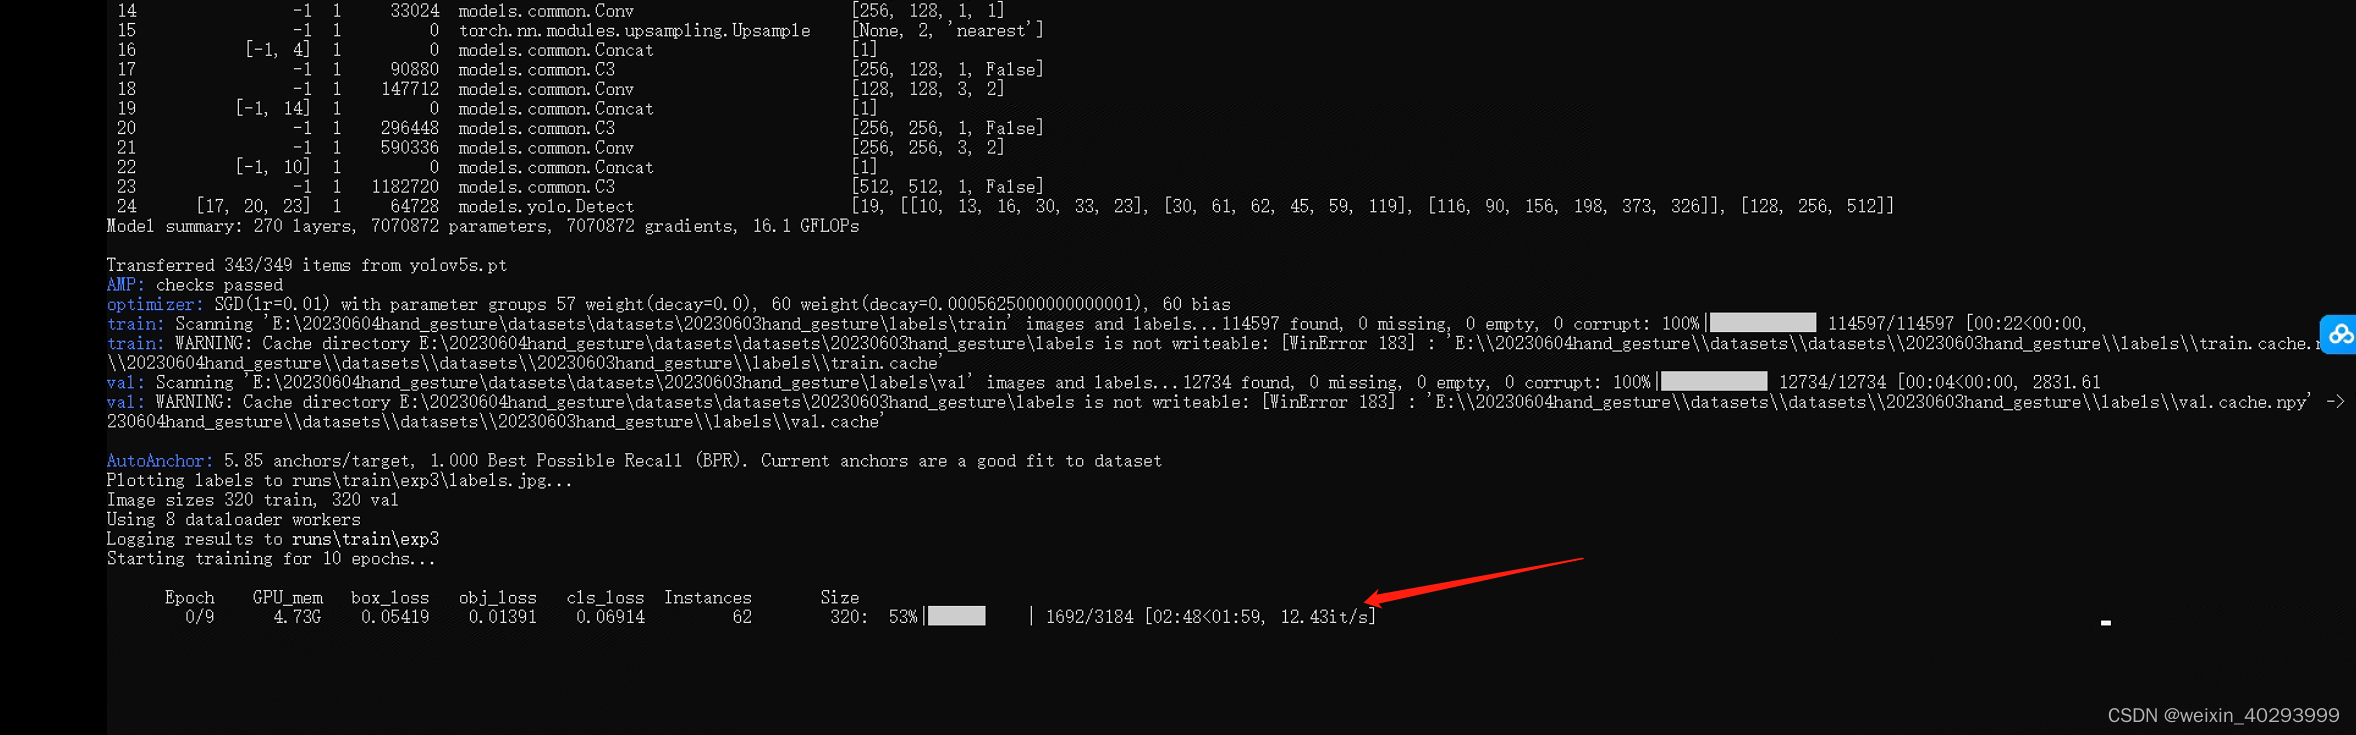
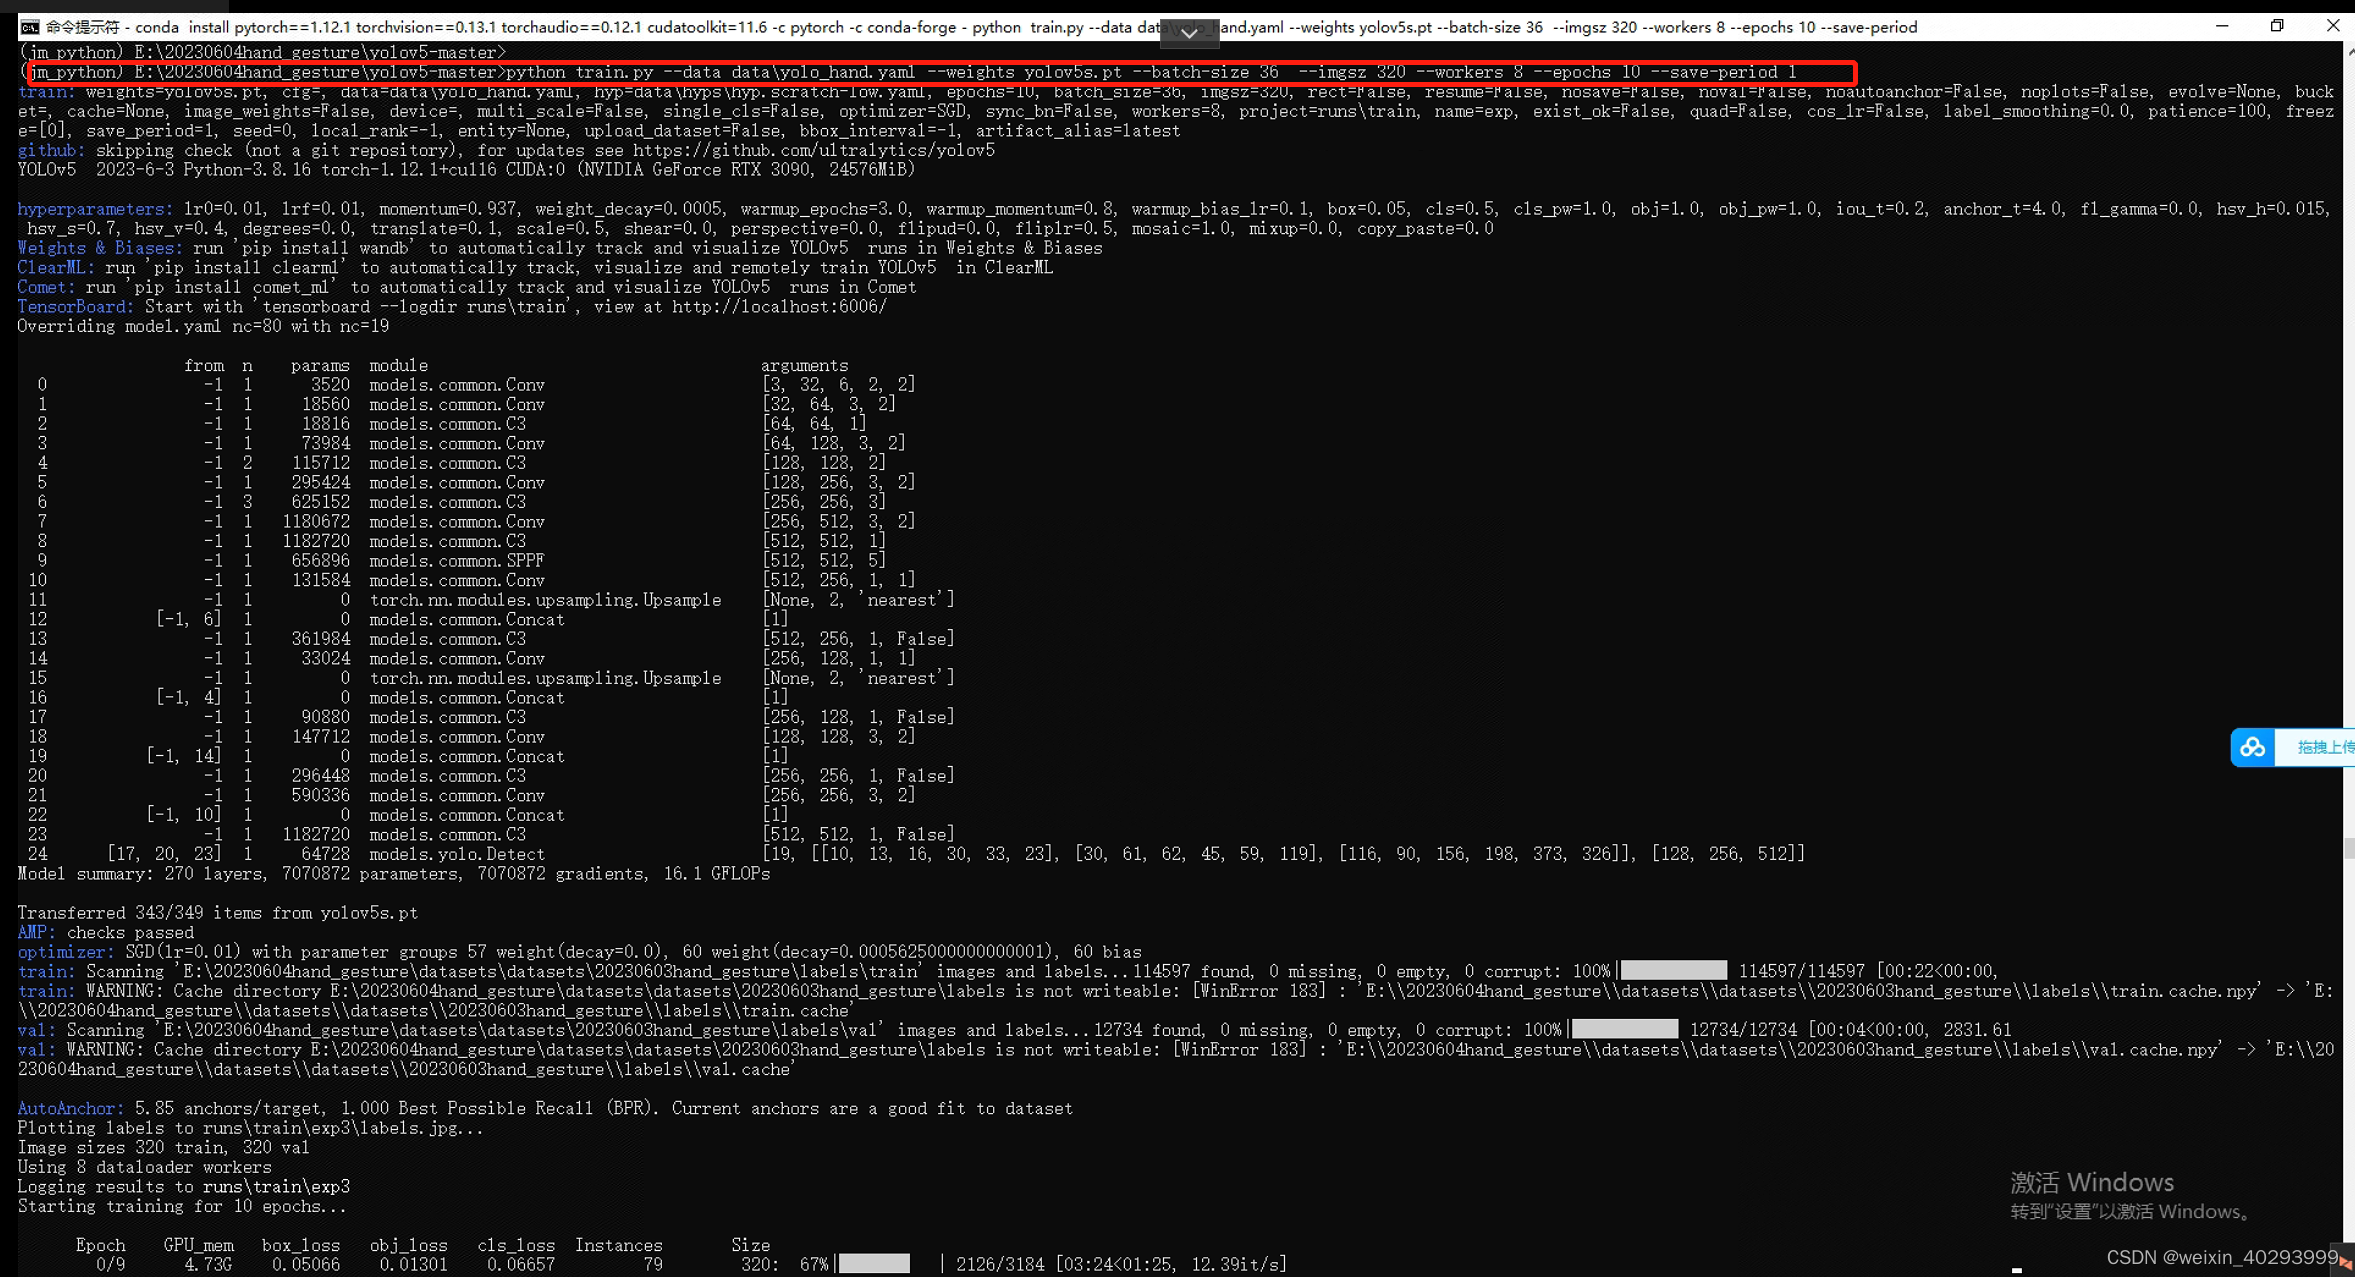
3090 上用的命令,显卡是24G的,是我自己电脑的3倍
python train.py --data data\yolo_hand.yaml --weights yolov5s.pt --batch-size 36 --imgsz 320 --workers 8 --epochs 10 --save-period 1
训练过程中的一些图片:
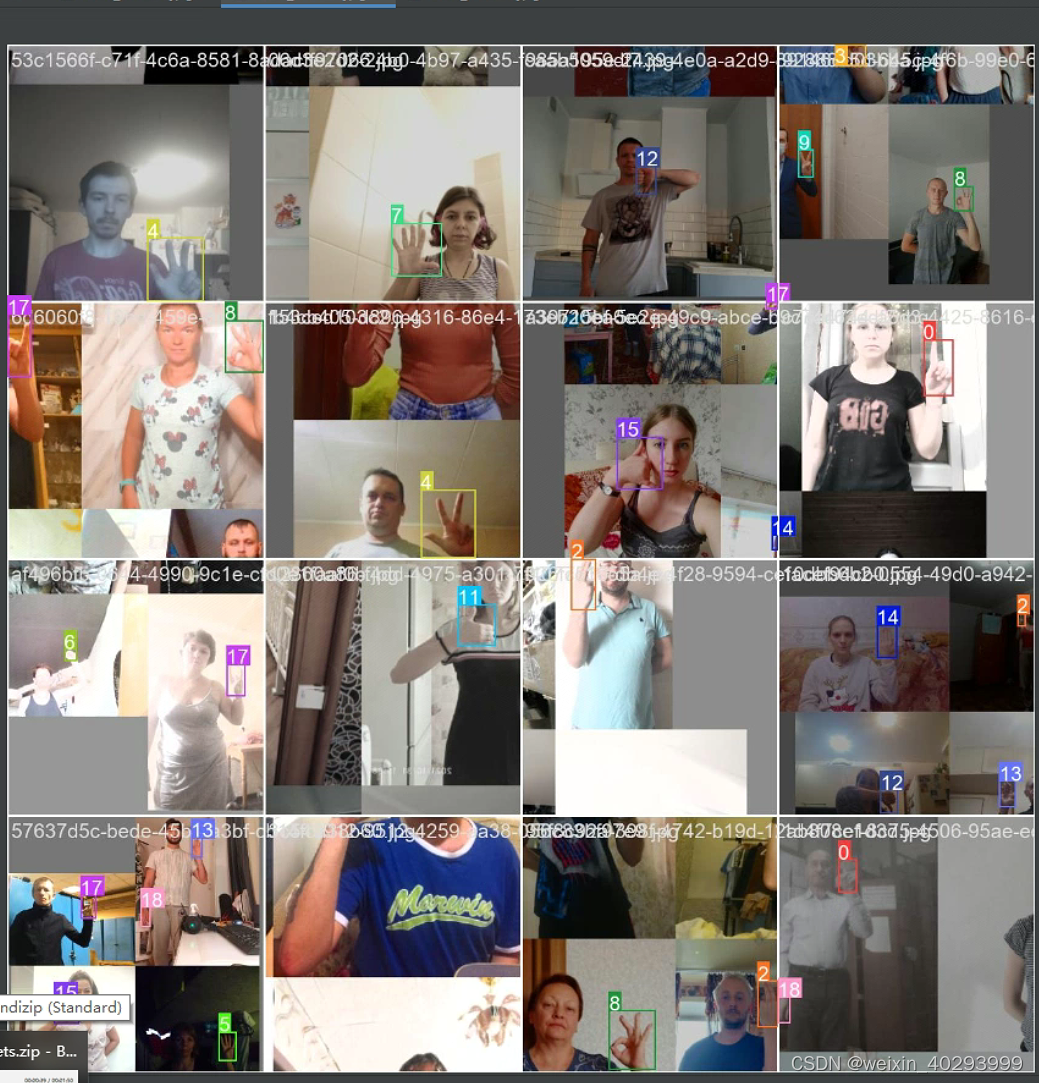
训练完成的表现,可以看到,epochs=5的时候就已经很好了。

看下效果:
python detect.py --weights weights/best.pt --source 0 --data /data/yolo_hand.yaml --device 0 --view-img --vid-stride 10
总结:
- 数据集我有,我自己的清洗好的,支持yolov格式的你也可以拿去,代码你也可以拿去。
- 进阶,好的深度学习的模型,会把,数据集中 有多少类,多少图片,每张图片有多少实例,实例的类别,目标大小,目标占整个图片的比例,以及图片的光照强度是否达标等,都拉出清单了。
其实就是跑一遍标注脚本。 光照强度是,光照分布不均匀性不超过40%


 被折叠的 条评论
为什么被折叠?
被折叠的 条评论
为什么被折叠?
 到【灌水乐园】发言


