


这里记录下yolov5 tag7.0的实例分割,因为也用过paddle家族的实例分割,能够训练出来,但是开放restiful api时遇到点小问题,还是yolov爽啊!!通过这篇博文,您可以一步步的搭建自己的分割网络。
文章目录
前言
git仓库:https://github.com/ultralytics/yolov5/tree/v7.0
在tag7.0开始支持的,号称sota,在master下的英文介绍中,有这句话,是realtime的sota。
yolv6,yolov7也都在号称sota,大家都是sota。。。。
中文介绍到时没有这个,看来是十分新的研究成果了。

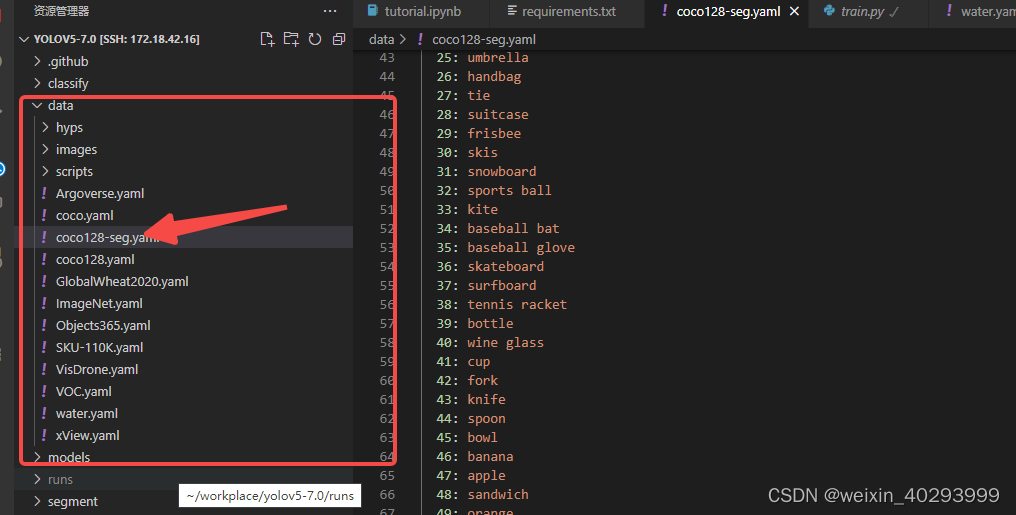
一、小试牛刀
yolov5-7.0/segment/
下,有个tutorials.ipynb文件,这上面说的很清楚,如何训练、如何推理预测,和目标检测的用法几乎是一模一样的。
关于如何安装自行解决吧。
如何预测:
python segment/predict.py --source 0 # webcam
img.jpg # image
vid.mp4 # video
screen # screenshot
path/ # directory
‘path/*.jpg’ # glob
‘https://youtu.be/Zgi9g1ksQHc’ # YouTube
‘rtsp://example.com/media.mp4’ # RTSP, RTMP, HTTP stream
python segment/predict.py --weights yolov5s-seg.pt --img 640 --conf 0.25 --source data/images
#display.Image(filename='runs/predict-seg/exp/zidane.jpg', width=600)
如何训练:
Train YOLOv5s on COCO128 for 3 epochs
!python segment/train.py --img 640 --batch 16 --epochs 3 --data coco128-seg.yaml --weights yolov5s-seg.pt --cache
1. 预训练权重
https://github.com/ultralytics/yolov5/releases/v7.0

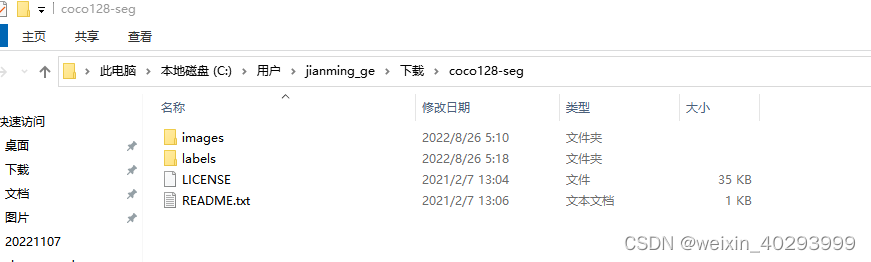
2. coco128 数据集在这里
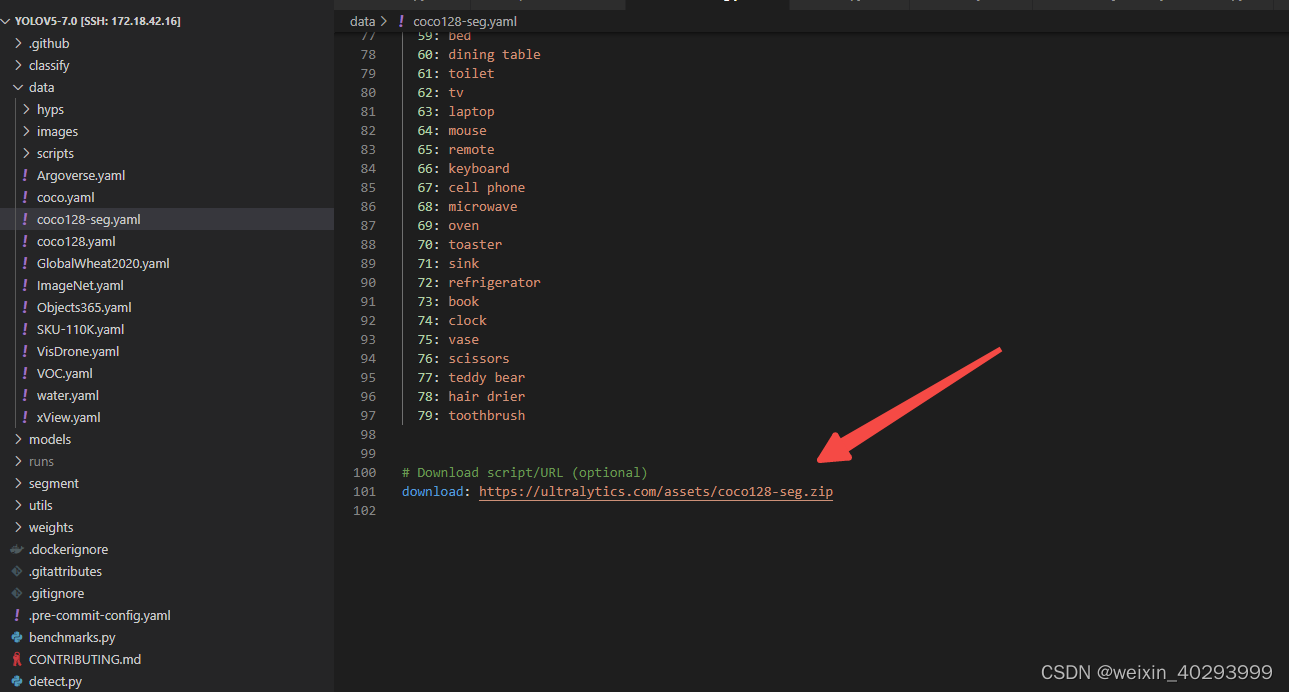
download: https://ultralytics.com/assets/coco128-seg.zip
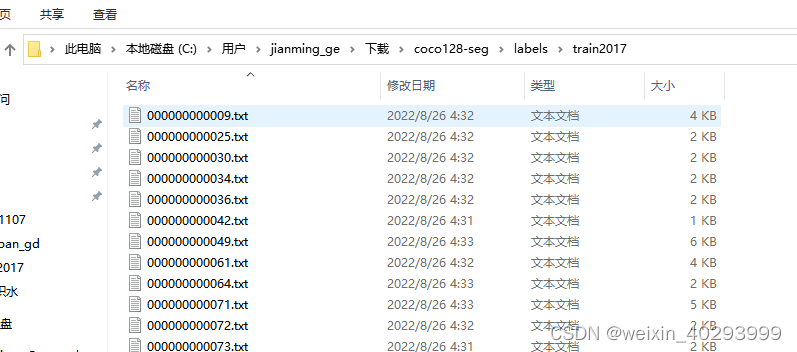
3.coco128-seg的数据初探
连码放的格式都和目标检测一模一样

45 是指的类别, 和coco128-seg.yaml文件的names相对应
后面是 x,y x,y …的坐标。分别对应宽和高,需要特别说明的是,这是归一化的。
细心如我,一定会将他们反写到图片,看看啥情况了啊,反写代码如下
def get_a_coco_pic():
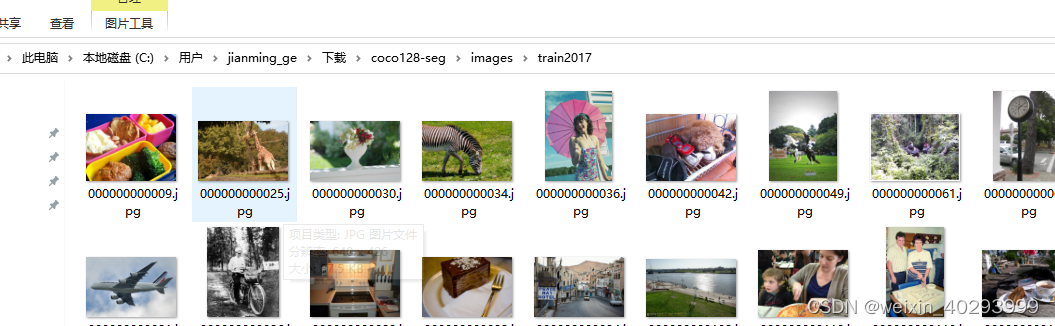
pic_path = r"C:\Users\jianming_ge\Downloads\coco128-seg\images\train2017\000000000009.jpg"
txt_path = r"C:\Users\jianming_ge\Downloads\coco128-seg\labels\train2017\000000000009.txt"
import cv2
img = cv2.imread(pic_path)
height, width, _ = img.shape
print(height, width)
# cv2.imshow("111",img)
# 显示原始图片
# cv2.waitKey()
# 勾勒多边形
file_handle = open(txt_path)
cnt_info = file_handle.readlines()
new_cnt_info = [line_str.replace("\n", "").split(" ") for line_str in cnt_info]
print(len(new_cnt_info))
print("---====---")
# 45 bowl 碗 49 橘子 50 西兰花
color_map = {"49": (0, 255, 255), "45": (255, 0, 255), "50": (255, 255, 0)}
for new_info in new_cnt_info:
print(new_info)
s = []
for i in range(1, len(new_info), 2):
b = [float(tmp) for tmp in new_info[i:i + 2]]
s.append([int(b[0] * width), int(b[1] * height)])
print(s)
cv2.polylines(img, [np.array(s, np.int32)], True, color_map.get(new_info[0]))
cv2.imshow('img2', img)
cv2.waitKey()
效果也贴出来,现在还找到yolov官方提供的回写标注到图片的代码,但以我对yolov的了解,不出几天就会出来。
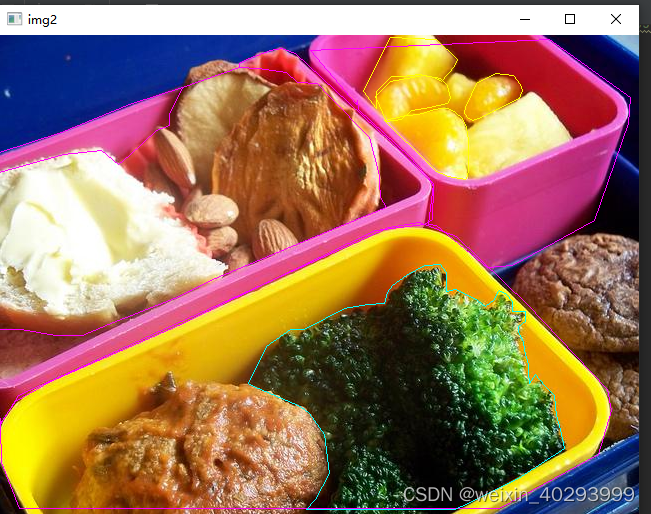
类别是45 bowl 碗 49 橘子 50 西兰花 好吧,那个黄黄的是橘子。
然后就可以拿着这个coco128训练玩儿了,但是你一定不会满足于此,哪我还用写这个blog么。直接看yolov5的readme.md 不是也能搞定么。
看下面,我们用yolov5做一个路面积水
二、自有数据集路面积水
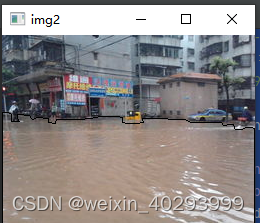
1.数据介绍
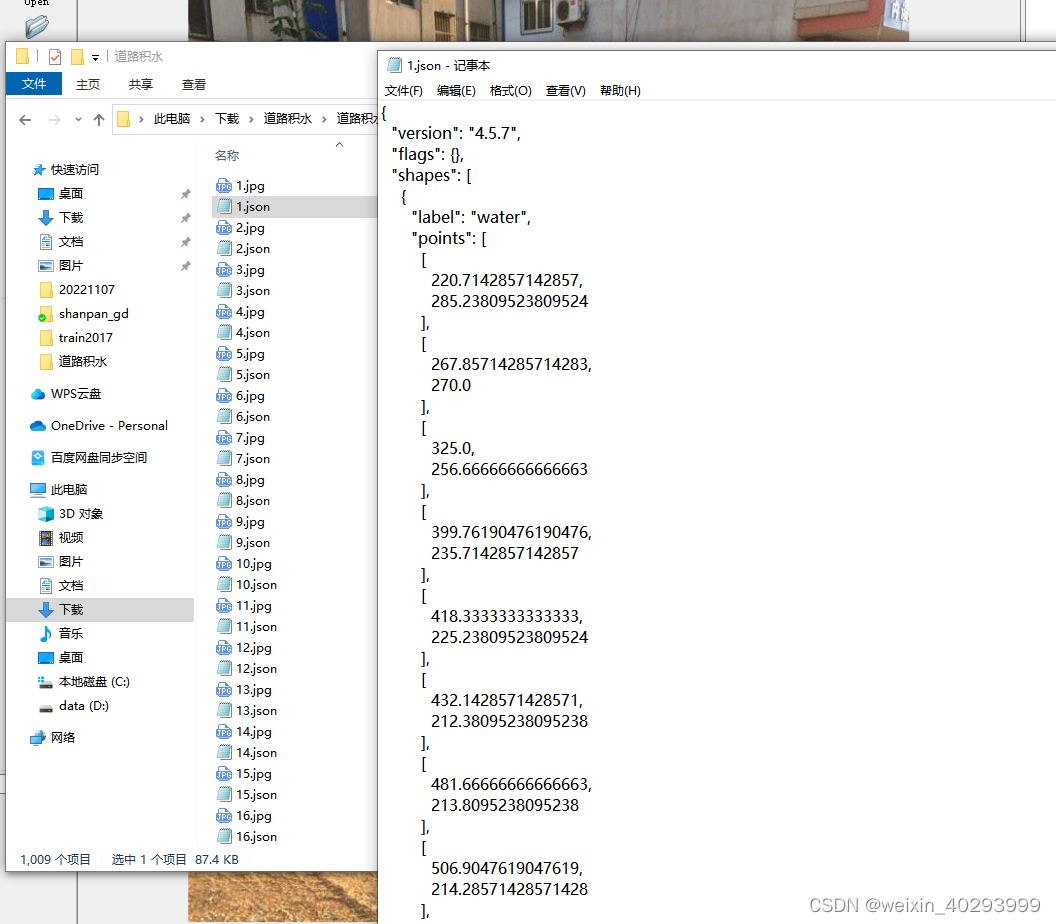
一共550张,lambelme标注,效果如下:
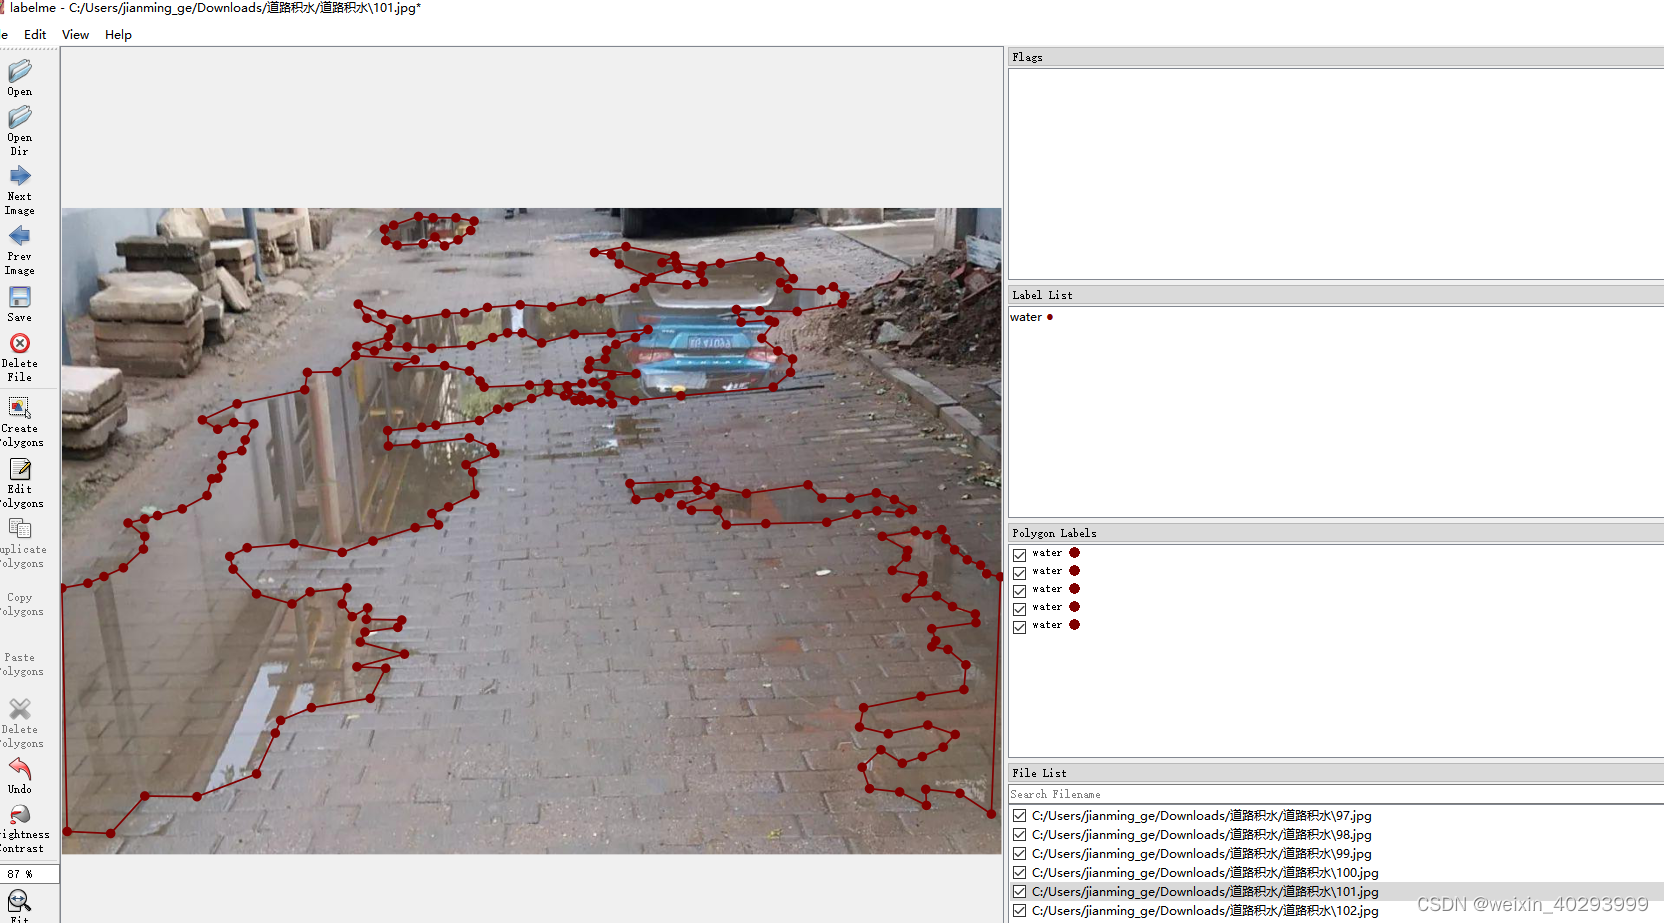
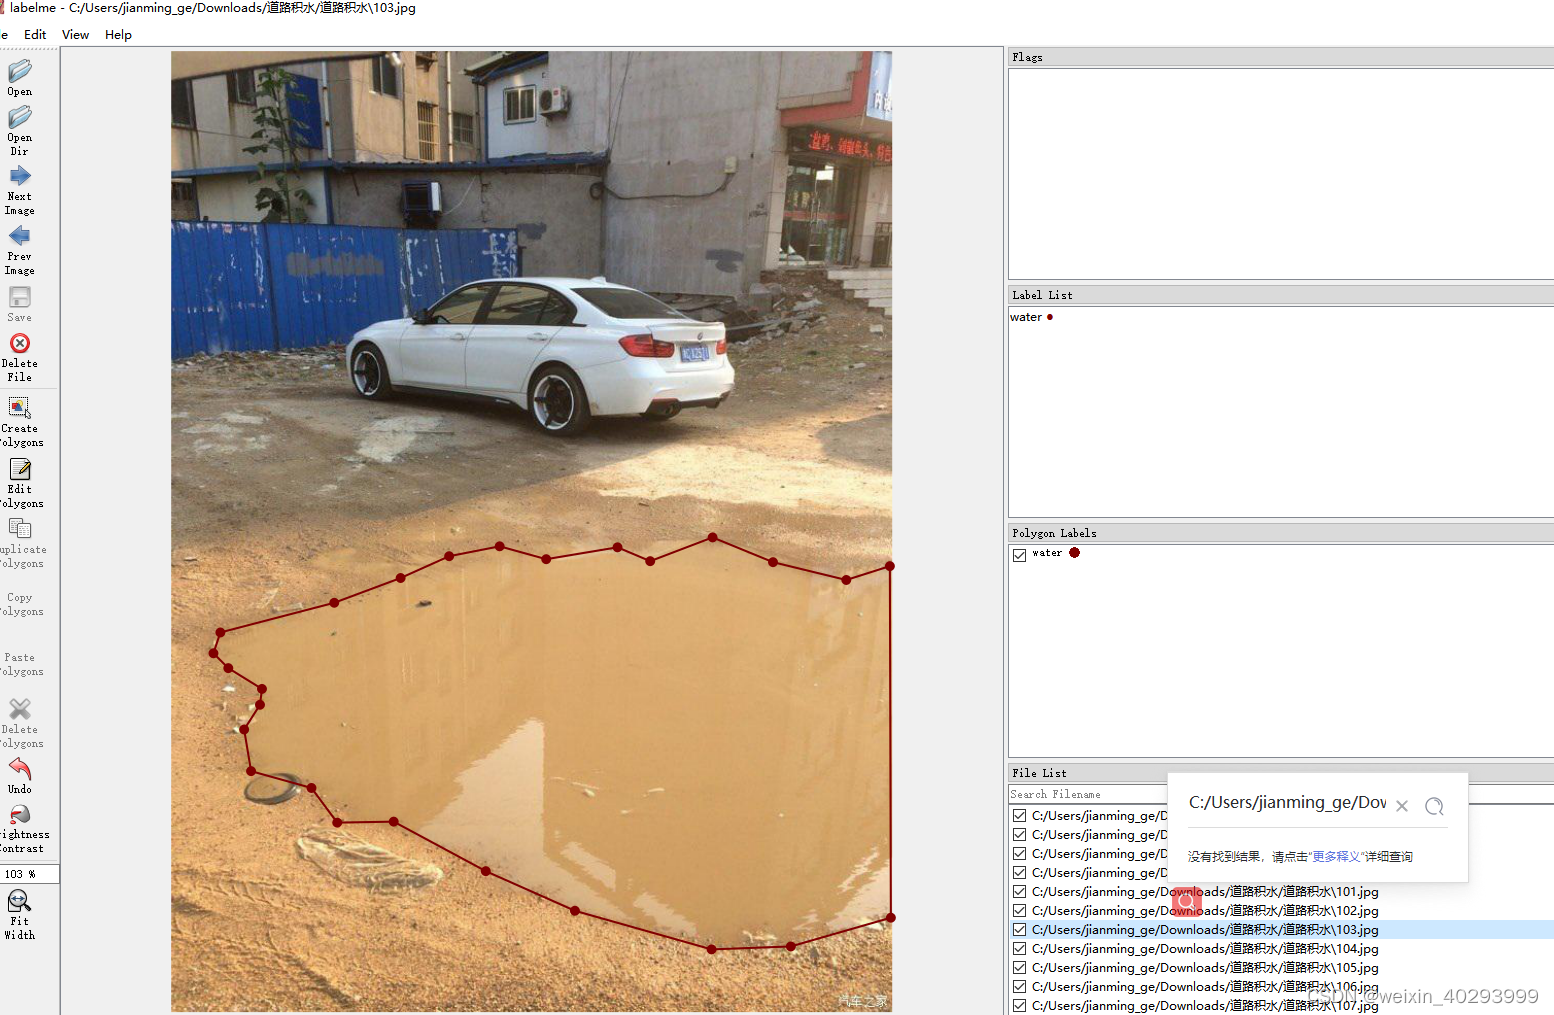
但是labelme的标注是json格式的,需要做一次转换。
这还是自己准备好的数据集,只需要批量转换一下,自己标注分割就费时费力了啊。(广告:本数据集有偿提供,私信我即可),主要是归一化一下
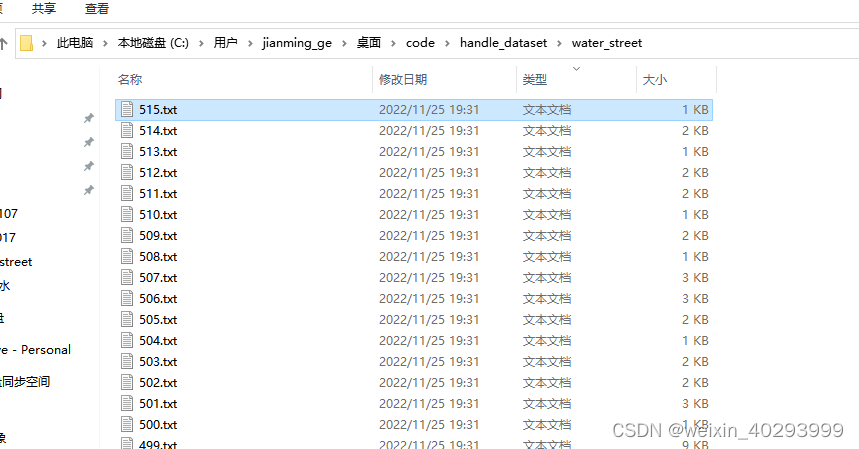
2.标注文件的转化:
需要安装他的要求转,转换脚本如下:
def convert_json_label_to_yolov_seg_label():
    import glob
    import numpy as np
    json_path = r"C:\Users\jianming_ge\Desktop\code\handle_dataset\water_street";
    json_files = glob.glob(json_path + "/*.json")
    for json_file in json_files:
        # if json_file != r"C:\Users\jianming_ge\Desktop\code\handle_dataset\water_street\223.json":
        #     continue
        print(json_file)
        f = open(json_file)
        json_info = json.load(f)
        # print(json_info.keys())
        img = cv2.imread(os.path.join(json_path, json_info["imagePath"]))
        height, width, _ = img.shape
        np_w_h = np.array([[width, height]], np.int32)
        txt_file = json_file.replace(".json", ".txt")
        f = open(txt_file, "a")
        for point_json in json_info["shapes"]:
            txt_content = ""
            np_points = np.array(point_json["points"], np.int32)
            norm_points = np_points / np_w_h
            norm_points_list = norm_points.tolist()
            txt_content += "0 " + " ".join([" ".join([str(cell[0]), str(cell[1])]) for cell in norm_points_list]) + "\n"
            f.write(txt_content)
会对应产生.txt 文件,和之前yolov分割例子的coco-128一致
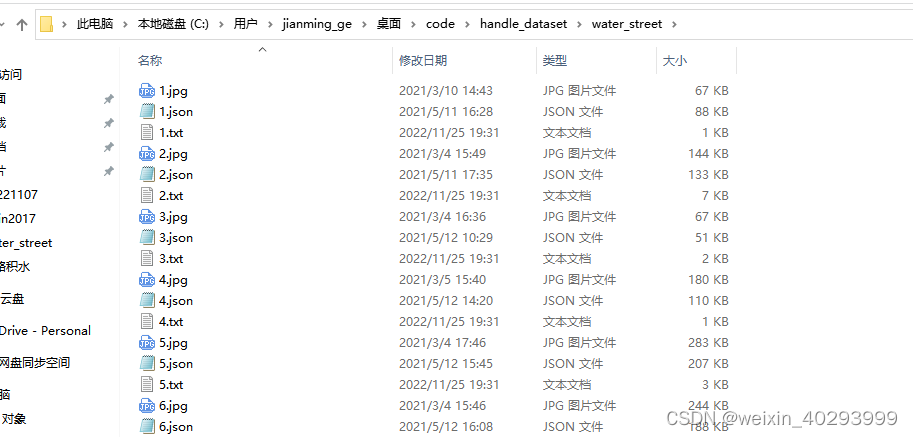
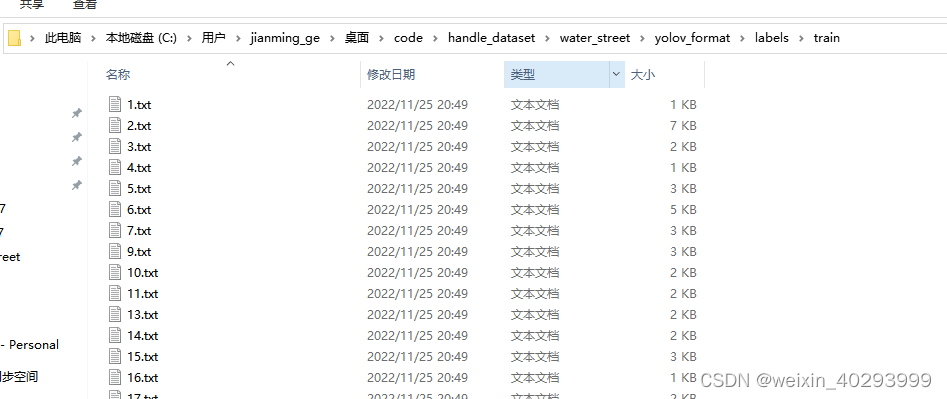
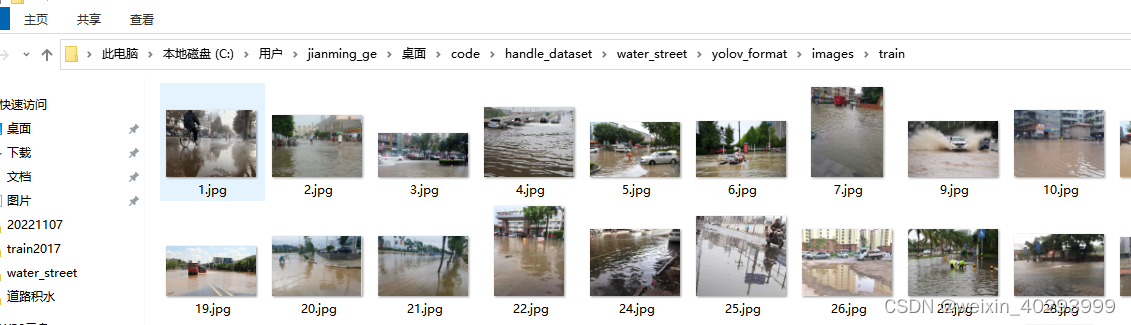
整个数据集的对应关系:
1.jpg 是原始图片,1.json是labelme标注的图片,1.txt是yolov分割所需要的格式
3.标注再验证
转化完成一定要再次验证一遍,否则会死的很惨。因为算法工程师80%的时间,都耗费再数据上,而训练只是一行命令的事儿。
def check_convert_json_label_to_yolov_seg_label():
    """
    验证一下对不对
    :return:
    """
    import glob
    import numpy as np
    import cv2
    txt_path = r"C:\Users\jianming_ge\Desktop\code\handle_dataset\water_street";
    txt_files = glob.glob(txt_path + "/*.txt")
    for txt_file in txt_files:
        # if json_file != r"C:\Users\jianming_ge\Desktop\code\handle_dataset\water_street\223.json":
        # continue
        print(txt_file)
        pic_path = txt_file.replace(".txt", ".jpg")
        img = cv2.imread(pic_path)
        height, width, _ = img.shape
        print(height, width)

        # cv2.imshow("111",img)
        # 显示原始图片
        # cv2.waitKey()
        # 勾勒多边形
        file_handle = open(txt_file)
        cnt_info = file_handle.readlines()
        new_cnt_info = [line_str.replace("\n", "").split(" ") for line_str in cnt_info]
        print(len(new_cnt_info))
        print("---====---")
        # 45 bowl 碗 49 橘子 50 西兰花
        color_map = {"49": (0, 255, 255), "45": (255, 0, 255), "50": (255, 255, 0)}
        for new_info in new_cnt_info:
            print(new_info)
            s = []
            for i in range(1, len(new_info), 2):
                b = [float(tmp) for tmp in new_info[i:i + 2]]
                s.append([int(b[0] * width), int(b[1] * height)])
            print(s)
            cv2.polylines(img, [np.array(s, np.int32)], True, color_map.get(new_info[0]))
        cv2.imshow('img2', img)
        cv2.waitKey()
你会看到这样的图片:
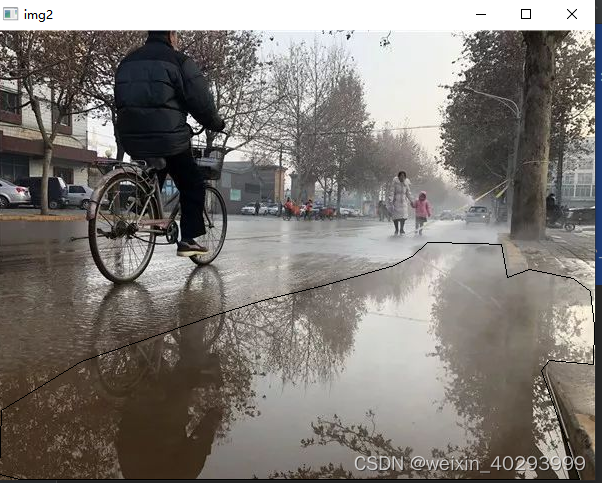
证明转化的标注文件没有问题。
4.分割数据集
下面就是要按1:9 或者2:8的比例分开数据集,因为数据集才550张,不是特别大,所以我会在代码中重新建目录,把图片和标注文件复制过来。这样并不动旧的数据集,这是一个好习惯!
数据集拆分的代码如下:
def split_dataset():
    # 为防止数据混乱,执行此脚本前,先将'C:\Users\jianming_ge\Desktop\code\handle_dataset\water_street\yolov_format'清空
    """
    :return:
    """
    import glob
    import shutil
    import random
    txt_path = r"C:\Users\jianming_ge\Desktop\code\handle_dataset\water_street"
    txt_files = glob.glob(txt_path + "/*.txt")
    # 基础图片文件夹
    images_base_dir = r"C:\Users\jianming_ge\Desktop\code\handle_dataset\water_street\yolov_format\images"
    # 基础标注文件夹
    labels_base_dir = r"C:\Users\jianming_ge\Desktop\code\handle_dataset\water_street\yolov_format\labels"

    # 训练集图片文件夹
    images_train_dir = os.path.join(images_base_dir, "train")
    # 训练集标注文件夹
    labels_train_dir = os.path.join(labels_base_dir, "train")
    # 验证集图片文件夹
    images_val_dir = os.path.join(images_base_dir, "val")
    # 验证集标注文件夹
    labels_val_dir = os.path.join(labels_base_dir, "val")
    # 生成所需4个文件夹
    [make_new_dir(dir_path) for dir_path in [images_train_dir, labels_train_dir, images_val_dir, labels_val_dir]]
    # 验证集数据的比例,可以自定义成任何你所需要的比例
    val_rate = 0.1
    for txt_ori_path in txt_files:
        fpath, fname = os.path.split(txt_ori_path)  # 分离文件名和路径
        if random.randint(1, 10) == 10 * val_rate:
            # 验证集数据
            txt_dst_path = os.path.join(labels_val_dir, fname)
            img_dst_path = os.path.join(images_val_dir, fname.replace(".txt", ".jpg"))
        else:
            # 训练集
            txt_dst_path = os.path.join(labels_train_dir, fname)
            img_dst_path = os.path.join(images_train_dir, fname.replace(".txt", ".jpg"))
        # 执行复制
        # 图片都是jpg,且和原始txt文件在同一个目录,所以可以这么写
        img_ori_path = txt_ori_path.replace(".txt", ".jpg")
        # 移动标注文件
        shutil.copy(txt_ori_path, txt_dst_path)
        # 移动图片文件
        shutil.copy(img_ori_path, img_dst_path)
执行完,会多这个目录,和coco128-seg的一样:

ok完事具备,开始训练吧!
三、训练
1.构建配置文件
water.yaml
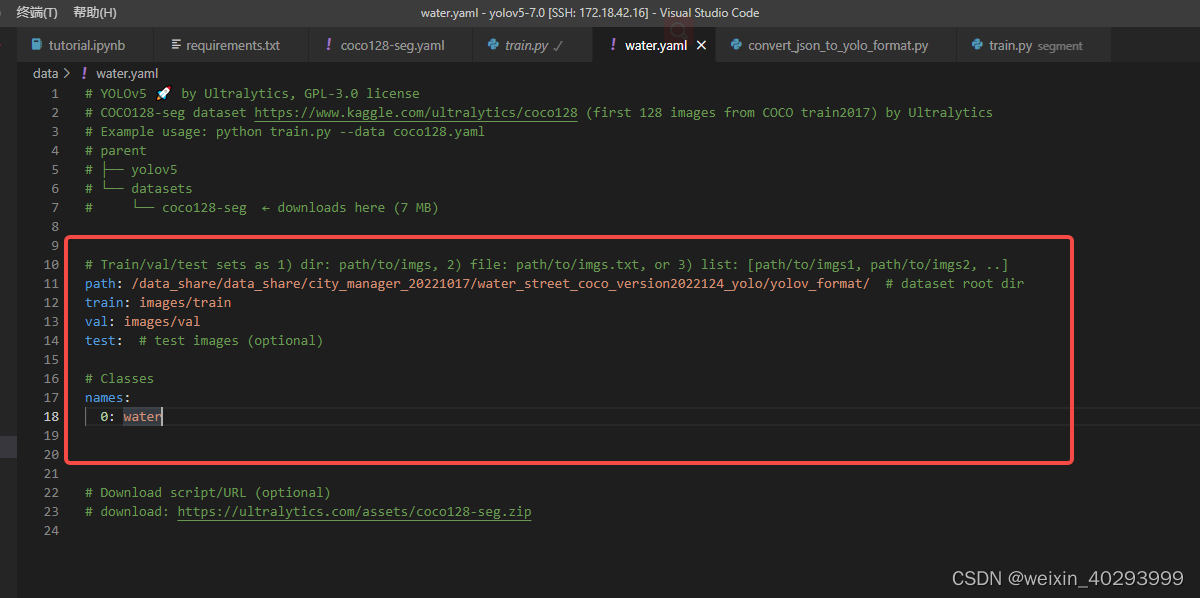
照著coco128-seg.yaml抄一份,改成自己目录结构即可
path: /data_share/data_share/city_manager_20221017/water_street_coco_version2022124_yolo/yolov_format/  # dataset root dir
train: images/train
val: images/val
test:  # test images (optional)

# Classes
names:
  0: water
这里需要多啰嗦一句,配置文件只需要体现图片的路径即可
比如train,最终代码会到这个目录下加载图片:
/data_share/data_share/city_manager_20221017/water_street_coco_version2022124_yolo/yolov_format/images/train
然后智能(暴力)把images替换成labels,也就是说去:/data_share/data_share/city_manager_20221017/water_street_coco_version2022124_yolo/yolov_format/labels/train 下找标注
反正配置文件的写法有好几种,我就照着coco128-seg超了一份。
这里插入一个知识点, 为什么test下人家给写的是optional,引出的问题是在啥时候不需要test数据集?
瓜书上说,train是用来xxx,val是用来ooo,test数据集是用来xxoo。
那么问题来了,那是书上写的,我的问题是,什么时候不需要test数据集,少废话,出答案:
在train、val、test都来自一个概率分布的时候,是不需要test的,仔细想想,都来自一个概率分布,其实连val都可以不用。当然,val是用来防止模型过拟合的,根据loss曲线挑选一个train和val表现都还不错的模型。
就目前这个分割网络来说,我们没有拿到生产数据,还不知道是啥情况,只能先训练一个初版,然后试运行(预生产时)再去迭代优化了。话说,我这里已经在生产摄像头下,下雨时,把收集了一些积水的视频。
2.训练
发车、发车。。
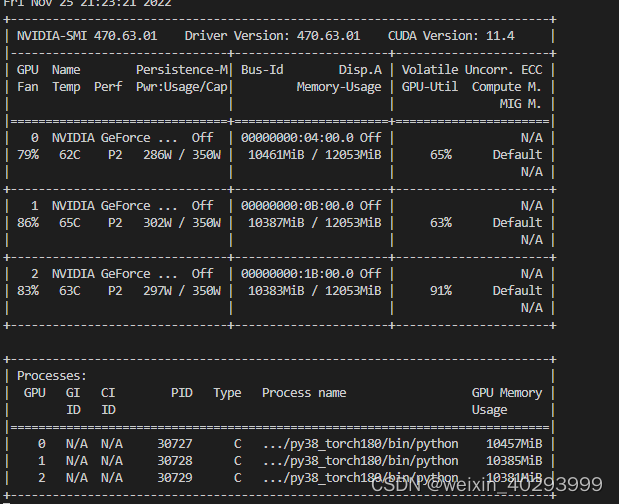
前面已经说过了和目标检测训练的命令一模一样,祖上富裕,3张卡,走你
python -m torch.distributed.launch --nproc_per_node=3 segment/train.py --img 640 --batch 48 --epochs 300 --data water-seg.yaml --weights weights/yolov5m-seg.pt --workers 16 --save-period 20 --cache
上面几个参数自行查一下他的意思
卡的数据和batch 一定是能被整出才行,比如我有3张卡,那么batch要是3的倍数。
一切正常:
3.选择模型
300轮次下来,每20轮保留一个模型,
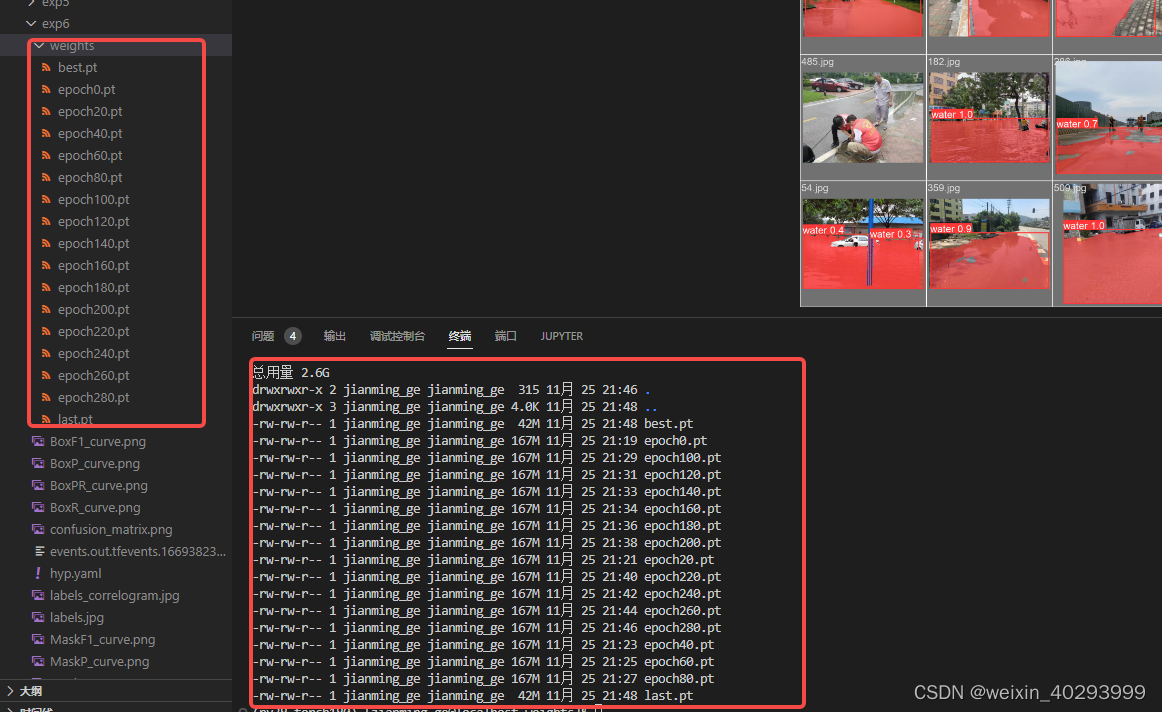
可以看到last.pt 就是best.pt
从result.png 上看
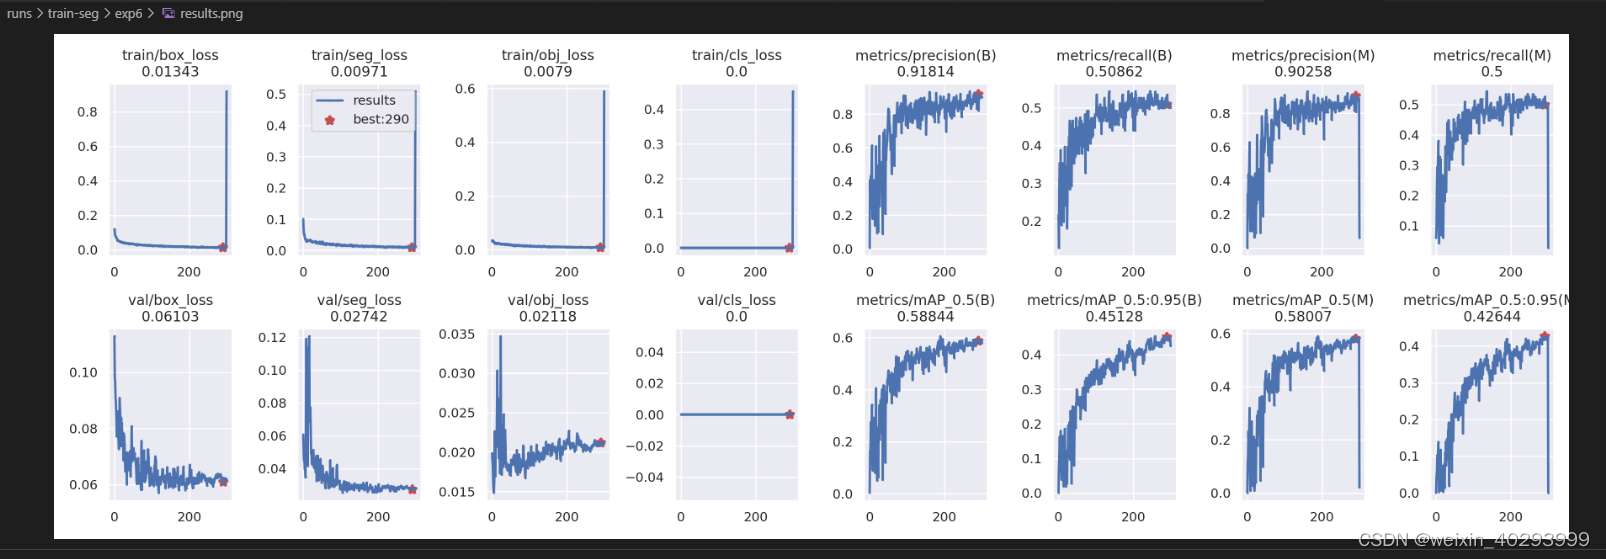
选取200-300轮直接的一个模型是合适的,
本来用tensorboard看更直观的,可是我的tensorboard报错,尚不清楚咋回事。解决了两个小时,无解,翻过来正过去就是那么两句话。
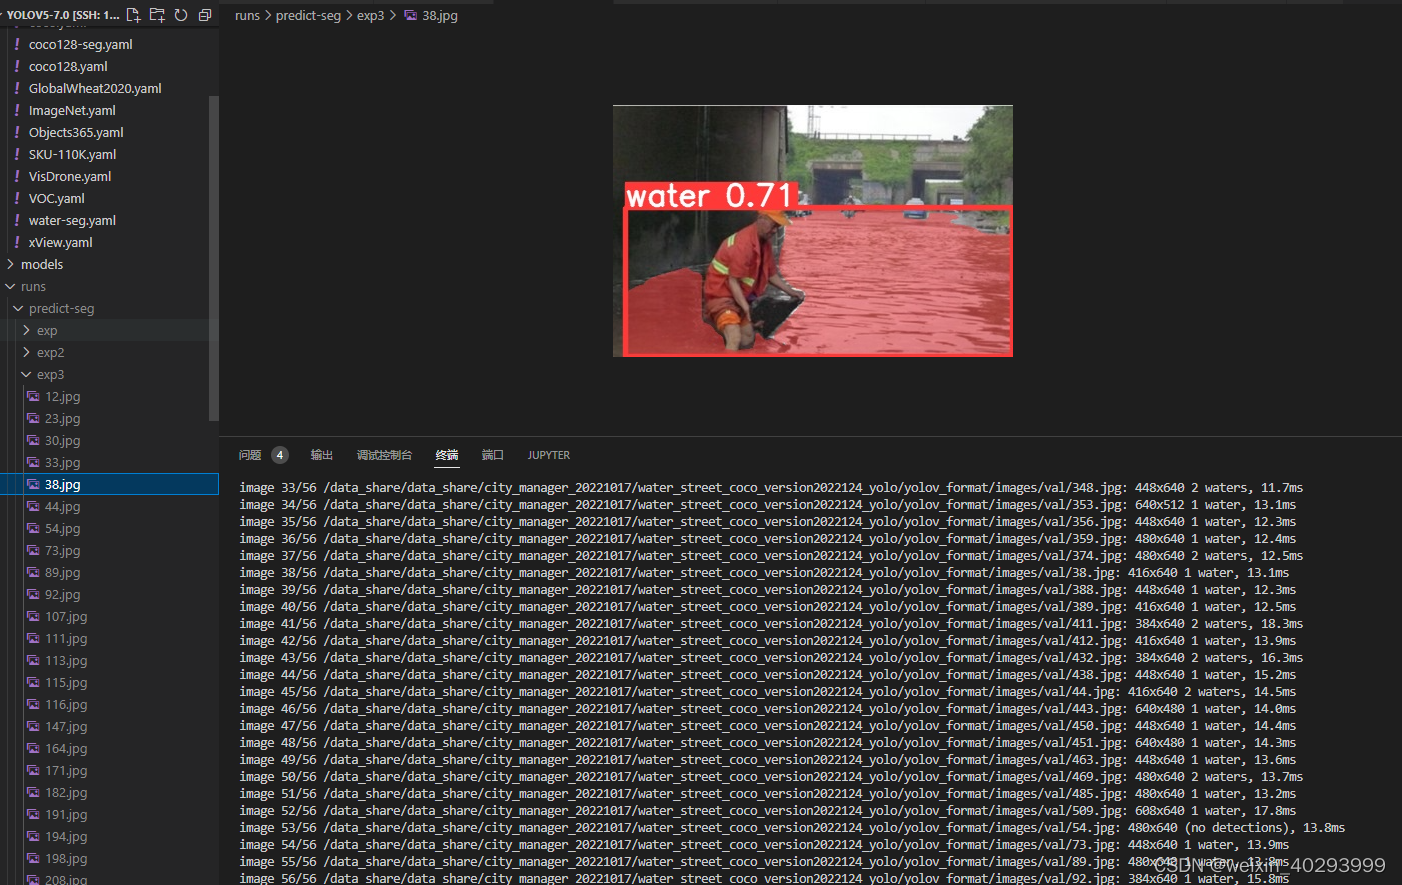
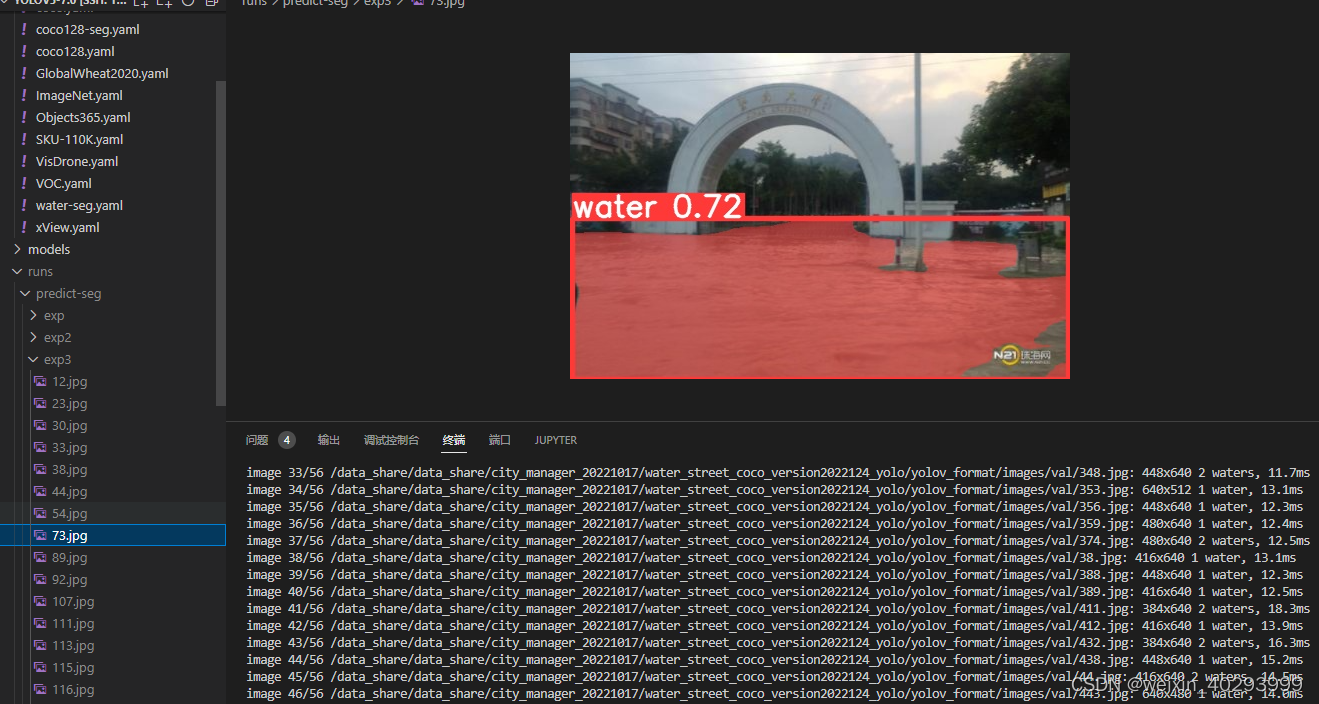
就用best.pt 推理一下试试,把runs/exp 下的best.pt 复制到weights/下,并且重命名為best-seg.pt
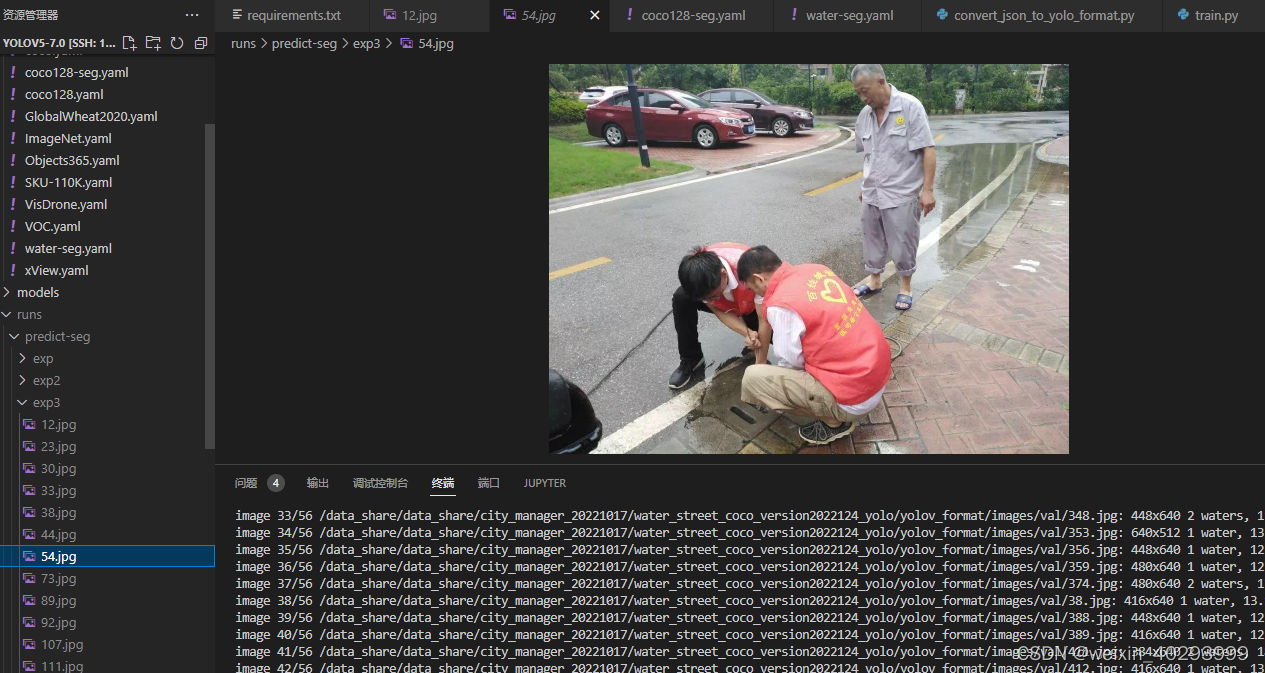
python segment/predict.py --weights weights/best-seg.pt --img 640 --conf 0.25 --source /data_share/data_share/city_manager_20221017/water_street_coco_version2022124_yolo/yolov_format/images/val
#display.Image(filename='runs/predict-seg/exp/zidane.jpg', width=600)
麻蛋,把环境搞坏了,这可是我的主环境啊啊啊:
Uninstalling torchvision-0.2.2:
Successfully uninstalled torchvision-0.2.2
Successfully installed dataclasses-0.6 torch-1.7.0 torchvision-0.8.1
报错说需要torchvision>=0.8.1, 我的是0.2.2, 然后我pip install torchvision==0.8.1, 结果给我把torch1.8卸载了,重新安装的torch1.7,
然后重新运行命令,就报错了
Traceback (most recent call last):
  File "segment/predict.py", line 274, in <module>
    main(opt)
  File "segment/predict.py", line 269, in main
    run(**vars(opt))
  File "/home/jianming_ge/miniconda3/envs/py38_torch180/lib/python3.8/site-packages/torch/autograd/grad_mode.py", line 26, in decorate_context
    return func(*args, **kwargs)
  File "segment/predict.py", line 99, in run
    model = DetectMultiBackend(weights, device=device, dnn=dnn, data=data, fp16=half)
  File "/home/jianming_ge/workplace/yolov5-7.0/models/common.py", line 345, in __init__
    model = attempt_load(weights if isinstance(weights, list) else w, device=device, inplace=True, fuse=fuse)
  File "/home/jianming_ge/workplace/yolov5-7.0/models/experimental.py", line 80, in attempt_load
    ckpt = (ckpt.get('ema') or ckpt['model']).to(device).float()  # FP32 model
  File "/home/jianming_ge/miniconda3/envs/py38_torch180/lib/python3.8/site-packages/torch/nn/modules/module.py", line 490, in float
    return self._apply(lambda t: t.float() if t.is_floating_point() else t)
  File "/home/jianming_ge/workplace/yolov5-7.0/models/yolo.py", line 155, in _apply
    self = super()._apply(fn)
  File "/home/jianming_ge/miniconda3/envs/py38_torch180/lib/python3.8/site-packages/torch/nn/modules/module.py", line 359, in _apply
    module._apply(fn)
  File "/home/jianming_ge/miniconda3/envs/py38_torch180/lib/python3.8/site-packages/torch/nn/modules/module.py", line 359, in _apply
    module._apply(fn)
  File "/home/jianming_ge/miniconda3/envs/py38_torch180/lib/python3.8/site-packages/torch/nn/modules/module.py", line 359, in _apply
    module._apply(fn)
  File "/home/jianming_ge/miniconda3/envs/py38_torch180/lib/python3.8/site-packages/torch/nn/modules/module.py", line 381, in _apply
    param_applied = fn(param)
  File "/home/jianming_ge/miniconda3/envs/py38_torch180/lib/python3.8/site-packages/torch/nn/modules/module.py", line 490, in <lambda>
    return self._apply(lambda t: t.float() if t.is_floating_point() else t)
RuntimeError: CUDA error: no kernel image is available for execution on the device
唉锅从天上来啊,和cuda有不匹配了,算求,又重启了一个环境,安装了新环境。深度学习,有一半时间再安装环境,另一半时间制作docker…
py39_torch1.10.1
# 基础环境
pip install torch==1.10.1+cu111 torchvision==0.11.2+cu111 torchaudio==0.10.1 -f https://download.pytorch.org/whl/cu113/torch_stable.html
# yolov所需环境
pip install -r requirements.txt
# 其它的再报错再说吧,唉,倒霉啊!!比如flask fastapi kafka mysql sharply之类的,求大牛指导管理环境啊
在等这个安装的同时,又重新将原环境装了一次:torch 从1.8 更换成1.8.2 因为LST版本。很快就装完了,然后执行推理也好使。太奇怪了。不知道怎么动了环境
pip install torch==1.8.2 torchvision==0.9.2 torchaudio==0.8.2 --extra-index-url https://download.pytorch.org/whl/lts/1.8/cu111
也有未识别的
再看看tensorbord好用了没

还是没有,其实我已经pip install tensorboard了,主要是想很直观的看loss,先这样吧,等环境py39_torch1.10.1弄好了,再运行下看是否成功。
四、模型转化
1.转化细节
.pt 到.onnx
根据我之前的博文,onnx对cpu非常友好,能够提升10倍的推理速度,从1-2s 下降到 0.1-0.2s
onnx的安装可以看我之前的博文
转化命令:
python export.py --weights weights/best-seg.pt --include onnx
验证速度:
python segment/predict.py --weights weights/best-seg.onnx --img 640 --conf 0.25 --source /data_share/data_share/city_manager_20221017/water_street_coco_version2022124_yolo/yolov_format/images/val
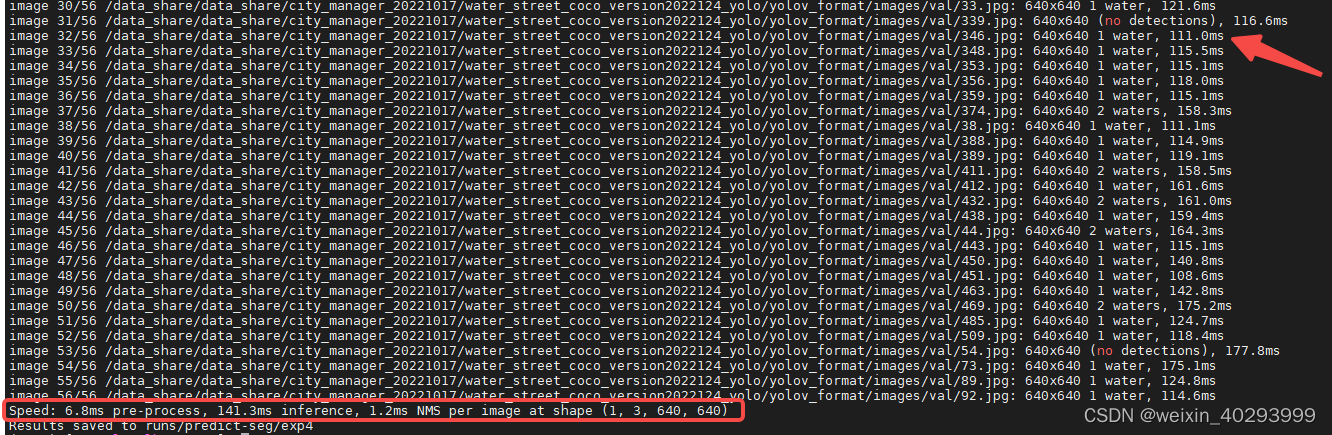
cpu 的onnx 下是0.15s,作为对比gpu的.pt 是0.015s,证明cpu下的分割网络是可行的。
2.推理返回值代表
# Run inference
        self.model.warmup(imgsz=(1 if pt else bs, 3, *imgsz))  # warmup
        dt =  (Profile(), Profile(), Profile())
        with dt[0]:
            im = torch.from_numpy(im).to(self.device)
            im = im.half() if self.model.fp16 else im.float()  # uint8 to fp16/32
            im /= 255  # 0 - 255 to 0.0 - 1.0
            if len(im.shape) == 3:
                im = im[None]  # expand for batch dim
        # Inference
        with dt[1]:
            visualize = False
            pred, proto = self.model(im, augment=False, visualize=visualize)[:2]
        # NMS
        with dt[2]:
            pred = non_max_suppression(pred, self.conf_thres, self.iou_thres, self.retain_classes,nm=32)

        for i, det in enumerate(pred):  # per image
            im0 = im0.copy()
            im0 = im0.copy()
        segments = None
        annotator = Annotator(im0, line_width=3, example=str(names))
        if len(det):
            masks = process_mask(proto[i], det[:, 6:], det[:, :4], im.shape[2:], upsample=True)  # HWC
            det[:, :4] = scale_boxes(im.shape[2:], det[:, :4], im0.shape).round()  # rescale boxes to im0 size

            # Segments
            save_txt =True
            if save_txt:
                segments = reversed(masks2segments(masks))
                segments = [scale_segments(im.shape[2:], x, im0.shape, normalize=True) for x in segments]

            # Print results
            s = ""
            for c in det[:, 5].unique():
                n = (det[:, 5] == c).sum()  # detections per class
                s += f"{n} {names[int(c)]}{'s' * (n > 1)}, "  # add to string

            # Mask plotting
            retina_masks = False
            annotator.masks(masks,
                            colors=[colors(x, True) for x in det[:, 5]],
                            im_gpu=None if retina_masks else im[i])
这是我略加修改后的代码,原始代码在segment/predict.py下
pred, proto = self.model(im, augment=False, visualize=visualize)[:2]
这个里面的proto也是重要的,代表了分割的实例组成的list,细节的分割点位
det 代表有无识别到目标其里面的内容很风丰富,但是经过nms之后
non_max_suppression函数的注释是,是将pred经过非极大抑制之后的矩形框
list of detections, on (n,6) tensor per image [xyxy, conf, cls]
四个坐标点,置信度,类别值,这是我打印出来的det,看样子不是(n,6) 我的理解是前6个元素的含义是明确的,先存疑??
tensor([[ 3.14000e+02,  2.53000e+02,  9.28000e+02,  6.02000e+02,  9.83171e-01,  0.00000e+00,  5.36699e-01, -5.76064e-01, -3.26006e-01,  1.20082e+00,  3.36137e-01, -4.49288e-01, -1.76419e-01,  7.95439e-01,  4.11805e-01, -2.94021e-01, -1.07274e+00,  3.74787e-01,  7.30362e-01, -5.80536e-01,  1.28794e+00,  1.05980e+00,
          7.34846e-01, -6.37928e-01,  5.95232e-01,  7.47005e-01, -5.02438e-01,  4.93569e-01, -3.65522e-01,  3.31907e-01,  2.75088e-01, -1.21060e+00, -7.28429e-01,  4.78636e-01,  1.70226e-01, -7.33963e-01, -5.29957e-01,  3.69660e-01],
        [ 2.00000e+00,  2.05000e+02,  2.84000e+02,  6.03000e+02,  9.76957e-01,  0.00000e+00,  4.87412e-01, -4.98163e-01, -4.37511e-01,  1.22402e+00,  2.67139e-01, -4.17416e-01, -1.08538e-01,  7.58215e-01,  4.04070e-01, -3.91520e-01, -7.94110e-01, -2.26625e-02,  7.35040e-01, -3.86938e-01,  1.27367e+00,  6.53839e-01,
          9.14556e-01, -4.18411e-01,  7.33185e-01,  4.69820e-01, -2.65769e-01,  3.17441e-01, -2.13026e-01,  2.10853e-01,  1.38901e-01, -1.21001e+00, -6.82711e-01,  6.36819e-01,  3.86214e-01, -6.94586e-01, -6.36750e-01,  3.26956e-01]])
五、ONNX 内存泄漏
美好的时光总是短暂的,量化也没有那么好,起码在onnx的cpu版本是有问题的。bug在这里:
https://github.com/microsoft/onnxruntime/issues/9313
发现它是因为,服务器登陆不上了,关机了, 原因是内存和cpu都顶爆了。
内存持续升高,存在内存泄漏的问题, 不是pytorch 或者 yolov的问题,是onnx的问题。
初始状态:
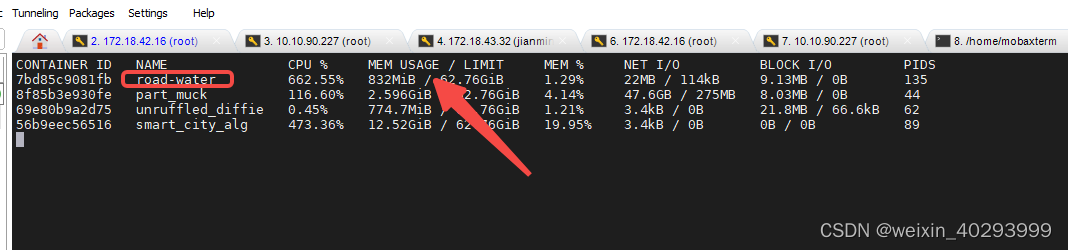
35分钟之后:

我是用docker的方式启动的 只有要图片送入,mem usage会一直增加。。。而且进入docker内部 杀死推理服务外侧docker的监控的mem usage依然不会往下掉,只是不在变化,观察一下,半天干到6G的内存了, 所以重启大法了,一小时重启一次。
后面有时间,再根进下,这个是个大活儿,我还挺有兴趣的,虽然自己很菜,人菜瘾大。
您若是直接命令启动的服务,则可以用脚本控制,每隔一段时间重启一次。
分割线:20230331 ------------------------------------------------------
六 遗传参数的用处
今天再次迭代算法,想要尝试copy paste的方式来增加样本量,但是我大yolov已经给我们准备好了,实在是太贴心了。
有好处就有缺点,用了–evolve 就不能用一机多卡的形式了。 这不得不说是个遗憾。
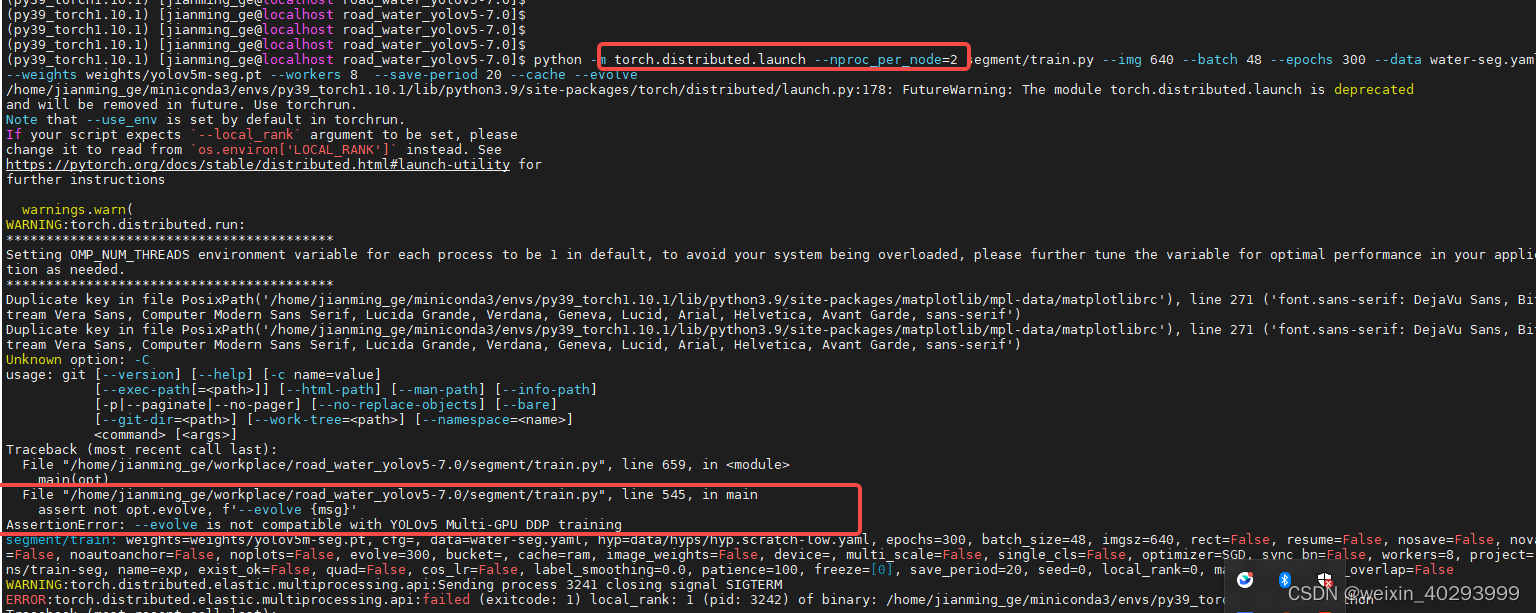
报错单独贴一下:
AssertionError: --evolve is not compatible with YOLOv5 Multi-GPU DDP training
实际运行命令:
python segment/train.py --img 640 --batch 12 --epochs 300 --data water-seg.yaml --weights weights/yolov5m-seg.pt --workers 2 --save-period 20 --cache --evolve
实际是用到了这里。
 # Train
    if not opt.evolve:
        train(opt.hyp, opt, device, callbacks)

    # Evolve hyperparameters (optional)
    else:
        # Hyperparameter evolution metadata (mutation scale 0-1, lower_limit, upper_limit)
        meta = {
            'lr0': (1, 1e-5, 1e-1),  # initial learning rate (SGD=1E-2, Adam=1E-3)
            'lrf': (1, 0.01, 1.0),  # final OneCycleLR learning rate (lr0 * lrf)
            'momentum': (0.3, 0.6, 0.98),  # SGD momentum/Adam beta1
            'weight_decay': (1, 0.0, 0.001),  # optimizer weight decay
            'warmup_epochs': (1, 0.0, 5.0),  # warmup epochs (fractions ok)
            'warmup_momentum': (1, 0.0, 0.95),  # warmup initial momentum
            'warmup_bias_lr': (1, 0.0, 0.2),  # warmup initial bias lr
            'box': (1, 0.02, 0.2),  # box loss gain
            'cls': (1, 0.2, 4.0),  # cls loss gain
            'cls_pw': (1, 0.5, 2.0),  # cls BCELoss positive_weight
            'obj': (1, 0.2, 4.0),  # obj loss gain (scale with pixels)
            'obj_pw': (1, 0.5, 2.0),  # obj BCELoss positive_weight
            'iou_t': (0, 0.1, 0.7),  # IoU training threshold
            'anchor_t': (1, 2.0, 8.0),  # anchor-multiple threshold
            'anchors': (2, 2.0, 10.0),  # anchors per output grid (0 to ignore)
            'fl_gamma': (0, 0.0, 2.0),  # focal loss gamma (efficientDet default gamma=1.5)
            'hsv_h': (1, 0.0, 0.1),  # image HSV-Hue augmentation (fraction)
            'hsv_s': (1, 0.0, 0.9),  # image HSV-Saturation augmentation (fraction)
            'hsv_v': (1, 0.0, 0.9),  # image HSV-Value augmentation (fraction)
            'degrees': (1, 0.0, 45.0),  # image rotation (+/- deg)
            'translate': (1, 0.0, 0.9),  # image translation (+/- fraction)
            'scale': (1, 0.0, 0.9),  # image scale (+/- gain)
            'shear': (1, 0.0, 10.0),  # image shear (+/- deg)
            'perspective': (0, 0.0, 0.001),  # image perspective (+/- fraction), range 0-0.001
            'flipud': (1, 0.0, 1.0),  # image flip up-down (probability)
            'fliplr': (0, 0.0, 1.0),  # image flip left-right (probability)
            'mosaic': (1, 0.0, 1.0),  # image mixup (probability)
            'mixup': (1, 0.0, 1.0),  # image mixup (probability)
            'copy_paste': (1, 0.0, 1.0)}  # segment copy-paste (probability)
不加----evolve 参数的话, else 这里面的一坨优化手动应该都是用不到的。包括hsv,mosaic,mixup,copy_pase等等。(存疑)
TensorBoard: Start with 'tensorboard --logdir runs/train-seg', view at http://localhost:6006/
 tensorboard --logdir runs/train-seg --host=0.0.0.0
新装的环境发现报错:
2023-04-04 16:02:14.485000: W tensorflow/compiler/xla/stream_executor/platform/default/dso_loader.cc:64] Could not load dynamic library ‘libnvinfer.so.7’; dlerror: libnvinfer.so.7: cannot op
七 关于图片通道问题的一个bug 20230411发现
      Epoch    GPU_mem   box_loss   seg_loss   obj_loss   cls_loss  Instances       Size
      0/299      5.74G     0.1204    0.07856    0.02553          0         23        640:  35%|███▌      | 12/34 00:07libpng warning: sBIT: invalid
      0/299      5.74G     0.1188    0.07694    0.02574          0         33        640:  41%|████      | 14/34 00:08libpng warning: sBIT: invalid
      0/299      5.74G     0.1108    0.07117    0.02713          0         28        640:  71%|███████   | 24/34 00:11libpng warning: sBIT: invalid
      0/299      5.75G     0.1029    0.06394    0.02723          0         10        640: 100%|██████████| 34/34 00:13
                 Class     Images  Instances      Box(P          R      mAP50  mAP50-95)     Mask(P          R      mAP50  mAP50-95): 100%|██████████| 8/8 00:02
                   all        188        215       0.28      0.251      0.142       0.06      0.212      0.195      0.082     0.0289

      Epoch    GPU_mem   box_loss   seg_loss   obj_loss   cls_loss  Instances       Size
      1/299      7.32G    0.07902    0.04293    0.02481          0         40        640:  32%|███▏      | 11/34 00:02libpng warning: sBIT: invalid
      1/299      7.32G    0.07798    0.04315    0.02462          0         27        640:  38%|███▊      | 13/34 00:03libpng warning: sBIT: invalid
      1/299      7.32G    0.07878    0.04556    0.02474          0         38        640:  62%|██████▏   | 21/34 00:05libpng warning: sBIT: invalid
      1/299      7.32G    0.07873    0.04521    0.02454          0         36        640:  68%|██████▊   | 23/34 00:05libpng warning: sBIT: invalid
      1/299      7.32G    0.07862    0.04364    0.02392          0         34        640:  82%|████████▏ | 28/34 00:06libpng warning: sBIT: invalid
      1/299      7.32G    0.07739    0.04325     0.0235          0          8        640: 100%|██████████| 34/34 00:07
                 Class     Images  Instances      Box(P          R      mAP50  mAP50-95)     Mask(P          R      mAP50  mAP50-95):  25%|██▌       | 2/8 00:00libpng warning: sBIT: invalid
                 Class     Images  Instances      Box(P          R      mAP50  mAP50-95)     Mask(P          R      mAP50  mAP50-95): 100%|██████████| 8/8 00:01
                   all        188        215      0.334      0.279      0.166      0.101      0.291      0.251       0.13     0.0608

      Epoch    GPU_mem   box_loss   seg_loss   obj_loss   cls_loss  Instances       Size
      2/299      7.32G    0.06256    0.03825     0.0188          0         27        640:   3%|▎         | 1/34 00:00libpng warning: sBIT: invalid
      2/299      7.32G    0.07064    0.04049    0.02257          0         40        640:  18%|█▊        | 6/34 00:01libpng warning: sBIT: invalid
      2/299      7.32G    0.07023    0.03491    0.02087          0         22        640:  44%|████▍     | 15/34 00:03libpng warning: sBIT: invalid
      2/299      7.32G    0.06993    0.03416    0.02027          0         25        640:  50%|█████     | 17/34 00:04libpng warning: sBIT: invalid
      2/299      7.32G    0.06714    0.03363    0.01893          0          6        640: 100%|██████████| 34/34 00:07
                 Class     Images  Instances      Box(P          R      mAP50  mAP50-95)     Mask(P          R      mAP50  mAP50-95): 100%|██████████| 8/8 00:01
                   all        188        215      0.359      0.326      0.167     0.0631      0.235      0.228     0.0824     0.0265

      Epoch    GPU_mem   box_loss   seg_loss   obj_loss   cls_loss  Instances       Size
      3/299      7.32G    0.06512    0.03397    0.02116          0         37        640:   3%|▎         | 1/34 00:00libpng warning: sBIT: invalid
      3/299      7.32G    0.06598    0.04451    0.01951          0         32        640:   9%|▉         | 3/34 00:00libpng warning: sBIT: invalid
      3/299      7.32G    0.06442    0.03769    0.01774          0         21        640:  18%|█▊        | 6/34 00:01libpng warning: sBIT: invalid
      3/299      7.32G    0.06639    0.03573    0.02024          0         19        640:  38%|███▊      | 13/34 00:03libpng warning: sBIT: invalid
      3/299      7.32G    0.06504    0.03499    0.02038          0         29        640:  76%|███████▋  | 26/34 00:06^Z
warning :00:03libpng warning: sBIT: invalid
出现这个问题是因为有的图片是四通道的,带透明度。要先转换成三通道才可以,
修复后进度条都可以走到100%,否则遇到四通道的图片就break down了。
pytorch1.8 肯定是没这个问题, 现在用的1.10 是有问题的。
修复脚本也很简单:
import glob
import glob
import os
from PIL import Image
base_dir_list =  ['/data_share/data_share/city_manager_20221017/water_street_coco_version2022124_yolo/yolov_format/images/train','/data_share/data_share/bad_case_water20230119/final/train/images','/data_share/data_share/city_manager_20221017/bad_case_water20240331/final/images']

for base_dir in base_dir_list:
    imglist =  glob.glob(base_dir + "/*.jpg")
    for imgpath in imglist:
        print(imgpath)
        image = Image.open(imgpath)
        # image = image.resize((128, 128))   # 批量处理图像大小
        image = image.convert("RGB")  # 4通道转化为rgb三通道
        image.save(imgpath)
八 补充负例
20230427,今天补充了500+负例,多卡训练时发现了这个问题,先记录一下,还为解决
Model summary: 302 layers, 21671158 parameters, 21671158 gradients, 70.2 GFLOPs

Transferred 493/499 items from weights/yolov5m-seg.pt
AMP: checks passed ✅
optimizer: SGD(lr=0.01) with parameter groups 82 weight(decay=0.0), 85 weight(decay=0.00046875), 85 bias
train: Scanning /data_share/data_share/bad_case_water20230119/final/train/labels.cache... 1376 images, 872 backgrounds, 0 corrupt: 100%|██████████| 1376/1376 00:00
val: Scanning /data_share/data_share/bad_case_water20230119/final/val/labels.cache... 767 images, 652 backgrounds, 0 corrupt: 100%|██████████| 767/767 00:00

AutoAnchor: 2.78 anchors/target, 0.994 Best Possible Recall (BPR). Current anchors are a good fit to dataset ✅
Plotting labels to runs/train-seg/exp4/labels.jpg...
Image sizes 640 train, 640 val
Using 0 dataloader workers
Logging results to runs/train-seg/exp4
Starting training for 300 epochs...

      Epoch    GPU_mem   box_loss   seg_loss   obj_loss   cls_loss  Instances       Size
      0/299      3.09G    0.08411    0.04014    0.02043          0          5        640: 100%|██████████| 115/115 01:17
                 Class     Images  Instances      Box(P          R      mAP50  mAP50-95)     Mask(P          R      mAP50  mAP50-95): 100%|██████████| 64/64 00:19
                   all        767        215      0.231      0.144     0.0901     0.0377      0.208       0.13      0.067      0.027

      Epoch    GPU_mem   box_loss   seg_loss   obj_loss   cls_loss  Instances       Size
      1/299      3.74G    0.06376    0.02859    0.01463          0          8        640: 100%|██████████| 115/115 01:12
                 Class     Images  Instances      Box(P          R      mAP50  mAP50-95)     Mask(P          R      mAP50  mAP50-95): 100%|██████████| 64/64 00:18
                   all        767        215      0.302      0.205      0.145     0.0623      0.282      0.167       0.11     0.0449

      Epoch    GPU_mem   box_loss   seg_loss   obj_loss   cls_loss  Instances       Size
      2/299      3.74G    0.05911    0.02605    0.01249          0          1        640: 100%|██████████| 115/115 01:12
                 Class     Images  Instances      Box(P          R      mAP50  mAP50-95)     Mask(P          R      mAP50  mAP50-95): 100%|██████████| 64/64 00:18
                   all        767        215      0.146      0.191     0.0664     0.0275      0.102      0.135       0.04     0.0152

      Epoch    GPU_mem   box_loss   seg_loss   obj_loss   cls_loss  Instances       Size
      3/299      3.74G    0.05821    0.02656      0.013          0          3        640: 100%|██████████| 115/115 01:11
                 Class     Images  Instances      Box(P          R      mAP50  mAP50-95)     Mask(P          R      mAP50  mAP50-95): 100%|██████████| 64/64 00:18
                   all        767        215      0.127      0.256     0.0634     0.0207      0.114      0.223     0.0468     0.0146

      Epoch    GPU_mem   box_loss   seg_loss   obj_loss   cls_loss  Instances       Size
      4/299      3.74G    0.05413    0.02566    0.01132          0          0        640:  78%|███████▊  | 90/115 00:57
Traceback (most recent call last):
  File "/home/jianming_ge/workplace/road_water_yolov5-7.0/segment/train.py", line 659, in <module>
    main(opt)
  File "/home/jianming_ge/workplace/road_water_yolov5-7.0/segment/train.py", line 555, in main
    train(opt.hyp, opt, device, callbacks)
  File "/home/jianming_ge/workplace/road_water_yolov5-7.0/segment/train.py", line 309, in train
    pred = model(imgs)  # forward
  File "/home/jianming_ge/miniconda3/envs/py39_torch1.10.1/lib/python3.9/site-packages/torch/nn/modules/module.py", line 1102, in _call_impl
    return forward_call(*input, **kwargs)
  File "/home/jianming_ge/miniconda3/envs/py39_torch1.10.1/lib/python3.9/site-packages/torch/nn/parallel/distributed.py", line 873, in forward
    if torch.is_grad_enabled() and self.reducer._rebuild_buckets():
RuntimeError: Expected to have finished reduction in the prior iteration before starting a new one. This error indicates that your module has parameters that were not used in producing loss. You can enable unused parameter detection by passing the keyword argument `find_unused_parameters=True` to `torch.nn.parallel.DistributedDataParallel`, and by
making sure all `forward` function outputs participate in calculating loss.
If you already have done the above, then the distributed data parallel module wasn't able to locate the output tensors in the return value of your module's `forward` function. Please include the loss function and the structure of the return value of `forward` of your module when reporting this issue (e.g. list, dict, iterable).
Parameter indices which did not receive grad for rank 0: 243 244 245 246 247 248 249 250 251
 In addition, you can set the environment variable TORCH_DISTRIBUTED_DEBUG to either INFO or DETAIL to print out information about which particular parameters did not receive gradient on this rank as part of this error
WARNING:torch.distributed.elastic.multiprocessing.api:Sending process 15743 closing signal SIGTERM
ERROR:torch.distributed.elastic.multiprocessing.api:failed (exitcode: 1) local_rank: 0 (pid: 15742) of binary: /home/jianming_ge/miniconda3/envs/py39_torch1.10.1/bin/python
Traceback (most recent call last):
  File "/home/jianming_ge/miniconda3/envs/py39_torch1.10.1/lib/python3.9/runpy.py", line 197, in _run_module_as_main
    return _run_code(code, main_globals, None,
  File "/home/jianming_ge/miniconda3/envs/py39_torch1.10.1/lib/python3.9/runpy.py", line 87, in _run_code
    exec(code, run_globals)
  File "/home/jianming_ge/miniconda3/envs/py39_torch1.10.1/lib/python3.9/site-packages/torch/distributed/launch.py", line 193, in <module>
    main()
  File "/home/jianming_ge/miniconda3/envs/py39_torch1.10.1/lib/python3.9/site-packages/torch/distributed/launch.py", line 189, in main
    launch(args)
  File "/home/jianming_ge/miniconda3/envs/py39_torch1.10.1/lib/python3.9/site-packages/torch/distributed/launch.py", line 174, in launch
    run(args)
  File "/home/jianming_ge/miniconda3/envs/py39_torch1.10.1/lib/python3.9/site-packages/torch/distributed/run.py", line 710, in run
    elastic_launch(
  File "/home/jianming_ge/miniconda3/envs/py39_torch1.10.1/lib/python3.9/site-packages/torch/distributed/launcher/api.py", line 131, in __call__
    return launch_agent(self._config, self._entrypoint, list(args))
  File "/home/jianming_ge/miniconda3/envs/py39_torch1.10.1/lib/python3.9/site-packages/torch/distributed/launcher/api.py", line 259, in launch_agent
    raise ChildFailedError(
torch.distributed.elastic.multiprocessing.errors.ChildFailedError:
============================================================
segment/train.py FAILED
------------------------------------------------------------
Failures:
  <NO_OTHER_FAILURES>
------------------------------------------------------------
Root Cause (first observed failure):
[0]:
  time      : 2023-04-27_18:44:32
  host      : localhost.localdomain
  rank      : 0 (local_rank: 0)
  exitcode  : 1 (pid: 15742)
  error_file: <N/A>
  traceback : To enable traceback see: https://pytorch.org/docs/stable/elastic/errors.html
九、另一个bug 20230509
train: WARNING ⚠️ /data_share/data_share/city_manager_20221017/water_street_20230509/images/726.jpg: corrupt JPEG restored and saved
train: WARNING ⚠️ /data_share/data_share/city_manager_20221017/water_street_20230509/images/730.jpg: corrupt JPEG restored and saved
train: WARNING ⚠️ /data_share/data_share/city_manager_20221017/water_street_20230509/images/732.jpg: corrupt JPEG restored and saved
train: WARNING ⚠️ /data_share/data_share/city_manager_20221017/water_street_20230509/images/734.jpg: corrupt JPEG restored and saved
train: WARNING ⚠️ /data_share/data_share/city_manager_20221017/water_street_20230509/images/736.jpg: corrupt JPEG restored and saved
train: WARNING ⚠️ /data_share/data_share/city_manager_20221017/water_street_20230509/images/740.jpg: corrupt JPEG restored and saved
train: WARNING ⚠️ /data_share/data_share/city_manager_20221017/water_street_20230509/images/742.jpg: corrupt JPEG restored and saved
train: WARNING ⚠️ /data_share/data_share/city_manager_20221017/water_street_20230509/images/744.jpg: corrupt JPEG restored and saved
train: WARNING ⚠️ /data_share/data_share/city_manager_20221017/water_street_20230509/images/748.jpg: corrupt JPEG restored and saved
train: WARNING ⚠️ /data_share/data_share/city_manager_20221017/water_street_20230509/images/750.jpg: corrupt JPEG restored and saved
train: WARNING ⚠️ /data_share/data_share/city_manager_20221017/water_street_20230509/images/752.jpg: corrupt JPEG restored and saved
train: WARNING ⚠️ /data_share/data_share/city_manager_20221017/water_street_20230509/images/754.jpg: corrupt JPEG restored and saved
train: WARNING ⚠️ /data_share/data_share/city_manager_20221017/water_street_20230509/images/756.jpg: corrupt JPEG restored and saved
train: WARNING ⚠️ /data_share/data_share/city_manager_20221017/water_street_20230509/images/760.jpg: corrupt JPEG restored and saved
train: WARNING ⚠️ /data_share/data_share/city_manager_20221017/water_street_20230509/images/762.jpg: corrupt JPEG restored and saved
train: WARNING ⚠️ /data_share/data_share/city_manager_20221017/water_street_20230509/images/766.jpg: corrupt JPEG restored and saved
train: WARNING ⚠️ /data_share/data_share/city_manager_20221017/water_street_20230509/images/768.jpg: corrupt JPEG restored and saved
train: WARNING ⚠️ /data_share/data_share/city_manager_20221017/water_street_20230509/images/772.jpg: corrupt JPEG restored and saved
train: WARNING ⚠️ /data_share/data_share/city_manager_20221017/water_street_20230509/images/776.jpg: corrupt JPEG restored and saved
train: WARNING ⚠️ /data_share/data_share/city_manager_20221017/water_street_20230509/images/780.jpg: corrupt JPEG restored and saved
train: WARNING ⚠️ /data_share/data_share/city_manager_20221017/water_street_20230509/images/782.jpg: corrupt JPEG restored and saved
train: WARNING ⚠️ /data_share/data_share/city_manager_20221017/water_street_20230509/images/784.jpg: corrupt JPEG restored and saved
train: WARNING ⚠️ /data_share/data_share/city_manager_20221017/water_street_20230509/images/790.jpg: corrupt JPEG restored and saved
train: WARNING ⚠️ /data_share/data_share/city_manager_20221017/water_street_20230509/images/792.jpg: corrupt JPEG restored and saved
train: WARNING ⚠️ /data_share/data_share/city_manager_20221017/water_street_20230509/images/794.jpg: corrupt JPEG restored and saved
train: WARNING ⚠️ /data_share/data_share/city_manager_20221017/water_street_20230509/images/800.jpg: corrupt JPEG restored and saved
train: WARNING ⚠️ /data_share/data_share/city_manager_20221017/water_street_20230509/images/802.jpg: corrupt JPEG restored and saved
train: WARNING ⚠️ /data_share/data_share/city_manager_20221017/water_street_20230509/images/804.jpg: corrupt JPEG restored and saved
train: WARNING ⚠️ /data_share/data_share/city_manager_20221017/water_street_20230509/images/808.jpg: corrupt JPEG restored and saved
应该是最近一次补充样本的数据集没处理好,还未找到原因。待定!查询了一下warning,不影响训练,但估计会影响训练效果,因为这个图片感觉没有读取成功,或者读取成功了。我也不太清楚,知道的大佬欢迎留言。
----------------------------20230721---------------------------
这个报错的代码找到了,那是因为它走到了这里:
ref:https://huggingface.co/spaces/nakamura196/yolov5-ndl-layout/blob/447b47ec77e6ea46fef0abba2594b11de7874676/ultralytics/yolov5/utils/datasets.py
 if im.format.lower() in ('jpg', 'jpeg'):
            with open(im_file, 'rb') as f:
                f.seek(-2, 2)
                if f.read() != b'\xff\xd9':  # corrupt JPEG
                    ImageOps.exif_transpose(Image.open(im_file)).save(im_file, 'JPEG', subsampling=0, quality=100)
                    msg = f'{prefix}WARNING: {im_file}: corrupt JPEG restored and saved'
这是训练另外一个模型的时候发现的错误,先把它记录下来,然后看如何修复。另外这个多卡训练没有报上面的错误,但是报了另外一个错误:
AutoAnchor: 6.24 anchors/target, 0.999 Best Possible Recall (BPR). Current anchors are a good fit to dataset ✅
Plotting labels to runs/train/exp3/labels.jpg...
Image sizes 640 train, 640 val
Using 32 dataloader workers
Logging results to runs/train/exp3
Starting training for 500 epochs...

      Epoch    GPU_mem   box_loss   obj_loss   cls_loss  Instances       Size
      0/499      7.48G     0.1133    0.02796    0.02854         64        640:   0%|          | 1/447 [00:04<33:41,  4.53s/it]Reducer buckets have been rebuilt in this iteration.
      0/499      7.54G      0.109    0.02788    0.02835         93        640:   4%|▎         | 16/447 [00:10<02:08,  3.34it/s]WARNING:torch.distributed.elastic.agent.server.api:Received 1 death signal, shutting down workers
WARNING:torch.distributed.elastic.multiprocessing.api:Sending process 9802 closing signal SIGHUP
WARNING:torch.distributed.elastic.multiprocessing.api:Sending process 9803 closing signal SIGHUP
Traceback (most recent call last):
  File "/home/jianming_ge/miniconda3/envs/py39_torch1.10.1/lib/python3.9/runpy.py", line 197, in _run_module_as_main
    return _run_code(code, main_globals, None,
  File "/home/jianming_ge/miniconda3/envs/py39_torch1.10.1/lib/python3.9/runpy.py", line 87, in _run_code
    exec(code, run_globals)
  File "/home/jianming_ge/miniconda3/envs/py39_torch1.10.1/lib/python3.9/site-packages/torch/distributed/launch.py", line 193, in <module>
    main()
  File "/home/jianming_ge/miniconda3/envs/py39_torch1.10.1/lib/python3.9/site-packages/torch/distributed/launch.py", line 189, in main
    launch(args)
  File "/home/jianming_ge/miniconda3/envs/py39_torch1.10.1/lib/python3.9/site-packages/torch/distributed/launch.py", line 174, in launch
    run(args)
  File "/home/jianming_ge/miniconda3/envs/py39_torch1.10.1/lib/python3.9/site-packages/torch/distributed/run.py", line 710, in run
    elastic_launch(
  File "/home/jianming_ge/miniconda3/envs/py39_torch1.10.1/lib/python3.9/site-packages/torch/distributed/launcher/api.py", line 131, in __call__
    return launch_agent(self._config, self._entrypoint, list(args))
  File "/home/jianming_ge/miniconda3/envs/py39_torch1.10.1/lib/python3.9/site-packages/torch/distributed/launcher/api.py", line 252, in launch_agent
    result = agent.run()
  File "/home/jianming_ge/miniconda3/envs/py39_torch1.10.1/lib/python3.9/site-packages/torch/distributed/elastic/metrics/api.py", line 125, in wrapper
    result = f(*args, **kwargs)
  File "/home/jianming_ge/miniconda3/envs/py39_torch1.10.1/lib/python3.9/site-packages/torch/distributed/elastic/agent/server/api.py", line 709, in run
    result = self._invoke_run(role)
  File "/home/jianming_ge/miniconda3/envs/py39_torch1.10.1/lib/python3.9/site-packages/torch/distributed/elastic/agent/server/api.py", line 843, in _invoke_run
    time.sleep(monitor_interval)
  File "/home/jianming_ge/miniconda3/envs/py39_torch1.10.1/lib/python3.9/site-packages/torch/distributed/elastic/multiprocessing/api.py", line 60, in _terminate_process_handler
    raise SignalException(f"Process {os.getpid()} got signal: {sigval}", sigval=sigval)
torch.distributed.elastic.multiprocessing.api.SignalException: Process 9751 got signal: 1
将batch_size 和 worker 调低后,就不报错了
python -m torch.distributed.launch --nproc_per_node=2 train.py --weights weights/yolov5m6_coco.pt --img 640 --epoch 500 --data fire_smoke.yaml --batch-size 24 --workers 8 --save-period 20
怀疑之前是因为显卡扛不住造成的,bs从36挑成24后,还占80%,90%呢。
训练完成,遇到了 early stop 挺好的 哈哈哈
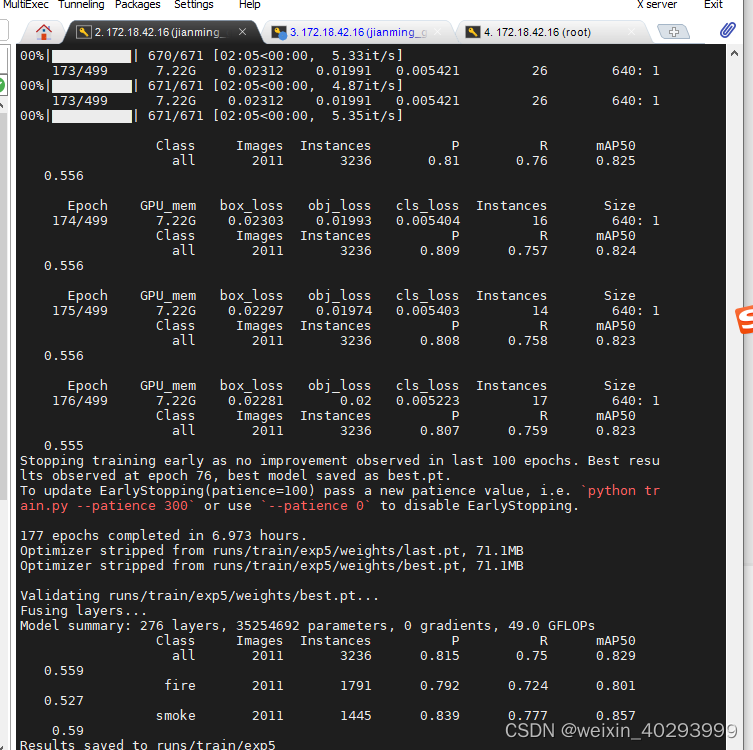
延伸问题:
- 我这里按 8:1:1 分了 train, val 和 test 数据集, 那他上面的P 0.815 R 0.75 是根据啥计算出来的? val or test
- 我是在yolov5m6.pt 上进行的ft, 那么用yolov5l6.pt 和 yolov8 会有什么不同么?
这篇文章太长了,我准备再换一篇来写。
总结
就先写到这里把,等着模型好了,看看效果继续写。
后面就是封装api了,已经有现成的框架和套路了,美滋滋。
再打一次广告,需要数据集私信我,but 有偿啊


 1588
1588

 被折叠的 条评论
为什么被折叠?
被折叠的 条评论
为什么被折叠?
 到【灌水乐园】发言


