


本文主要是利用python包spyne实现web server
在实现之前需要安装三个包:spyne,suds,zeep
pip3 install spyne
pip3 install suds-jurko
pip3 install zeep
注:这里不要pip install suds 这样安装完成后,suds对应的Client是python2版本的,与python3不兼容,导致报错。
Web Service 之 Python -- spyne学习
Server部分:
from spyne import Application, rpc, ServiceBase
from spyne import Integer, Unicode, Array, ComplexModel, Iterable, String
from spyne.protocol.soap import Soap11   #如果支持soap的协议需要用到Soap11
from spyne.server.wsgi import WsgiApplication    #可以创建一个wsgi服务器,做测试用
from wsgiref.simple_server import make_server
from spyne.protocol.json import JsonDocument  #如果开发传入传出为Json需要用到JsonDocument


class Person(ComplexModel):
    name = Unicode
    age = Integer


class HelloWorldService(ServiceBase):
    @rpc(Unicode, Integer, _returns=Iterable(Unicode))
    def say_hello(self, name, times):
        for i in range(times):
            yield "Hello %s, It's the %s time to meet you." % (name, i + 1)

    @rpc(Array(Person), _returns=Iterable(Unicode))
    def say_hello_1(self, persons):
        print('-------say_hello_1()--------')
        if not persons:
            yield 'None'
        for person in persons:
            print('name is : %s, age is %s.' % (person.name, person.age))
            yield 'name is : %s, age is %s.' % (person.name, person.age)


#定义API的输入输出类型
application = Application([HelloWorldService],
                          'spyne.examples.hello',
                          in_protocol=Soap11(validator='lxml'),
                          out_protocol=Soap11())

wsgi_application = WsgiApplication(application)

if __name__ == '__main__':
    import logging

    host = '127.0.0.1'
    port = 8000

    logging.info("listening to http://127.0.0.1:8000")
    logging.info("wsdl is at: http://localhost:8000/?wsdl")

    server = make_server(host, port, wsgi_application)
    server.serve_forever()
Client部分:
#!/usr/bin/python
# coding:utf-8

from suds.client import Client

host = '127.0.0.1'
port = 8000

client = Client('http://%s:%s/?wsdl' % (host, port))
# print(client)


persons = client.service.say_hello('zhangsan', 2)
print(persons)

print('-' * 20)
person = {}
person['name'] = 'zhangsan'
person['age'] = 23

persons = client.factory.create('PersonArray')
persons.Person.append(person)
persons.Person.append(person)
# print(persons)
person = client.service.say_hello_1(persons)
print(person)
返回结果:
(stringArray){
   string[] =
      "Hello zhangsan, It's the 1 time to meet you.",
      "Hello zhangsan, It's the 2 time to meet you.",
 }
--------------------
(stringArray){
   string[] =
      "name is : zhangsan, age is 23.",
      "name is : zhangsan, age is 23.",
}zeep——这里也是起一个测试作用
from zeep import Client

ip = '127.0.0.1'
port = 8000
client = Client("http://%s:%s/?wsdl" % (ip, port))
# print(client.wsdl.dump())

### say_hello
factory = client.type_factory("ns0")
r = client.service.say_hello('zhangsan', 3)
print(r)

## say_hello_1
factory = client.type_factory("ns0")
person = factory.Person(name='zhangsan', age=23)
persons = factory.PersonArray([person, person])
r = client.service.say_hello_1(persons)
print(r)
返回结果:
["Hello zhangsan, It's the 1 time to meet you.", "Hello zhangsan, It's the 2 time to meet you.", "Hello zhangsan, It's the 3 time to meet you."]
['name is : zhangsan, age is 23.', 'name is : zhangsan, age is 23.']
根据上面的学习,框架是固定的,主要是根据需求定义自己的视图函数,这里写一个简单的文档分页功能:
Server部分:
#!/usr/bin/python
# -*- coding: UTF-8 -*-
"""
@author:ZSW
@file:server_partnew.py
@time:2020/04/16
"""
#https://blog.csdn.net/shangguanyunluo123/article/details/79070064
#https://www.cnblogs.com/Evan-fanfan/p/10325447.html

from spyne import Application, rpc, ServiceBase
from spyne import Integer, Unicode, Array, ComplexModel, Iterable, String
from spyne.protocol.soap import Soap11   #如果支持soap的协议需要用到Soap11
from spyne.server.wsgi import WsgiApplication    #可以创建一个wsgi服务器,做测试用
from wsgiref.simple_server import make_server
from spyne.protocol.json import JsonDocument  #如果开发传入传出为Json需要用到JsonDocument
import csv
import pandas as pd
import json


#创建一个服务
class splitPageService(ServiceBase):
    #传入参数Unicode, Integer,由之前定义的
    @rpc(Integer, Integer, _returns=Unicode)
    #具体实现的视图函数 pagesize为每页多少条数据  pagenumber为第几页
    def splitPage(self, pagesize, pagenumber):
        excel_data = pd.read_excel("laws.xlsx")
        data_df = pd.DataFrame(excel_data)
        start = (pagenumber - 1) * pagesize
        end = pagenumber * pagesize
        df = data_df.loc[start:end]
        result = df.to_dict(orient='records')
        return json.dumps(result, ensure_ascii=False)
        # for res in  result:
        #     print(res)
        #     yield  json.dumps(res,ensure_ascii=False)
            # yield str(res)


#定义API的输入输出类型
application = Application([splitPageService],
                          'spyne.examples.hello',
                          in_protocol=Soap11(validator='lxml'),
                          out_protocol=Soap11()
                          )

# application = Application([splitPageService],
#                           'spyne.examples.hello',
#                           in_protocol=JsonDocument(validator='soft'),
#                           out_protocol=JsonDocument()
#                           )

wsgi_application = WsgiApplication(application)

if __name__ == '__main__':
    import logging

    host = '127.0.0.1'
    port = 8091

    logging.info("listening to http://127.0.0.1:8091")
    logging.info("wsdl is at: http://localhost:8091/?wsdl")

    server = make_server(host, port, wsgi_application)
    server.serve_forever()
服务端创建成功并启动,通过浏览器输入 http://localhost:8091/?wsdl,可看到接口wsdl,如下图示:
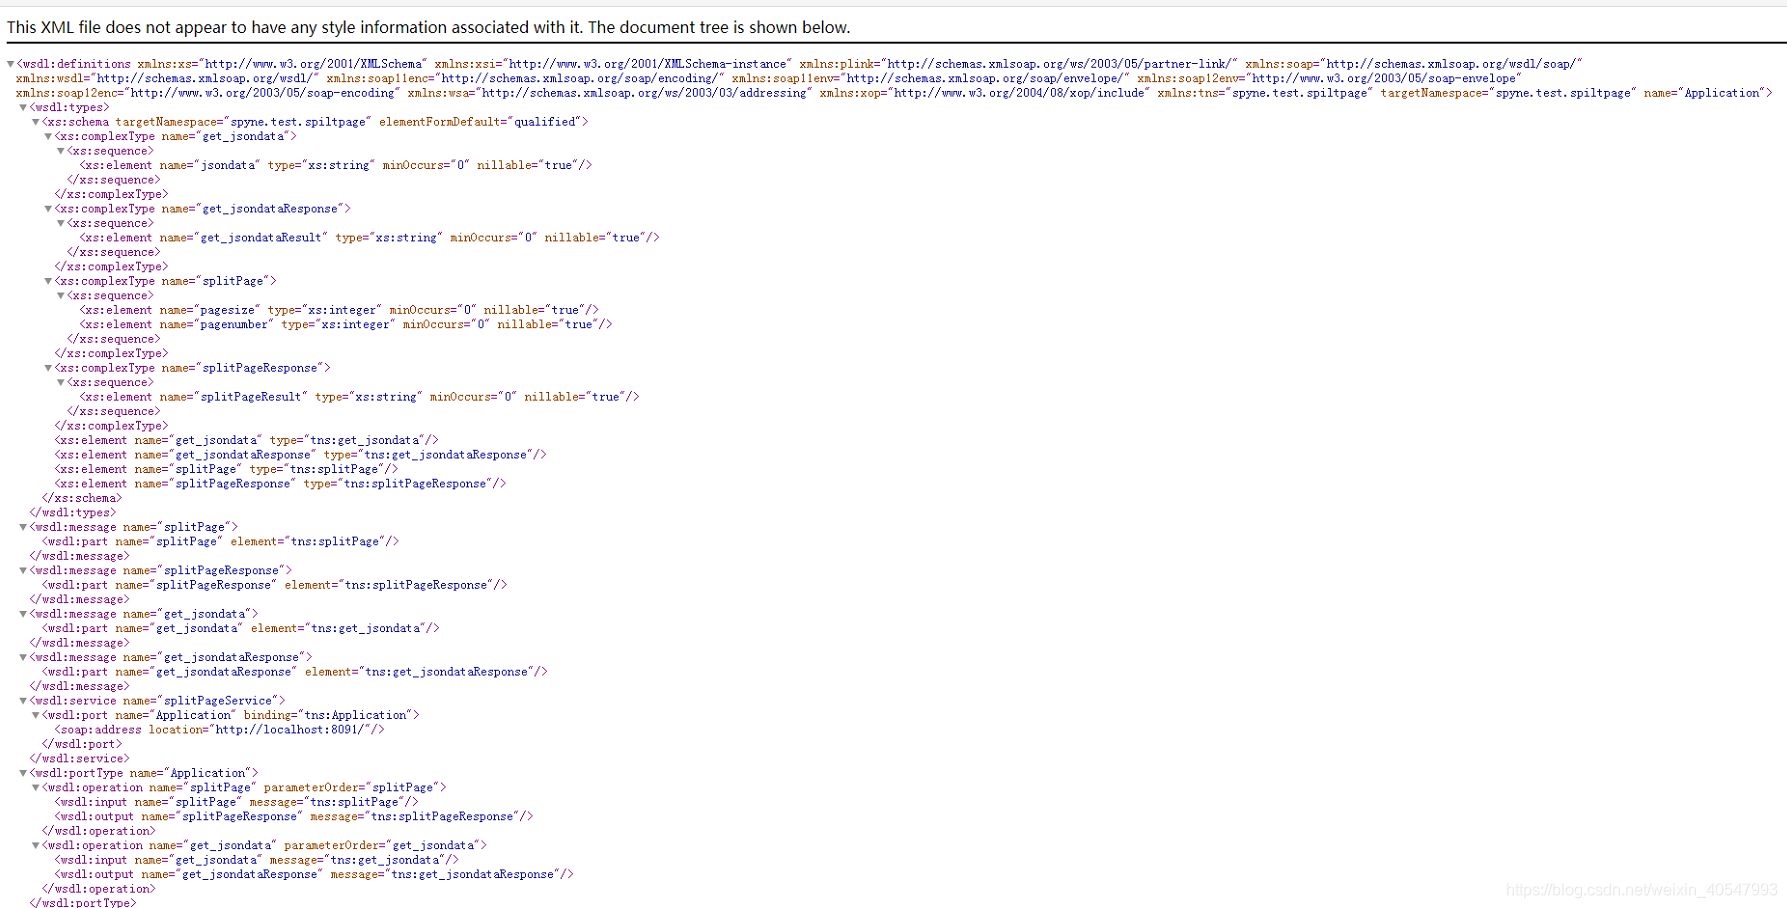
Client部分:对server部分进行测试
from suds.client import Client

host = '127.0.0.1'
port = 8091

client = Client('http://%s:%s/?wsdl' % (host, port))
# print(client)

res = client.service.splitPage(10, 2) #设置每页10条,查看第2页数据
print(res)
返回结果:

参考链接:https://blog.csdn.net/shangguanyunluo123/article/details/79070064
https://www.cnblogs.com/Evan-fanfan/p/10325447.html


 879
879


 被折叠的 条评论
为什么被折叠?
被折叠的 条评论
为什么被折叠?
 到【灌水乐园】发言


