


一、ES的基本操作
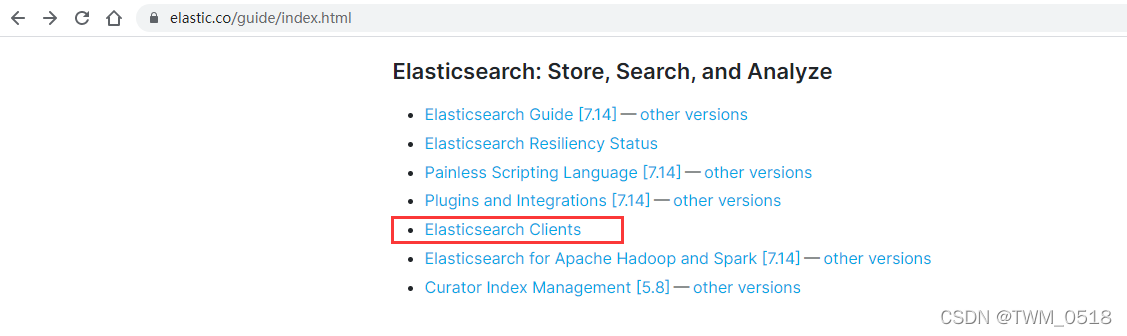
针对ES的操作,官方提供了很多种操作方式。
https://www.elastic.co/guide/index.html
在实际工作中使用ES的时候,如果想屏蔽语言的差异,建议使用REST API,这种兼容性比较好,但是个人感觉有的操作使用起来比较麻烦,需要拼接组装各种数据字符串。
针对Java程序员而言,还有一种选择是使用Java API,这种方式相对于REST API而言,代码量会大一些,但是代码层面看起来是比较清晰的。
下面在操作ES的时候,分别使用一下这两种方式:
使用REST API的方式操作ES
使用Java API的方式操作ES
二、使用REST API的方式操作ES
如果想要在Linux命令行中使用REST API操作ES,需要借助于CURL工具。
CURL是利用URL语法在命令行下工作的开源文件传输工具,使用CURL可以简单实现常见的get/post请求。
curl后面通过-X参数指定请求类型,通过-d指定要传递的参数。
1、索引库的操作(创建、删除)
(1)创建索引库:
curl -XPUT ‘http://bigdata01:9200/test/’
这里使用PUT或者POST都可以。
[root@bigdata01 soft]# curl  -XPUT 'http://bigdata01:9200/test/'
{"acknowledged":true,"shards_acknowledged":true,"index":"test"}
注意:索引库名称必须要全部小写,不能以_、 -、 +开头,也不能包含逗号。
错误示例:
[root@bigdata01 soft]# curl  -XPUT 'http://bigdata01:9200/_test/'     {"error":{"root_cause":[{"type":"invalid_index_name_exception","reason":"Invalid index name [_test], must not start with '_', '-', or '+'","index_uuid":"_na_","index":"_test"}],"type":"invalid_index_name_exception","reason":"Invalid index name [_test], must not start with '_', '-', or '+'","index_uuid":"_na_","index":"_test"},"status":400}
[root@bigdata01 soft]# curl  -XPUT 'http://bigdata01:9200/Test/'
{"error":{"root_cause":[{"type":"invalid_index_name_exception","reason":"Invalid index name [Test], must be lowercase","index_uuid":"_na_","index":"Test"}],"type":"invalid_index_name_exception","reason":"Invalid index name [Test], must be lowercase","index_uuid":"_na_","index":"Test"},"status":400}
(2)删除索引库:
[root@bigdata01 soft]# curl  -XDELETE 'http://bigdata01:9200/test/'
{"acknowledged":true}

注意:索引库可以提前创建,也可以在后期添加数据的时候直接指定一个不存在的索引库,ES默认会自动创建这个索引库。
手工创建索引库和自动创建索引库的区别就是,手工创建可以自定义索引库的分片数量。
(3)创建一个具有3个分片的索引库
下面创建一个具有3个分片的索引库。
[root@bigdata01 soft]# curl -H "Content-Type: application/json" -XPUT 'http://bigdata01:9200/test/' -d'{"settings":{"index.number_of_shards":3}}'
{"acknowledged":true,"shards_acknowledged":true,"index":"test"}
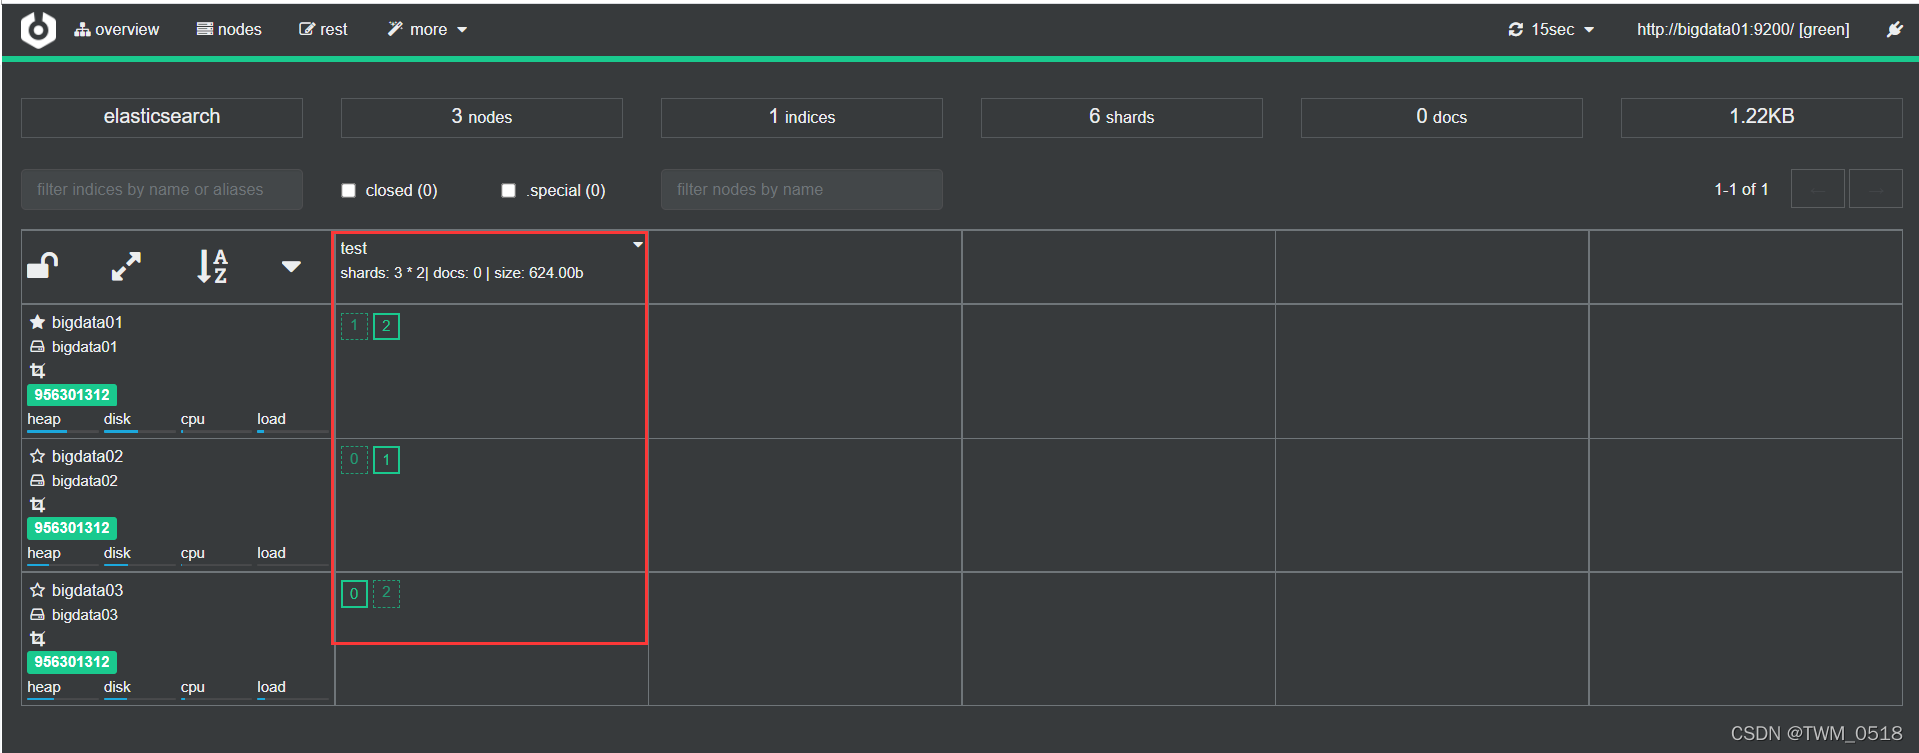
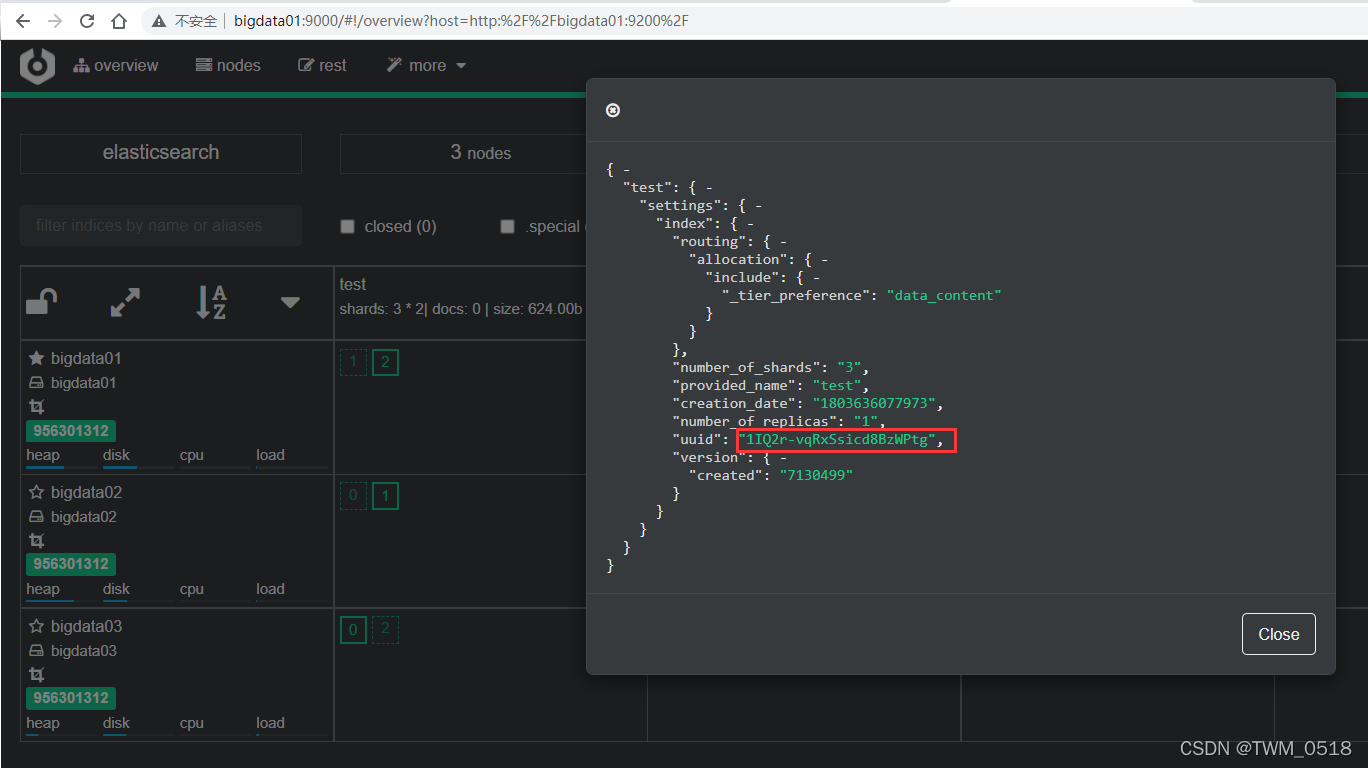
其中实线的框表示是主分片,虚线框是副本分片。
索引分片编号是从0开始的,并且索引分片在物理层面是存在的,可以到集群中查看一下,从界面中也看到test索引库的1号和2号分片是在bigdata01节点上的。

到bigdata01节点中看一下,ES中的所有数据都在ES的数据存储目录中,默认是在ES_HOME下的data目录里面:
[root@bigdata01 1IQ2r-vqRxSsicd8BzWPtg]# pwd
/data/soft/elasticsearch-7.13.4/data/nodes/0/indices/1IQ2r-vqRxSsicd8BzWPtg
[root@bigdata01 1IQ2r-vqRxSsicd8BzWPtg]# ll
total 0
drwxrwxr-x. 5 es es 49 Feb 26 18:01 1
drwxrwxr-x. 5 es es 49 Feb 26 18:01 2
drwxrwxr-x. 2 es es 24 Feb 26 18:01 _state
这里面的1IQ2r-vqRxSsicd8BzWPtg表示的是索引库的UUID。
4、索引的操作(增、删、改、查、Bulk批量操作)
(1)添加索引:
[root@bigdata01 soft]# curl -H "Content-Type: application/json" -XPOST 'http://bigdata01:9200/emp/_doc/1' -d '{"name":"tom","age":20}'
{"_index":"emp","_type":"_doc","_id":"1","_version":1,"result":"created","_shards":{"total":2,"successful":1,"failed":0},"_seq_no":0,"_primary_term":1}
注意:
1、这里emp索引库是不存在的,在使用的时候ES会自动创建,只不过索引分片数量默认是1。
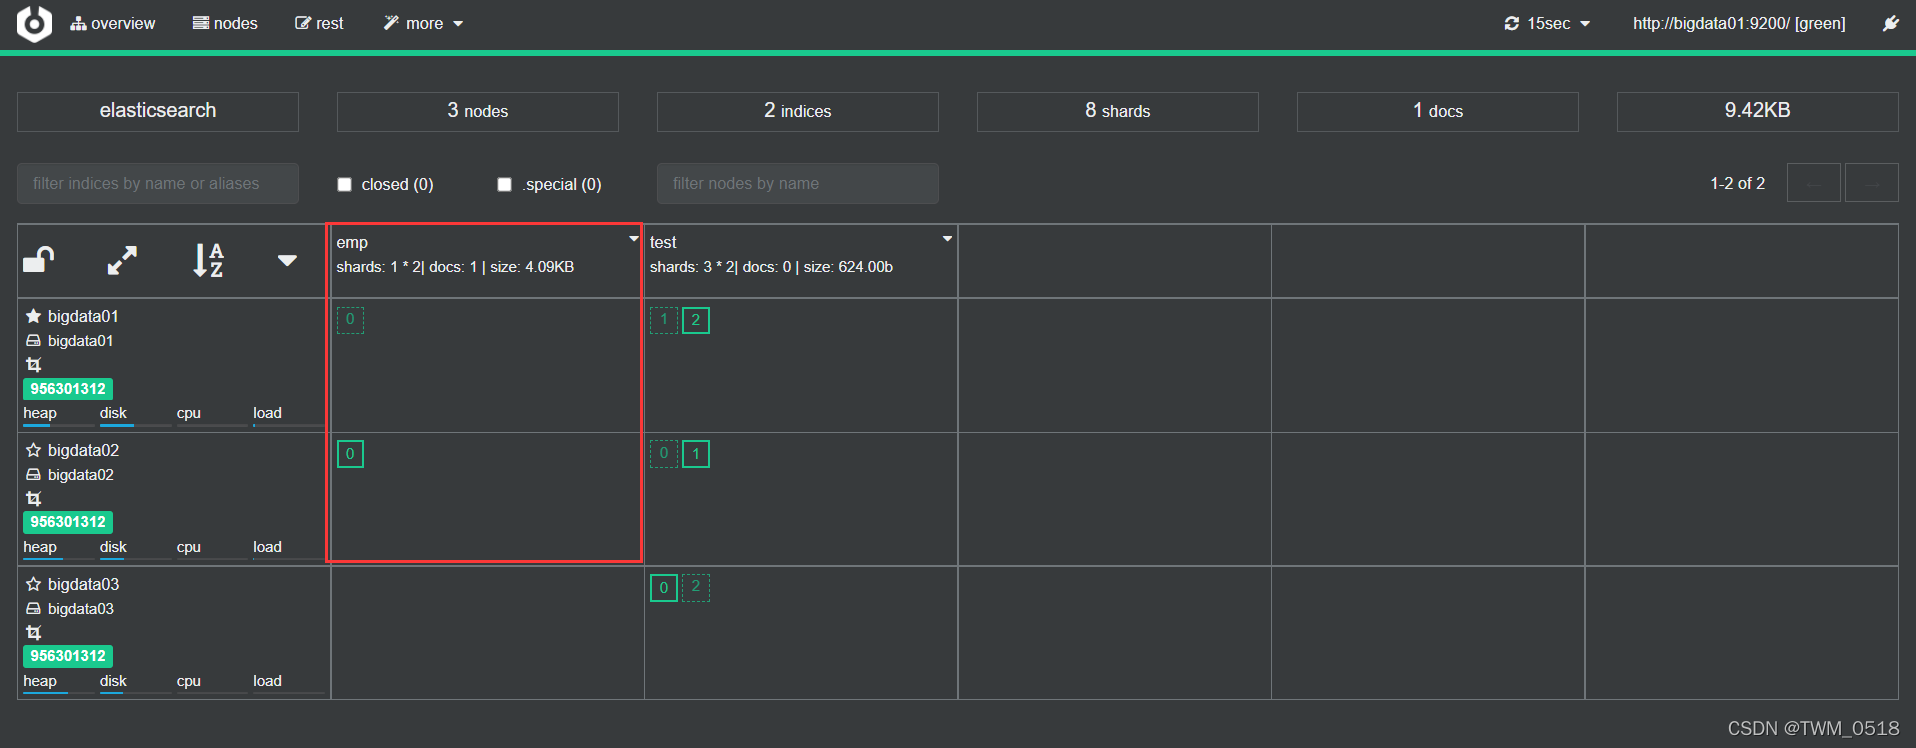
为了兼容之前的API,虽然ES现在取消了Type,但是API中Type的位置还是预留出来了,官方建议统一使用_doc 。
注意:在添加索引的时候,如果没有指定数据的ID,那么ES会自动生成一个随机的唯一ID。
[root@bigdata01 soft]# curl -H "Content-Type: application/json" -XPOST 'http://bigdata01:9200/emp/_doc' -d '{"name":"jack","age":30}'
{"_index":"emp","_type":"_doc","_id":"EFND8aMBpApLBooiIWda","_version":1,"result":"created","_shards":{"total":2,"successful":2,"failed":0},"_seq_no":1,"_primary_term":1}
(2)查询索引:
查看id=1的索引数据。
[root@bigdata01 soft]# curl -XGET 'http://bigdata01:9200/emp/_doc/1?pretty'
{
  "_index" : "emp",
  "_type" : "_doc",
  "_id" : "1",
  "_version" : 1,
  "_seq_no" : 0,
  "_primary_term" : 1,
  "found" : true,
  "_source" : {
    "name" : "tom",
    "age" : 20
  }
}
只获取部分字段内容。
[root@bigdata01 soft]# curl -XGET 'http://bigdata01:9200/emp/_doc/1?_source=name&pretty'
{
  "_index" : "emp",
  "_type" : "_doc",
  "_id" : "1",
  "_version" : 1,
  "_seq_no" : 0,
  "_primary_term" : 1,
  "found" : true,
  "_source" : {
    "name" : "tom"
  }
}
[root@bigdata01 soft]# curl -XGET 'http://bigdata01:9200/emp/_doc/1?_source=name,age&pretty'
{
  "_index" : "emp",
  "_type" : "_doc",
  "_id" : "1",
  "_version" : 1,
  "_seq_no" : 0,
  "_primary_term" : 1,
  "found" : true,
  "_source" : {
    "name" : "tom",
    "age" : 20
  }
}
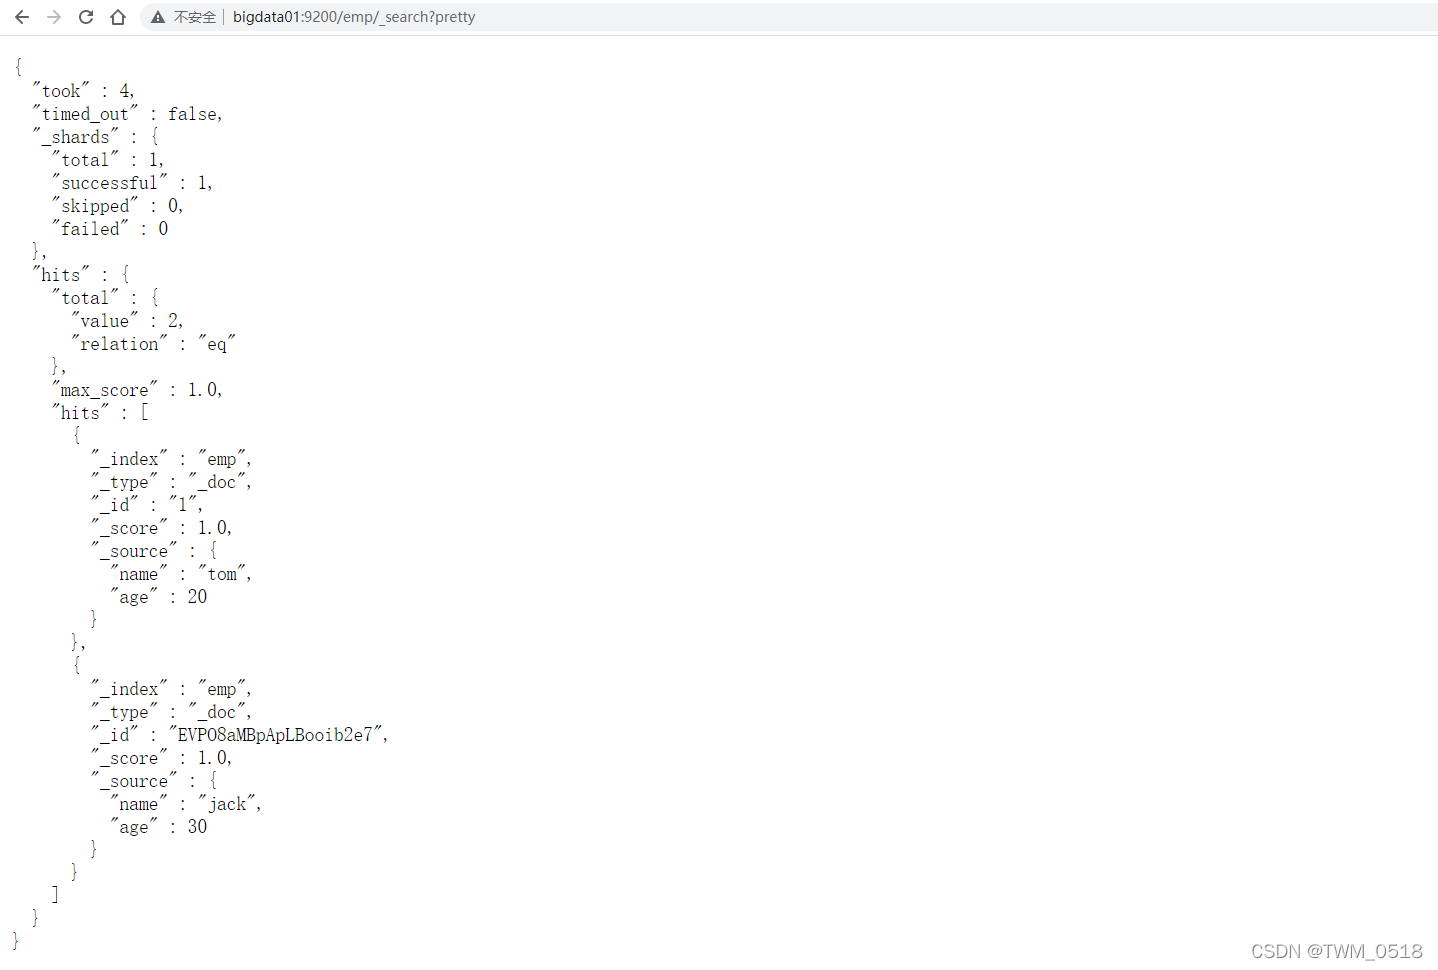
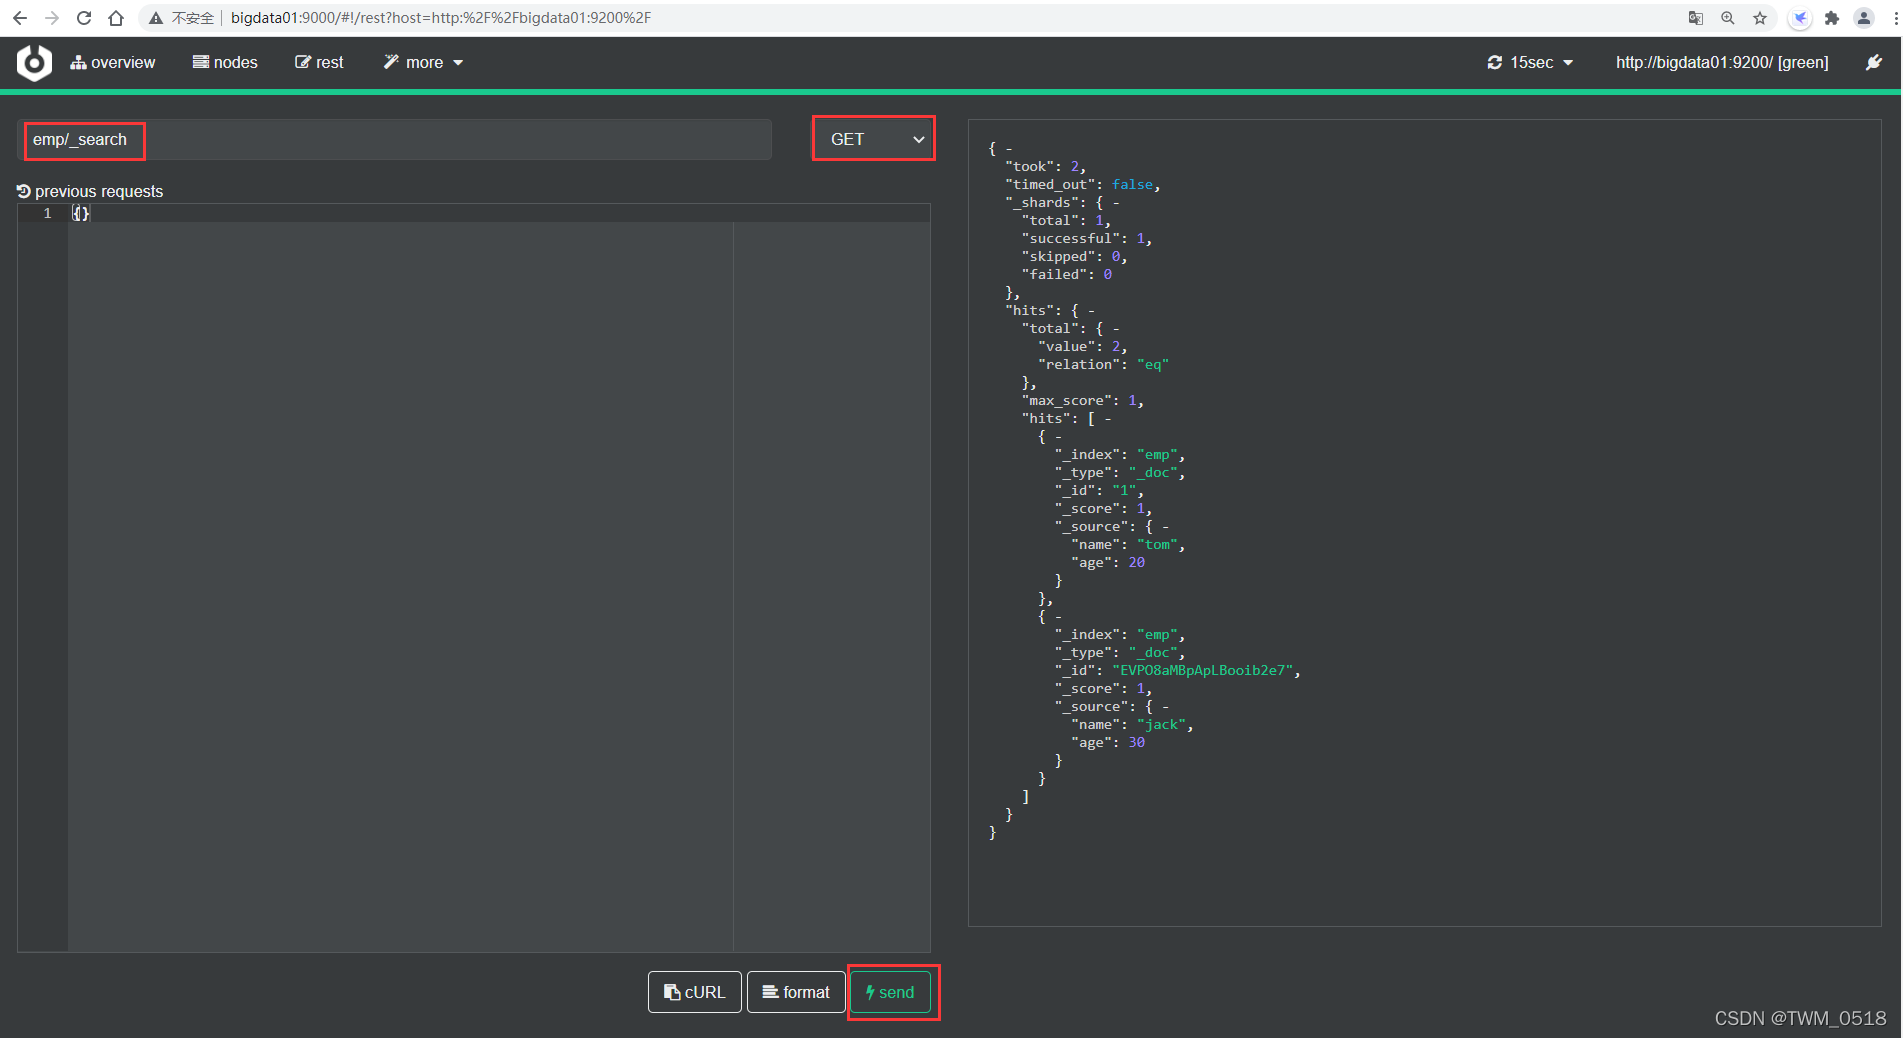
(3)查询指定索引库中所有数据
[root@bigdata01 soft]# curl -XGET 'http://bigdata01:9200/emp/_search?pretty'
{
  "took" : 2,
  "timed_out" : false,
  "_shards" : {
    "total" : 1,
    "successful" : 1,
    "skipped" : 0,
    "failed" : 0
  },
  "hits" : {
    "total" : {
      "value" : 2,
      "relation" : "eq"
    },
    "max_score" : 1.0,
    "hits" : [
      {
        "_index" : "emp",
        "_type" : "_doc",
        "_id" : "1",
        "_score" : 1.0,
        "_source" : {
          "name" : "tom",
          "age" : 20
        }
      },
      {
        "_index" : "emp",
        "_type" : "_doc",
        "_id" : "EVPO8aMBpApLBooib2e7",
        "_score" : 1.0,
        "_source" : {
          "name" : "jack",
          "age" : 30
        }
      }
    ]
  }
}
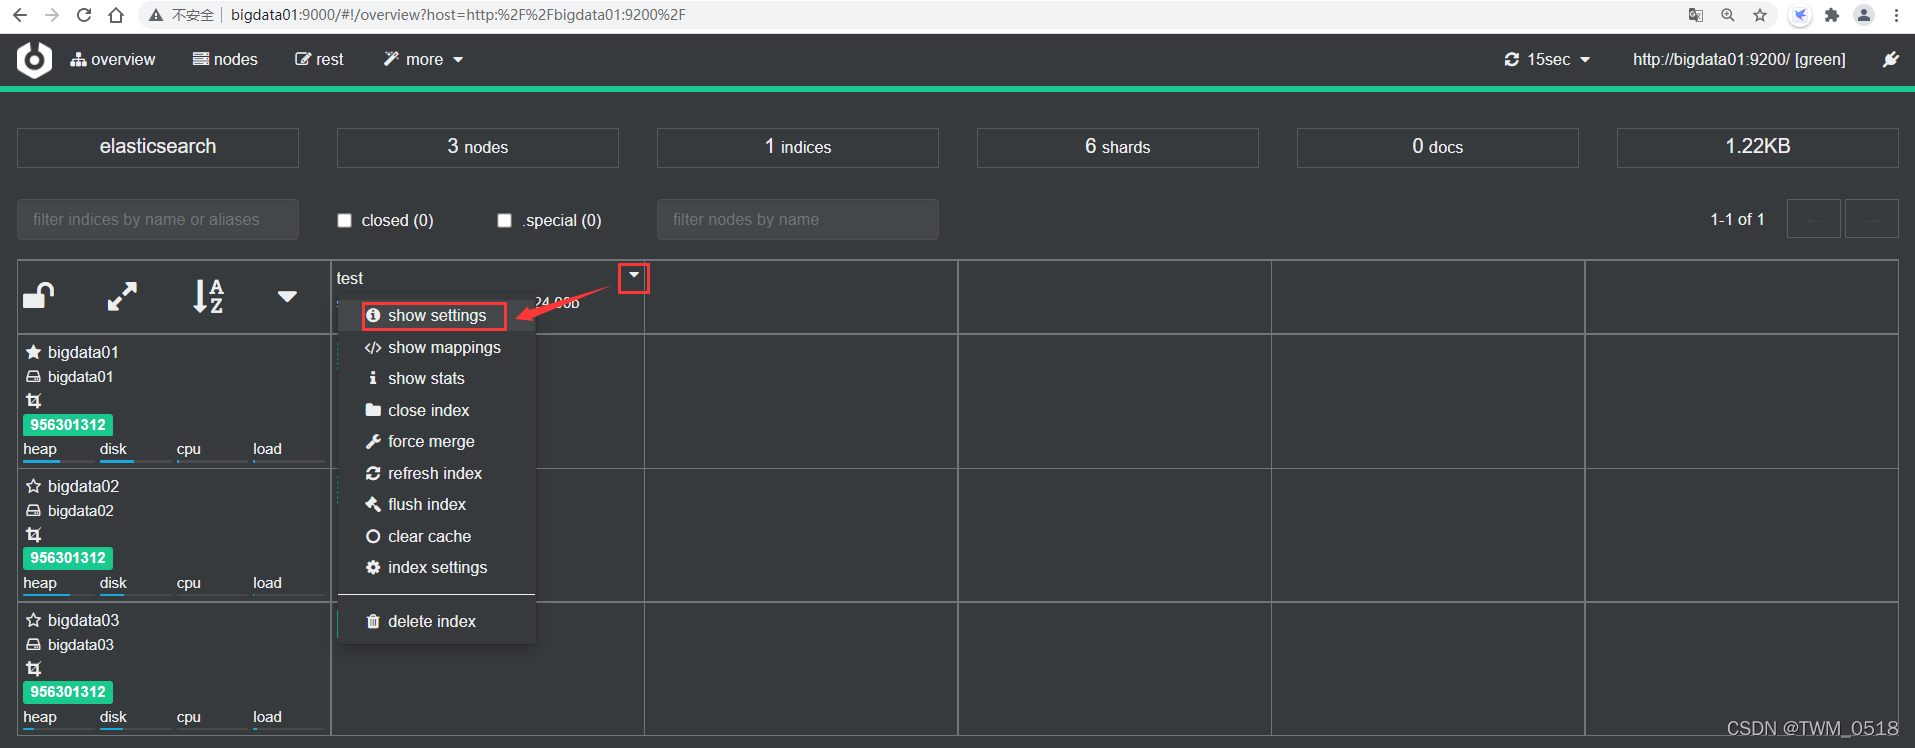
注意:针对这种查询操作,可以在浏览器里面执行,或者在cerebo中查询都是可以的,看起来更加清晰。
(4)更新索引
可以分为全部更新和局部更新
全部更新:同添加索引,如果指定id的索引数据(文档)已经存在,则执行更新操作。
注意:执行更新操作的时候,ES首先将旧的文标记为删除状态,然后添加新的文档
旧的文档不会立即消失,但是你也无法访问,ES会在你继续添加更多数据的时候在后台清理已经标记为删除状态的文档。
局部更新:可以添加新字段或者更新已有字段,必须使用POST请求。
[root@bigdata01 soft]# curl -H "Content-Type: application/json" -XPOST 'http://bigdata01:9200/emp/_doc/1/_update' -d '{"doc":{"age":25}}'
{"_index":"emp","_type":"_doc","_id":"1","_version":2,"result":"updated","_shards":{"total":2,"successful":2,"failed":0},"_seq_no":2,"_primary_term":1}
(5)删除索引:
删除id=1的索引数据。
[root@bigdata01 soft]# curl -XDELETE 'http://bigdata01:9200/emp/_doc/1'
{"_index":"emp","_type":"_doc","_id":"1","_version":3,"result":"deleted","_shards":{"total":2,"successful":2,"failed":0},"_seq_no":3,"_primary_term":1}

[root@bigdata01 soft]# curl -XDELETE 'http://bigdata01:9200/emp/_doc/1'
{"_index":"emp","_type":"_doc","_id":"1","_version":4,"result":"not_found","_shards":{"total":2,"successful":2,"failed":0},"_seq_no":4,"_primary_term":1}
如果索引数据(文档)存在,ES返回的数据中,result属性值为deleted,_version(版本)属性的值+1。
如果索引数据不存在,ES返回的数据中,result属性值为not_found,但是_version属性的值依然会+1,这属于ES的版本控制系统,它保证了我们在多个节点间的不同操作的顺序都被正确标记了。
对于索引数据的每次写操作,无论是 index,update 还是 delete,ES都会将_version增加 1。该增加是原子的,并且保证在操作成功返回时会发生。
注意:删除一条索引数据(文档)也不会立即生效,它只是被标记成已删除状态。ES将会在你之后添加更多索引数据的时候才会在后台清理标记为删除状态的内容。
5、Bulk批量操作
Bulk API可以帮助我们同时执行多个请求,提高效率。
格式:
{ action: { metadata }}
{ request body }
解释:
action:index/create/update/delete
metadata:_index,_type,_id
request body:_source(删除操作不需要)
create 和index的区别:如果数据存在,使用create操作失败,会提示文档已经存在,使用index则可以成功执行。
下面来看一个案例,假设在MySQL中有一批数据,首先需要从MySQL中把数据读取出来,然后将数据转化为Bulk需要的数据格式。
在这直接手工生成Bulk需要的数据格式。
[root@bigdata01 elasticsearch-7.13.4]# vi request
{ "index" : { "_index" : "test", "_type" : "_doc", "_id" : "1" } }
{ "field1" : "value1" }
{ "index" : { "_index" : "test", "_type" : "_doc", "_id" : "2" } }
{ "field1" : "value1" }
{ "delete" : { "_index" : "test", "_type" : "_doc", "_id" : "2" } }
{ "create" : { "_index" : "test", "_type" : "_doc", "_id" : "3" } }
{ "field1" : "value1" }
{ "update" : {"_index" : "test", "_type" : "_doc","_id" : "1" } }
{ "doc" : {"field2" : "value2"} }
6、执行Bulk API
[root@bigdata01 elasticsearch-7.13.4]# curl -H "Content-Type: application/json"  -XPUT 'http://bigdata01:9200/test/_doc/_bulk' --data-binary @request
{"took":167,"errors":false,"items":[{"index":{"_index":"test","_type":"_doc","_id":"1","_version":1,"result":"created","_shards":{"total":2,"successful":2,"failed":0},"_seq_no":0,"_primary_term":1,"status":201}},{"index":{"_index":"test","_type":"_doc","_id":"2","_version":1,"result":"created","_shards":{"total":2,"successful":2,"failed":0},"_seq_no":0,"_primary_term":1,"status":201}},{"delete":{"_index":"test","_type":"_doc","_id":"2","_version":2,"result":"deleted","_shards":{"total":2,"successful":2,"failed":0},"_seq_no":1,"_primary_term":1,"status":200}},{"create":{"_index":"test","_type":"_doc","_id":"3","_version":1,"result":"created","_shards":{"total":2,"successful":2,"failed":0},"_seq_no":2,"_primary_term":1,"status":201}},{"update":{"_index":"test","_type":"_doc","_id":"1","_version":2,"result":"updated","_shards":{"total":2,"successful":2,"failed":0},"_seq_no":1,"_primary_term":1,"status":200}}]}
查看结果:
[root@bigdata01 elasticsearch-7.13.4]# curl -XGET 'http://bigdata01:9200/test/_search?pretty'
{
  "took" : 6,
  "timed_out" : false,
  "_shards" : {
    "total" : 3,
    "successful" : 3,
    "skipped" : 0,
    "failed" : 0
  },
  "hits" : {
    "total" : {
      "value" : 2,
      "relation" : "eq"
    },
    "max_score" : 1.0,
    "hits" : [
      {
        "_index" : "test",
        "_type" : "_doc",
        "_id" : "3",
        "_score" : 1.0,
        "_source" : {
          "field1" : "value1"
        }
      },
      {
        "_index" : "test",
        "_type" : "_doc",
        "_id" : "1",
        "_score" : 1.0,
        "_source" : {
          "field1" : "value1",
          "field2" : "value2"
        }
      }
    ]
  }
}
Bulk一次最大可以处理多少数据量?
Bulk会把将要处理的数据加载到内存中,所以数据量是有限制的,最佳的数据量不是一个确定的数值,它取决于集群硬件,文档大小、文档复杂性,索引以及ES集群的负载。
一般建议是1000-5000个文档,如果文档很大,可以适当减少,文档总大小建议是5-15MB,默认不能超过100M。
如果想要修改最大限制大小,可以在ES的配置文件中修改http.max_content_length: 100mb,但是不建议,因为太大的话Bulk操作也会慢。
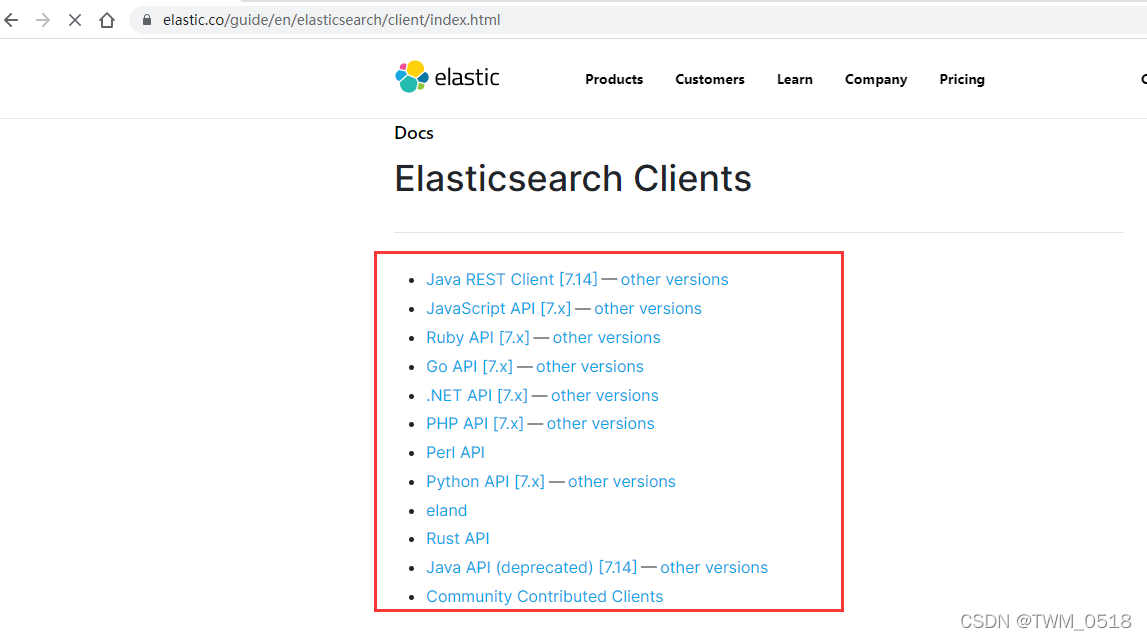
三、使用Java API的方式操作ES
针对Java API,目前ES提供了两个Java REST Client版本:
1、Java Low Level REST Client:
低级别的REST客户端,通过HTTP与集群交互,用户需自己组装请求JSON串,以及解析响应JSON串。兼容所有Elasticsearch版本。
这种方式其实就相当于使用Java对前面讲的REST API做了一层简单的封装,前面我们是使用的CURL这个工具执行的,现在是使用Java代码模拟执行HTTP请求了。
2、Java High Level REST Client:
高级别的REST客户端,基于低级别的REST客户端进行了封装,增加了组装请求JSON串、解析响应JSON串等相关API,开发代码使用的ES版本需要和集群中的ES版本一致,否则会有版本冲突问题。
这种方式是从ES 6.0版本开始加入的,目的是以Java面向对象的方式进行请求、响应处理。
高级别的REST客户端会兼容高版本的ES集群,例如:使用ES7.0版本开发的代码可以和任何7.x版本的ES集群交互。
如果ES集群后期升级到了8.x版本,那么也要升级之前基于ES 7.0版本开发的代码。
如果考虑到代码后期的兼容性,建议使用Java Low Level REST Client。
如果考虑到易用性,建议使用Java High Level REST Client。
在这我们使用Java High Level REST Client。
创建maven项目:db_elasticsearch
创建包:com.imooc.es
在pom.xml文件中添加ES的依赖和日志的依赖。
<dependency>
    <groupId>org.elasticsearch.client</groupId>
    <artifactId>elasticsearch-rest-high-level-client</artifactId>
<version>7.13.4</version>
</dependency>
<dependency>
    <groupId>org.apache.logging.log4j</groupId>
    <artifactId>log4j-core</artifactId>
    <version>2.14.1</version>
</dependency>
在resources目录下添加log4j2.properties。
appender.console.type = Console
appender.console.name = console
appender.console.layout.type = PatternLayout
appender.console.layout.pattern = [%d{ISO8601}][%-5p][%-25c] %marker%m%n

rootLogger.level = info
rootLogger.appenderRef.console.ref = console
1、索引库的操作(创建、删除)
package com.imooc.es;


import org.apache.http.HttpHost;
import org.elasticsearch.action.admin.indices.delete.DeleteIndexRequest;
import org.elasticsearch.client.RequestOptions;
import org.elasticsearch.client.RestClient;
import org.elasticsearch.client.RestHighLevelClient;
import org.elasticsearch.client.indices.CreateIndexRequest;
import org.elasticsearch.common.settings.Settings;

import java.io.IOException;

/**
 * 针对ES中索引库的操作
 * 1:创建索引库
 * 2:删除索引库
 *
 */
public class EsIndexOp {
    public static void main(String[] args) throws Exception{
        //获取RestClient连接
        RestHighLevelClient client = new RestHighLevelClient(
                RestClient.builder(
                        new HttpHost("bigdata01", 9200, "http"),
                        new HttpHost("bigdata02", 9200, "http"),
                        new HttpHost("bigdata03", 9200, "http")));

        //创建索引库
        //createIndex(client);

        //删除索引库
        //deleteIndex(client);


        //关闭连接
        client.close();
    }


    private static void deleteIndex(RestHighLevelClient client) throws IOException {
        DeleteIndexRequest deleteRequest = new DeleteIndexRequest("java_test");
        //执行
        client.indices().delete(deleteRequest, RequestOptions.DEFAULT);
    }


    private static void createIndex(RestHighLevelClient client) throws IOException {
        CreateIndexRequest createRequest = new CreateIndexRequest("java_test");
        //指定索引库的配置信息
        createRequest.settings(Settings.builder()
                .put("index.number_of_shards", 3)//指定分片个数
        );

        //执行
        client.indices().create(createRequest, RequestOptions.DEFAULT);
    }

}
执行代码的时候会有一个警告信息,提示ES集群没有开启权限校验机制,其实在企业中只要在运维层面控制好了ES集群IP和端口的访问其实就足够了。
2、索引的操作(增、删、改、查、Bulk批量操作)
package com.imooc.es;

import org.apache.commons.logging.LogFactory;
import org.apache.http.HttpHost;
import org.apache.logging.log4j.LogManager;
import org.apache.logging.log4j.Logger;
import org.elasticsearch.action.bulk.BulkItemResponse;
import org.elasticsearch.action.bulk.BulkRequest;
import org.elasticsearch.action.bulk.BulkResponse;
import org.elasticsearch.action.delete.DeleteRequest;
import org.elasticsearch.action.get.GetRequest;
import org.elasticsearch.action.get.GetResponse;
import org.elasticsearch.action.index.IndexRequest;
import org.elasticsearch.action.update.UpdateRequest;
import org.elasticsearch.client.RequestOptions;
import org.elasticsearch.client.RestClient;
import org.elasticsearch.client.RestHighLevelClient;
import org.elasticsearch.common.Strings;
import org.elasticsearch.common.xcontent.XContentType;
import org.elasticsearch.search.fetch.subphase.FetchSourceContext;

import java.io.IOException;
import java.util.HashMap;
import java.util.Map;

/**
 * 针对ES中索引数据的操作
 * 增删改查
 *
 */
public class EsDataOp {
    private static Logger logger = LogManager.getLogger(EsDataOp.class);

    public static void main(String[] args) throws Exception{
        //获取RestClient连接
        RestHighLevelClient client = new RestHighLevelClient(
                RestClient.builder(
                        new HttpHost("bigdata01", 9200, "http"),
                        new HttpHost("bigdata02", 9200, "http"),
                        new HttpHost("bigdata03", 9200, "http")));

        //创建索引
        //addIndexByJson(client);
        //addIndexByMap(client);

        //查询索引
        //getIndex(client);
        //getIndexByFiled(client);

        //更新索引
        //注意:可以使用创建索引直接完整更新已存在的数据
        //updateIndexByPart(client);//局部更新

        //删除索引
        //deleteIndex(client);

        //Bulk批量操作
        //bulkIndex(client);

        //关闭连接
        client.close();
    }

    private static void bulkIndex(RestHighLevelClient client) throws IOException {
        BulkRequest request = new BulkRequest();
        request.add(new IndexRequest("emp").id("20")
                .source(XContentType.JSON,"field1", "value1","field2","value2"));
        request.add(new DeleteRequest("emp", "10"));//id为10的数据不存在,但是执行删除是不会报错的
        request.add(new UpdateRequest("emp", "11")
                .doc(XContentType.JSON,"age", 19));
        request.add(new UpdateRequest("emp", "12")//id为12的数据不存在,这一条命令在执行的时候会失败
                .doc(XContentType.JSON,"age", 19));
        //执行
        BulkResponse bulkResponse = client.bulk(request, RequestOptions.DEFAULT);
        //如果Bulk中的个别语句出错不会导致整个Bulk执行失败,所以可以在这里判断一下是否有返回执行失败的信息
        for (BulkItemResponse bulkItemResponse : bulkResponse) {
            if (bulkItemResponse.isFailed()) {
                BulkItemResponse.Failure failure = bulkItemResponse.getFailure();
                logger.error("Bulk中出现了异常:"+failure);
            }
        }
    }

    private static void deleteIndex(RestHighLevelClient client) throws IOException {
        DeleteRequest request = new DeleteRequest("emp", "10");
        //执行
        client.delete(request, RequestOptions.DEFAULT);
    }

    private static void updateIndexByPart(RestHighLevelClient client) throws IOException {
        UpdateRequest request = new UpdateRequest("emp", "10");
        String jsonString = "{\"age\":23}";
        request.doc(jsonString, XContentType.JSON);
        //执行
        client.update(request, RequestOptions.DEFAULT);
    }

    private static void getIndexByFiled(RestHighLevelClient client) throws IOException {
        GetRequest request = new GetRequest("emp", "10");
        //只查询部分字段
        String[] includes = new String[]{"name"};//指定包含哪些字段
        String[] excludes = Strings.EMPTY_ARRAY;//指定多滤掉哪些字段
        FetchSourceContext fetchSourceContext = new FetchSourceContext(true, includes, excludes);
        request.fetchSourceContext(fetchSourceContext);
        //执行
        GetResponse response = client.get(request, RequestOptions.DEFAULT);
        //通过response获取index、id、文档详细内容(source)
        String index = response.getIndex();
        String id = response.getId();
        if(response.isExists()){//如果没有查询到文档数据,则isExists返回false
            //获取json字符串格式的文档结果
            String sourceAsString = response.getSourceAsString();
            System.out.println(sourceAsString);
            //获取map格式的文档结果
            Map<String, Object> sourceAsMap = response.getSourceAsMap();
            System.out.println(sourceAsMap);
        }else{
            logger.warn("没有查询到索引库{}中id为{}的文档!",index,id);
        }
    }

    private static void getIndex(RestHighLevelClient client) throws IOException {
        GetRequest request = new GetRequest("emp", "10");
        //执行
        GetResponse response = client.get(request, RequestOptions.DEFAULT);
        //通过response获取index、id、文档详细内容(source)
        String index = response.getIndex();
        String id = response.getId();
        if(response.isExists()){//如果没有查询到文档数据,则isExists返回false
            //获取json字符串格式的文档结果
            String sourceAsString = response.getSourceAsString();
            System.out.println(sourceAsString);
            //获取map格式的文档结果
            Map<String, Object> sourceAsMap = response.getSourceAsMap();
            System.out.println(sourceAsMap);
        }else{
            logger.warn("没有查询到索引库{}中id为{}的文档!",index,id);
        }
    }

    private static void addIndexByMap(RestHighLevelClient client) throws IOException {
        IndexRequest request = new IndexRequest("emp");
        request.id("11");
        HashMap<String, Object> jsonMap = new HashMap<String, Object>();
        jsonMap.put("name", "tom");
        jsonMap.put("age", 17);
        request.source(jsonMap);
        //执行
        client.index(request, RequestOptions.DEFAULT);
    }

    private static void addIndexByJson(RestHighLevelClient client) throws IOException {
        IndexRequest request = new IndexRequest("emp");
        request.id("10");
        String jsonString = "{" +
                "\"name\":\"jessic\"," +
                "\"age\":20" +
                "}";
        request.source(jsonString, XContentType.JSON);
        //执行
        client.index(request, RequestOptions.DEFAULT);
    }
}


 3万+
3万+


 被折叠的 条评论
为什么被折叠?
被折叠的 条评论
为什么被折叠?
 到【灌水乐园】发言


