


线程的创建一般有4种形式,即:
1.继承Thread类并重写run()方法
2.实现Runnable接口并重写run()方法
3.实现Callable接口并重写call()方法
4.通过线程池创建
本文主要回顾前三种创建方法,线程池的使用会单写一篇
1.继承Thread类
首先我们定义一个继承了Thread类的MyThread
class MyThread extends Thread {
    private int value = 5;
    @Override
    public void run(){
        System.out.println(currentThread().getName()+" value is "+--value);
    }
}
然后我们通过使用实例化MyThread的方式开启线程
    public static void main(String[] args)  {
        MyThread test0 = new MyThread();//新建MyThread实例
        MyThread test1 = new MyThread();//新建MyThread实例
        MyThread test2 = new MyThread();//新建MyThread实例
        test0.start();//运行线程
        test1.start();//运行线程
        test2.start();//运行线程
    }
我们重写run()方法之后需要用start()方法开始线程,start()方法通知JVM来调用当前线程的run()方法。要注意的是,一个线程不可以调用两次start()——It is never legal to start a thread more than once.In particular, a thread may not be restarted once it has completed execution.
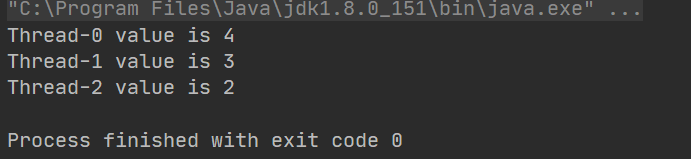
输出结果:

可以看到我们线程的默认名字是Thread-n,三个线程的value都是4,说明他们操作的是各自的实例方法。
下面我们在用public Thread(Runnable target)的方法开启线程
    public static void main(String[] args)  {
        MyThread test = new MyThread();//新建MyThread实例
        Thread thread0 = new Thread(test);//通过带参Thread构造函数创建线程,参数test是我们继承了Thread的MyThread
        Thread thread1 = new Thread(test);
        Thread thread2 = new Thread(test);
        test.start();
        thread0.start();//运行线程
        thread1.start();
        thread2.start();
    }
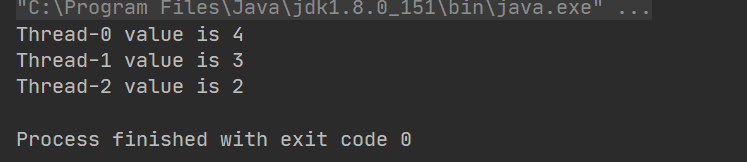
输出结果:

可以看到我们创建的线程在启动时,操作的都是同一个实例的run()方法,也就是test实例的方法,所以value的值是共享的。所以有些文章说继承Thread类和实现Runnable接口这两种创建线程方式的区别是一个共享另一个不共享,但其实深层原因是调用了不同的Thread构造函数。Thread类也是实现了Runnable接口的类,最终新建线程都要创建一个Thread类。
2.实现Runnable接口
这种实现方式与第一种差别不大,只是我们的类实现了Runnable接口,符合public Thread(Runnable target)构造函数的参数要求,然后再实例化一个Thread对象新建线程。
我们实现了Runnable接口的类:
class MyThread implements Runnable {
    private int value = 5;

    @Override
    public void run(){
        System.out.println(Thread.currentThread().getName()" value is "+--value);
    }
}
由于只是实现接口,并没有继承Thread类,所以无法直接调用currentThread()方法(这个方法是Thread类的一个本地方法public static native Thread currentThread();),而是通过Thread.currentThread()获取当先线程对象
    public static void main(String[] args)  {
        MyThread test = new MyThread();//新建MyThread实例
        Thread thread0 = new Thread(test);//通过带参Thread构造函数创建线程,参数test是我们继承了Thread的MyThread
        Thread thread1 = new Thread(test);
        Thread thread2 = new Thread(test);
        thread0.start();//运行线程
        thread1.start();
        thread2.start();
    }
输出结果:
同样的因为操作同一个对象的run()方法,所以属性是共享的。
我们再让每个Thread操作不同的Mythread实例
        public static void main(String[] args)  {
            MyThread test = new MyThread();//新建MyThread实例
            MyThread test1 = new MyThread();//新建MyThread实例
            MyThread test2 = new MyThread();//新建MyThread实例
            Thread thread0 = new Thread(test);//通过带参Thread构造函数创建线程,参数test是我们继承了Thread的MyThread
            Thread thread1 = new Thread(test1);
            Thread thread2 = new Thread(test2);
            thread0.start();//运行线程
            thread1.start();
            thread2.start();
        }
实现Runnable接口的形式也可以实现线程隔离
3.通过实现Callable接口来实现多线程
通过实现Callable接口创建的线程可以实现获取返回值,取消等。值得注意的是,FutureTask是一个可取消的异步计算,当计算完成时FutureTask便不再可用。
首先我们需要一个实现了Callable接口的类(重写其中的**call()**方法)
    class MyThread implements Callable<Integer> {
        private int value = 5;

        @Override
        public Integer call() {
            System.out.println(Thread.currentThread().getName()+" value is "+--value);
            return value;
        }
    }
然后在通过FutureTask创建线程并启动
    public static void main(String[] args) {
        MyThread test = new MyThread();//新建MyThread实例
        FutureTask task = new FutureTask(test);//创建一个FutureTask,参数是我们的MyThread实例
        Thread thread0 = new Thread(task);//将FutureTask传入Thread来创建线程
        Thread thread1 = new Thread(task);
        Thread thread2 = new Thread(task);
        thread0.start();//运行线程并打印
        thread1.start();
        thread2.start();
    }
输出结果

可以看到只有一个线程成功启动,因为Thread-0执行结束后,FutureTask也就不可用了,后面的线程自然无法启动。如果要FutureTask可复用的话需要调用它的protected boolean runAndReset()方法。
我们在多创建几个FutureTask实例
    public static void main(String[] args) {
        MyThread test = new MyThread();//新建MyThread实例
        FutureTask task = new FutureTask(test);//创建一个FutureTask,参数是我们的MyThread实例
        FutureTask task1 = new FutureTask(test);
        FutureTask task2 = new FutureTask(test);
        Thread thread0 = new Thread(task);//将FutureTask传入Thread来创建线程
        Thread thread1 = new Thread(task1);
        Thread thread2 = new Thread(task2);
        thread0.start();//运行线程并打印
        thread1.start();
        thread2.start();
    }
输出结果为:
虽然是不同的FutureTask,但是他们调用的都是同一个MyThread实例的call()方法。所以实例属性也是共享的。
获取FutureTask的返回值
    public static void main(String[] args) throws ExecutionException, InterruptedException {
        MyThread test = new MyThread();//新建MyThread实例
        FutureTask task = new FutureTask(test);//创建一个FutureTask,参数是我们的MyThread实例
        Thread thread0 = new Thread(task);//将FutureTask传入Thread来创建线程
        thread0.start();//运行线程并打印
        System.out.println("task运行结果"+task.get());

    }
利用FutureTask提供的get()方法可以获得线程的返回值,输出结果:

FutureTask也提供了其他的方法,就不一一列举;
总之FutureTask是RunnableFuture接口的一个实现public class FutureTask<V> implements RunnableFuture<V>,而RunnableFuture接口继承了Runnable接口和Future接口public interface RunnableFuture<V> extends Runnable, Future<V>,所以FutureTask可以作为参数传给Thread来实现创建线程的功能,同时实现Future接口又实现了获取返回值等异步操作。妙啊。


 210
210


 被折叠的 条评论
为什么被折叠?
被折叠的 条评论
为什么被折叠?
 到【灌水乐园】发言


