


 本文档详细介绍了如何在Spring项目中集成Apache CXF来创建和消费Web服务。首先,概述了所需的依赖库,然后逐步展示了创建接口、实现、配置Spring XML以及客户端调用的方法。此外,还提供了开源项目的链接供进一步参考。
文章目录
一、资料准备
1. 官网链接
http://cxf.apache.org/download.html
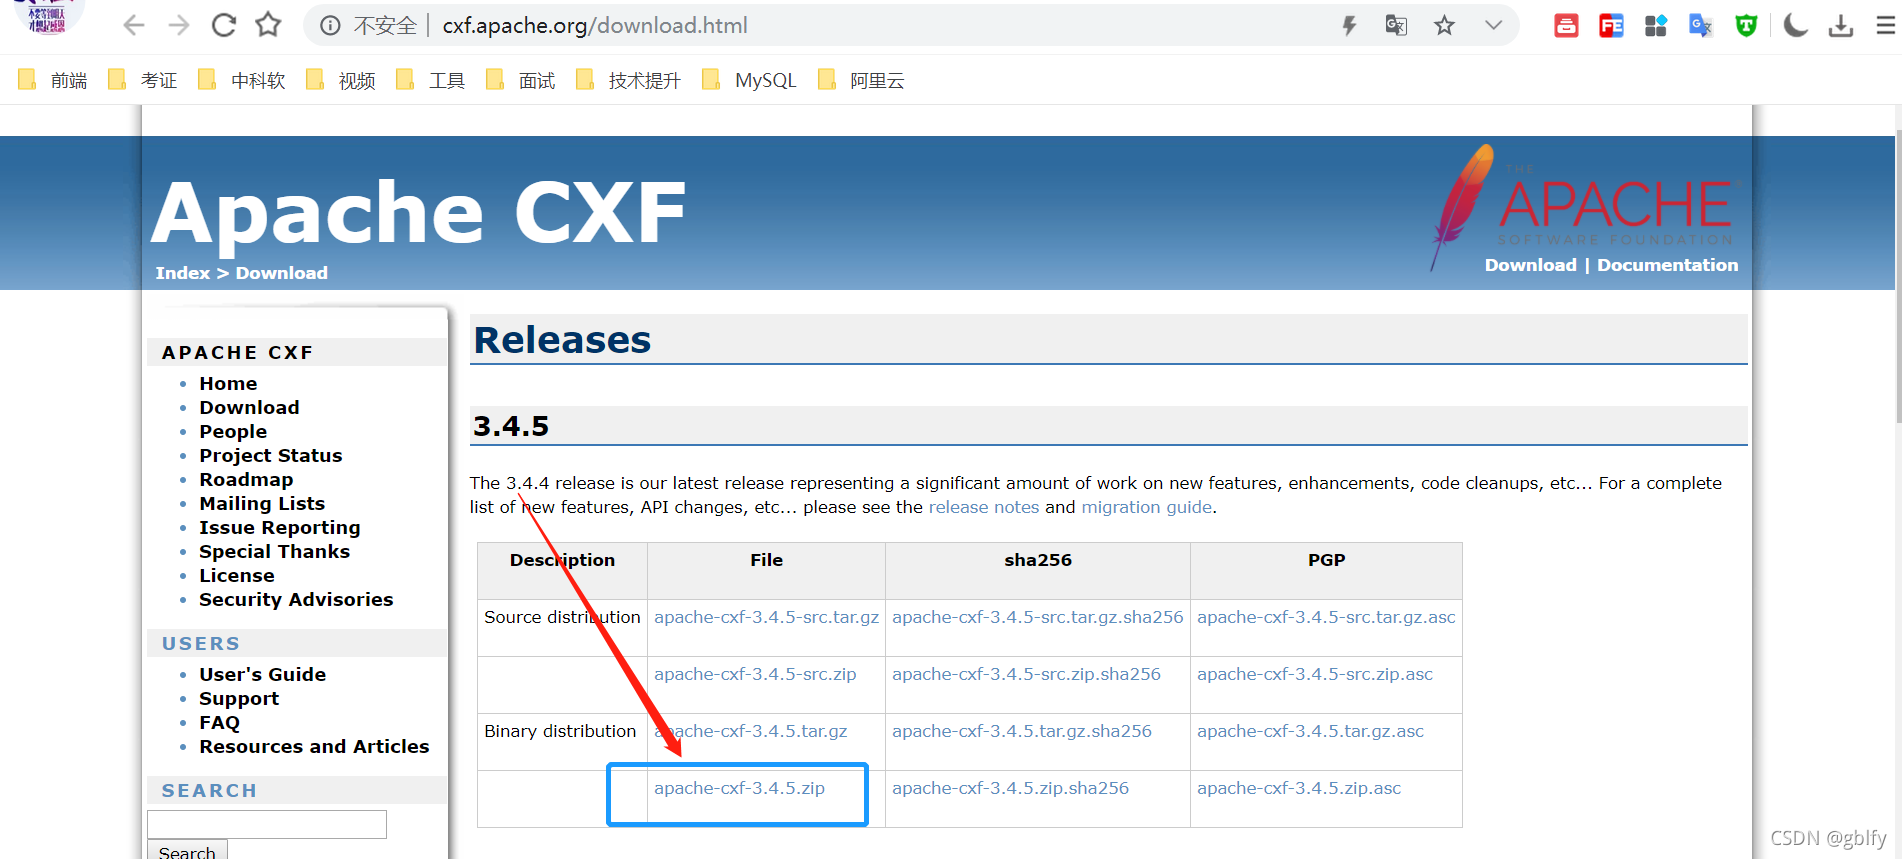
下载apache-cxf-3.4.5.zip
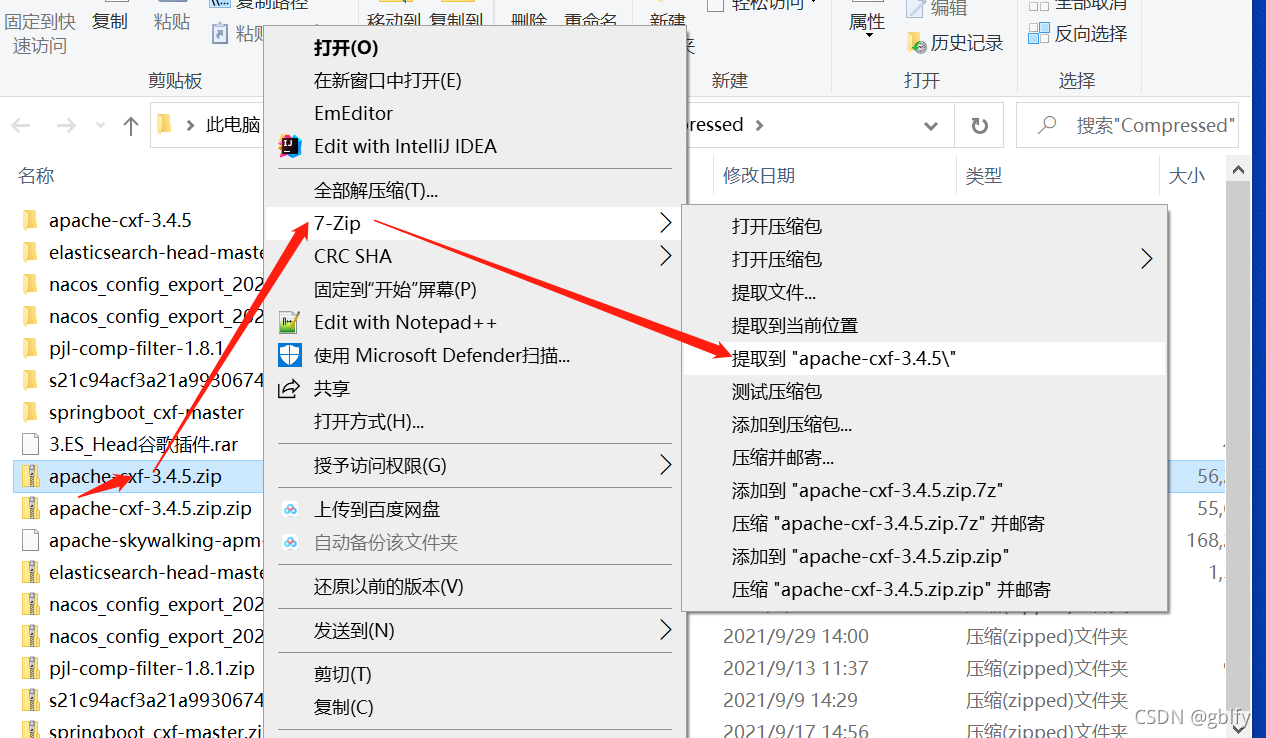
2. 解压
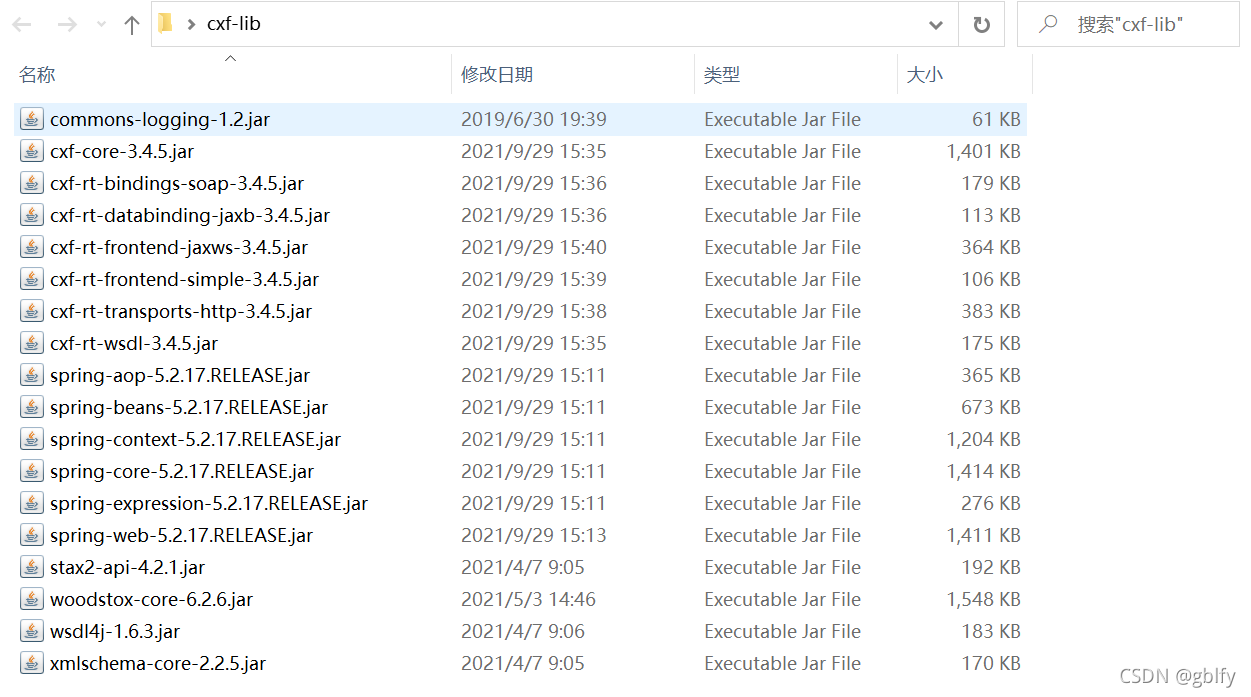
3. 依赖梳理
cd apache-cxf-3.4.5/lib
从bin目录下面,复制以下jar到一个单独的文件夹中
commons-logging-1.2.jar
cxf-core-3.4.5.jar
cxf-rt-bindings-soap-3.4.5.jar
cxf-rt-databinding-jaxb-3.4.5.jar
cxf-rt-frontend-jaxws-3.4.5.jar
cxf-rt-frontend-simple-3.4.5.jar
cxf-rt-transports-http-3.4.5.jar
cxf-rt-wsdl-3.4.5.jar
spring-aop-5.2.17.RELEASE.jar
spring-beans-5.2.17.RELEASE.jar
spring-context-5.2.17.RELEASE.jar
spring-core-5.2.17.RELEASE.jar
spring-expression-5.2.17.RELEASE.jar
spring-web-5.2.17.RELEASE.jar
stax2-api-4.2.1.jar
woodstox-core-6.2.6.jar
wsdl4j-1.6.3.jar
xmlschema-core-2.2.5.jar
二、spring集成cxf
2.1.创建spring项目
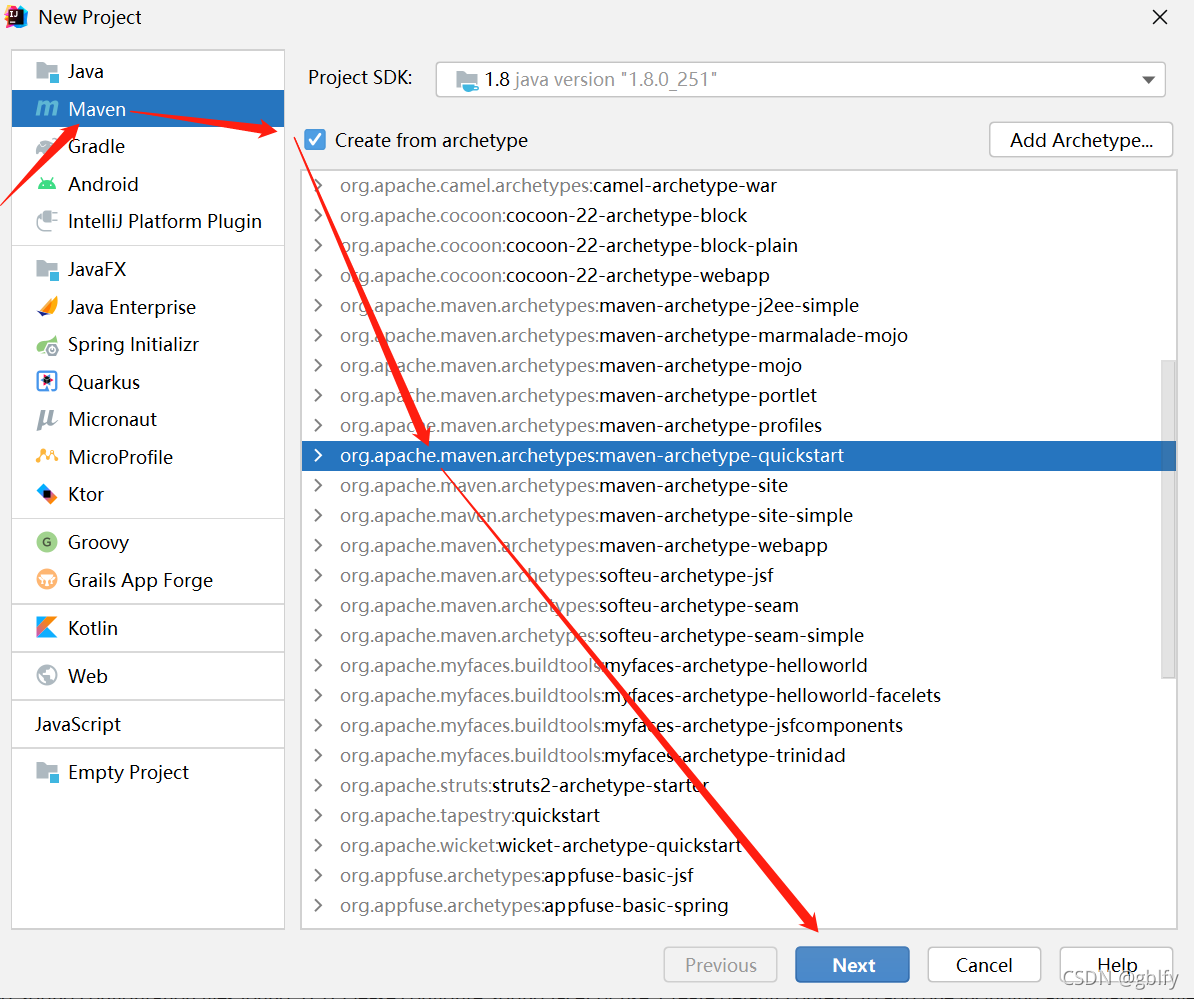
创建java和resources包路径
2.2. 创建接口

package com.gblfy.service;

import javax.jws.WebMethod;
import javax.jws.WebParam;
import javax.jws.WebService;

@WebService(targetNamespace = "http://impl.service.gblfy.com/")
public interface IUserService {

    @WebMethod
    public String getCxf(@WebParam(name = "reqXml") String reqXml);
}
2.3. impl
package com.gblfy.service.impl;

import com.gblfy.service.IUserService;

import javax.jws.WebService;

@WebService
public class UserServiceImpl implements IUserService {

    @Override
    public String getCxf(String reqXml) {

        System.out.println("接收到的报文:" + reqXml);
        return "OK";
    }
}
2.4. spring-cxf.xml
<?xml version="1.0" encoding="UTF-8"?>
<beans xmlns="http://www.springframework.org/schema/beans"
       xmlns:context="http://www.springframework.org/schema/context"
       xmlns:jaxws="http://cxf.apache.org/jaxws" xmlns:xsi="http://www.w3.org/2001/XMLSchema-instance"
       xsi:schemaLocation="http://www.springframework.org/schema/beans http://www.springframework.org/schema/beans/spring-beans-3.0.xsd http://www.springframework.org/schema/context http://www.springframework.org/schema/context/spring-context-3.0.xsd http://cxf.apache.org/jaxws http://cxf.apache.org/schemas/jaxws.xsd">

    <!-- cxf3以后,只需要引入这个配置文件即可 -->
    <import resource="classpath:META-INF/cxf/cxf.xml" />

    <jaxws:endpoint id="userService"
                    implementor="com.gblfy.service.impl.UserServiceImpl"
                    address="/userWS">
    </jaxws:endpoint>
</beans>
2.5. 客户端
package com.gblfy.service.client;

import org.apache.cxf.endpoint.Client;
import org.apache.cxf.jaxws.endpoint.dynamic.JaxWsDynamicClientFactory;
import org.springframework.stereotype.Component;

import javax.xml.namespace.QName;

/**
 * cxf客户端调用(企业内部已封装)
 *
 * @author gblfy
 * @date 2021-09-17
 */
@Component
public class CxfClient {
    public static void main(String[] args) throws Exception {

        //-------------------------------- cxf webservice 服务端信息----------------------------------------
        // cxf webservice 服务地址
        //格式:http://IP地址/项目名称/拦截url/请求地址?wsdl
        String cxfUrl = "http://127.0.0.1:8080/spring_cxf_war/cxf/userWS?wsdl";

        // cxf webservice 命名空间
        //获取方式:从wsdl中复制targetNamespace标签中的内容
        String targetNamespace = "http://impl.service.gblfy.com/";

        // cxf webservice 方法名
        //获取方式1:由服务商提供
        //获取方式2:从wsdl中复制operation标签中name对应的指定的内容
        String method = "getCxf";


        //-------------------------------- cxf webservice 客户端请求报文----------------------------------------
        // cxf 模拟请求报文(根据实际需求而定)
        String reqXml = "cxf请求报文";

        //--------------------------------调用服务客户端任选一种即可----------------------------------------

        //调用服务 客户端1
        CxfClient.sendCxfReqClientHandle(cxfUrl, method, reqXml);

        //调用服务 客户端2
        CxfClient.sendCxfReqClientHandle2(cxfUrl, targetNamespace, method, reqXml);


    }

    /**
     * 单/多参调用工具类(Object类型)
     *
     * @param cxfUrl url地址
     * @param method 调用方法名
     * @param reqXml 发送报文体
     * @return res 返回结果
     * @throws Exception 若有异常,在控制台输出异常,并将异常抛出
     */
    public static String sendCxfReqClientHandle(String cxfUrl, String method, Object... reqXml) throws Exception {
        String res = null;
        // 创建动态客户端
        JaxWsDynamicClientFactory dcf = JaxWsDynamicClientFactory.newInstance();
        Client client = dcf.createClient(cxfUrl);

        // 需要密码的情况需要加上用户名和密码
        // client.getOutInterceptors().add(new ClientLoginInterceptor(USER_NAME, PASS_WORD));
        Object[] objects = new Object[0];
        try {
            // 基本格式:invoke("方法名",参数1,参数2,参数3....);
            objects = client.invoke(method, reqXml);
            res = objects[0].toString();
            System.out.println("返回数据:" + res);
        } catch (java.lang.Exception e) {
            e.printStackTrace();
            throw e;
        }
        return res;
    }

    /**
     * 单/多参调用工具类(Object类型)
     *
     * @param cxfUrl          url地址
     * @param targetNamespace 命名空间
     * @param method          调用方法名
     * @param reqXml          发送报文体
     * @return res 返回结果
     * @throws Exception 若有异常,在控制台输出异常,并将异常抛出
     */
    public static String sendCxfReqClientHandle2(String cxfUrl, String targetNamespace, String method, Object... reqXml) throws Exception {
        String res = null;
        // 创建动态客户端
        JaxWsDynamicClientFactory dcf = JaxWsDynamicClientFactory.newInstance();
        Client client = dcf.createClient(cxfUrl);

        // 需要密码的情况需要加上用户名和密码
        // client.getOutInterceptors().add(new ClientLoginInterceptor(USER_NAME, PASS_WORD));
        Object[] objects = new Object[0];
        try {
            // 基本格式:invoke("方法名",参数1,参数2,参数3....);
            QName qName = new QName(targetNamespace, method);
            objects = client.invoke(qName, reqXml);
            res = objects[0].toString();
            System.out.println("返回数据:" + res);
        } catch (Exception e) {
            e.printStackTrace();
            throw e;
        }
        return res;
    }
}


 786
786

 被折叠的 条评论
为什么被折叠?
被折叠的 条评论
为什么被折叠?
 到【灌水乐园】发言


