


上一篇文章我们讲了如何用idea快速搭建一个工程,这篇文章我们将演示spring boot如何整合mybatis和mysql。
第一步 引入依赖
可以在新建工程的时候选择mybatis和mysql模块(参见spring boot初体验),如果新建工程的时候没有引入这两个模块,可以在pom.xml文件中引入依赖如下:
<dependency>
   <groupId>org.springframework.boot</groupId>
   <artifactId>spring-boot-starter-web</artifactId>
</dependency>
<dependency>
   <groupId>org.mybatis.spring.boot</groupId>
   <artifactId>mybatis-spring-boot-starter</artifactId>
   <version>1.3.2</version>
</dependency>

<dependency>
   <groupId>mysql</groupId>
   <artifactId>mysql-connector-java</artifactId>
   <scope>runtime</scope>
</dependency>
<dependency>
   <groupId>org.springframework.boot</groupId>
   <artifactId>spring-boot-starter-test</artifactId>
   <scope>test</scope>
</dependency>
第二步 配置数据库连接参数
resources路径下的application.properties文件为spring boot的默认配置文件,我们可以在里面配置数据库的连接参数,配置内容如下:
spring.datasource.url=jdbc:mysql://localhost:3306/rms?serverTimezone=GMT&useSSL=false
spring.datasource.username=rms
spring.datasource.password=rms
spring.datasource.driver-class-name=com.mysql.cj.jdbc.Driver

mybatis.mapperLocations=classpath:/mapper/*.xml
第三步 编写controller、service、dao、model代码及mybatis映射文件
UserController.java
package com.example.demo.controller;

import com.example.demo.model.User;
import com.example.demo.service.UserService;
import org.springframework.beans.factory.annotation.Autowired;
import org.springframework.web.bind.annotation.RequestMapping;
import org.springframework.web.bind.annotation.RequestParam;
import org.springframework.web.bind.annotation.RestController;

@RestController
public class UserController {
    @Autowired
    private UserService userService;
    @RequestMapping("/user")
    public User getUser(@RequestParam("id") Integer id){
        return this.userService.getUserById(id);
    }
}
UserService.java
package com.example.demo.service;

import com.example.demo.model.User;

public interface UserService {
    public User getUserById(Integer id);
}
UserServiceImpl.java
package com.example.demo.service.impl;

import com.example.demo.dao.UserMapper;
import com.example.demo.model.User;
import com.example.demo.service.UserService;
import org.springframework.beans.factory.annotation.Autowired;
import org.springframework.stereotype.Service;

@Service
public class UserServiceImpl implements UserService {

    @Autowired
    private UserMapper userMapper;
    @Override
    public User getUserById(Integer id) {
        return this.userMapper.getUserById(id);
    }
}
userMapper.java
package com.example.demo.dao;

import com.example.demo.model.User;
import org.apache.ibatis.annotations.Mapper;
import org.springframework.stereotype.Component;

@Mapper
@Component
public interface UserMapper {
    public User getUserById(Integer id);
}
userMapper.xml
<?xml version="1.0" encoding="UTF-8"?>
<!DOCTYPE mapper PUBLIC "-//mybatis.org//DTD Mapper 3.0//EN" "http://mybatis.org/dtd/mybatis-3-mapper.dtd">
<mapper namespace="com.example.demo.dao.UserMapper">


    <select id="getUserById"   resultType="com.example.demo.model.User">
        select id ,name from user_info where 1=1 and id = #{id}
    </select>


</mapper>
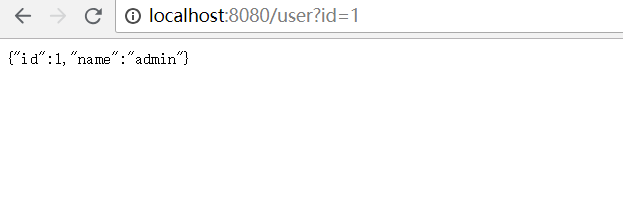
第四步 运行调试
启用应用,在浏览器输入http://localhost:8080/user?id=1,看到如下结果表示运行正常:
感谢大家百忙之中抽出宝贵的时间阅读本文,欢迎大家批评指正。微信扫下面二维码添加公众号议码评川,可获取java web、大数据、人工智能等相关学习资料。


 2232
2232


 被折叠的 条评论
为什么被折叠?
被折叠的 条评论
为什么被折叠?
 到【灌水乐园】发言


