


本例为在idea下shiro集成springMVC。仅有一个认证加密方式(一个realm
)
为什么是MD5盐值加密呢?shiro用密码匹配,密码一样,就ok。如果两个用户的密码一样,则就会造成麻烦。所以使用MD5盐值加密。盐值加密简单来说就是:两个一样的西红柿,加不同的盐炒出来的味道不一样。什么适合作为盐值呢?肯定是惟一的东西。
比如用户名(一般采用手机号,或者邮箱等等)(用户id也ok)。下面来详细说明。
1.idea中新建立spring-springMVC项目。(建立方法可以参考之前的文章)
2.需要导入shiro的jar包。shiro的所有的包可以去http:shiro.apache.org网站下载。里面也有一些实例项目可以参考。
这里需要这么四个包:

在idea中的lib中导入这些包,注意一定要右键add as library和在program structure中put into。关于如何导入,可以参考我之前的文章。
3.配置ss的文件。
web.xml:
<?xml version="1.0" encoding="UTF-8"?>
<web-app xmlns="http://xmlns.jcp.org/xml/ns/javaee"
         xmlns:xsi="http://www.w3.org/2001/XMLSchema-instance"
         xsi:schemaLocation="http://xmlns.jcp.org/xml/ns/javaee http://xmlns.jcp.org/xml/ns/javaee/web-app_4_0.xsd"
         version="4.0">
    <context-param>
        <param-name>contextConfigLocation</param-name>
        <param-value>/WEB-INF/applicationContext.xml</param-value>
    </context-param>
    <listener>
        <listener-class>org.springframework.web.context.ContextLoaderListener</listener-class>
    </listener>
    <servlet>
        <servlet-name>dispatcher</servlet-name>
        <servlet-class>org.springframework.web.servlet.DispatcherServlet</servlet-class>
        <load-on-startup>1</load-on-startup>
    </servlet>
    <servlet-mapping>
        <servlet-name>dispatcher</servlet-name>
        <url-pattern>/</url-pattern>
    </servlet-mapping>
    <!--1.配置shiroFilter-->
    <filter>
        <filter-name>shiroFilter</filter-name>
        <filter-class>org.springframework.web.filter.DelegatingFilterProxy</filter-class>
        <init-param>
            <param-name>targetFilterLifecycle</param-name>
            <param-value>true</param-value>
        </init-param>
    </filter>

    <filter-mapping>
        <filter-name>shiroFilter</filter-name>
        <url-pattern>/*</url-pattern>
    </filter-mapping>
</web-app>
dispatcher-servler.xml:
<?xml version="1.0" encoding="UTF-8"?>
<beans xmlns="http://www.springframework.org/schema/beans"
       xmlns:xsi="http://www.w3.org/2001/XMLSchema-instance" xmlns:p="http://www.springframework.org/schema/p"
       xmlns:tx="http://www.springframework.org/schema/tx" xmlns:context="http://www.springframework.org/schema/context"
       xmlns:mvc="http://www.springframework.org/schema/mvc" xmlns:aop="http://www.springframework.org/schema/aop"
       xsi:schemaLocation="http://www.springframework.org/schema/beans http://www.springframework.org/schema/beans/spring-beans-4.0.xsd
       http://www.springframework.org/schema/tx http://www.springframework.org/schema/tx/spring-tx-4.0.xsd
       http://www.springframework.org/schema/context http://www.springframework.org/schema/context/spring-context-4.0.xsd
       http://www.springframework.org/schema/mvc http://www.springframework.org/schema/mvc/spring-mvc-4.0.xsd http://www.springframework.org/schema/aop http://www.springframework.org/schema/aop/spring-aop.xsd">
    <!--配置controller扫描-->
    <context:component-scan base-package="com.atguigu.shiro"/>
    <mvc:annotation-driven/>
    <mvc:default-servlet-handler/>
    <!--配置视图解析器-->
    <bean class="org.springframework.web.servlet.view.InternalResourceViewResolver">
        <property name="prefix" value="/"/>
        <property name="suffix" value=".jsp"/>
    </bean>


</beans>
applicationContext.xml:
<?xml version="1.0" encoding="UTF-8"?>
<beans xmlns="http://www.springframework.org/schema/beans"
       xmlns:xsi="http://www.w3.org/2001/XMLSchema-instance"
       xsi:schemaLocation="http://www.springframework.org/schema/beans http://www.springframework.org/schema/beans/spring-beans.xsd">

    <!-- =========================================================
         Shiro Core Components - Not Spring Specific
         ========================================================= -->
    <!-- Shiro's main business-tier object for web-enabled applications
         (use DefaultSecurityManager instead when there is no web environment)-->
    <!--
    1. 配置 SecurityManager!
    -->
    <bean id="securityManager" class="org.apache.shiro.web.mgt.DefaultWebSecurityManager">
        <property name="cacheManager" ref="cacheManager"/>
        <!--仅仅有一个realm就使用下面这个-->
       <property name="realm" ref="jdbcRealm"></property>
    </bean>

    <!-- Let's use some enterprise caching support for better performance.  You can replace this with any enterprise
         caching framework implementation that you like (Terracotta+Ehcache, Coherence, GigaSpaces, etc -->
    <!--
    2. 配置 CacheManager.
    2.1 需要加入 ehcache 的 jar 包及配置文件.
    -->
    <bean id="cacheManager" class="org.apache.shiro.cache.ehcache.EhCacheManager">
        <!-- Set a net.sf.ehcache.CacheManager instance here if you already have one.  If not, a new one
             will be creaed with a default config:
             <property name="cacheManager" ref="ehCacheManager"/> -->
        <!-- If you don't have a pre-built net.sf.ehcache.CacheManager instance to inject, but you want
             a specific Ehcache configuration to be used, specify that here.  If you don't, a default
             will be used.: -->
        <property name="cacheManagerConfigFile" value="classpath:ehcache.xml"/>
    </bean>


    <!-- Used by the SecurityManager to access security data (users, roles, etc).
         Many other realm implementations can be used too (PropertiesRealm,
         LdapRealm, etc. -->
    <!--
    	3. 配置 Realm
    	3.1 直接配置实现了 org.apache.shiro.realm.Realm 接口的 bean
    -->
    <bean id="jdbcRealm" class="com.atguigu.shiro.realms.ShiroRealm">
        <property name="credentialsMatcher">
            <bean class="org.apache.shiro.authc.credential.HashedCredentialsMatcher">
                <property name="hashAlgorithmName" value="MD5"></property>
                <property name="hashIterations" value="1024"></property>
            </bean>
        </property>
    </bean>

    <!-- =========================================================
         Shiro Spring-specific integration
         ========================================================= -->
    <!-- Post processor that automatically invokes init() and destroy() methods
         for Spring-configured Shiro objects so you don't have to
         1) specify an init-method and destroy-method attributes for every bean
            definition and
         2) even know which Shiro objects require these methods to be
            called. -->
    <!--
    4. 配置 LifecycleBeanPostProcessor. 可以自定的来调用配置在 Spring IOC 容器中 shiro bean 的生命周期方法.
    -->
    <bean id="lifecycleBeanPostProcessor" class="org.apache.shiro.spring.LifecycleBeanPostProcessor"/>

    <!-- Enable Shiro Annotations for Spring-configured beans.  Only run after
         the lifecycleBeanProcessor has run: -->
    <!--
    5. 启用 IOC 容器中使用 shiro 的注解. 但必须在配置了 LifecycleBeanPostProcessor 之后才可以使用.
    -->
    <bean class="org.springframework.aop.framework.autoproxy.DefaultAdvisorAutoProxyCreator"
          depends-on="lifecycleBeanPostProcessor"/>
    <bean class="org.apache.shiro.spring.security.interceptor.AuthorizationAttributeSourceAdvisor">
        <property name="securityManager" ref="securityManager"/>
    </bean>

    <!-- Define the Shiro Filter here (as a FactoryBean) instead of directly in web.xml -
         web.xml uses the DelegatingFilterProxy to access this bean.  This allows us
         to wire things with more control as well utilize nice Spring things such as
         PropertiesPlaceholderConfigurer and abstract beans or anything else we might need: -->
    <!--
    6. 配置 ShiroFilter.
    6.1 id 必须和 web.xml 文件中配置的 DelegatingFilterProxy 的 <filter-name> 一致.
                      若不一致, 则会抛出: NoSuchBeanDefinitionException. 因为 Shiro 会来 IOC 容器中查找和 <filter-name> 名字对应的 filter bean.
    -->
    <bean id="shiroFilter" class="org.apache.shiro.spring.web.ShiroFilterFactoryBean">
        <property name="securityManager" ref="securityManager"/>
        <property name="loginUrl" value="/login.jsp"/>
        <property name="successUrl" value="/list.jsp"/>
        <property name="unauthorizedUrl" value="/unauthorized.jsp"/>
        <!--
        	配置哪些页面需要受保护.
        	以及访问这些页面需要的权限.
        	1). anon 可以被匿名访问
        	2). authc 必须认证(即登录)后才可能访问的页面.
        	3). logout 登出.
        	4). roles 角色过滤器
        -->

        <property name="filterChainDefinitions">
            <value>
                /login.jsp = anon
                /shiro/login = anon
                /shiro/logout = logout
                # everything else requires authentication:
                /** = authc
            </value>
        </property>
    </bean>


</beans>
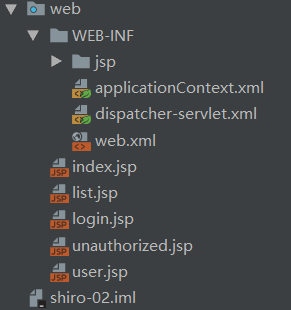
web 目录下的文件:
建立realm:
package com.atguigu.shiro.realms;

import org.apache.shiro.authc.*;
import org.apache.shiro.crypto.hash.SimpleHash;
import org.apache.shiro.realm.AuthenticatingRealm;
import org.apache.shiro.realm.Realm;
import org.apache.shiro.util.ByteSource;

public class ShiroRealm extends AuthenticatingRealm {
    @Override
    protected AuthenticationInfo doGetAuthenticationInfo(AuthenticationToken token) throws AuthenticationException {
        System.out.println("[FirstRealm]+doGetAuthenticationInfo");
        //1.把AuthenticationToken对象装换为UsernamePasswordToken
        UsernamePasswordToken upToken= (UsernamePasswordToken) token;
        //2.从UsernamePasswordToken中来获取username
        String username = upToken.getUsername();
        //3.调用数据库的方法,从数据库中查询username对应的记录
        System.out.println("从数据库中获取username:"+username+"所对应的信息");
        //4.若用户不存在,则可以抛出UnKnownAccountException异常
        if("unknown".equals(username))
        {
            throw new UnknownAccountException("用户不存在!");
        }
        //5.根据用户信息的情况,决定是否需要抛出其他的AuthenticationException异常
        if("monster".equals(username))
        {
            throw new LockedAccountException("用户被锁定!");
        }
        //6.根据用户的情况,来构建AuthenticationInfo对象并且返回
        //通常使用的实现类是SimpleAuthenticationInfo
        //以下信息从数据库中获取
        //<1.principal:认证的实体信息,可以是username也可以是数据表对应的实体类对象
        Object principal=username;
        //<2.credentials:密码
        Object credentials=null;
        if("admin".equals(username))
        {
            credentials="038bdaf98f2037b31f1e75b5b4c9b26e";
        }else if("user".equals(username))
        {
            credentials="098d2c478e9c11555ce2823231e02ec1";
        }
        //<3.realName:当前realm对象的name,调用父类对象的getName()方法即可
        String realmName=getName();
        //<4 盐值 这个盐值要唯一,我们假设这里用户名是唯一的,我们使用用户名作为盐值
        //盐值的作用:如果两个人的密码一样的话,就要盐值,就像西红柿,家不同的盐味道不一样!
        ByteSource credentialsSalt=ByteSource.Util.bytes(username);
        SimpleAuthenticationInfo info=null;
        info=new SimpleAuthenticationInfo(principal,credentials,credentialsSalt,realmName);
        return info;
    }

    public static void main(String[] args) {
        String algorithmName="MD5";
        Object credentials="123456";
        Object salt=ByteSource.Util.bytes("user");
        int hashIterations=1024;
        Object result = new SimpleHash(algorithmName, credentials, salt, hashIterations);
        System.out.println(result);
    }
}
注意,实际项目中,这个credentials是从数据库中拿到的。不是用下面的main方法现成加密的哈!
编写controller:
package com.atguigu.shiro.controller;

import org.apache.shiro.SecurityUtils;
import org.apache.shiro.authc.*;
import org.apache.shiro.subject.Subject;
import org.springframework.stereotype.Controller;
import org.springframework.web.bind.annotation.RequestMapping;
import org.springframework.web.bind.annotation.RequestMethod;

@Controller
@RequestMapping("/shiro")
public class ShiroHandler {

    @RequestMapping(value = "/login",method = RequestMethod.POST)
    public String login(String username,String password){
        // 获取当前的 Subject. 调用 SecurityUtils.getSubject();
        Subject currentUser = SecurityUtils.getSubject();
        // let's login the current user so we can check against roles and permissions:
        // 测试当前的用户是否已经被认证. 即是否已经登录.
        // 调动 Subject 的 isAuthenticated()
        if (!currentUser.isAuthenticated()) {
            // 把用户名和密码封装为 UsernamePasswordToken 对象
            UsernamePasswordToken token = new UsernamePasswordToken(username, password);
            // rememberme
            token.setRememberMe(true);
            try {
                // 执行登录.
                //这个token其实就传到了shiroRealm里面的那个token
                currentUser.login(token);
            }
            // 所有认证时异常的父类.
            catch (AuthenticationException ae) {
                //unexpected condition?  error?
                System.out.println("登录失败:"+ae.getMessage());
            }
        }
        return "redirect:/list.jsp";
    }
}
注意这里一定要写上method。
login.jsp的内容:
<%--
  Created by IntelliJ IDEA.
  User: lenovo
  Date: 2019/8/30
  Time: 11:27
  To change this template use File | Settings | File Templates.
--%>
<%@ page contentType="text/html;charset=UTF-8" language="java" pageEncoding="UTF-8" %>
<%
    String path = request.getContextPath();
    String basePath = request.getScheme() + "://" + request.getServerName() + ":" + request.getServerPort()
            + path + "/";
%>
<html>
<head>
    <title>login</title>
</head>
<body>
<h4>login page</h4>
<form action="<%=basePath%>shiro/login" method="post">
    username:<input type="text" name="username">
    <br><br>
    password:<input type="password" name="password">
    <br><br>
    <input type="submit">
</form>
</body>
</html>
需要登出:
在list.jsp中登出:
<%--
  Created by IntelliJ IDEA.
  User: lenovo
  Date: 2019/8/30
  Time: 11:27
  To change this template use File | Settings | File Templates.
--%>
<%@ page contentType="text/html;charset=UTF-8" language="java" pageEncoding="utf-8" %>
<%
    String path = request.getContextPath();
    String basePath = request.getScheme() + "://" + request.getServerName() + ":" + request.getServerPort()
            + path + "/";
%>
<html>
<head>
    <title>list</title>
</head>
<body>
<h4>List Page</h4>
<a href="<%=basePath%>shiro/logout">Log Out</a>
</body>
</html>
完整的代码:
流程:

ehcache.xml的内容:
<ehcache>

    <!-- Sets the path to the directory where cache .data files are created.

         If the path is a Java System Property it is replaced by
         its value in the running VM.

         The following properties are translated:
         user.home - User's home directory
         user.dir - User's current working directory
         java.io.tmpdir - Default temp file path -->
    <diskStore path="java.io.tmpdir"/>

    <cache name="authorizationCache"
           eternal="false"
           timeToIdleSeconds="3600"
           timeToLiveSeconds="0"
           overflowToDisk="false"
           statistics="true">
    </cache>

    <cache name="authenticationCache"
           eternal="false"
           timeToIdleSeconds="3600"
           timeToLiveSeconds="0"
           overflowToDisk="false"
           statistics="true">
    </cache>

    <cache name="shiro-activeSessionCache"
           eternal="false"
           timeToIdleSeconds="3600"
           timeToLiveSeconds="0"
           overflowToDisk="false"
           statistics="true">
    </cache>

    <!--Default Cache configuration. These will applied to caches programmatically created through
        the CacheManager.

        The following attributes are required for defaultCache:

        maxInMemory       - Sets the maximum number of objects that will be created in memory
        eternal           - Sets whether elements are eternal. If eternal,  timeouts are ignored and the element
                            is never expired.
        timeToIdleSeconds - Sets the time to idle for an element before it expires. Is only used
                            if the element is not eternal. Idle time is now - last accessed time
        timeToLiveSeconds - Sets the time to live for an element before it expires. Is only used
                            if the element is not eternal. TTL is now - creation time
        overflowToDisk    - Sets whether elements can overflow to disk when the in-memory cache
                            has reached the maxInMemory limit.

        -->
    <defaultCache
        maxElementsInMemory="10000"
        eternal="false"
        timeToIdleSeconds="120"
        timeToLiveSeconds="120"
        overflowToDisk="true"
        />

    <!--Predefined caches.  Add your cache configuration settings here.
        If you do not have a configuration for your cache a WARNING will be issued when the
        CacheManager starts

        The following attributes are required for defaultCache:

        name              - Sets the name of the cache. This is used to identify the cache. It must be unique.
        maxInMemory       - Sets the maximum number of objects that will be created in memory
        eternal           - Sets whether elements are eternal. If eternal,  timeouts are ignored and the element
                            is never expired.
        timeToIdleSeconds - Sets the time to idle for an element before it expires. Is only used
                            if the element is not eternal. Idle time is now - last accessed time
        timeToLiveSeconds - Sets the time to live for an element before it expires. Is only used
                            if the element is not eternal. TTL is now - creation time
        overflowToDisk    - Sets whether elements can overflow to disk when the in-memory cache
                            has reached the maxInMemory limit.

        -->

    <!-- Sample cache named sampleCache1
        This cache contains a maximum in memory of 10000 elements, and will expire
        an element if it is idle for more than 5 minutes and lives for more than
        10 minutes.

        If there are more than 10000 elements it will overflow to the
        disk cache, which in this configuration will go to wherever java.io.tmp is
        defined on your system. On a standard Linux system this will be /tmp"
        -->
    <cache name="sampleCache1"
        maxElementsInMemory="10000"
        eternal="false"
        timeToIdleSeconds="300"
        timeToLiveSeconds="600"
        overflowToDisk="true"
        />

    <!-- Sample cache named sampleCache2
        This cache contains 1000 elements. Elements will always be held in memory.
        They are not expired. -->
    <cache name="sampleCache2"
        maxElementsInMemory="1000"
        eternal="true"
        timeToIdleSeconds="0"
        timeToLiveSeconds="0"
        overflowToDisk="false"
        /> -->

    <!-- Place configuration for your caches following -->

</ehcache>


 957
957


 被折叠的 条评论
为什么被折叠?
被折叠的 条评论
为什么被折叠?
 到【灌水乐园】发言


