


1 - Download and install MySQL 8.0 APT Repository
First of all, you need to download the latest release package using the wget command:
wget https://dev.mysql.com/get/mysql-apt-config_0.8.12-1_all.deb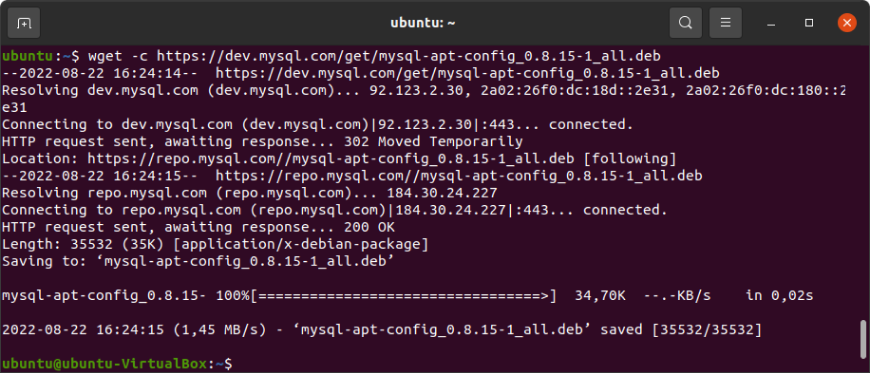
Next, you need to install the MySQL package. For this, execute the command below:
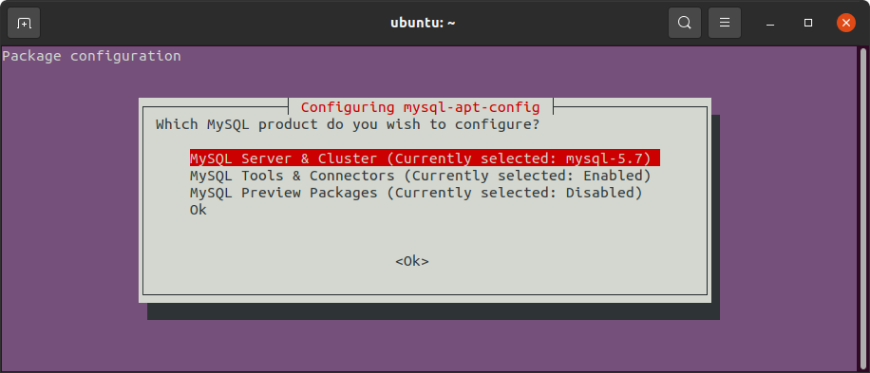
sudo dpkg -i mysql-apt-config_0.8.15-1_all.debIn the Package configuration window that appears, select the first option and then select OK.
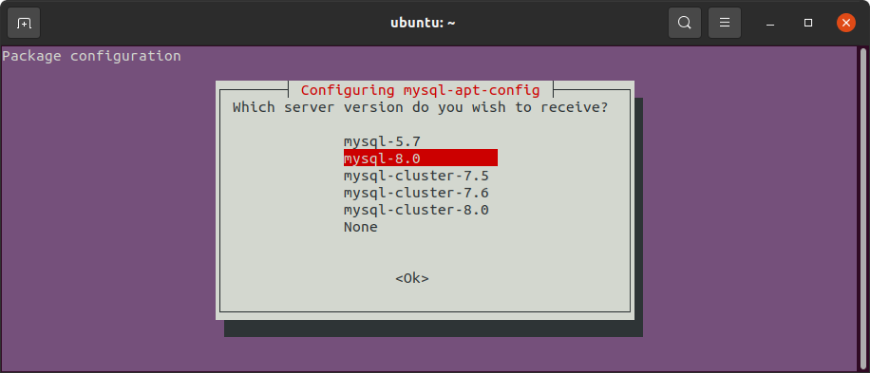
In the next window, select mysql - 8.0 and hit Enter to continue.
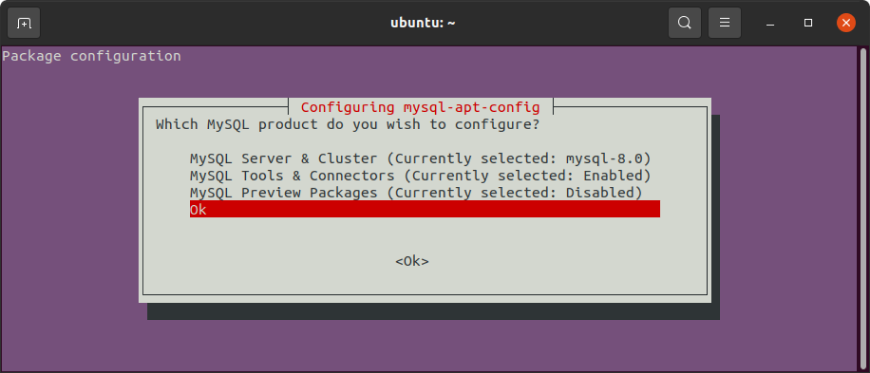
And finally, select the last option and press Enter to proceed:
Next, update the APT repository:
sudo apt update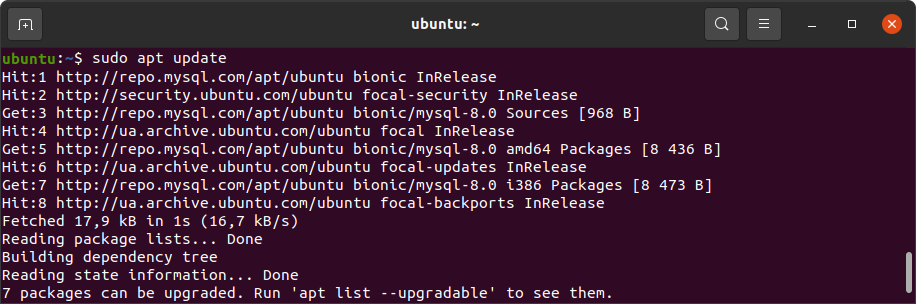
2 - Install MySQL 8.0
Now, you need to run the below command to install MySQL server and client. Press Y to begin the installation, then insert a password for the root user when asked.
sudo apt install -f mysql-client=8.0* mysql-community-server=8.0* mysql-server=8.0*In the next windows, provide a password for the root user, read the information about the authentication system based on SHA256-based password methods, and choose the authentication plugin. The installation will proceed, and MySQL 8.0 will be installed in your system.
3 - Check MySQL version
To make sure, that the installation has been successful, run the following command:
mysql –V
If you need more information about your MySQL server, run:
mysqladmin -u root -p version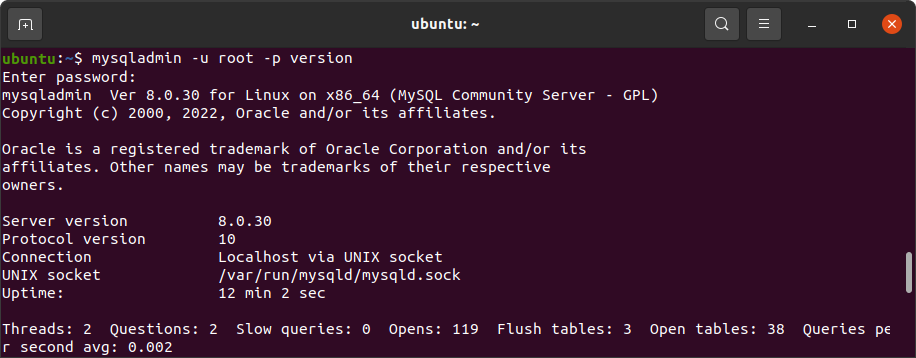
4 - Create a MySQL user
To create a new MySQL user account on Ubuntu, execute the following command:
CREATE USER 'username'@'localhost' IDENTIFIED BY 'user_password';Note
To allow a user remote access to MySQL on Ubuntu, we recommend creating a user with access from any host ('username'@'%') or from a specific IP address ('username'@'192.168.1.100').
refer link: How to install MySQL 5.7 or 8 on Ubuntu 18.04, 20.04, 22.04


 605
605


 被折叠的 条评论
为什么被折叠?
被折叠的 条评论
为什么被折叠?
 到【灌水乐园】发言


