


1 Python解释器 / PyCharm安装
下载需要的版本,直接一键install,记得add to path。
安装完成后在搜索框搜索python:
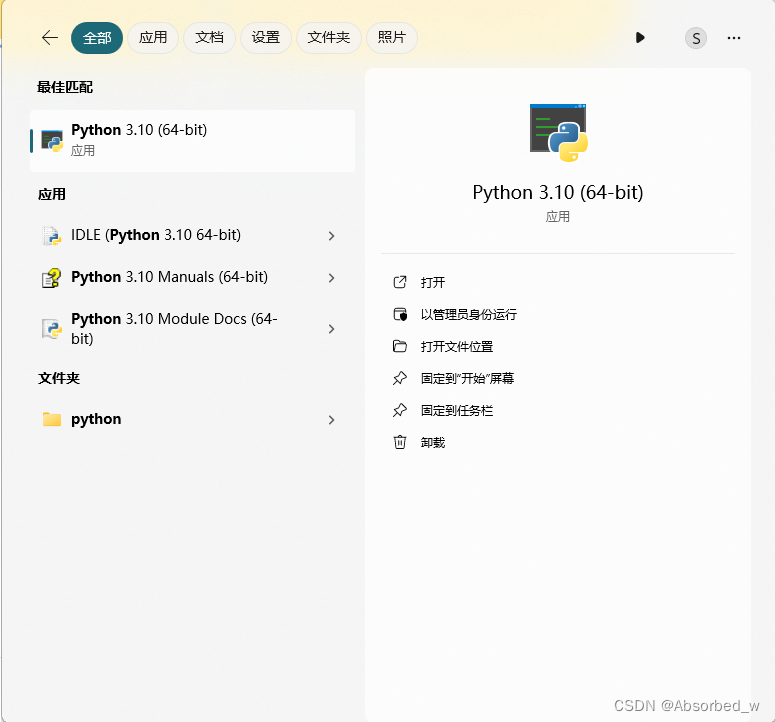
这就是我们要使用的解释器!除了这个命令行工具外,我们也可以使用一起被安装的IDLE。
PyCharm
PyCharm是一款Python的集成开发环境,可以运行在各种系统,包含丰富的工具辅助开发。
官网:PyCharm:适用于数据科学和 Web 开发的 Python IDE (jetbrains.com.cn)
下载地址:下载 PyCharm:JetBrains 出品的用于数据科学和 Web 开发的 Python IDE
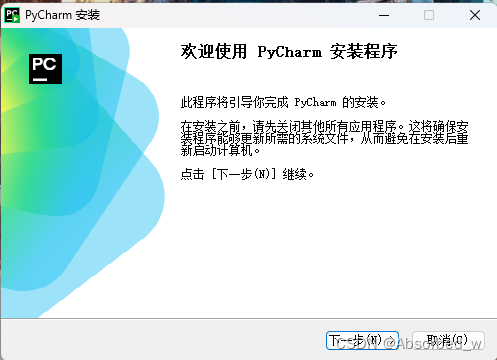
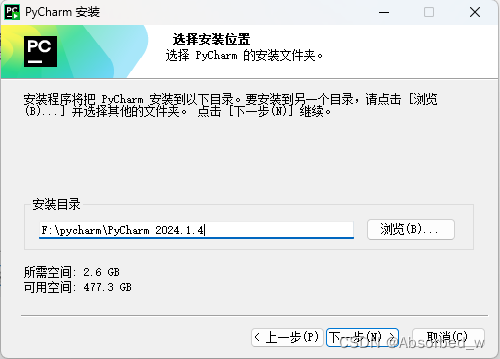
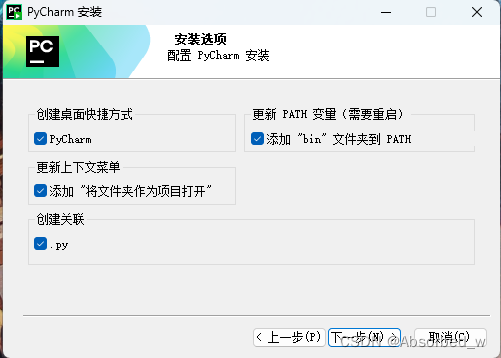
接下来全部下一步采用默认,开始安装:
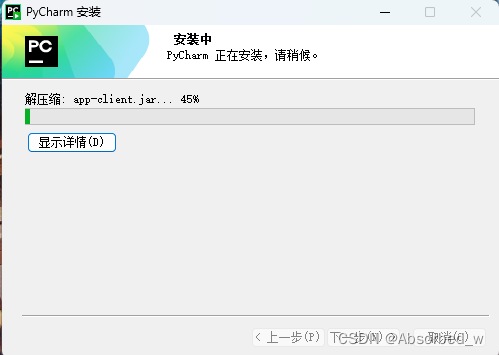
安装完成后重启电脑。
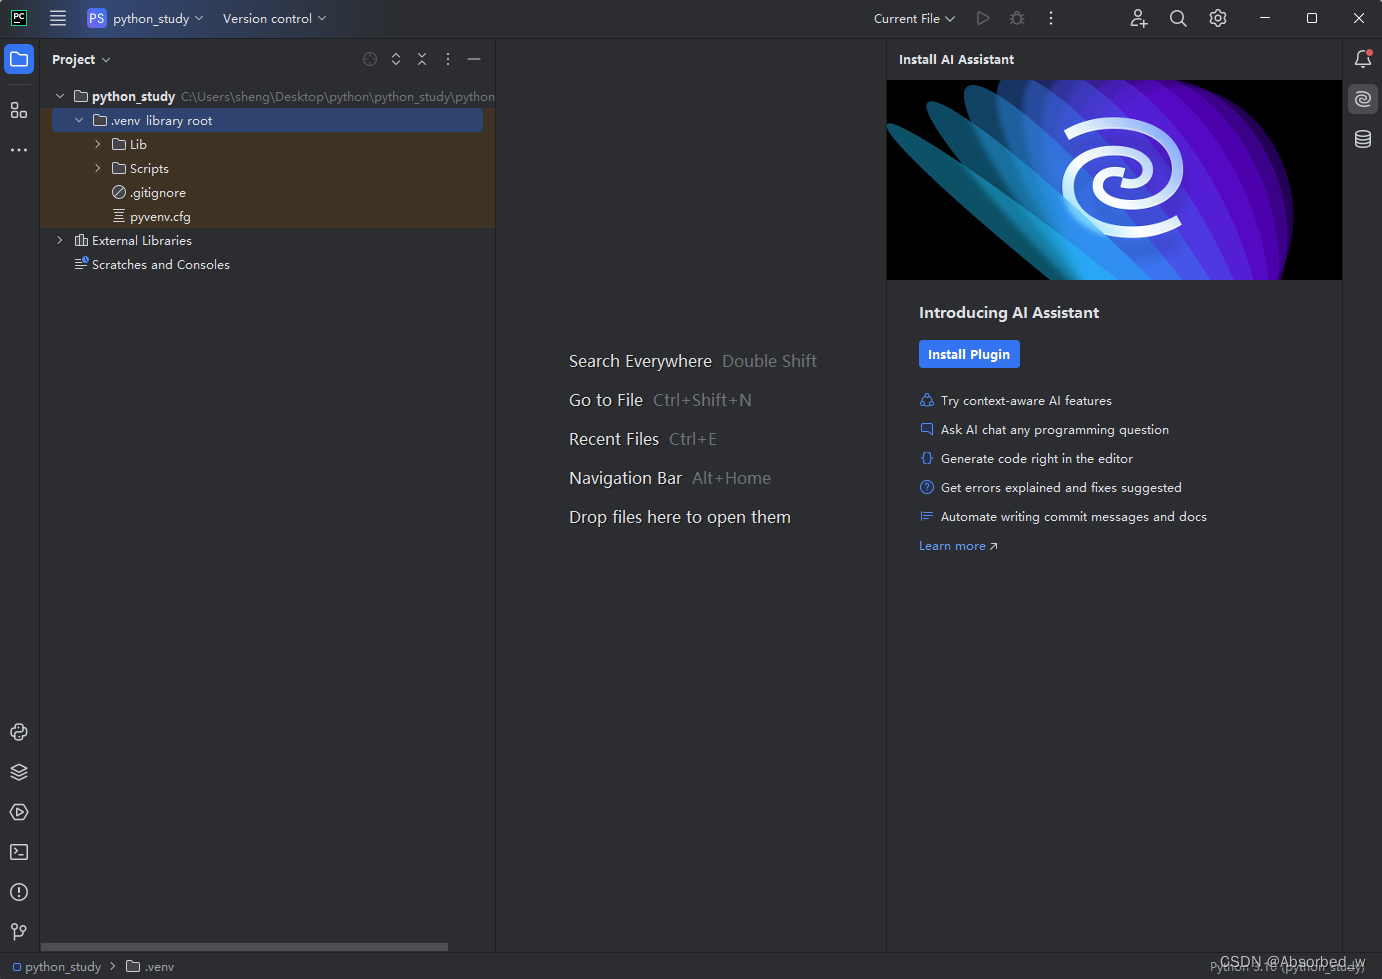
启动软件,中途如果有import,选择跳过:

点击New Project,创建项目:
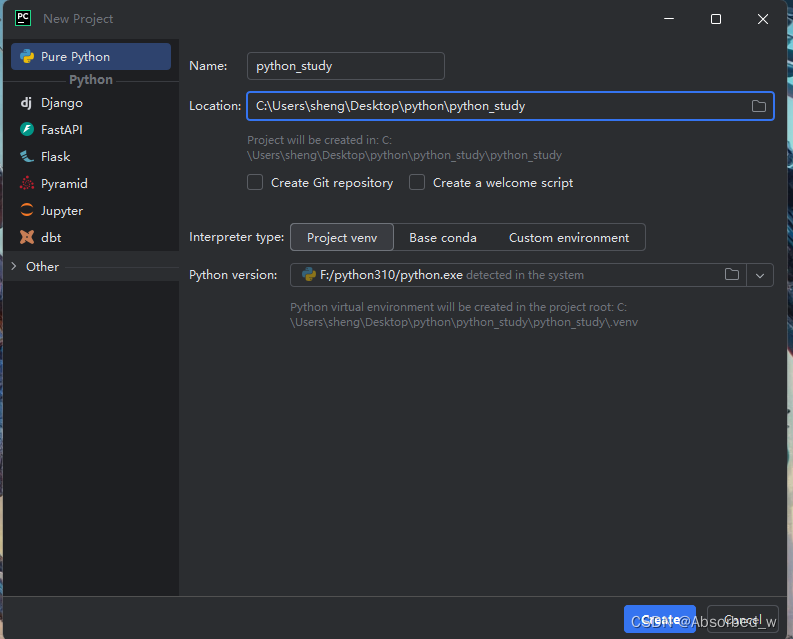
其中,name为项目名,location为项目保存路径,Python version为你的解释器安装路径,要选择到python.exe,最后create!
2 Python编程基础
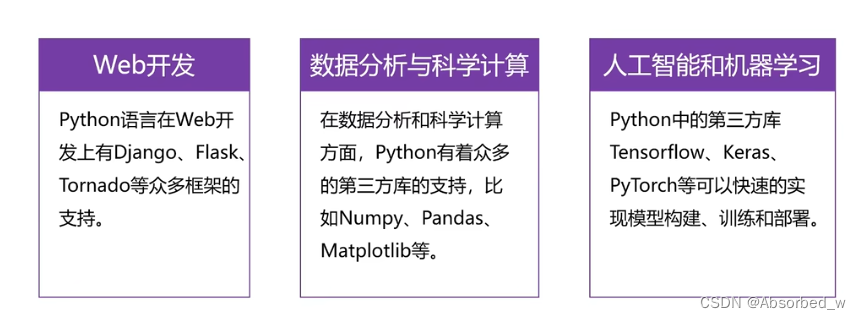
python语言的应用领域非常丰富,得益于其众多的第三方库,由于AI的迭代,迅速带动了Python发展。
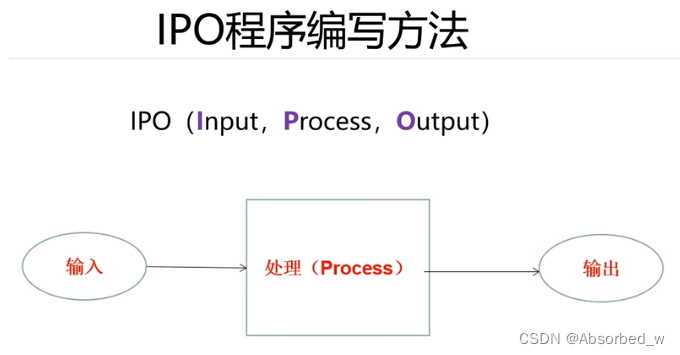
IPO编程
编程的基本思维,输入,处理,输出。
print函数
print函数是Python中用于向控制台输出文本和变量值的内置函数。它的基本用法和参数包括:
print("Hello, World!")

#输出结果为:
#Hello, World!
常用参数
sep:指定多个参数间的分隔符,默认是空格。
print("Hello", "World", sep="-") # 输出:Hello-World
end:指定打印结束后的字符,默认是换行符。
print("Hello", end=" ")
print("World!")  # 输出:Hello World!
file:指定输出目标,默认是sys.stdout。
with open("output.txt", "w") as f:
    print("Hello, World!", file=f)
flush:指定是否立即将内容输出到流,默认是False。
print("Hello, World!", flush=True)高级用法
print函数可以与格式化字符串结合使用,提供更灵活的输出控制:
name = "Alice"
age = 30
print(f"Name: {name}, Age: {age}")
numbers = [1, 2, 3, 4, 5]
print("Numbers:", *numbers) # 使用解包符号*输出列表
#输出结果为:
#Numbers: 1 2 3 4 5总结
print函数是Python中最常用的输出工具,其灵活的参数设置和易于使用的特点使其成为调试和展示结果的首选方法。
chr函数
chr 函数用于将整数转换为其对应的字符,整数必须在有效的 Unicode 范围内(0 到 1,114,111)。
语法
chr(i)参数
i:一个整数,表示 Unicode 码点。
返回值
返回对应 Unicode 码点的字符。
示例
print(chr(65))  # 输出: 'A'
print(chr(97))  # 输出: 'a'
print(chr(8364))  # 输出: '€'(欧元符号)
用途
转换 ASCII 码或 Unicode 码点为字符。
在处理字符编码时非常有用。
chr 函数的逆函数是 ord,用于将字符转换为对应的 Unicode 码点。
ord函数
ord 函数用于将单个字符转换为其对应的 Unicode 码点(整数)。
语法
ord(c)参数
c:一个字符,必须是长度为1的字符串。
返回值
返回对应字符的 Unicode 码点。
示例
print(ord('A'))  # 输出: 65
print(ord('a'))  # 输出: 97
print(ord('€'))  # 输出: 8364(欧元符号)
用途
将字符转换为其对应的 Unicode 码点。
在字符编码和解码时非常有用。
ord 函数的逆函数是 chr,用于将 Unicode 码点转换为对应的字符。
input函数
input 函数用于从用户那里获取输入,并将输入的内容作为字符串返回。
input([prompt])参数
prompt:可选参数,一个字符串,用于显示提示信息。
返回值
返回用户输入的字符串。
示例
name = input("Enter your name: ")
print("Hello, " + name + "!")
当你运行这个程序时,它会提示你输入名字,并且输出一个问候信息。例如:
Enter your name: Alice
Hello, Alice!
转换输入类型
由于 input 函数返回的是字符串,若需要其他类型(如整数、浮点数),需要进行类型转换。
age = int(input("Enter your age: "))
print("You are " + str(age) + " years old.")
注意事项
数据类型:input 函数返回的数据类型始终是字符串,需要转换为其他类型时需手动进行转换。
错误处理:处理用户输入时,要注意捕获可能的错误,例如转换类型时的错误。
input 函数是与用户交互的基本方法,广泛应用于命令行程序和简单的用户输入处理场景。
注释
注释是程序员用来解释代码的文字说明,帮助理解代码的目的、逻辑和实现细节。Python支持单行注释和多行注释。
单行注释
单行注释以 # 开头,# 后面的内容在同一行内都被认为是注释。
# 这是一个单行注释
print("Hello, World!")  # 这也是一个单行注释
多行注释
Python没有专门的多行注释语法,但可以使用一系列单行注释或者使用多行字符串(用三个引号包围)来实现多行注释。
# 这是一个多行注释
# 第一行
# 第二行
# 第三行
使用多行字符串
虽然多行字符串通常用于字符串字面量,但也可以用于注释。
"""
这是一个多行注释
可以跨越多行
但需要注意它实际上是一个字符串
"""
print("Hello, World!")
在上面的例子中,尽管多行字符串可以用作注释,但它会占用内存,因为它们实际上是字符串对象。一般推荐在需要多行注释时,使用一系列单行注释。
# 这是一个函数定义
def greet(name):
    """
    这个函数用于打印问候语
    参数:
        name (str): 要问候的人的名字
    """
    print(f"Hello, {name}!")

# 调用函数
greet("Alice")  # 输出: Hello, Alice!
注释的最佳实践
清晰简洁:注释应简明扼要,直接说明代码的目的和功能。
保持同步:确保注释与代码保持一致,避免在代码修改后遗留过时的注释。
必要时使用:在复杂或不直观的代码段添加注释,帮助读者理解代码。
注释是编写可维护代码的重要部分,有助于提高代码的可读性和可维护性。
代码缩进
Python使用缩进来表示代码块,而不是像许多其他编程语言使用的大括号 {}。正确的缩进在Python中至关重要,因为它直接影响代码的语法和逻辑结构。
缩进规则
缩进的一致性:在同一代码块中必须使用相同的缩进量,可以是空格或制表符,但不能混用。
缩进量:通常使用4个空格作为缩进量,Python官方建议使用空格而不是制表符。
示例 条件语句
if x > 0:
    print("x is positive")
else:
    print("x is non-positive")
循环语句
for i in range(5):
    print(i)
    if i % 2 == 0:
        print("Even number")
函数定义
def greet(name):
    print(f"Hello, {name}!")
    return name
类定义
class Dog:
    def __init__(self, name):
        self.name = name

    def bark(self):
        print("Woof!")
缩进错误
Python对缩进的严格要求使得缩进错误会导致代码无法运行,常见的错误包括:
缺少缩进:
if x > 0:
print("x is positive")  # 错误:print语句没有缩进
不一致的缩进:
if x > 0:
    print("x is positive")
  print("This is also positive")  # 错误:不一致的缩进
使用IDE和编辑器
大多数现代IDE和代码编辑器(如PyCharm、VSCode、Sublime Text等)提供了自动缩进和缩进检查功能,有助于保持代码的整洁和一致。示例
以下是一个包含函数、循环和条件语句的完整示例:
def process_numbers(numbers):
    for number in numbers:
        if number % 2 == 0:
            print(f"{number} is even")
        else:
            print(f"{number} is odd")

numbers = [1, 2, 3, 4, 5]
process_numbers(numbers)
正确的缩进使代码的结构清晰,易于阅读和维护。确保在编写Python代码时始终遵循缩进规则,以避免语法错误和逻辑错误。
保留字与标识符
保留字(关键词)
保留字是Python语言中已经被赋予特定意义的单词,不能用作变量名、函数名或其他标识符。这些词在Python中有特殊用途和语法规则。
以下是Python中的保留字列表(以Python 3.10为例):
False      await      else       import     pass
None       break      except     in         raise
True       class      finally    is         return
and        continue   for        lambda     try
as         def        from       nonlocal   while
assert     del        global     not        with
async      elif       if         or         yield
示例
if True:
    print("This is a reserved keyword")
标识符
标识符是用于命名变量、函数、类、模块和其他对象的名称。标识符由字母(a-z,A-Z)、数字(0-9)和下划线(_)组成,但不能以数字开头。
标识符的命名规则
区分大小写:Var 和 var 是不同的标识符。
不能以数字开头:如 1variable 是无效的,但 _1variable 是有效的。
不能使用保留字:如 for、if 等。
合法标识符示例
variable1 = 10
_variable = "Hello"
Var123 = [1, 2, 3]
不合法标识符示例
1variable = 10      # 无效,不能以数字开头
class = "Hello"     # 无效,class 是保留字
my-variable = 5     # 无效,不能包含连字符
示例
以下示例展示了如何定义和使用标识符:
# 合法标识符
my_variable = 10
_myVariable = 20
variable123 = 30

# 使用标识符
print(my_variable)  # 输出: 10
print(_myVariable)  # 输出: 20
print(variable123)  # 输出: 30
总结
保留字:具有特殊意义,不能用作标识符。
标识符:用于命名变量、函数等,应遵循命名规则。
正确理解和使用保留字与标识符是编写清晰、有效代码的基础。
变量与常量
变量
变量是用于存储数据的命名位置,可以在程序运行时改变其值。Python中的变量不需要显式声明类型,类型由赋值操作决定。变量的命名规则
只能包含字母、数字和下划线:如my_var1。
不能以数字开头:如1variable是无效的。
区分大小写:如Var和var是不同的变量。
不能使用Python的保留字:如for、if等。
示例
# 变量声明与赋值
x = 10
name = "Alice"
is_active = True

# 使用变量
print(x)        # 输出: 10
print(name)     # 输出: Alice
print(is_active)  # 输出: True
常量
常量在程序运行时其值不应改变。Python没有内置的常量机制,但通过命名约定来表示常量,一般使用全大写字母命名常量。示例
PI = 3.14159
GRAVITY = 9.8

# 使用常量
print(PI)       # 输出: 3.14159
print(GRAVITY)  # 输出: 9.8
尽管Python没有强制常量的值不能被修改,但通过约定,开发者通常不会改变常量的值。变量与常量的区别
变量:值可以在程序运行过程中改变。
常量:值在程序运行过程中通常不改变,使用全大写字母命名以示区分。
示例代码
# 变量示例
age = 25
print(age)  # 输出: 25

age = 26
print(age)  # 输出: 26

# 常量示例
MAX_USERS = 100
print(MAX_USERS)  # 输出: 100

# 虽然技术上可以更改常量的值,但不推荐
MAX_USERS = 200
print(MAX_USERS)  # 输出: 200
总结
变量:用于存储可变数据,可以在程序执行过程中更改。
常量:用于存储不变的数据,通常通过命名约定表示其不可变性。
理解变量与常量的概念及其正确使用,对于编写清晰、可维护的代码至关重要。
数值类型
Python支持多种数值类型,用于表示不同范围和精度的数值。主要的数值类型包括整数、浮点数、复数和布尔值。
1. 整数(int)
整数是没有小数部分的数字,可以是正数、负数或零。Python的整数没有固定的大小限制,取决于可用内存。示例
a = 10
b = -5
c = 0

print(a)  # 输出: 10
print(b)  # 输出: -5
print(c)  # 输出: 0
2. 浮点数(float)
浮点数是带有小数部分的数字,用于表示实数。浮点数在Python中是基于64位IEEE 754标准。示例
x = 3.14
y = -2.7
z = 0.0

print(x)  # 输出: 3.14
print(y)  # 输出: -2.7
print(z)  # 输出: 0.0
3. 复数(complex)
复数由实部和虚部组成,形式为 a + bj,其中 a 是实部,b 是虚部,j 表示虚数单位。示例
c1 = 2 + 3j
c2 = -1 + 4j

print(c1)  # 输出: (2+3j)
print(c2)  # 输出: (-1+4j)
4. 布尔值(bool)
布尔值是一个特殊的数值类型,用于表示真(True)和假(False)。布尔值实际上是整数的子类型,其中 True 等于1,False 等于0。示例
is_active = True
is_logged_in = False

print(is_active)      # 输出: True
print(is_logged_in)   # 输出: False
print(is_active + 1)  # 输出: 2
数值类型之间的转换
Python提供了一些内置函数来转换不同的数值类型。示例
# 转换为整数
print(int(3.14))   # 输出: 3
print(int(True))   # 输出: 1
print(int(False))  # 输出: 0

# 转换为浮点数
print(float(10))  # 输出: 10.0

# 转换为复数
print(complex(10))        # 输出: (10+0j)
print(complex(3.14, 2))   # 输出: (3.14+2j)

# 转换为布尔值
print(bool(1))    # 输出: True
print(bool(0))    # 输出: False
print(bool(3.14)) # 输出: True
数值运算
Python支持多种数值运算,包括加法、减法、乘法、除法、取整、取余和幂运算。示例
a = 10
b = 3

# 加法
print(a + b)  # 输出: 13

# 减法
print(a - b)  # 输出: 7

# 乘法
print(a * b)  # 输出: 30

# 除法
print(a / b)  # 输出: 3.3333333333333335

# 取整除
print(a // b)  # 输出: 3

# 取余
print(a % b)  # 输出: 1

# 幂运算
print(a ** b)  # 输出: 1000
总结
整数(int):用于表示没有小数部分的数字。
浮点数(float):用于表示带小数部分的数字。
复数(complex):用于表示包含实部和虚部的数字。
布尔值(bool):用于表示真和假,是整数的子类型。
理解这些数值类型及其相互转换和运算方法,是进行Python编程的基础。
字符串类型
在Python中,字符串(str)是一种用于表示文本的数据类型。字符串是字符的序列,可以用单引号、双引号或三引号括起来。字符串是不可变的,这意味着一旦创建,它们的值就不能更改。
字符串的定义
单引号:
str1 = 'Hello, World!'双引号:
str2 = "Hello, World!"三引号(用于多行字符串):
str3 = """This is a
multi-line string."""
字符串操作
连接字符串:
使用 + 进行连接:
str1 = "Hello"
str2 = "World"
result = str1 + ", " + str2 + "!"
print(result)  # 输出: Hello, World!
重复字符串:
使用 * 进行重复:
str1 = "Ha"
result = str1 * 3
print(result)  # 输出: HaHaHa
访问字符串中的字符:
使用索引(从0开始):
str1 = "Hello"
print(str1[1])  # 输出: e
切片:
获取子字符串:
str1 = "Hello, World!"
print(str1[0:5])  # 输出: Hello
print(str1[7:])   # 输出: World!
长度:
获取字符串长度:
str1 = "Hello"
print(len(str1))  # 输出: 5
检查子字符串:
使用 in 关键字:
str1 = "Hello, World!"
print("World" in str1)  # 输出: True
字符串方法:
转换大小写:
str1 = "Hello"
print(str1.upper())  # 输出: HELLO
print(str1.lower())  # 输出: hello
去除空白:
str1 = "  Hello  "
print(str1.strip())  # 输出: Hello
替换:
str1 = "Hello, World!"
print(str1.replace("World", "Python"))  # 输出: Hello, Python!
分割:
str1 = "Hello, World!"
print(str1.split(", "))  # 输出: ['Hello', 'World!']
格式化字符串:
使用 format 方法:
name = "Alice"
age = 30
str1 = "My name is {} and I am {} years old.".format(name, age)
print(str1)  # 输出: My name is Alice and I am 30 years old.
使用 f-string(Python 3.6+):
name = "Alice"
age = 30
str1 = f"My name is {name} and I am {age} years old."
print(str1)  # 输出: My name is Alice and I am 30 years old.
总结
Python 字符串类型是用于表示和操作文本的强大工具。通过各种内置方法和操作符,开发者可以轻松地处理和格式化字符串。理解和熟练使用这些操作对于高效编程非常重要。
布尔类型
在Python中,布尔类型(bool)表示逻辑值,只有两个值:True 和 False。布尔类型通常用于条件判断和控制程序的逻辑流。
布尔类型的定义
布尔值可以直接赋值给变量:
is_active = True
is_logged_in = False
布尔类型的常用操作
比较运算:
比较运算符返回布尔值。
a = 10
b = 20
print(a < b)   # 输出: True
print(a > b)   # 输出: False
print(a == 10) # 输出: True
逻辑运算:
and:当且仅当两个操作数都为 True 时,结果为 True。
or:当其中至少一个操作数为 True 时,结果为 True。
not:对操作数取反,True 变为 False,False 变为 True。
x = True
y = False
print(x and y)  # 输出: False
print(x or y)   # 输出: True
print(not x)    # 输出: False
布尔值的类型转换:
任何值都可以转换为布尔值。
数字类型:0为False,非零为True。
序列类型:空序列为False,非空序列为True。
print(bool(0))        # 输出: False
print(bool(1))        # 输出: True
print(bool(""))       # 输出: False
print(bool("hello"))  # 输出: True
在条件语句中的应用:
布尔值通常用于控制流程语句。
is_raining = True
if is_raining:
    print("Take an umbrella")
else:
    print("No need for an umbrella")
总结
布尔类型在Python中是控制程序逻辑流的基础。通过理解布尔运算、逻辑运算和条件判断,开发者可以编写出更加清晰和高效的代码。布尔值的类型转换和在条件语句中的应用使其成为编程中的重要工具。
类型转换函数
Python 提供了一系列内置函数,用于在不同数据类型之间进行转换。以下是一些常见的类型转换函数及其用途。
数字类型转换
int():将一个值转换为整数。
print(int(3.5))       # 输出: 3
print(int("10"))      # 输出: 10
print(int(True))      # 输出: 1
print(int(False))     # 输出: 0
float():将一个值转换为浮点数。
print(float(3))       # 输出: 3.0
print(float("10.5"))  # 输出: 10.5
print(float(True))    # 输出: 1.0
print(float(False))   # 输出: 0.0
complex():将一个值转换为复数。
print(complex(3))          # 输出: (3+0j)
print(complex(3, 4))       # 输出: (3+4j)
print(complex("3+4j"))     # 输出: (3+4j)
序列类型转换
str():将一个值转换为字符串。
print(str(10))         # 输出: '10'
print(str(10.5))       # 输出: '10.5'
print(str(True))       # 输出: 'True'
list():将一个值转换为列表。
print(list("hello"))       # 输出: ['h', 'e', 'l', 'l', 'o']
print(list((1, 2, 3)))     # 输出: [1, 2, 3]
tuple():将一个值转换为元组。
print(tuple("hello"))      # 输出: ('h', 'e', 'l', 'l', 'o')
print(tuple([1, 2, 3]))    # 输出: (1, 2, 3)
set():将一个值转换为集合。
print(set("hello"))        # 输出: {'h', 'e', 'l', 'o'}
print(set([1, 2, 2, 3]))   # 输出: {1, 2, 3}
dict():将一个值转换为字典。
从键值对序列创建字典:
print(dict([("a", 1), ("b", 2)])) # 输出: {'a': 1, 'b': 2}布尔类型转换
bool():将一个值转换为布尔值。
print(bool(0))         # 输出: False
print(bool(1))         # 输出: True
print(bool([]))        # 输出: False
print(bool([1, 2, 3])) # 输出: True
综合示例
# 数字类型转换
print(int(3.5))            # 输出: 3
print(float(3))            # 输出: 3.0
print(complex(3, 4))       # 输出: (3+4j)

# 序列类型转换
print(str(10))             # 输出: '10'
print(list("hello"))       # 输出: ['h', 'e', 'l', 'l', 'o']
print(tuple([1, 2, 3]))    # 输出: (1, 2, 3)
print(set([1, 2, 2, 3]))   # 输出: {1, 2, 3}
print(dict([("a", 1), ("b", 2)]))  # 输出: {'a': 1, 'b': 2}

# 布尔类型转换
print(bool(0))             # 输出: False
print(bool([1, 2, 3]))     # 输出: True
总结
Python 的类型转换函数允许在不同的数据类型之间进行转换,增强了数据处理的灵活性。理解和使用这些转换函数是编写高效、灵活代码的重要技能。
eval 函数
eval 函数用于执行一个字符串表达式,并返回表达式的结果。在使用 eval 时,Python 解释器会解析和执行传递的字符串内容,就像它是一个普通的 Python 表达式一样。
语法
eval(expression, globals=None, locals=None)参数
expression:一个字符串,表示有效的 Python 表达式。
globals(可选):一个字典,用于指定全局命名空间。
locals(可选):一个字典,用于指定局部命名空间。
返回值
返回表达式的计算结果。
示例
基本用法
# 计算简单表达式
result = eval("2 + 3 * 4")
print(result)  # 输出: 14

# 使用变量
x = 10
result = eval("x * 2")
print(result)  # 输出: 20
使用全局和局部命名空间
# 定义全局和局部命名空间
globals_dict = {"x": 10, "y": 20}
locals_dict = {"z": 5}

# 计算表达式
result = eval("x + y + z", globals_dict, locals_dict)
print(result)  # 输出: 35
动态执行代码
# 动态执行代码
code = "print('Hello, World!')"
eval(code)  # 输出: Hello, World!
注意事项
安全性:由于 eval 可以执行任意代码,使用不当可能导致安全风险。特别是在处理来自不可信来源的输入时,应该避免使用 eval。
性能:eval 的执行效率较低,不建议在性能敏感的场景中频繁使用。
替代方法:如果只需要计算简单表达式,可以考虑使用 literal_eval(位于 ast 模块中),它比 eval 更安全。
from ast import literal_eval

result = literal_eval("10 + 20")
print(result)  # 输出: 30
示例代码
# 基本用法
expression = "2 + 3 * 4"
print(f"The result of '{expression}' is {eval(expression)}")  # 输出: The result of '2 + 3 * 4' is 14

# 使用变量
x = 10
expression = "x * 2"
print(f"The result of '{expression}' is {eval(expression)}")  # 输出: The result of 'x * 2' is 20

# 使用全局和局部命名空间
globals_dict = {"x": 10, "y": 20}
locals_dict = {"z": 5}
expression = "x + y + z"
print(f"The result of '{expression}' is {eval(expression, globals_dict, locals_dict)}")  # 输出: The result of 'x + y + z' is 35

# 动态执行代码
code = "print('Hello, World!')"
eval(code)  # 输出: Hello, World!
总结
eval 函数是一个强大的工具,可以动态执行字符串表达式。然而,由于潜在的安全风险和性能问题,应该谨慎使用 eval。在处理不可信输入时,优先考虑更安全的替代方法,如 literal_eval。
运算符
Python 支持多种运算符,包括算术运算符、赋值运算符、比较运算符、逻辑运算符、位运算符以及运算符优先级。以下是详细介绍:
1. 算术运算符
用于执行基本的数学运算。
a = 10
b = 3

print(a + b)  # 加法,输出: 13
print(a - b)  # 减法,输出: 7
print(a * b)  # 乘法,输出: 30
print(a / b)  # 除法,输出: 3.3333333333333335
print(a % b)  # 取余,输出: 1
print(a ** b) # 幂运算,输出: 1000
print(a // b) # 取整除,输出: 3
2. 赋值运算符
用于给变量赋值。
x = 5         # 赋值
x += 3        # 相当于 x = x + 3,输出: 8
x -= 3        # 相当于 x = x - 3,输出: 5
x *= 3        # 相当于 x = x * 3,输出: 15
x /= 3        # 相当于 x = x / 3,输出: 5.0
x %= 3        # 相当于 x = x % 3,输出: 2.0
x **= 3       # 相当于 x = x ** 3,输出: 8.0
x //= 3       # 相当于 x = x // 3,输出: 2.0
3. 比较运算符
用于比较两个值,返回布尔值(True 或 False)。
a = 10
b = 20

print(a == b)   # 相等,输出: False
print(a != b)   # 不相等,输出: True
print(a > b)    # 大于,输出: False
print(a < b)    # 小于,输出: True
print(a >= b)   # 大于等于,输出: False
print(a <= b)   # 小于等于,输出: True
4. 逻辑运算符
用于布尔值之间的运算。
x = True
y = False

print(x and y)  # 与运算,输出: False
print(x or y)   # 或运算,输出: True
print(not x)    # 非运算,输出: False
5. 位运算符
用于对整数在其二进制表示形式上进行操作。
a = 10  # 二进制: 1010
b = 4   # 二进制: 0100

print(a & b)  # 按位与,输出: 0
print(a | b)  # 按位或,输出: 14
print(a ^ b)  # 按位异或,输出: 14
print(~a)     # 按位取反,输出: -11
print(a << 2) # 左移,输出: 40
print(a >> 2) # 右移,输出: 2
6. 运算符优先级
Python 中运算符的优先级决定了表达式中的哪些部分最先计算。优先级从高到低如下:
括号:()
指数:**
按位取反:~
乘、除、取余和取整除:*, /, %, //
加法和减法:+, -
按位移位:<<, >>
按位与:&
按位异或:^
按位或:|
比较运算符:==, !=, >, <, >=, <=
赋值运算符:=, +=, -=, *=, /=, %=, **=, //=
逻辑运算符:not, and, or
通过理解和掌握这些运算符及其优先级,可以编写出更加高效和正确的Python代码。
分支结构if-else
Python 提供了强大的分支结构,用于控制程序的执行流。主要的分支结构包括 if、else 和 elif,以及嵌套的 if 语句。
基本语法
if condition:
    # 当条件为真时执行的代码块
elif condition:
    # 当上一个条件为假且当前条件为真时执行的代码块
else:
    # 当所有条件都为假时执行的代码块
示例
1. if 语句
if 语句用于判断一个条件,如果条件为真,则执行相应的代码块。
age = 18
if age >= 18:
    print("You are an adult.")
输出:
You are an adult.
2. if...else 语句
if...else 语句用于在条件为假时执行另一代码块。
age = 16
if age >= 18:
    print("You are an adult.")
else:
    print("You are a minor.")
输出:
You are a minor.
3. if...elif...else 语句
if...elif...else 语句用于判断多个条件。
score = 85
if score >= 90:
    print("Grade: A")
elif score >= 80:
    print("Grade: B")
elif score >= 70:
    print("Grade: C")
else:
    print("Grade: D")
输出:
Grade: B
4. 嵌套 if 语句
嵌套 if 语句允许在一个 if 语句内使用另一个 if 语句。
age = 25
if age >= 18:
    print("You are an adult.")
    if age >= 65:
        print("You are a senior citizen.")
    else:
        print("You are not a senior citizen.")
else:
    print("You are a minor.")
输出:
You are an adult.
You are not a senior citizen.
总结
if 语句:用于判断单个条件。
if...else 语句:用于在条件为假时执行另一代码块。
if...elif...else 语句:用于判断多个条件。
嵌套 if 语句:允许在一个 if 语句内使用另一个 if 语句,适用于复杂条件判断。
通过理解和使用这些分支结构,可以编写出更加灵活和强大的Python程序。
for 循环
for 循环用于遍历序列(如列表、元组、字符串)或其他可迭代对象(如字典、集合)。它比传统的 while 循环更简洁和直观。
基本语法
for variable in iterable:
    # 循环体
示例
1. 遍历列表
fruits = ["apple", "banana", "cherry"]
for fruit in fruits:
    print(fruit)
输出:
apple
banana
cherry
2. 遍历字符串
for char in "hello":
    print(char)
输出:
h
e
l
l
o
3. 遍历元组
numbers = (1, 2, 3)
for number in numbers:
    print(number)
输出:
1
2
3
4. 遍历字典
遍历字典的键和值。
person = {"name": "Alice", "age": 25}
for key, value in person.items():
    print(f"{key}: {value}")
输出:
name: Alice
age: 25
5. 使用 range() 函数
range() 生成一个数值序列,常用于 for 循环中。
for i in range(5):
    print(i)
输出:
复制代码
0
1
2
3
4
高级用法
1. 使用 else 子句
for 循环可以带 else 子句,当循环正常结束时执行 else 代码块。
for i in range(5):
    print(i)
else:
    print("Loop finished")
输出:
0
1
2
3
4
Loop finished
2. 嵌套循环
可以在一个 for 循环内部嵌套另一个 for 循环。
for i in range(3):
    for j in range(2):
        print(f"i: {i}, j: {j}")
输出:
i: 0, j: 0
i: 0, j: 1
i: 1, j: 0
i: 1, j: 1
i: 2, j: 0
i: 2, j: 1
3. break 和 continue 语句
break:终止循环。
continue:跳过当前迭代,继续下一次迭代。
# 使用 break
for i in range(5):
    if i == 3:
        break
    print(i)
# 使用 continue
for i in range(5):
if i == 3:
continue
print(i)输出:
0
1
2
# break终止了循环,所以只打印了0, 1, 2
0
1
2
4
# continue跳过了3, 所以只打印了0, 1, 2, 4
总结
for 循环是 Python 中强大的工具,用于遍历各种可迭代对象。通过使用 range()、嵌套循环、else 子句、break 和 continue 语句,可以实现复杂的循环逻辑。理解和掌握 for 循环的用法,可以提高代码的效率和可读性。
while 循环
while 循环用于在指定条件为真时重复执行一段代码。与 for 循环不同,while 循环在条件表达式为 True 时持续执行,直到条件表达式为 False 时终止。
基本语法
while condition:
    # 循环体
示例
1. 基本 while 循环
count = 0
while count < 5:
    print(count)
    count += 1
输出:
0
1
2
3
4
2. while 循环与 else 子句
while 循环可以带 else 子句,当循环正常结束时执行 else 代码块。
count = 0
while count < 5:
    print(count)
    count += 1
else:
    print("Loop finished")
输出:
0
1
2
3
4
Loop finished
控制循环
1. break 语句
break 语句用于立即终止循环。
count = 0
while count < 5:
    if count == 3:
        break
    print(count)
    count += 1
输出:
0
1
2
2. continue 语句
continue 语句用于跳过当前迭代,继续下一次迭代。
count = 0
while count < 5:
    count += 1
    if count == 3:
        continue
    print(count)
输出:
复制代码
1
2
4
5
嵌套 while 循环
可以在一个 while 循环内部嵌套另一个 while 循环。
i = 1
while i <= 3:
    j = 1
    while j <= 2:
        print(f"i: {i}, j: {j}")
        j += 1
    i += 1
输出:
i: 1, j: 1
i: 1, j: 2
i: 2, j: 1
i: 2, j: 2
i: 3, j: 1
i: 3, j: 2
无限循环
如果条件表达式始终为 True,则 while 循环将变成无限循环。
while True:
    print("This is an infinite loop")
    break  # 通常使用 break 语句来终止循环
输出:
This is an infinite loop
示例代码
以下是一个更复杂的示例,展示了 while 循环结合 if...else 和 break 的用法。
# 用户输入密码示例
correct_password = "python123"
attempts = 3

while attempts > 0:
    password = input("Enter your password: ")
    if password == correct_password:
        print("Access granted")
        break
    else:
        attempts -= 1
        print(f"Wrong password. You have {attempts} attempts left.")
else:
    print("Access denied. Too many failed attempts.")
输出:
Enter your password: wrongpass
Wrong password. You have 2 attempts left.
Enter your password: wrongpass
Wrong password. You have 1 attempts left.
Enter your password: python123
Access granted
总结
while 循环是 Python 中的重要控制结构,用于在条件为真时重复执行一段代码。通过使用 break 和 continue 语句以及嵌套循环,可以实现复杂的循环逻辑。理解 while 循环的用法,有助于编写更加灵活和高效的 Python 代码。
序列的索引及操作
Python 序列包括字符串、列表、元组等类型。序列支持多种操作,包括索引、切片、连接、重复和成员资格测试。
1. 序列的索引
序列中的每个元素都有一个位置索引,索引从 0 开始,负索引从 -1 开始表示倒数第一个元素。
# 示例序列
sequence = [10, 20, 30, 40, 50]

# 正向索引
print(sequence[0])  # 输出: 10
print(sequence[3])  # 输出: 40

# 负向索引
print(sequence[-1])  # 输出: 50
print(sequence[-2])  # 输出: 40
2. 序列的切片
切片用于访问序列的一个子集,通过指定开始和结束索引。
# 示例序列
sequence = [10, 20, 30, 40, 50]

# 正向切片
print(sequence[1:4])  # 输出: [20, 30, 40]

# 负向切片
print(sequence[-4:-1])  # 输出: [20, 30, 40]

# 从头开始的切片
print(sequence[:3])  # 输出: [10, 20, 30]

# 到末尾的切片
print(sequence[2:])  # 输出: [30, 40, 50]

# 全部元素的切片
print(sequence[:])  # 输出: [10, 20, 30, 40, 50]

# 带步长的切片
print(sequence[0:5:2])  # 输出: [10, 30, 50]
print(sequence[::-1])   # 输出: [50, 40, 30, 20, 10]
3. 序列的连接
可以使用 + 运算符连接两个序列。
list1 = [1, 2, 3]
list2 = [4, 5, 6]

result = list1 + list2
print(result)  # 输出: [1, 2, 3, 4, 5, 6]
4. 序列的重复
可以使用 * 运算符重复序列。
list1 = [1, 2, 3]

result = list1 * 3
print(result)  # 输出: [1, 2, 3, 1, 2, 3, 1, 2, 3]
5. 序列的成员资格测试
可以使用 in 和 not in 运算符测试元素是否在序列中。
sequence = [10, 20, 30, 40, 50]

print(20 in sequence)   # 输出: True
print(60 not in sequence)  # 输出: True
6. 序列的长度、最大值和最小值
可以使用内置函数 len()、max() 和 min() 获取序列的长度、最大值和最小值。
sequence = [10, 20, 30, 40, 50]

print(len(sequence))  # 输出: 5
print(max(sequence))  # 输出: 50
print(min(sequence))  # 输出: 10
示例代码
# 创建一个列表
sequence = [10, 20, 30, 40, 50]

# 索引
print(sequence[0])  # 输出: 10
print(sequence[-1])  # 输出: 50

# 切片
print(sequence[1:4])  # 输出: [20, 30, 40]
print(sequence[:3])  # 输出: [10, 20, 30]
print(sequence[2:])  # 输出: [30, 40, 50]
print(sequence[::2])  # 输出: [10, 30, 50]

# 连接
list1 = [1, 2, 3]
list2 = [4, 5, 6]
print(list1 + list2)  # 输出: [1, 2, 3, 4, 5, 6]

# 重复
print(list1 * 3)  # 输出: [1, 2, 3, 1, 2, 3, 1, 2, 3]

# 成员资格测试
print(20 in sequence)  # 输出: True
print(60 not in sequence)  # 输出: True

# 长度、最大值和最小值
print(len(sequence))  # 输出: 5
print(max(sequence))  # 输出: 50
print(min(sequence))  # 输出: 10
通过理解和使用这些操作,你可以灵活地处理Python中的序列数据类型。
列表及其操作
Python 列表是一种用于存储多个项目的有序集合。列表是可变的,可以包含不同类型的元素。列表使用方括号 [] 定义,并且元素之间用逗号分隔。列表的创建
# 创建一个空列表
empty_list = []

# 创建一个包含多个元素的列表
fruits = ["apple", "banana", "cherry"]
列表的基本操作
1. 访问元素
使用索引访问列表中的元素,索引从 0 开始,负索引用于从末尾访问元素。
print(fruits[0])   # 输出: apple
print(fruits[-1])  # 输出: cherry
2. 修改元素
通过索引修改列表中的元素。
fruits[1] = "blueberry"
print(fruits)  # 输出: ['apple', 'blueberry', 'cherry']
3. 添加元素
使用 append() 方法在列表末尾添加元素。
fruits.append("orange")
print(fruits)  # 输出: ['apple', 'blueberry', 'cherry', 'orange']
使用 insert() 方法在指定位置插入元素。
fruits.insert(1, "banana")
print(fruits)  # 输出: ['apple', 'banana', 'blueberry', 'cherry', 'orange']
4. 删除元素
使用 remove() 方法删除指定值的元素。
fruits.remove("banana")
print(fruits)  # 输出: ['apple', 'blueberry', 'cherry', 'orange']
使用 pop() 方法删除指定索引处的元素,若不指定索引,则删除最后一个元素。
fruits.pop(2)
print(fruits)  # 输出: ['apple', 'blueberry', 'orange']
使用 del 语句删除指定索引处的元素。
del fruits[0]
print(fruits)  # 输出: ['blueberry', 'orange']
查找元素的索引
使用 index() 方法
fruits = ["apple", "banana", "cherry"]
index = fruits.index("cherry")
print(index)  # 输出: 2
10. 列表排序
使用 sort() 方法对列表进行原地排序。
numbers = [3, 1, 4, 1, 5, 9]
numbers.sort()
print(numbers)  # 输出: [1, 1, 3, 4, 5, 9]
使用 sorted() 函数返回排序后的新列表。
numbers = [3, 1, 4, 1, 5, 9]
sorted_numbers = sorted(numbers)
print(sorted_numbers)  # 输出: [1, 1, 3, 4, 5, 9]
print(numbers)         # 输出: [3, 1, 4, 1, 5, 9]
通过这些操作,可以灵活地处理Python中的列表数据类型。
列表遍历
遍历列表是对列表中的每个元素执行操作的过程。Python 提供了多种方法来遍历列表。
1. 使用 for 循环
这是最常见的方法,通过 for 循环直接遍历列表中的每个元素。
2. 使用 for 循环和 range() 函数
通过 range() 函数生成索引,然后使用索引遍历列表。
3. 使用 while 循环
使用 while 循环和索引变量遍历列表。
4. 使用列表推导式
列表推导式是一种简洁的遍历列表并生成新列表的方法。
fruits = ["apple", "banana", "cherry"]
uppercased_fruits = [fruit.upper() for fruit in fruits]
print(uppercased_fruits)
5. 使用 enumerate()
enumerate() 函数可以在遍历列表时同时获取元素的索引和值。
fruits = ["apple", "banana", "cherry"]
for index, fruit in enumerate(fruits):
    print(f"Index: {index}, Fruit: {fruit}")
遍历列表是处理列表数据的基本操作,Python 提供了多种方法来实现这一操作,包括 for 循环、while 循环、列表推导式和 enumerate() 函数。根据具体需求选择合适的方法可以使代码更简洁高效。
二维列表的创建和遍历
二维列表是列表的列表,用于表示矩阵或表格数据。下面介绍如何创建和遍历二维列表。
创建二维列表
可以通过多种方式创建二维列表:
直接嵌套列表:
matrix = [
    [1, 2, 3],
    [4, 5, 6],
    [7, 8, 9]
]
使用列表推导式:
rows = 3
cols = 3
matrix = [[0 for _ in range(cols)] for _ in range(rows)]
遍历二维列表
可以使用嵌套的 for 循环遍历二维列表。
1. 遍历所有元素
matrix = [
    [1, 2, 3],
    [4, 5, 6],
    [7, 8, 9]
]

for row in matrix:
    for element in row:
        print(element, end=' ')
    print()  # 换行
2. 使用索引遍历
matrix = [
    [1, 2, 3],
    [4, 5, 6],
    [7, 8, 9]
]

for i in range(len(matrix)):
    for j in range(len(matrix[i])):
        print(matrix[i][j], end=' ')
    print()  # 换行
3. 使用 enumerate 遍历
matrix = [
    [1, 2, 3],
    [4, 5, 6],
    [7, 8, 9]
]

for i, row in enumerate(matrix):
    for j, element in enumerate(row):
        print(f'matrix[{i}][{j}] = {element}')
通过这些操作,可以轻松创建和遍历Python中的二维列表,处理复杂的矩阵或表格数据。
元组
元组(tuple)是Python中的一种数据结构,用于存储一组不可变的、有序的元素。元组的元素可以是不同类型的。由于元组是不可变的,一旦创建,就不能修改其内容。元组通常用于存储不需要修改的数据。
使用圆括号:
my_tuple = (1, 2, 3)不使用圆括号(也称隐式元组):
my_tuple = 1, 2, 3单元素元组(需要在元素后添加逗号):
single_element_tuple = (1,)空元组:
empty_tuple = ()访问元组元素
使用索引:
my_tuple = (1, 2, 3)
print(my_tuple[0])  # 输出: 1
print(my_tuple[-1]) # 输出: 3
使用切片:
my_tuple = (1, 2, 3, 4, 5)
print(my_tuple[1:3]) # 输出: (2, 3)
print(my_tuple[:2])  # 输出: (1, 2)
print(my_tuple[3:])  # 输出: (4, 5)
print(my_tuple[:])   # 输出: (1, 2, 3, 4, 5)
print(my_tuple[::2]) # 输出: (1, 3, 5)
元组的方法
count():返回指定元素在元组中出现的次数。
my_tuple = (1, 2, 2, 3)
print(my_tuple.count(2))  # 输出: 2
index():返回指定元素在元组中的索引,如果元素不在元组中,则抛出异常。
my_tuple = (1, 2, 3)
print(my_tuple.index(2))  # 输出: 1
遍历元组
使用 for 循环:
使用 enumerate():
元组的解包
可以将元组中的元素解包到变量中。
my_tuple = (1, 2, 3)
a, b, c = my_tuple
print(a, b, c)  # 输出: 1 2 3
示例代码
# 创建元组
my_tuple = (1, 2, 3)
print(my_tuple)  # 输出: (1, 2, 3)

# 单元素元组
single_element_tuple = (1,)
print(single_element_tuple)  # 输出: (1,)

# 访问元素
print(my_tuple[0])  # 输出: 1
print(my_tuple[-1]) # 输出: 3

# 元组切片
print(my_tuple[1:3]) # 输出: (2, 3)

# 元组连接
tuple1 = (1, 2)
tuple2 = (3, 4)
combined = tuple1 + tuple2
print(combined)  # 输出: (1, 2, 3, 4)

# 元组重复
repeated = tuple1 * 3
print(repeated)  # 输出: (1, 2, 1, 2, 1, 2)

# 元组方法
my_tuple = (1, 2, 2, 3)
print(my_tuple.count(2))  # 输出: 2
print(my_tuple.index(2))  # 输出: 1

# 遍历元组
for element in my_tuple:
    print(element)

# 使用 enumerate
for index, element in enumerate(my_tuple):
    print(f"Index: {index}, Element: {element}")

# 元组解包
my_tuple = (1, 2, 3)
a, b, c = my_tuple
print(a, b, c)  # 输出: 1 2 3
总结
元组是一种不可变的有序集合,适用于存储不需要修改的数据。通过了解元组的创建、访问、操作和方法,可以有效地使用元组处理数据。
字典
字典(dictionary)是Python中用于存储键值对的数据结构。字典是无序的、可变的,并且键必须是唯一的。字典使用花括号 {} 定义,每个键值对之间使用逗号分隔,键和值之间使用冒号分隔。
创建字典
直接创建:
my_dict = {
    "name": "Alice",
    "age": 25,
    "city": "New York"
}
使用 dict() 函数:
my_dict = dict(name="Alice", age=25, city="New York")访问字典元素
通过键访问值:
name = my_dict["name"]
print(name)  # 输出: Alice
使用 get() 方法:
age = my_dict.get("age")
print(age)  # 输出: 25
# 使用默认值
country = my_dict.get("country", "USA")
print(country) # 输出: USA修改字典
添加或更新键值对:
my_dict["email"] = "alice@example.com"  # 添加新的键值对
my_dict["age"] = 26  # 更新已有键的值
print(my_dict)
# 输出: {'name': 'Alice', 'age': 26, 'city': 'New York', 'email': 'alice@example.com'}
使用 update() 方法:
my_dict.update({"age": 27, "city": "Los Angeles"})
print(my_dict)
# 输出: {'name': 'Alice', 'age': 27, 'city': 'Los Angeles', 'email': 'alice@example.com'}
删除字典元素
使用 del 语句:
del my_dict["email"]
print(my_dict)
# 输出: {'name': 'Alice', 'age': 27, 'city': 'Los Angeles'}
使用 pop() 方法:
age = my_dict.pop("age")
print(age)  # 输出: 27
print(my_dict)
# 输出: {'name': 'Alice', 'city': 'Los Angeles'}
使用 popitem() 方法(删除并返回最后一个键值对,Python 3.7+):
item = my_dict.popitem()
print(item)  # 输出: ('city', 'Los Angeles')
print(my_dict)
# 输出: {'name': 'Alice'}
使用 clear() 方法(清空字典):
my_dict.clear()
print(my_dict)  # 输出: {}
遍历字典
遍历键:
for key in my_dict.keys():
    print(key)
遍历值:
for value in my_dict.values():
    print(value)
遍历键值对:
for key, value in my_dict.items():
    print(f"{key}: {value}")
示例代码
# 创建字典
my_dict = {
    "name": "Alice",
    "age": 25,
    "city": "New York"
}

# 访问字典元素
print(my_dict["name"])  # 输出: Alice
print(my_dict.get("age"))  # 输出: 25
print(my_dict.get("country", "USA"))  # 输出: USA

# 修改字典
my_dict["email"] = "alice@example.com"  # 添加新的键值对
my_dict["age"] = 26  # 更新已有键的值
print(my_dict)  # 输出: {'name': 'Alice', 'age': 26, 'city': 'New York', 'email': 'alice@example.com'}

# 使用 update() 方法
my_dict.update({"age": 27, "city": "Los Angeles"})
print(my_dict)  # 输出: {'name': 'Alice', 'age': 27, 'city': 'Los Angeles', 'email': 'alice@example.com'}

# 删除字典元素
del my_dict["email"]
print(my_dict)  # 输出: {'name': 'Alice', 'age': 27, 'city': 'Los Angeles'}

# 使用 pop() 方法
age = my_dict.pop("age")
print(age)  # 输出: 27
print(my_dict)  # 输出: {'name': 'Alice', 'city': 'Los Angeles'}

# 使用 popitem() 方法
item = my_dict.popitem()
print(item)  # 输出: ('city', 'Los Angeles')
print(my_dict)  # 输出: {'name': 'Alice'}

# 使用 clear() 方法
my_dict.clear()
print(my_dict)  # 输出: {}

# 遍历字典
my_dict = {
    "name": "Alice",
    "age": 25,
    "city": "New York"
}

# 遍历键
for key in my_dict.keys():
    print(key)  # 输出: name, age, city

# 遍历值
for value in my_dict.values():
    print(value)  # 输出: Alice, 25, New York

# 遍历键值对
for key, value in my_dict.items():
    print(f"{key}: {value}")  # 输出: name: Alice, age: 25, city: New York
总结
字典是一种强大的数据结构,适用于需要键值对存储和快速查找的场景。通过了解如何创建、访问、修改、删除和遍历字典,可以有效地使用字典处理复杂的数据。
集合
集合(set)是Python中的一种数据结构,是一个无序且不重复的元素集合。集合用于存储唯一的项目,并且支持集合运算,如并集、交集和差集。
创建集合
使用花括号 {}:
my_set = {1, 2, 3, 4, 5}使用 set() 函数:
my_set = set([1, 2, 3, 4, 5])创建空集合(注意:不能使用 {},那样创建的是空字典):
my_set = set()集合的基本操作
添加元素:
使用 add() 方法
my_set = {1, 2, 3}
my_set.add(4)
print(my_set)  # 输出: {1, 2, 3, 4}
使用 update() 方法可以添加多个元素
my_set.update([5, 6])
print(my_set)  # 输出: {1, 2, 3, 4, 5, 6}
删除元素:
使用 remove() 方法(如果元素不存在,会抛出 KeyError)
my_set.remove(2)
print(my_set)  # 输出: {1, 3, 4, 5, 6}
使用 discard() 方法(如果元素不存在,不会抛出异常)
my_set.discard(10)
print(my_set)  # 输出: {1, 3, 4, 5, 6}
使用 pop() 方法删除并返回一个随机元素
element = my_set.pop()
print(element)
print(my_set)
使用 clear() 方法清空集合
my_set.clear()
print(my_set)  # 输出: set()
集合运算:
并集:| 或 union()
set1 = {1, 2, 3}
set2 = {3, 4, 5}
print(set1 | set2)  # 输出: {1, 2, 3, 4, 5}
print(set1.union(set2))  # 输出: {1, 2, 3, 4, 5}
交集:& 或 intersection()
print(set1 & set2)  # 输出: {3}
print(set1.intersection(set2))  # 输出: {3}
差集:- 或 difference()
print(set1 - set2)  # 输出: {1, 2}
print(set1.difference(set2))  # 输出: {1, 2}
对称差集:^ 或 symmetric_difference()
print(set1 ^ set2)  # 输出: {1, 2, 4, 5}
print(set1.symmetric_difference(set2))  # 输出: {1, 2, 4, 5}
子集和超集:
检查子集:<= 或 issubset()
set1 = {1, 2, 3}
set2 = {1, 2, 3, 4, 5}
print(set1 <= set2)  # 输出: True
print(set1.issubset(set2))  # 输出: True
检查超集:>= 或 issuperset()
print(set2 >= set1)  # 输出: True
print(set2.issuperset(set1))  # 输出: True
集合的遍历:
my_set = {1, 2, 3, 4, 5}
for element in my_set:
    print(element)
示例代码
# 创建集合
my_set = {1, 2, 3, 4, 5}
print(my_set)  # 输出: {1, 2, 3, 4, 5}

# 使用 set() 函数创建集合
my_set = set([1, 2, 3, 4, 5])
print(my_set)  # 输出: {1, 2, 3, 4, 5}

# 创建空集合
empty_set = set()
print(empty_set)  # 输出: set()

# 添加元素
my_set.add(6)
print(my_set)  # 输出: {1, 2, 3, 4, 5, 6}

# 添加多个元素
my_set.update([7, 8])
print(my_set)  # 输出: {1, 2, 3, 4, 5, 6, 7, 8}

# 删除元素
my_set.remove(2)
print(my_set)  # 输出: {1, 3, 4, 5, 6, 7, 8}

# 删除不存在的元素(不会抛出异常)
my_set.discard(10)
print(my_set)  # 输出: {1, 3, 4, 5, 6, 7, 8}

# 随机删除一个元素
element = my_set.pop()
print(element)
print(my_set)

# 清空集合
my_set.clear()
print(my_set)  # 输出: set()

# 集合运算
set1 = {1, 2, 3}
set2 = {3, 4, 5}

# 并集
print(set1 | set2)  # 输出: {1, 2, 3, 4, 5}
print(set1.union(set2))  # 输出: {1, 2, 3, 4, 5}

# 交集
print(set1 & set2)  # 输出: {3}
print(set1.intersection(set2))  # 输出: {3}

# 差集
print(set1 - set2)  # 输出: {1, 2}
print(set1.difference(set2))  # 输出: {1, 2}

# 对称差集
print(set1 ^ set2)  # 输出: {1, 2, 4, 5}
print(set1.symmetric_difference(set2))  # 输出: {1, 2, 4, 5}

# 检查子集
print(set1 <= set2)  # 输出: True
print(set1.issubset(set2))  # 输出: True

# 检查超集
print(set2 >= set1)  # 输出: True
print(set2.issuperset(set1))  # 输出: True

# 遍历集合
my_set = {1, 2, 3, 4, 5}
for element in my_set:
    print(element)
总结
集合是一种无序且不重复的元素集合,适用于需要快速查找和去重操作的场景。通过了解集合的创建、基本操作、集合运算和遍历方法,可以有效地使用集合处理数据。
字符串
字符串(string)是Python中表示文本数据的一种数据类型。字符串是不可变的字符序列。可以使用单引号 '、双引号 " 或三引号 ''' 或 """ 来定义字符串。
访问字符串中的字符
使用索引:
str1 = 'Hello'
print(str1[0])  # 输出: H
print(str1[-1]) # 输出: o
使用切片:
str1 = 'Hello, World!'
print(str1[0:5])  # 输出: Hello
print(str1[:5])   # 输出: Hello
print(str1[7:])   # 输出: World!
print(str1[:])    # 输出: Hello, World!
print(str1[::2])  # 输出: Hlo ol!
print(str1[::-1]) # 输出: !dlroW ,olleH
字符串操作
连接字符串:
str1 = 'Hello'
str2 = 'World'
str3 = str1 + ', ' + str2 + '!'
print(str3)  # 输出: Hello, World!
重复字符串:
str1 = 'Hello'
str2 = str1 * 3
print(str2)  # 输出: HelloHelloHello
检查子字符串:
str1 = 'Hello, World!'
print('Hello' in str1)  # 输出: True
print('Python' not in str1)  # 输出: True
字符串方法
转换大小写:
str1 = 'Hello, World!'
print(str1.upper())  # 输出: HELLO, WORLD!
print(str1.lower())  # 输出: hello, world!
print(str1.capitalize())  # 输出: Hello, world!
print(str1.title())  # 输出: Hello, World!
print(str1.swapcase())  # 输出: hELLO, wORLD!
去除空白:
str1 = '   Hello, World!   '
print(str1.strip())  # 输出: Hello, World!
print(str1.lstrip()) # 输出: Hello, World!
print(str1.rstrip()) # 输出:    Hello, World!
替换字符串:
str1 = 'Hello, World!'
print(str1.replace('World', 'Python'))  # 输出: Hello, Python!
分割字符串:
str1 = 'Hello, World!'
print(str1.split(','))  # 输出: ['Hello', ' World!']
查找字符串:
str1 = 'Hello, World!'
print(str1.find('World'))  # 输出: 7
print(str1.find('Python'))  # 输出: -1
print(str1.index('World'))  # 输出: 7
# print(str1.index('Python'))  # 会引发ValueError
字符串的长度:
str1 = 'Hello, World!'
print(len(str1))  # 输出: 13
格式化字符串
使用 % 操作符:
name = 'Alice'
age = 25
print('My name is %s and I am %d years old.' % (name, age))
# 输出: My name is Alice and I am 25 years old.
使用 format() 方法:
print('My name is {} and I am {} years old.'.format(name, age))
# 输出: My name is Alice and I am 25 years old.
print('My name is {0} and I am {1} years old.'.format(name, age))
# 输出: My name is Alice and I am 25 years old.
print('My name is {name} and I am {age} years old.'.format(name=name, age=age))
# 输出: My name is Alice and I am 25 years old.
使用 f-string(Python 3.6+):
print(f'My name is {name} and I am {age} years old.')
# 输出: My name is Alice and I am 25 years old.
示例代码
# 创建字符串
str1 = 'Hello, World!'
str2 = "Hello, World!"
str3 = """This is a
multi-line string."""

# 访问字符串中的字符
print(str1[0])  # 输出: H
print(str1[-1]) # 输出: !

# 字符串切片
print(str1[0:5])  # 输出: Hello
print(str1[:5])   # 输出: Hello
print(str1[7:])   # 输出: World!
print(str1[:])    # 输出: Hello, World!
print(str1[::2])  # 输出: Hlo ol!
print(str1[::-1]) # 输出: !dlroW ,olleH

# 字符串连接和重复
str4 = str1 + ' ' + str2
print(str4)  # 输出: Hello, World! Hello, World!
str5 = str1 * 2
print(str5)  # 输出: Hello, World!Hello, World!

# 检查子字符串
print('Hello' in str1)  # 输出: True
print('Python' not in str1)  # 输出: True

# 字符串方法
print(str1.upper())  # 输出: HELLO, WORLD!
print(str1.lower())  # 输出: hello, world!
print(str1.capitalize())  # 输出: Hello, world!
print(str1.title())  # 输出: Hello, World!
print(str1.swapcase())  # 输出: hELLO, wORLD!

str6 = '   Hello, World!   '
print(str6.strip())  # 输出: Hello, World!
print(str6.lstrip()) # 输出: Hello, World!
print(str6.rstrip()) # 输出:    Hello, World!

print(str1.replace('World', 'Python'))  # 输出: Hello, Python!

print(str1.split(','))  # 输出: ['Hello', ' World!']

print(str1.find('World'))  # 输出: 7
print(str1.index('World'))  # 输出: 7

print(len(str1))  # 输出: 13

# 字符串格式化
name = 'Alice'
age = 25
print('My name is %s and I am %d years old.' % (name, age))
print('My name is {} and I am {} years old.'.format(name, age))
print(f'My name is {name} and I am {age} years old.')
总结
字符串是Python中用于表示文本数据的重要数据类型。通过学习字符串的创建、访问、操作和格式化方法,可以高效地处理文本数据。字符串方法和格式化技术是处理和显示文本信息的基本工具。
正则表达式
正则表达式(Regular Expressions,简称 regex 或 RE)是一种强大的工具,用于匹配字符串中的字符模式。Python 中的 re 模块提供了对正则表达式的支持。

导入 re 模块
import re基本的正则表达式功能
匹配(match)
match() 函数尝试从字符串的起始位置匹配一个模式。
result = re.match(r'Hello', 'Hello, World!')
print(result)  # 输出: <re.Match object; span=(0, 5), match='Hello'>
搜索(search)
search() 函数在字符串中搜索模式,并返回第一个匹配对象。
result = re.search(r'World', 'Hello, World!')
print(result)  # 输出: <re.Match object; span=(7, 12), match='World'>
查找所有匹配项(findall)
findall() 函数返回字符串中所有非重叠匹配项的列表。
result = re.findall(r'\d+', 'There are 123 apples and 456 bananas')
print(result)  # 输出: ['123', '456']
替换(sub)
sub() 函数用于替换字符串中所有匹配的子字符串。
result = re.sub(r'apples', 'oranges', 'There are apples')
print(result)  # 输出: There are oranges
拆分字符串(split)
split() 函数根据匹配项拆分字符串,并返回拆分后的列表。
result = re.split(r'\s+', 'Split this sentence into words')
print(result)  # 输出: ['Split', 'this', 'sentence', 'into', 'words']
正则表达式语法
特殊字符
. 匹配任意单个字符(除换行符外)
^ 匹配字符串的起始位置
$ 匹配字符串的结束位置
* 匹配前一个字符零次或多次
+ 匹配前一个字符一次或多次
? 匹配前一个字符零次或一次
{n} 匹配前一个字符恰好 n 次
{n,} 匹配前一个字符至少 n 次
{n,m} 匹配前一个字符至少 n 次且至多 m 次
[] 匹配字符集中的一个字符
| 匹配左右任意一个表达式
() 捕获组
示例
简单匹配
pattern = r'hello'
text = 'hello world'
result = re.match(pattern, text)
print(result)  # 输出: <re.Match object; span=(0, 5), match='hello'>
使用捕获组
pattern = r'(\d{3})-(\d{3})-(\d{4})'
text = 'My phone number is 123-456-7890'
result = re.search(pattern, text)
if result:
    print(result.group())  # 输出: 123-456-7890
    print(result.group(1)) # 输出: 123
    print(result.group(2)) # 输出: 456
    print(result.group(3)) # 输出: 7890
使用字符集
pattern = r'[aeiou]'
text = 'hello world'
result = re.findall(pattern, text)
print(result)  # 输出: ['e', 'o', 'o']
替换
pattern = r'\d+'
text = 'There are 123 apples and 456 bananas'
result = re.sub(pattern, '#', text)
print(result)  # 输出: There are # apples and # bananas
拆分
pattern = r'\s+'
text = 'Split this sentence into words'
result = re.split(pattern, text)
print(result)  # 输出: ['Split', 'this', 'sentence', 'into', 'words']
示例代码
import re

# 简单匹配
pattern = r'hello'
text = 'hello world'
result = re.match(pattern, text)
if result:
    print(result.group())  # 输出: hello

# 搜索
pattern = r'world'
text = 'hello world'
result = re.search(pattern, text)
if result:
    print(result.group())  # 输出: world

# 查找所有匹配项
pattern = r'\d+'
text = 'There are 123 apples and 456 bananas'
result = re.findall(pattern, text)
print(result)  # 输出: ['123', '456']

# 替换
pattern = r'apples'
text = 'There are apples'
result = re.sub(pattern, 'oranges', text)
print(result)  # 输出: There are oranges

# 拆分字符串
pattern = r'\s+'
text = 'Split this sentence into words'
result = re.split(pattern, text)
print(result)  # 输出: ['Split', 'this', 'sentence', 'into', 'words']

# 使用捕获组
pattern = r'(\d{3})-(\d{3})-(\d{4})'
text = 'My phone number is 123-456-7890'
result = re.search(pattern, text)
if result:
    print(result.group())  # 输出: 123-456-7890
    print(result.group(1)) # 输出: 123
    print(result.group(2)) # 输出: 456
    print(result.group(3)) # 输出: 7890

# 使用字符集
pattern = r'[aeiou]'
text = 'hello world'
result = re.findall(pattern, text)
print(result)  # 输出: ['e', 'o', 'o']
总结
正则表达式是一个强大的工具,用于匹配、搜索和操作文本。通过使用Python的re模块,可以轻松地在字符串中进行复杂的模式匹配和文本操作。理解和熟练使用正则表达式,可以显著提高文本处理的效率和灵活性。
异常处理
异常处理是编程中的重要部分,用于处理程序运行时可能发生的错误。Python 提供了 try、except、else 和 finally 语句来捕获和处理异常。
基本语法
try:
    # 可能发生异常的代码
    pass
except ExceptionType as e:
    # 处理异常的代码
    pass
else:
    # 没有发生异常时执行的代码
    pass
finally:
    # 无论是否发生异常都执行的代码
    pass
示例代码
简单的异常处理
try:
    result = 10 / 0
except ZeroDivisionError as e:
    print(f"Error: {e}")
输出:
Error: division by zero
捕获多个异常
try:
    x = int("abc")
except (ValueError, TypeError) as e:
    print(f"Error: {e}")
输出:
Error: invalid literal for int() with base 10: 'abc'
使用 else 语句
try:
    result = 10 / 2
except ZeroDivisionError as e:
    print(f"Error: {e}")
else:
    print(f"Result: {result}")
输出:
Result: 5.0
使用 finally 语句
try:
    result = 10 / 2
except ZeroDivisionError as e:
    print(f"Error: {e}")
else:
    print(f"Result: {result}")
finally:
    print("This block always executes.")
输出:
Result: 5.0
This block always executes.
自定义异常
class CustomError(Exception):
    pass

try:
    raise CustomError("This is a custom error.")
except CustomError as e:
    print(f"Error: {e}")
输出:
Error: This is a custom error.
异常处理中的常用异常类型
Exception:所有异常的基类。
ArithmeticError:所有数值计算错误的基类。
ZeroDivisionError:除(或取模)零(所有数据类型)。
ImportError:导入模块/对象失败。
IndexError:序列中没有此索引(索引超出范围)。
KeyError:映射中没有这个键。
NameError:未声明/初始化对象(没有属性)。
SyntaxError:Python 语法错误。
TypeError:对类型无效的操作。
ValueError:传入无效的参数。
示例代码
# 简单的异常处理
try:
    result = 10 / 0
except ZeroDivisionError as e:
    print(f"Error: {e}")

# 捕获多个异常
try:
    x = int("abc")
except (ValueError, TypeError) as e:
    print(f"Error: {e}")

# 使用 else 语句
try:
    result = 10 / 2
except ZeroDivisionError as e:
    print(f"Error: {e}")
else:
    print(f"Result: {result}")

# 使用 finally 语句
try:
    result = 10 / 2
except ZeroDivisionError as e:
    print(f"Error: {e}")
else:
    print(f"Result: {result}")
finally:
    print("This block always executes.")

# 自定义异常
class CustomError(Exception):
    pass

try:
    raise CustomError("This is a custom error.")
except CustomError as e:
    print(f"Error: {e}")
总结
通过使用 try、except、else 和 finally 语句,可以有效地捕获和处理Python程序中的异常,保证程序的健壮性和可靠性。理解和掌握异常处理机制是编写高质量Python代码的重要技能。
raise 关键字
raise 关键字用于引发异常,可以引发系统定义的异常或者自定义异常。通过使用 raise,可以在程序中特定的条件下主动引发异常,以处理特殊情况或错误。
基本语法
raise ExceptionType("Error message")示例代码
引发系统定义的异常
# 引发 ValueError 异常
try:
    raise ValueError("This is a ValueError.")
except ValueError as e:
    print(f"Caught an exception: {e}")
输出:
Caught an exception: This is a ValueError.
引发自定义异常
# 定义自定义异常
class CustomError(Exception):
    pass

# 引发自定义异常
try:
    raise CustomError("This is a custom error.")
except CustomError as e:
    print(f"Caught an exception: {e}")
输出:
Caught an exception: This is a custom error.
重新引发异常
# 重新引发异常
try:
    try:
        raise ValueError("Initial error.")
    except ValueError as e:
        print(f"Caught an exception: {e}")
        raise  # 重新引发捕获的异常
except ValueError as e:
    print(f"Caught re-raised exception: {e}")
输出:
Caught an exception: Initial error.
Caught re-raised exception: Initial error.
在函数中引发异常
def divide(a, b):
    if b == 0:
        raise ZeroDivisionError("division by zero is undefined")
    return a / b

try:
    result = divide(10, 0)
except ZeroDivisionError as e:
    print(f"Caught an exception: {e}")
输出:
Caught an exception: division by zero is undefined
使用场景
输入验证当函数参数不满足特定条件时,可以使用 raise 引发异常来阻止非法操作。
def set_age(age):
    if age < 0:
        raise ValueError("Age cannot be negative")
    print(f"Age is set to {age}")

try:
    set_age(-1)
except ValueError as e:
    print(f"Caught an exception: {e}")
输出:
Caught an exception: Age cannot be negative
程序逻辑控制
当程序逻辑进入不期望的分支时,可以使用 raise 引发异常进行控制。
def process_data(data):
    if not isinstance(data, list):
        raise TypeError("Data must be a list")
    # 处理数据
    print(f"Processing {data}")

try:
    process_data("not a list")
except TypeError as e:
    print(f"Caught an exception: {e}")
输出:
Caught an exception: Data must be a list
示例代码
# 引发系统定义的异常
try:
    raise ValueError("This is a ValueError.")
except ValueError as e:
    print(f"Caught an exception: {e}")

# 引发自定义异常
class CustomError(Exception):
    pass

try:
    raise CustomError("This is a custom error.")
except CustomError as e:
    print(f"Caught an exception: {e}")

# 重新引发异常
try:
    try:
        raise ValueError("Initial error.")
    except ValueError as e:
        print(f"Caught an exception: {e}")
        raise  # 重新引发捕获的异常
except ValueError as e:
    print(f"Caught re-raised exception: {e}")

# 在函数中引发异常
def divide(a, b):
    if b == 0:
        raise ZeroDivisionError("division by zero is undefined")
    return a / b

try:
    result = divide(10, 0)
except ZeroDivisionError as e:
    print(f"Caught an exception: {e}")

# 输入验证
def set_age(age):
    if age < 0:
        raise ValueError("Age cannot be negative")
    print(f"Age is set to {age}")

try:
    set_age(-1)
except ValueError as e:
    print(f"Caught an exception: {e}")

# 程序逻辑控制
def process_data(data):
    if not isinstance(data, list):
        raise TypeError("Data must be a list")
    print(f"Processing {data}")

try:
    process_data("not a list")
except TypeError as e:
    print(f"Caught an exception: {e}")
总结
raise 关键字用于引发异常,可以是系统定义的异常也可以是自定义异常。通过使用 raise,可以在程序中特定的条件下主动引发异常,以处理特殊情况或错误。这是编写健壮和灵活代码的重要部分。
函数的定义与调用
函数是组织代码以便重用和提高代码可读性的重要工具。Python 使用 def 关键字来定义函数。
定义函数
函数定义使用 def 关键字,后跟函数名和圆括号,圆括号内可以包含参数列表。函数体使用缩进表示。
定义一个简单的函数
def greet():
    print("Hello, World!")
带参数的函数
def greet(name):
    print(f"Hello, {name}!")
带返回值的函数
def add(a, b):
    return a + b
带默认参数的函数
def greet(name="Guest"):
    print(f"Hello, {name}!")
带可变数量参数的函数
使用 *args 处理可变数量的位置参数。
使用 **kwargs 处理可变数量的关键字参数。
def print_numbers(*args):
    for number in args:
        print(number)

def print_info(**kwargs):
    for key, value in kwargs.items():
        print(f"{key}: {value}")
调用函数
定义函数之后,可以通过函数名和括号来调用函数,并传递相应的参数。
# 调用无参数函数
greet()

# 调用带参数的函数
greet("Alice")

# 调用带返回值的函数
result = add(3, 5)
print(result)

# 调用带默认参数的函数
greet()
greet("Bob")

# 调用带可变数量参数的函数
print_numbers(1, 2, 3, 4, 5)
print_info(name="Alice", age=30)
示例代码
以下是一个综合示例,展示了如何定义和调用各种类型的函数:
# 定义无参数函数
def greet():
print("Hello, World!")
# 定义带参数的函数
def greet(name):
print(f"Hello, {name}!")
# 定义带返回值的函数
def add(a, b):
return a + b
# 定义带默认参数的函数
def greet(name="Guest"):
print(f"Hello, {name}!")
# 定义带可变数量位置参数的函数
def print_numbers(*args):
for number in args:
print(number)
# 定义带可变数量关键字参数的函数
def print_info(**kwargs):
for key, value in kwargs.items():
print(f"{key}: {value}")
# 调用无参数函数
greet() # 输出: Hello, World!
# 调用带参数的函数
greet("Alice") # 输出: Hello, Alice!
# 调用带返回值的函数
result = add(3, 5)
print(result) # 输出: 8
# 调用带默认参数的函数
greet() # 输出: Hello, Guest!
greet("Bob") # 输出: Hello, Bob!
# 调用带可变数量位置参数的函数
print_numbers(1, 2, 3, 4, 5)
# 输出:
# 1
# 2
# 3
# 4
# 5
# 调用带可变数量关键字参数的函数
print_info(name="Alice", age=30)
# 输出:
# name: Alice
# age: 30总结
函数是Python中组织和重用代码的基本单元。通过定义和调用函数,可以提高代码的可读性、可维护性和可重用性。理解函数的定义、参数传递、返回值和可变数量参数的使用,是编写高效Python代码的基础。
匿名函数(Lambda)
匿名函数,也称为 lambda 函数,是没有名称的函数。它们通常用于需要一个简单函数的场景,而不需要正式定义一个函数。Python 使用 lambda 关键字定义匿名函数。
定义和语法
匿名函数使用 lambda 关键字定义,后跟参数,冒号和表达式。Lambda 函数可以有任意数量的参数,但只能包含一个表达式。
lambda 参数1, 参数2, ... : 表达式示例
基本用法
# 定义一个 lambda 函数
add = lambda x, y: x + y
# 调用 lambda 函数
print(add(2, 3)) # 输出: 5在函数中使用 lambda 函数
def make_incrementor(n):
return lambda x: x + n
inc = make_incrementor(10)
print(inc(5)) # 输出: 15在内置函数中使用 lambda 函数
Lambda 函数通常用于内置函数如 map、filter 和 sorted 中。
map 函数
numbers = [1, 2, 3, 4, 5]
squared = map(lambda x: x ** 2, numbers)
print(list(squared)) # 输出: [1, 4, 9, 16, 25]filter 函数
numbers = [1, 2, 3, 4, 5]
even_numbers = filter(lambda x: x % 2 == 0, numbers)
print(list(even_numbers)) # 输出: [2, 4]sorted 函数
pairs = [(1, 'one'), (2, 'two'), (3, 'three'), (4, 'four')]
pairs_sorted = sorted(pairs, key=lambda pair: pair[1])
print(pairs_sorted) # 输出: [(4, 'four'), (1, 'one'), (3, 'three'), (2, 'two')]示例代码
# 定义一个简单的 lambda 函数
add = lambda x, y: x + y
print(add(2, 3)) # 输出: 5
# 在函数中使用 lambda 函数
def make_incrementor(n):
return lambda x: x + n
inc = make_incrementor(10)
print(inc(5)) # 输出: 15
# 使用 lambda 函数和 map 函数
numbers = [1, 2, 3, 4, 5]
squared = map(lambda x: x ** 2, numbers)
print(list(squared)) # 输出: [1, 4, 9, 16, 25]
# 使用 lambda 函数和 filter 函数
numbers = [1, 2, 3, 4, 5]
even_numbers = filter(lambda x: x % 2 == 0, numbers)
print(list(even_numbers)) # 输出: [2, 4]
# 使用 lambda 函数和 sorted 函数
pairs = [(1, 'one'), (2, 'two'), (3, 'three'), (4, 'four')]
pairs_sorted = sorted(pairs, key=lambda pair: pair[1])
print(pairs_sorted) # 输出: [(4, 'four'), (1, 'one'), (3, 'three'), (2, 'two')]总结
Lambda 函数是简洁、便捷的匿名函数,用于需要一个简单函数的场景。它们常用于内置函数如 map、filter 和 sorted 中,帮助编写简洁、高效的代码。理解 lambda 函数的定义和使用,是掌握 Python 函数式编程的基础。
类
类是面向对象编程(OOP)的基础,通过类可以创建对象,封装数据和方法。Python 使用 class 关键字定义类。
定义类
基本的类定义如下:
class MyClass:
# 类属性
class_attribute = "I am a class attribute"
# 初始化方法
def __init__(self, value):
# 实例属性
self.instance_attribute = value
# 实例方法
def instance_method(self):
print(f"This is an instance method. Instance attribute: {self.instance_attribute}")
# 类方法
@classmethod
def class_method(cls):
print(f"This is a class method. Class attribute: {cls.class_attribute}")
# 静态方法
@staticmethod
def static_method():
print("This is a static method.")创建对象
创建对象(实例化类):
obj = MyClass("Hello")访问属性和方法
访问实例属性和方法:
print(obj.instance_attribute) # 输出: Hello
obj.instance_method() # 输出: This is an instance method. Instance attribute: Hello访问类属性和类方法:
print(MyClass.class_attribute) # 输出: I am a class attribute
MyClass.class_method() # 输出: This is a class method. Class attribute: I am a class attribute访问静态方法:
MyClass.static_method() # 输出: This is a static method.示例代码
以下是一个综合示例,展示了如何定义类、创建对象和访问属性和方法:
class MyClass:
# 类属性
class_attribute = "I am a class attribute"
# 初始化方法
def __init__(self, value):
# 实例属性
self.instance_attribute = value
# 实例方法
def instance_method(self):
print(f"This is an instance method. Instance attribute: {self.instance_attribute}")
# 类方法
@classmethod
def class_method(cls):
print(f"This is a class method. Class attribute: {cls.class_attribute}")
# 静态方法
@staticmethod
def static_method():
print("This is a static method.")
# 创建对象
obj = MyClass("Hello")
# 访问实例属性和方法
print(obj.instance_attribute) # 输出: Hello
obj.instance_method() # 输出: This is an instance method. Instance attribute: Hello
# 访问类属性和类方法
print(MyClass.class_attribute) # 输出: I am a class attribute
MyClass.class_method() # 输出: This is a class method. Class attribute: I am a class attribute
# 访问静态方法
MyClass.static_method() # 输出: This is a static method.继承
继承是面向对象编程的核心概念之一,可以让一个类继承另一个类的属性和方法。子类可以重写父类的方法,并且可以添加新的属性和方法。示例代码
class Animal:
def __init__(self, name):
self.name = name
def speak(self):
pass
class Dog(Animal):
def speak(self):
return f"{self.name} says Woof!"
class Cat(Animal):
def speak(self):
return f"{self.name} says Meow!"
dog = Dog("Buddy")
cat = Cat("Kitty")
print(dog.speak()) # 输出: Buddy says Woof!
print(cat.speak()) # 输出: Kitty says Meow!总结
类是Python面向对象编程的基础,通过定义类、创建对象、访问属性和方法,可以实现代码的封装和重用。继承机制使得代码更加灵活和可扩展。掌握类的定义和使用,是编写高质量Python代码的重要技能。
模块
模块是Python中的基本代码组织单位,可以将相关的代码分组到一个文件中,从而提高代码的可读性和可重用性。Python模块是一个包含Python定义和语句的文件,文件名以 .py 结尾。创建和导入模块
创建模块:将以下代码保存到名为 mymodule.py 的文件中。
# mymodule.py
def greet(name):
print(f"Hello, {name}!")
def add(a, b):
return a + b导入模块:在另一个Python文件或解释器中导入并使用模块中的函数。
# main.py
import mymodule
mymodule.greet("Alice") # 输出: Hello, Alice!
result = mymodule.add(3, 5)
print(result) # 输出: 8导入模块的不同方式
导入整个模块:
import mymodule
mymodule.greet("Alice")导入模块中的特定函数:
from mymodule import greet, add
greet("Bob")
result = add(2, 3)使用别名导入模块:
import mymodule as mm
mm.greet("Charlie")导入模块中的所有内容:
from mymodule import *
greet("Diana")
result = add(5, 7)标准库模块
Python 标准库包含许多有用的模块,可以直接导入和使用。例如:
math 模块:提供数学函数。
import math
print(math.sqrt(16)) # 输出: 4.0random 模块:提供生成随机数的函数。
import random
print(random.randint(1, 10)) # 输出: 一个1到10之间的随机整数datetime 模块:提供处理日期和时间的函数。
import datetime
now = datetime.datetime.now()
print(now) # 输出: 当前日期和时间示例代码
以下是一个综合示例,展示了如何创建、导入和使用模块:创建模块 mymodule.py:
# mymodule.py
def greet(name):
print(f"Hello, {name}!")
def add(a, b):
return a + b
使用模块 main.py:
# main.py
# 导入整个模块
import mymodule
mymodule.greet("Alice") # 输出: Hello, Alice!
result = mymodule.add(3, 5)
print(result) # 输出: 8
# 导入模块中的特定函数
from mymodule import greet, add
greet("Bob") # 输出: Hello, Bob!
result = add(2, 3)
print(result) # 输出: 5
# 使用别名导入模块
import mymodule as mm
mm.greet("Charlie") # 输出: Hello, Charlie!
# 导入模块中的所有内容
from mymodule import *
greet("Diana") # 输出: Hello, Diana!
result = add(5, 7)
print(result) # 输出: 12使用标准库模块:
# 使用 math 模块
import math
print(math.sqrt(16)) # 输出: 4.0
# 使用 random 模块
import random
print(random.randint(1, 10)) # 输出: 一个1到10之间的随机整数
# 使用 datetime 模块
import datetime
now = datetime.datetime.now()
print(now) # 输出: 当前日期和时间总结
模块是Python中组织代码的重要方式,通过将相关的代码放入一个文件中,可以提高代码的可读性和可重用性。Python提供了丰富的标准库模块,涵盖了从数学运算到文件处理等各个方面的功能。理解和使用模块是编写高效、结构化Python代码的关键。
主程序运行
在编写 Python 脚本时,通常会包含一些函数和类定义。为了使得脚本可以作为模块被导入到其他脚本中使用,同时也可以作为独立程序运行,Python 提供了一个特殊的变量 __name__。
__name__ 变量
当 Python 文件被直接运行时,__name__ 变量的值为 "__main__";当 Python 文件被作为模块导入时,__name__ 变量的值为该模块的名字(即不包括路径和扩展名的文件名)。
使用 if __name__ == "__main__" 结构
通过检查 __name__ 变量,可以决定一些代码是否应该在文件被直接运行时执行,而在文件被作为模块导入时不执行。这种结构通常放在脚本的末尾。示例代码
创建一个模块 mymodule.py:
# mymodule.py
def greet(name):
print(f"Hello, {name}!")
def add(a, b):
return a + b
if __name__ == "__main__":
# 仅当模块被直接运行时执行的代码
greet("Alice")
result = add(3, 5)
print(result)创建一个使用该模块的脚本 main.py:
# main.py
import mymodule
mymodule.greet("Bob") # 输出: Hello, Bob!
result = mymodule.add(2, 3)
print(result) # 输出: 5执行结果
直接运行 mymodule.py:
python mymodule.py输出:
Hello, Alice!
8
运行 main.py:
python main.py输出:
Hello, Bob!
5
在这种结构下,mymodule.py 文件中的测试代码(在 if __name__ == "__main__" 块中)仅在直接运行该文件时执行,而在 main.py 导入 mymodule 时不会执行。
总结
if __name__ == "__main__" 结构是编写可重用模块和可独立运行脚本的标准方式。通过这种方式,可以确保模块中的测试代码和主程序代码不会在模块被导入时执行,从而提高代码的可读性和模块化程度。
random 模块
random 模块提供了生成随机数的各种方法,常用于模拟、测试和生成随机数据。以下是一些常用的函数和方法。
导入 random 模块
import random常用函数
random(): 生成一个 0 到 1 之间的随机浮点数(包括 0,但不包括 1)。
result = random.random()
print(result) # 输出: 一个 0 到 1 之间的随机浮点数
randint(a, b): 生成一个 [a, b] 之间的随机整数(包括 a 和 b)。
result = random.randint(1, 10)
print(result) # 输出: 一个 1 到 10 之间的随机整数randrange(start, stop[, step]): 从范围 [start, stop) 中生成一个随机整数,步长为 step。
result = random.randrange(1, 10, 2)
print(result) # 输出: 一个 1 到 9 之间的奇数choice(seq): 从非空序列 seq 中随机选择一个元素。
items = ['apple', 'banana', 'cherry']
result = random.choice(items)
print(result) # 输出: 'apple' 或 'banana' 或 'cherry'choices(population, weights=None, *, cum_weights=None, k=1): 从 population 中随机选择 k 个元素,有权重时按权重选择。
items = ['apple', 'banana', 'cherry']
result = random.choices(items, weights=[10, 1, 1], k=2)
print(result) # 输出: 可能更倾向于 'apple'shuffle(x[, random]): 原地打乱序列 x。
items = ['apple', 'banana', 'cherry']
random.shuffle(items)
print(items) # 输出: ['banana', 'apple', 'cherry'] 等随机顺序sample(population, k): 从 population 中随机选择 k 个元素,不重复。
items = ['apple', 'banana', 'cherry']
result = random.sample(items, 2)
print(result) # 输出: ['banana', 'apple'] 等随机组合uniform(a, b): 生成一个 [a, b] 之间的随机浮点数。
result = random.uniform(1.5, 10.5)
print(result) # 输出: 一个 1.5 到 10.5 之间的随机浮点数seed(a=None, version=2): 初始化随机数生成器。
random.seed(42)示例代码
import random
# random() 示例
print("random():", random.random())
# randint(a, b) 示例
print("randint(1, 10):", random.randint(1, 10))
# randrange(start, stop[, step]) 示例
print("randrange(1, 10, 2):", random.randrange(1, 10, 2))
# choice(seq) 示例
items = ['apple', 'banana', 'cherry']
print("choice(items):", random.choice(items))
# choices(population, weights=None, *, cum_weights=None, k=1) 示例
print("choices(items, weights=[10, 1, 1], k=2):", random.choices(items, weights=[10, 1, 1], k=2))
# shuffle(x[, random]) 示例
random.shuffle(items)
print("shuffle(items):", items)
# sample(population, k) 示例
print("sample(items, 2):", random.sample(items, 2))
# uniform(a, b) 示例
print("uniform(1.5, 10.5):", random.uniform(1.5, 10.5))
# seed(a=None, version=2) 示例
random.seed(42)
print("random() with seed:", random.random())总结
random 模块提供了丰富的函数用于生成随机数和操作随机序列,适用于多种场景。理解和掌握这些函数,可以在模拟、测试和生成随机数据的过程中提供很大帮助。
time 模块
time 模块提供了各种函数来处理时间相关的任务,例如获取当前时间、暂停执行、格式化时间等。
导入 time 模块
import time常用函数
time.time(): 返回当前时间的时间戳(自1970年1月1日以来的秒数)。
timestamp = time.time()
print(timestamp) # 输出: 当前时间的时间戳time.sleep(seconds): 休眠指定的秒数。
print("Start sleeping")
time.sleep(2)
print("End sleeping") # 输出: 休眠2秒后打印time.ctime([secs]): 将时间戳转换为可读的字符串。如果不提供时间戳,使用当前时间。
current_time = time.ctime()
print(current_time) # 输出: 当前时间的可读字符串time.localtime([secs]): 将时间戳转换为本地时间的struct_time对象。如果不提供时间戳,使用当前时间。
local_time = time.localtime()
print(local_time) # 输出: 当前时间的struct_time对象time.strftime(format[, t]): 将struct_time对象转换为指定格式的字符串。
local_time = time.localtime()
formatted_time = time.strftime("%Y-%m-%d %H:%M:%S", local_time)
print(formatted_time) # 输出: 当前时间的格式化字符串time.strptime(string, format): 将格式化字符串转换为struct_time对象。
time_string = "2024-01-01 12:00:00"
time_object = time.strptime(time_string, "%Y-%m-%d %H:%M:%S")
print(time_object) # 输出: 对应的struct_time对象time.mktime(t): 将struct_time对象转换为时间戳。
time_object = time.localtime()
timestamp = time.mktime(time_object)
print(timestamp) # 输出: struct_time对象对应的时间戳time.monotonic(): 返回一个单调时钟的时间(不可回调,用于计算运行时间)。
start = time.monotonic()
# 执行一些操作
end = time.monotonic()
print(f"Elapsed time: {end - start} seconds") # 输出: 操作执行的时间示例代码
import time
# 获取当前时间的时间戳
timestamp = time.time()
print("Current Timestamp:", timestamp)
# 休眠2秒
print("Start sleeping")
time.sleep(2)
print("End sleeping")
# 获取当前时间的可读字符串
current_time = time.ctime()
print("Current Time:", current_time)
# 获取本地时间的struct_time对象
local_time = time.localtime()
print("Local Time:", local_time)
# 将struct_time对象转换为格式化字符串
formatted_time = time.strftime("%Y-%m-%d %H:%M:%S", local_time)
print("Formatted Time:", formatted_time)
# 将格式化字符串转换为struct_time对象
time_string = "2024-01-01 12:00:00"
time_object = time.strptime(time_string, "%Y-%m-%d %H:%M:%S")
print("Time Object:", time_object)
# 将struct_time对象转换为时间戳
timestamp_from_object = time.mktime(time_object)
print("Timestamp from Object:", timestamp_from_object)
# 使用单调时钟计算运行时间
start = time.monotonic()
# 执行一些操作
end = time.monotonic()
print(f"Elapsed Time: {end - start} seconds")总结
time 模块提供了丰富的函数来处理时间相关的任务。理解和掌握这些函数可以帮助我们在编程中处理各种时间和日期相关的问题,例如获取当前时间、暂停执行、格式化时间等。
datetime 模块
datetime 模块提供了处理日期和时间的类和方法。该模块允许操作日期、时间及其组合,并支持日期的格式化和解析。
导入 datetime 模块
import datetime常用类和方法
datetime.datetime 类: 表示日期和时间。
获取当前日期和时间:
now = datetime.datetime.now()print(now) # 输出: 当前日期和时间
创建指定日期和时间的对象:
dt = datetime.datetime(2024, 7, 2, 15, 30, 45)
print(dt) # 输出: 2024-07-02 15:30:45日期格式化:
formatted_date = now.strftime("%Y-%m-%d %H:%M:%S")
print(formatted_date) # 输出: 格式化后的日期字符串解析日期字符串:
date_str = "2024-07-02 15:30:45"
dt = datetime.datetime.strptime(date_str, "%Y-%m-%d %H:%M:%S")
print(dt) # 输出: 2024-07-02 15:30:45datetime.date 类: 表示日期(年、月、日)。
获取当前日期:
today = datetime.date.today()
print(today) # 输出: 当前日期创建指定日期的对象:
d = datetime.date(2024, 7, 2)
print(d) # 输出: 2024-07-02
datetime.time 类: 表示时间(时、分、秒、微秒)。
创建指定时间的对象:
t = datetime.time(15, 30, 45)
print(t) # 输出: 15:30:45datetime.timedelta 类: 表示时间间隔,用于日期时间的加减运算。
创建时间间隔对象:
delta = datetime.timedelta(days=2, hours=3, minutes=30)
print(delta) # 输出: 2 days, 3:30:00日期加减时间间隔:
future_date = now + delta
print(future_date) # 输出: 当前日期时间加上时间间隔后的结果示例代码
import datetime
# 获取当前日期和时间
now = datetime.datetime.now()
print("Current DateTime:", now)
# 创建指定日期和时间的对象
dt = datetime.datetime(2024, 7, 2, 15, 30, 45)
print("Specified DateTime:", dt)
# 日期格式化
formatted_date = now.strftime("%Y-%m-%d %H:%M:%S")
print("Formatted Date:", formatted_date)
# 解析日期字符串
date_str = "2024-07-02 15:30:45"
parsed_date = datetime.datetime.strptime(date_str, "%Y-%m-%d %H:%M:%S")
print("Parsed Date:", parsed_date)
# 获取当前日期
today = datetime.date.today()
print("Current Date:", today)
# 创建指定日期的对象
d = datetime.date(2024, 7, 2)
print("Specified Date:", d)
# 创建指定时间的对象
t = datetime.time(15, 30, 45)
print("Specified Time:", t)
# 创建时间间隔对象
delta = datetime.timedelta(days=2, hours=3, minutes=30)
print("Time Delta:", delta)
# 日期加减时间间隔
future_date = now + delta
print("Future Date:", future_date)
past_date = now - delta
print("Past Date:", past_date)总结
datetime 模块提供了丰富的类和方法来处理日期和时间。通过理解和掌握这些类和方法,可以方便地进行日期和时间的获取、创建、格式化、解析和计算等操作,从而处理各种日期和时间相关的需求。
第三方模块的安装与卸载
Python的第三方模块可以通过包管理工具 pip 进行安装和卸载。以下是安装和卸载第三方模块的基本操作。
安装第三方模块
使用 pip 安装:
安装某个模块,例如 requests:
pip install requests安装指定版本的模块:
pip install requests==2.25.1安装最新版本的模块:
pip install --upgrade requests从文件安装:
从 requirements.txt 文件中安装多个模块:
pip install -r requirements.txt卸载第三方模块
使用 pip 卸载:
卸载某个模块,例如 requests:
pip uninstall requests检查已安装模块
列出已安装的模块:
pip list检查某个模块的详细信息:
pip show requests总结
使用 pip 可以方便地安装和卸载Python的第三方模块,并可以通过 requirements.txt 文件管理项目的依赖。虚拟环境工具如 virtualenv 可以帮助隔离项目的依赖,确保不同项目之间不会发生冲突。通过这些工具,可以有效地管理Python项目的依赖。
requests 模块
requests 模块是一个用于发送 HTTP 请求的第三方库,简化了与 Web 服务的交互。requests 模块易于使用,并且功能强大。
安装 requests 模块
使用 pip 安装 requests 模块:
pip install requests基本使用
发送 GET 请求
import requests
response = requests.get('https://api.github.com')
print(response.status_code) # 输出: 200
print(response.text) # 输出: 响应内容发送 POST 请求
import requests
url = 'https://httpbin.org/post'
data = {'key': 'value'}
response = requests.post(url, data=data)
print(response.status_code) # 输出: 200
print(response.json()) # 输出: JSON 响应内容添加请求头
import requests
url = 'https://api.github.com'
headers = {'User-Agent': 'my-app/0.0.1'}
response = requests.get(url, headers=headers)
print(response.status_code) # 输出: 200发送带参数的 GET 请求
import requests
url = 'https://api.github.com/search/repositories'
params = {'q': 'requests+language:python'}
response = requests.get(url, params=params)
print(response.url) # 输出: 请求的完整 URL
print(response.json()) # 输出: JSON 响应内容发送带 JSON 数据的 POST 请求
import requests
url = 'https://httpbin.org/post'
json_data = {'key': 'value'}
response = requests.post(url, json=json_data)
print(response.status_code) # 输出: 200
print(response.json()) # 输出: JSON 响应内容处理响应
import requests
response = requests.get('https://api.github.com')
if response.status_code == 200:
print('Success!')
elif response.status_code == 404:
print('Not Found.')上传文件
import requests
url = 'https://httpbin.org/post'
files = {'file': open('report.txt', 'rb')}
response = requests.post(url, files=files)
print(response.status_code) # 输出: 200
print(response.json()) # 输出: JSON 响应内容使用会话对象
import requests
session = requests.Session()
session.headers.update({'User-Agent': 'my-app/0.0.1'})
response = session.get('https://api.github.com')
print(response.status_code) # 输出: 200示例代码
import requests
# 发送 GET 请求
response = requests.get('https://api.github.com')
print("GET 请求状态码:", response.status_code)
print("GET 请求响应内容:", response.text)
# 发送 POST 请求
url = 'https://httpbin.org/post'
data = {'key': 'value'}
response = requests.post(url, data=data)
print("POST 请求状态码:", response.status_code)
print("POST 请求响应内容:", response.json())
# 添加请求头
url = 'https://api.github.com'
headers = {'User-Agent': 'my-app/0.0.1'}
response = requests.get(url, headers=headers)
print("带请求头的 GET 请求状态码:", response.status_code)
# 发送带参数的 GET 请求
url = 'https://api.github.com/search/repositories'
params = {'q': 'requests+language:python'}
response = requests.get(url, params=params)
print("带参数的 GET 请求 URL:", response.url)
print("带参数的 GET 请求响应内容:", response.json())
# 发送带 JSON 数据的 POST 请求
url = 'https://httpbin.org/post'
json_data = {'key': 'value'}
response = requests.post(url, json=json_data)
print("带 JSON 数据的 POST 请求状态码:", response.status_code)
print("带 JSON 数据的 POST 请求响应内容:", response.json())
# 处理响应
response = requests.get('https://api.github.com')
if response.status_code == 200:
print('请求成功!')
elif response.status_code == 404:
print('请求的资源未找到。')
# 上传文件
url = 'https://httpbin.org/post'
files = {'file': open('report.txt', 'rb')}
response = requests.post(url, files=files)
print("上传文件的 POST 请求状态码:", response.status_code)
print("上传文件的 POST 请求响应内容:", response.json())
# 使用会话对象
session = requests.Session()
session.headers.update({'User-Agent': 'my-app/0.0.1'})
response = session.get('https://api.github.com')
print("使用会话对象的 GET 请求状态码:", response.status_code)总结
requests 模块是Python中处理HTTP请求的强大工具。通过使用requests,可以轻松地发送GET和POST请求,处理响应,上传文件,并管理会话等。理解和掌握requests模块的基本用法,是处理网络请求的基础。
openpyxl 模块
openpyxl 模块是一个用于读取和写入 Excel 文件的第三方库,支持 .xlsx 格式。它功能强大,易于使用。
安装 openpyxl 模块
使用 pip 安装 openpyxl 模块:
pip install openpyxl读取 Excel 文件
打开工作簿
import openpyxl
# 打开工作簿
workbook = openpyxl.load_workbook('example.xlsx')获取工作表
# 获取活动工作表
sheet = workbook.active
# 或者获取特定工作表
sheet = workbook['Sheet1']读取单元格的值
value = sheet['A1'].value
print(value) # 输出单元格A1的值遍历单元格
for row in sheet.iter_rows(min_row=1, max_row=10, min_col=1, max_col=5):
for cell in row:
print(cell.value)写入 Excel 文件
修改现有工作簿
# 修改单元格的值
sheet['A1'].value = 'New Value'
# 保存工作簿
workbook.save('example_modified.xlsx')创建新的工作簿
# 创建新的工作簿
new_workbook = openpyxl.Workbook()
# 获取活动工作表
new_sheet = new_workbook.active
# 修改单元格的值
new_sheet['A1'] = 'Hello'
new_sheet['B1'] = 'World'
# 保存工作簿
new_workbook.save('new_example.xlsx')添加新的工作表
new_sheet = workbook.create_sheet(title='NewSheet')
new_sheet['A1'] = 'New Sheet Data'
workbook.save('example_with_new_sheet.xlsx')示例代码
以下是一个综合示例,展示了如何使用 openpyxl 模块读取和写入 Excel 文件:
import openpyxl
# 打开现有工作簿
workbook = openpyxl.load_workbook('example.xlsx')
# 获取工作表
sheet = workbook.active
# 读取单元格的值
value = sheet['A1'].value
print("A1 单元格的值:", value)
# 遍历单元格
print("遍历单元格值:")
for row in sheet.iter_rows(min_row=1, max_row=5, min_col=1, max_col=3):
for cell in row:
print(cell.value, end=" ")
print()
# 修改现有工作簿中的单元格值
sheet['A1'].value = 'Modified Value'
workbook.save('example_modified.xlsx')
# 创建新的工作簿
new_workbook = openpyxl.Workbook()
# 获取活动工作表
new_sheet = new_workbook.active
# 写入新数据
new_sheet['A1'] = 'Hello'
new_sheet['B1'] = 'World'
# 保存新的工作簿
new_workbook.save('new_example.xlsx')
# 在现有工作簿中添加新的工作表
new_sheet = workbook.create_sheet(title='NewSheet')
new_sheet['A1'] = 'New Sheet Data'
workbook.save('example_with_new_sheet.xlsx')其他常用功能
设置单元格样式
from openpyxl.styles import Font, Color, Alignment
cell = sheet['A1']
cell.font = Font(size=14, bold=True, color="FF0000")
cell.alignment = Alignment(horizontal="center", vertical="center")合并单元格
sheet.merge_cells('A1:C1')
sheet['A1'] = 'Merged Cell'
workbook.save('example_merged.xlsx')插入图片
from openpyxl.drawing.image import Image
img = Image('path_to_image.png')
sheet.add_image(img, 'D1')
workbook.save('example_with_image.xlsx')总结
openpyxl 模块是一个功能强大的工具,可以用来读取和写入 Excel 文件。通过掌握如何打开、读取、写入、修改和保存工作簿,能够有效地处理 Excel 数据。理解和使用这些基本功能,可以满足大多数 Excel 操作的需求。
pdfplumber 模块
pdfplumber 模块是一个用于提取 PDF 文件内容的第三方库,尤其擅长提取表格数据。该模块基于 pdfminer.six,提供了更高级的接口来处理 PDF 文件。
安装 pdfplumber 模块
使用 pip 安装 pdfplumber 模块:
pip install pdfplumber基本使用
打开 PDF 文件
import pdfplumber
with pdfplumber.open("example.pdf") as pdf:
first_page = pdf.pages[0]
print(first_page.extract_text())提取页面文本
with pdfplumber.open("example.pdf") as pdf:
for page in pdf.pages:
text = page.extract_text()
print(text)提取表格
with pdfplumber.open("example.pdf") as pdf:
first_page = pdf.pages[0]
tables = first_page.extract_tables()
for table in tables:
for row in table:
print(row)提取页面中的矩形区域内容
with pdfplumber.open("example.pdf") as pdf:
first_page = pdf.pages[0]
bbox = (50, 50, 200, 200) # 左上角和右下角的坐标
cropped_page = first_page.within_bbox(bbox)
print(cropped_page.extract_text())示例代码
以下是一个综合示例,展示了如何使用 pdfplumber 模块提取 PDF 文件中的文本和表格数据:
import pdfplumber
# 打开 PDF 文件
with pdfplumber.open("example.pdf") as pdf:
# 提取第一页的内容
first_page = pdf.pages[0]
# 提取页面文本
text = first_page.extract_text()
print("页面文本:")
print(text)
# 提取页面中的表格
print("\n页面表格:")
tables = first_page.extract_tables()
for table in tables:
for row in table:
print(row)
# 提取页面中指定区域的文本
print("\n指定区域文本:")
bbox = (50, 50, 200, 200) # 左上角和右下角的坐标
cropped_page = first_page.within_bbox(bbox)
print(cropped_page.extract_text())提取并保存表格数据
pdfplumber 模块提取的表格数据可以直接保存为 CSV 文件或进一步处理。
import csv
import pdfplumber
# 打开 PDF 文件
with pdfplumber.open("example.pdf") as pdf:
# 提取第一页的内容
first_page = pdf.pages[0]
# 提取页面中的表格
tables = first_page.extract_tables()
# 保存表格到 CSV 文件
with open("output.csv", "w", newline="") as f:
writer = csv.writer(f)
for table in tables:
for row in table:
writer.writerow(row)提取图片
pdfplumber 也可以用于提取 PDF 页面中的图片。
import pdfplumber
with pdfplumber.open("example.pdf") as pdf:
first_page = pdf.pages[0]
images = first_page.images
for image in images:
print(image)
# 可以进一步使用 PIL 或其他图像处理库处理图片总结
pdfplumber 模块提供了一个强大的工具集,用于从 PDF 文件中提取文本、表格和图片。通过掌握 pdfplumber 的基本使用方法,可以高效地处理 PDF 文件中的各种数据。理解如何提取和保存这些数据,可以在数据处理和分析任务中大显身手。
numpy 模块
numpy 是 Python 中用于进行科学计算的基础库。它支持多维数组和矩阵运算,并提供大量的数学函数。numpy 的核心是其 ndarray 对象,这是一个多维数组容器。
安装 numpy 模块
使用 pip 安装 numpy 模块:
pip install numpy基本使用
导入 numpy 模块
import numpy as np创建数组
从列表创建数组:
arr = np.array([1, 2, 3, 4, 5])创建多维数组:
arr = np.array([[1, 2, 3], [4, 5, 6]])
使用内置函数创建数组:
arr_zeros = np.zeros((2, 3)) # 创建一个 2x3 的全零数组
arr_ones = np.ones((2, 3)) # 创建一个 2x3 的全一数组
arr_empty = np.empty((2, 3)) # 创建一个 2x3 的未初始化数组
arr_arange = np.arange(0, 10, 2) # 创建一个从 0 到 10(不包括 10),步长为 2 的数组
arr_linspace = np.linspace(0, 1, 5) # 创建一个从 0 到 1,包含 5 个等间距元素的数组数组运算
基本运算:
arr = np.array([1, 2, 3, 4, 5])
print(arr + 1) # 每个元素加 1
print(arr * 2) # 每个元素乘 2
print(arr ** 2) # 每个元素平方数组间运算:
arr1 = np.array([1, 2, 3])
arr2 = np.array([4, 5, 6])
print(arr1 + arr2) # 数组对应元素相加
print(arr1 * arr2) # 数组对应元素相乘数组索引与切片
arr = np.array([1, 2, 3, 4, 5])
print(arr[0]) # 访问第一个元素
print(arr[1:4]) # 切片操作,访问第2到第4个元素多维数组操作
访问元素:
arr = np.array([[1, 2, 3], [4, 5, 6]])
print(arr[0, 1]) # 访问第一行第二列的元素访问行和列:
print(arr[0, :]) # 访问第一行
print(arr[:, 1]) # 访问第二列数组形状操作
改变数组形状:
arr = np.array([[1, 2, 3], [4, 5, 6]])
reshaped = arr.reshape((3, 2)) # 将 2x3 数组变为 3x2 数组
print(reshaped)数组合并与分割:
arr1 = np.array([[1, 2], [3, 4]])
arr2 = np.array([[5, 6], [7, 8]])
combined = np.concatenate((arr1, arr2), axis=0) # 按行合并
print(combined)示例代码
以下是一个综合示例,展示了如何使用 numpy 模块进行数组创建、运算和操作:
import numpy as np
# 创建数组
arr = np.array([1, 2, 3, 4, 5])
print("数组:", arr)
# 创建多维数组
arr_2d = np.array([[1, 2, 3], [4, 5, 6]])
print("多维数组:\n", arr_2d)
# 使用内置函数创建数组
arr_zeros = np.zeros((2, 3))
arr_ones = np.ones((2, 3))
arr_empty = np.empty((2, 3))
arr_arange = np.arange(0, 10, 2)
arr_linspace = np.linspace(0, 1, 5)
print("全零数组:\n", arr_zeros)
print("全一数组:\n", arr_ones)
print("未初始化数组:\n", arr_empty)
print("arange 数组:", arr_arange)
print("linspace 数组:", arr_linspace)
# 数组运算
print("每个元素加 1:", arr + 1)
print("每个元素乘 2:", arr * 2)
print("每个元素平方:", arr ** 2)
# 数组间运算
arr1 = np.array([1, 2, 3])
arr2 = np.array([4, 5, 6])
print("数组相加:", arr1 + arr2)
print("数组相乘:", arr1 * arr2)
# 数组索引与切片
print("第一个元素:", arr[0])
print("切片 [1:4]:", arr[1:4])
# 多维数组操作
print("第一行第二列元素:", arr_2d[0, 1])
print("第一行:", arr_2d[0, :])
print("第二列:", arr_2d[:, 1])
# 数组形状操作
reshaped = arr_2d.reshape((3, 2))
print("重新形状后的数组:\n", reshaped)
# 数组合并与分割
arr3 = np.array([[1, 2], [3, 4]])
arr4 = np.array([[5, 6], [7, 8]])
combined = np.concatenate((arr3, arr4), axis=0)
print("合并后的数组:\n", combined)总结
numpy 模块是进行科学计算和数据分析的基础库,通过它可以方便地进行多维数组的创建、运算和操作。掌握 numpy 的基本使用方法,可以有效地处理和分析数据,是学习数据科学和机器学习的重要基础。
pandas 模块
pandas 是 Python 中用于数据操作和分析的强大库。它提供了易于使用的数据结构和数据分析工具。pandas 的核心是其 DataFrame 和 Series 对象。
安装 pandas 模块
使用 pip 安装 pandas 模块:
pip install pandas基本使用
导入 pandas 模块
import pandas as pd创建 Series
从列表创建 Series:
s = pd.Series([1, 3, 5, np.nan, 6, 8])创建 DataFrame
从字典创建 DataFrame:
data = {
'A': [1, 2, 3, 4],
'B': [5, 6, 7, 8],
'C': [9, 10, 11, 12]
}
df = pd.DataFrame(data)
print(df)读取和写入数据
读取 CSV 文件:
df = pd.read_csv('data.csv')写入 CSV 文件:
df.to_csv('output.csv', index=False)数据查看
查看前几行数据:
print(df.head())查看数据框的基本信息:
print(df.info())
print(df.describe())选择数据
选择列:
print(df['A'])选择行:
print(df.loc[0]) # 按标签选择
print(df.iloc[0]) # 按位置选择条件选择:
print(df[df['A'] > 2])数据操作
添加新列:
df['D'] = df['A'] + df['B']
print(df)删除列:
df = df.drop('D', axis=1)
print(df)重命名列:
df = df.rename(columns={'A': 'Alpha', 'B': 'Bravo'})
print(df)数据统计
计算均值、标准差等:
print(df.mean())
print(df.std())处理缺失值
填充缺失值:
df.fillna(0, inplace=True)删除包含缺失值的行:
df.dropna(inplace=True)示例代码
以下是一个综合示例,展示了如何使用 pandas 模块进行数据创建、操作和分析:
import pandas as pd
import numpy as np
# 创建 Series
s = pd.Series([1, 3, 5, np.nan, 6, 8])
print("Series:")
print(s)
# 创建 DataFrame
data = {
'A': [1, 2, 3, 4],
'B': [5, 6, 7, 8],
'C': [9, 10, 11, 12]
}
df = pd.DataFrame(data)
print("\nDataFrame:")
print(df)
# 读取 CSV 文件
# df = pd.read_csv('data.csv')
# 写入 CSV 文件
# df.to_csv('output.csv', index=False)
# 查看前几行数据
print("\nHead:")
print(df.head())
# 查看数据框的基本信息
print("\nInfo:")
print(df.info())
print("\nDescribe:")
print(df.describe())
# 选择数据
print("\nSelect Column A:")
print(df['A'])
print("\nSelect Row 0 by Label:")
print(df.loc[0])
print("\nSelect Row 0 by Position:")
print(df.iloc[0])
print("\nConditional Select (A > 2):")
print(df[df['A'] > 2])
# 数据操作
df['D'] = df['A'] + df['B']
print("\nAdd Column D (A + B):")
print(df)
df = df.drop('D', axis=1)
print("\nDrop Column D:")
print(df)
df = df.rename(columns={'A': 'Alpha', 'B': 'Bravo'})
print("\nRename Columns A to Alpha, B to Bravo:")
print(df)
# 数据统计
print("\nMean:")
print(df.mean())
print("\nStandard Deviation:")
print(df.std())
# 处理缺失值
df_with_nan = df.copy()
df_with_nan.loc[2, 'Alpha'] = np.nan
print("\nDataFrame with NaN:")
print(df_with_nan)
df_with_nan.fillna(0, inplace=True)
print("\nFill NaN with 0:")
print(df_with_nan)
df_with_nan.loc[2, 'Alpha'] = np.nan
df_with_nan.dropna(inplace=True)
print("\nDrop Rows with NaN:")
print(df_with_nan)总结
pandas 是一个功能强大的数据分析库,通过 DataFrame 和 Series 对象,可以方便地进行数据读取、操作和分析。掌握 pandas 的基本使用方法,可以有效地处理和分析数据,是数据科学和分析工作的基础。
matplotlib 模块
matplotlib 是一个广泛使用的绘图库,适用于创建各种静态、动态和交互式的图表。matplotlib 的核心是 pyplot 模块,它提供了类似于 MATLAB 的绘图 API。
安装 matplotlib 模块
使用 pip 安装 matplotlib 模块:
pip install matplotlib基本使用
导入 matplotlib.pyplot 模块
import matplotlib.pyplot as plt绘制基本图形
绘制折线图
import matplotlib.pyplot as plt
# 数据
x = [1, 2, 3, 4]
y = [1, 4, 9, 16]
# 绘制折线图
plt.plot(x, y)
plt.xlabel('X 轴标签')
plt.ylabel('Y 轴标签')
plt.title('折线图示例')
plt.show()绘制散点图
plt.scatter(x, y)
plt.xlabel('X 轴标签')
plt.ylabel('Y 轴标签')
plt.title('散点图示例')
plt.show()绘制柱状图
plt.bar(x, y)
plt.xlabel('X 轴标签')
plt.ylabel('Y 轴标签')
plt.title('柱状图示例')
plt.show()绘制直方图
data = [1, 2, 2, 3, 3, 3, 4, 4, 4, 4]
plt.hist(data, bins=4)
plt.xlabel('值')
plt.ylabel('频率')
plt.title('直方图示例')
plt.show()绘制饼图
labels = ['A', 'B', 'C', 'D']
sizes = [15, 30, 45, 10]
plt.pie(sizes, labels=labels, autopct='%1.1f%%')
plt.title('饼图示例')
plt.show()示例代码
以下是一个综合示例,展示了如何使用 matplotlib 模块绘制各种基本图形:
import matplotlib.pyplot as plt
# 绘制折线图
x = [1, 2, 3, 4]
y = [1, 4, 9, 16]
plt.figure()
plt.plot(x, y)
plt.xlabel('X 轴标签')
plt.ylabel('Y 轴标签')
plt.title('折线图示例')
plt.show()
# 绘制散点图
plt.figure()
plt.scatter(x, y)
plt.xlabel('X 轴标签')
plt.ylabel('Y 轴标签')
plt.title('散点图示例')
plt.show()
# 绘制柱状图
plt.figure()
plt.bar(x, y)
plt.xlabel('X 轴标签')
plt.ylabel('Y 轴标签')
plt.title('柱状图示例')
plt.show()
# 绘制直方图
data = [1, 2, 2, 3, 3, 3, 4, 4, 4, 4]
plt.figure()
plt.hist(data, bins=4)
plt.xlabel('值')
plt.ylabel('频率')
plt.title('直方图示例')
plt.show()
# 绘制饼图
labels = ['A', 'B', 'C', 'D']
sizes = [15, 30, 45, 10]
plt.figure()
plt.pie(sizes, labels=labels, autopct='%1.1f%%')
plt.title('饼图示例')
plt.show()其他功能
子图:使用 subplot 函数在一个图中绘制多个子图。
plt.figure()
plt.subplot(2, 1, 1) # (行, 列, 当前图的位置)
plt.plot(x, y)
plt.title('子图1')
plt.subplot(2, 1, 2)
plt.plot(y, x)
plt.title('子图2')
plt.tight_layout()
plt.show()自定义样式:matplotlib 提供了多种样式,可以使用 style 模块进行设置。
plt.style.use('ggplot')
plt.plot(x, y)
plt.xlabel('X 轴标签')
plt.ylabel('Y 轴标签')
plt.title('自定义样式示例')
plt.show()保存图像:使用 savefig 函数将图形保存到文件。
plt.plot(x, y)
plt.xlabel('X 轴标签')
plt.ylabel('Y 轴标签')
plt.title('保存图像示例')
plt.savefig('plot.png')
plt.show()总结
matplotlib 是一个功能强大且灵活的绘图库,通过它可以方便地创建各种类型的图表。掌握 matplotlib 的基本使用方法,可以有效地进行数据可视化,为数据分析和展示提供有力支持。
pyecharts 模块
pyecharts 是一个用于生成 ECharts 图表的 Python 库,ECharts 是一个强大的数据可视化库,支持各种类型的图表。pyecharts 提供了一个简单的 Python 接口,使得我们可以轻松创建和自定义各种交互式图表。
官网:pyecharts - A Python Echarts Plotting Library built with love.
安装 pyecharts 模块
使用 pip 安装 pyecharts 模块:
pip install pyecharts基本使用
导入 pyecharts 模块
from pyecharts.charts import Bar
from pyecharts import options as opts创建基本柱状图
bar = Bar()
bar.add_xaxis(["A", "B", "C", "D", "E", "F"])
bar.add_yaxis("销量", [5, 20, 36, 10, 75, 90])
bar.set_global_opts(title_opts=opts.TitleOpts(title="柱状图示例", subtitle="副标题"))
bar.render("bar_chart.html") # 将图表渲染为 HTML 文件创建其他类型的图表折线图
from pyecharts.charts import Line
line = Line()
line.add_xaxis(["A", "B", "C", "D", "E", "F"])
line.add_yaxis("销量", [5, 20, 36, 10, 75, 90])
line.set_global_opts(title_opts=opts.TitleOpts(title="折线图示例", subtitle="副标题"))
line.render("line_chart.html")饼图
from pyecharts.charts import Pie
pie = Pie()
pie.add("", [("A", 30), ("B", 25), ("C", 20), ("D", 15), ("E", 10)])
pie.set_global_opts(title_opts=opts.TitleOpts(title="饼图示例", subtitle="副标题"))
pie.render("pie_chart.html")散点图
from pyecharts.charts import Scatter
scatter = Scatter()
scatter.add_xaxis([10, 20, 30, 40, 50])
scatter.add_yaxis("系列1", [10, 25, 35, 55, 65])
scatter.set_global_opts(title_opts=opts.TitleOpts(title="散点图示例", subtitle="副标题"))
scatter.render("scatter_chart.html")
示例代码
以下是一个综合示例,展示了如何使用 pyecharts 模块创建柱状图、折线图、饼图和散点图:
from pyecharts.charts import Bar, Line, Pie, Scatter
from pyecharts import options as opts
# 创建柱状图
bar = Bar()
bar.add_xaxis(["A", "B", "C", "D", "E", "F"])
bar.add_yaxis("销量", [5, 20, 36, 10, 75, 90])
bar.set_global_opts(title_opts=opts.TitleOpts(title="柱状图示例", subtitle="副标题"))
bar.render("bar_chart.html")
# 创建折线图
line = Line()
line.add_xaxis(["A", "B", "C", "D", "E", "F"])
line.add_yaxis("销量", [5, 20, 36, 10, 75, 90])
line.set_global_opts(title_opts=opts.TitleOpts(title="折线图示例", subtitle="副标题"))
line.render("line_chart.html")
# 创建饼图
pie = Pie()
pie.add("", [("A", 30), ("B", 25), ("C", 20), ("D", 15), ("E", 10)])
pie.set_global_opts(title_opts=opts.TitleOpts(title="饼图示例", subtitle="副标题"))
pie.render("pie_chart.html")
# 创建散点图
scatter = Scatter()
scatter.add_xaxis([10, 20, 30, 40, 50])
scatter.add_yaxis("系列1", [10, 25, 35, 55, 65])
scatter.set_global_opts(title_opts=opts.TitleOpts(title="散点图示例", subtitle="副标题"))
scatter.render("scatter_chart.html")其他功能
自定义主题使用内置主题:
from pyecharts.globals import ThemeType
bar = Bar(init_opts=opts.InitOpts(theme=ThemeType.MACARONS))
bar.add_xaxis(["A", "B", "C", "D", "E", "F"])
bar.add_yaxis("销量", [5, 20, 36, 10, 75, 90])
bar.set_global_opts(title_opts=opts.TitleOpts(title="自定义主题示例"))
bar.render("bar_chart_theme.html")在 Jupyter Notebook 中展示图表
from pyecharts.charts import Bar
from pyecharts import options as opts
from pyecharts.globals import ThemeType
bar = Bar(init_opts=opts.InitOpts(theme=ThemeType.LIGHT))
bar.add_xaxis(["A", "B", "C", "D", "E", "F"])
bar.add_yaxis("销量", [5, 20, 36, 10, 75, 90])
bar.set_global_opts(title_opts=opts.TitleOpts(title="Jupyter Notebook 示例"))
# 在 Jupyter Notebook 中展示
from pyecharts.globals import CurrentConfig
from pyecharts.render import make_snapshot
from snapshot_selenium import snapshot
CurrentConfig.ONLINE_HOST = "https://cdn.jsdelivr.net/npm/echarts@latest/dist/"
bar.render_notebook()总结
pyecharts 是一个功能强大且易于使用的数据可视化库,通过它可以轻松创建各种交互式图表。掌握 pyecharts 的基本使用方法,可以有效地进行数据可视化,为数据分析和展示提供有力支持。
PIL 模块
PIL(Python Imaging Library)是一个用于图像处理的库。PIL 提供了广泛的图像操作功能。虽然 PIL 已经停止更新,但它的派生库 Pillow 继承并扩展了 PIL 的功能,是目前主流的图像处理库。
安装 Pillow 模块
使用 pip 安装 Pillow 模块:
pip install pillow基本使用
导入 Pillow 模块
from PIL import Image打开图像
image = Image.open("example.jpg")
image.show() # 在默认图像查看器中打开图像保存图像
image.save("example_copy.jpg")获取图像信息
print(image.format) # 输出图像格式
print(image.size) # 输出图像尺寸
print(image.mode) # 输出图像模式图像缩放
resized_image = image.resize((800, 600))
resized_image.show()图像旋转
rotated_image = image.rotate(45)
rotated_image.show()裁剪图像
cropped_image = image.crop((100, 100, 400, 400)) # (left, upper, right, lower)
cropped_image.show()图像转换
grayscale_image = image.convert("L") # 转换为灰度图像
grayscale_image.show()示例代码
以下是一个综合示例,展示了如何使用 Pillow 模块进行图像打开、保存、缩放、旋转、裁剪和转换:
from PIL import Image
# 打开图像
image = Image.open("example.jpg")
image.show()
# 获取图像信息
print("图像格式:", image.format)
print("图像尺寸:", image.size)
print("图像模式:", image.mode)
# 保存图像
image.save("example_copy.jpg")
# 图像缩放
resized_image = image.resize((800, 600))
resized_image.show()
# 图像旋转
rotated_image = image.rotate(45)
rotated_image.show()
# 裁剪图像
cropped_image = image.crop((100, 100, 400, 400))
cropped_image.show()
# 图像转换
grayscale_image = image.convert("L")
grayscale_image.show()高级操作
绘制文本
from PIL import ImageDraw, ImageFont
# 创建一个图像对象
image = Image.new("RGB", (800, 600), (255, 255, 255))
draw = ImageDraw.Draw(image)
# 设置字体
font = ImageFont.truetype("arial.ttf", 40)
# 绘制文本
draw.text((100, 100), "Hello, PIL!", fill=(0, 0, 0), font=font)
image.show()绘制图形
# 创建一个图像对象
image = Image.new("RGB", (800, 600), (255, 255, 255))
draw = ImageDraw.Draw(image)
# 绘制矩形
draw.rectangle((100, 100, 200, 200), outline=(0, 0, 0), width=5)
# 绘制椭圆
draw.ellipse((300, 100, 400, 200), outline=(255, 0, 0), width=5)
# 绘制线条
draw.line((100, 300, 400, 300), fill=(0, 0, 255), width=5)
image.show()总结
Pillow 是一个功能强大的图像处理库,继承并扩展了 PIL 的功能。通过掌握 Pillow 的基本使用方法,可以进行图像的打开、保存、缩放、旋转、裁剪和转换等操作,同时还可以进行文本和图形的绘制,为图像处理和计算机视觉提供强有力的支持。
PyInstaller 模块
PyInstaller 是一个用于将 Python 应用打包成独立可执行文件的工具,支持 Windows、macOS 和 Linux 操作系统。通过 PyInstaller,你可以将你的 Python 脚本及其所有依赖打包成一个单独的可执行文件,用户不需要安装 Python 解释器或任何依赖库即可运行你的应用程序。
安装 PyInstaller 模块
使用 pip 安装 PyInstaller 模块:
pip install pyinstaller基本使用
将 Python 脚本打包成可执行文件
进入 Python 脚本所在的目录,在命令行中运行以下命令:
pyinstaller --onefile your_script.py这个命令将生成一个独立的可执行文件,该文件将被放置在 dist 目录中。
常用选项
--onefile:将所有内容打包成一个独立的可执行文件。
--windowed 或 -w:打包成窗口程序(Windows 和 macOS),在运行时不显示控制台窗口。
--name:指定生成的可执行文件的名称。
pyinstaller --onefile --windowed --name my_app your_script.py生成配置文件
第一次运行 PyInstaller 时,会在当前目录生成一个 your_script.spec 文件。这个文件是一个配置文件,包含了打包过程中的所有配置信息。
可以手动编辑这个文件来定制打包过程,然后使用以下命令再次打包:
pyinstaller your_script.spec示例代码
假设我们有一个简单的 Python 脚本 hello.py:
# hello.py
import sys
from PyQt5.QtWidgets import QApplication, QLabel
app = QApplication(sys.argv)
label = QLabel("Hello, PyInstaller!")
label.show()
sys.exit(app.exec_())我们希望将这个脚本打包成一个独立的可执行文件。
将脚本打包成独立的可执行文件
pyinstaller --onefile --windowed hello.py生成的文件
dist/hello.exe(或 dist/hello):打包生成的可执行文件。
build/:打包过程中生成的临时工作目录。
hello.spec:打包配置文件。
修改 hello.spec 文件
可以编辑 hello.spec 文件来定制打包过程。例如,可以添加额外的数据文件或更改打包选项。
编辑完成后,可以使用以下命令重新打包:
pyinstaller hello.spec常见问题和解决方案
打包后的可执行文件运行时缺少依赖
可以在 spec 文件中添加依赖文件或目录。例如:
a = Analysis(
['your_script.py'],
pathex=['/path/to/your_script'],
datas=[('path/to/datafile', 'datafile')],
...
)也可以使用 --add-data 选项:
pyinstaller --onefile --add-data "path/to/datafile;datafile" your_script.py排除不必要的模块
可以在 spec 文件中使用 excludes 参数排除不必要的模块:
a = Analysis(
...
excludes=['tkinter', 'unittest'],
...
)总结
PyInstaller 是一个强大的工具,可以将 Python 脚本及其依赖打包成独立的可执行文件。通过理解和掌握 PyInstaller 的基本使用方法和常见选项,可以方便地分发你的 Python 应用,使用户无需安装 Python 解释器或依赖库即可运行。
文件操作
Python 提供了丰富的文件操作函数,用于读取、写入和管理文件。以下是常见的文件操作方法及其示例。
打开文件
使用 open() 函数打开文件。该函数返回一个文件对象,支持多种模式:
r:只读(默认)。
w:写入(会覆盖文件)。
a:追加(在文件末尾添加内容)。
b:二进制模式(如:rb、wb)。
t:文本模式(默认,如:rt、wt)。
+:读写模式(如:r+、w+、a+)。# 以只读模式打开文件
file = open('example.txt', 'r')
# 以写入模式打开文件
file = open('example.txt', 'w')
# 以二进制读模式打开文件
file = open('example.txt', 'rb')
# 以读写模式打开文件
file = open('example.txt', 'r+')with 语句
with 语句用于简化资源管理,如文件操作、网络连接和线程锁等。使用 with 语句,可以确保在块结束时正确地清理资源,无论是否发生异常。
基本语法
with expression [as variable]:
with-block其中,expression 通常是一个上下文管理器对象,variable 是可选的,它用于接收 expression 返回的值。
使用 with 语句进行文件操作
打开和读取文件
with open('example.txt', 'r') as file:
content = file.read()
print(content)打开和写入文件
with open('example.txt', 'w') as file:
file.write("Hello, World!")上下文管理器
with 语句依赖于上下文管理器对象,该对象实现了两个方法:__enter__(self):进入上下文管理器时执行的代码。
__exit__(self, exc_type, exc_value, traceback):离开上下文管理器时执行的代码。
自定义上下文管理器
通过实现 __enter__ 和 __exit__ 方法,可以创建自定义的上下文管理器。
class MyContextManager:
def __enter__(self):
print("Entering the context")
return self
def __exit__(self, exc_type, exc_value, traceback):
print("Exiting the context")# 使用自定义上下文管理器
with MyContextManager():
print("Inside the context")
#输出:
Entering the context
Inside the context
Exiting the context应用场景
文件操作:自动关闭文件。
数据库连接:自动提交或回滚事务,关闭连接。
线程锁:自动获取和释放锁。
网络连接:自动建立和关闭连接。
总结
with 语句通过上下文管理器简化了资源管理,确保在块结束时正确地清理资源。使用 with 语句可以使代码更加简洁、清晰,并减少资源泄漏的风险。了解和掌握 with 语句的使用,是编写高效 Python 代码的重要技能。
读取文件
读取整个文件
with open('example.txt', 'r') as file:
content = file.read()
print(content)读取一行
with open('example.txt', 'r') as file:
line = file.readline()
print(line)读取所有行
with open('example.txt', 'r') as file:
lines = file.readlines()
for line in lines:
print(line)写入文件
写入字符串
with open('example.txt', 'w') as file:
file.write("Hello, World!")写入多行
with open('example.txt', 'w') as file:
lines = ["First line\n", "Second line\n", "Third line\n"]
file.writelines(lines)文件追加
with open('example.txt', 'a') as file:
file.write("Appending new content.\n")其他常见操作
检查文件是否存在
import os
if os.path.exists('example.txt'):
print("File exists.")
else:
print("File does not exist.")删除文件
import os
if os.path.exists('example.txt'):
os.remove('example.txt')
print("File deleted.")
else:
print("File does not exist.")重命名文件
import os
os.rename('old_name.txt', 'new_name.txt')获取文件信息
import os
info = os.stat('example.txt')
print("File size:", info.st_size)
print("Last modified:", info.st_mtime)总结
文件操作是编程中的基本任务之一。通过使用 Python 提供的文件操作函数,可以方便地进行文件的打开、读取、写入、追加和删除等操作。了解和掌握这些基本文件操作方法,可以帮助你更高效地处理数据和文件。
json 模块
json 模块是 Python 内置的用于处理 JSON 数据的模块,提供了 JSON 数据的编码(序列化)和解码(反序列化)功能。
导入 json 模块
import jsonJSON 数据的编码(序列化)
将 Python 对象(如字典、列表)转换为 JSON 字符串。
使用 json.dumps() 方法将 Python 对象编码为 JSON 字符串
data = {
"name": "John",
"age": 30,
"married": True,
"children": ["Ann", "Billy"],
"pets": None,
"address": {
"street": "123 Main St",
"city": "New York",
"zipcode": "10001"
}
}
json_string = json.dumps(data)
print(json_string)将 JSON 字符串写入文件
with open('data.json', 'w') as file:
json.dump(data, file, indent=4)JSON 数据的解码(反序列化)
将 JSON 字符串转换为 Python 对象(如字典、列表)。使用 json.loads() 方法将 JSON 字符串解码为 Python 对象
json_string = '''
{
"name": "John",
"age": 30,
"married": true,
"children": ["Ann", "Billy"],
"pets": null,
"address": {
"street": "123 Main St",
"city": "New York",
"zipcode": "10001"
}
}
'''
data = json.loads(json_string)
print(data)从文件读取 JSON 数据
with open('data.json', 'r') as file:
data = json.load(file)
print(data)常用选项
indent:设置缩进级别,使输出的 JSON 数据格式化,便于阅读。
sort_keys:如果为 True,则按照键的字母顺序输出。
json_string = json.dumps(data, indent=4, sort_keys=True)
print(json_string)总结
json 模块是 Python 内置的用于处理 JSON 数据的工具,通过使用 json.dumps()、json.loads()、json.dump() 和 json.load() 方法,可以方便地对 JSON 数据进行编码和解码操作。掌握这些方法,可以有效地处理和交换 JSON 格式的数据。
os 模块常用函数
os 模块提供了与操作系统进行交互的各种功能,允许你执行许多操作系统相关的任务,如文件和目录操作、进程管理、环境变量访问等。以下是一些常用的 os 模块函数及其示例。
导入 os 模块
import os文件和目录操作
获取当前工作目录
cwd = os.getcwd()
print("当前工作目录:", cwd)改变当前工作目录
os.chdir('/path/to/directory')列出目录中的文件和子目录
files = os.listdir('/path/to/directory')
print("目录内容:", files)创建目录
os.mkdir('new_directory')递归创建目录
os.makedirs('parent_directory/new_directory')删除文件
os.remove('file.txt')删除目录
os.rmdir('directory') # 仅能删除空目录递归删除目录
os.removedirs('parent_directory/new_directory')重命名文件或目录
os.rename('old_name.txt', 'new_name.txt')获取文件或目录信息
info = os.stat('file.txt')
print("文件信息:", info)路径操作
获取绝对路径
abs_path = os.path.abspath('file.txt')
print("绝对路径:", abs_path)拆分路径
dir_name, file_name = os.path.split('/path/to/file.txt')
print("目录名:", dir_name)
print("文件名:", file_name)拼接路径
full_path = os.path.join('/path/to', 'file.txt')
print("拼接路径:", full_path)检查路径是否存在
exists = os.path.exists('/path/to/file.txt')
print("路径存在:", exists)检查路径是否为文件
is_file = os.path.isfile('/path/to/file.txt')
print("是文件:", is_file)检查路径是否为目录
is_dir = os.path.isdir('/path/to/directory')
print("是目录:", is_dir)环境变量
获取环境变量
path = os.getenv('PATH')
print("环境变量 PATH:", path)设置环境变量
os.environ['MY_VAR'] = 'value'删除环境变量
del os.environ['MY_VAR']进程管理
获取当前进程ID
pid = os.getpid()
print("当前进程ID:", pid)执行系统命令
os.system('ls -l')示例代码
以下是一个综合示例,展示了如何使用 os 模块的常用函数:
import os
# 获取当前工作目录
cwd = os.getcwd()
print("当前工作目录:", cwd)
# 列出当前目录中的文件和子目录
files = os.listdir(cwd)
print("目录内容:", files)
# 创建新目录
os.mkdir('new_directory')
print("新目录已创建")
# 重命名目录
os.rename('new_directory', 'renamed_directory')
print("目录已重命名")
# 获取文件信息
file_info = os.stat('renamed_directory')
print("文件信息:", file_info)
# 获取绝对路径
abs_path = os.path.abspath('renamed_directory')
print("绝对路径:", abs_path)
# 拼接路径
full_path = os.path.join(cwd, 'renamed_directory')
print("拼接路径:", full_path)
# 检查路径是否存在
exists = os.path.exists(full_path)
print("路径存在:", exists)
# 检查是否为目录
is_dir = os.path.isdir(full_path)
print("是目录:", is_dir)
# 删除目录
os.rmdir(full_path)
print("目录已删除")
# 获取环境变量
path = os.getenv('PATH')
print("环境变量 PATH:", path)
# 获取当前进程ID
pid = os.getpid()
print("当前进程ID:", pid)总结
os 模块提供了丰富的函数与操作系统进行交互,涵盖了文件和目录操作、路径操作、环境变量管理和进程管理等功能。掌握这些常用函数,可以有效地进行系统级的编程和操作。
Socket 网络编程
Socket 编程是实现网络通信的基础,通过 Python 的 socket 模块可以轻松创建网络应用,包括客户端和服务器。以下是一些基本的概念和实现示例。
基本概念
Socket:网络通信的端点,包含 IP 地址和端口号。
服务器:监听特定端口,等待客户端连接。
客户端:主动连接到服务器。
导入 socket 模块
import socket创建一个简单的 TCP 服务器
创建 Socket 对象
server_socket = socket.socket(socket.AF_INET, socket.SOCK_STREAM)绑定地址和端口
server_socket.bind(('localhost', 12345))监听连接
server_socket.listen(5) # 最大连接数为 5
print("服务器正在监听端口 12345...")接受连接
while True:
client_socket, addr = server_socket.accept()
print("连接地址:", addr)
client_socket.send(b"欢迎连接服务器!")
client_socket.close()创建一个简单的 TCP 客户端
创建 Socket 对象
client_socket = socket.socket(socket.AF_INET, socket.SOCK_STREAM)连接服务器
client_socket.connect(('localhost', 12345))接收数据
data = client_socket.recv(1024)
print("接收到的数据:", data.decode())关闭连接
client_socket.close()示例:简单的聊天程序
服务器代码:
import socket
server_socket = socket.socket(socket.AF_INET, socket.SOCK_STREAM)
server_socket.bind(('localhost', 12345))
server_socket.listen(5)
print("服务器正在监听端口 12345...")
while True:
client_socket, addr = server_socket.accept()
print("连接地址:", addr)
while True:
data = client_socket.recv(1024)
if not data:
break
print("客户端:", data.decode())
response = input("服务器: ")
client_socket.send(response.encode())
client_socket.close()客户端代码:
import socket
client_socket = socket.socket(socket.AF_INET, socket.SOCK_STREAM)
client_socket.connect(('localhost', 12345))
while True:
message = input("客户端: ")
client_socket.send(message.encode())
data = client_socket.recv(1024)
print("服务器:", data.decode())
if message.lower() == 'bye':
break
client_socket.close()总结
Socket 编程是实现网络通信的基础。通过 Python 的 socket 模块,可以轻松创建网络应用,包括客户端和服务器。理解和掌握 Socket 编程,可以帮助你开发各种网络应用程序,如聊天程序、文件传输工具等。
进程与线程
Python 提供了 threading 模块用于多线程编程和 multiprocessing 模块用于多进程编程。下面是更详细的介绍,包括各个函数的功能和使用方法。
多线程编程
threading 模块
threading 模块提供了线程类和锁类等工具,用于多线程编程。
创建线程
threading.Thread(target, args=(), kwargs={}):创建一个线程对象。target:线程执行的目标函数。
args:目标函数的参数元组。
kwargs:目标函数的关键字参数字典。
import threading
def print_numbers():
for i in range(1, 6):
print(f"Number: {i}")
# 创建线程
t1 = threading.Thread(target=print_numbers)启动线程
Thread.start():启动线程,调用目标函数。t1.start()等待线程完成
Thread.join(timeout=None):阻塞调用线程,直到线程完成。timeout:等待的时间(秒),可选。
t1.join()线程锁threading.Lock():创建一个锁对象,用于线程间同步。
Lock.acquire(blocking=True, timeout=-1):获取锁。
blocking:是否阻塞,默认为 True。
timeout:阻塞等待的时间(秒),可选。
Lock.release():释放锁。
counter = 0
lock = threading.Lock()
def increment_counter():
global counter
for _ in range(1000000):
with lock:
counter += 1
t1 = threading.Thread(target=increment_counter)
t2 = threading.Thread(target=increment_counter)
t1.start()
t2.start()
t1.join()
t2.join()
print(f"Counter: {counter}")线程示例
import threading
import time
def print_numbers():
for i in range(1, 6):
print(f"Number: {i}")
time.sleep(1)
def print_letters():
for letter in 'abcde':
print(f"Letter: {letter}")
time.sleep(1)
# 创建线程
t1 = threading.Thread(target=print_numbers)
t2 = threading.Thread(target=print_letters)
# 启动线程
t1.start()
t2.start()
# 等待线程完成
t1.join()
t2.join()
print("Done")多进程编程
multiprocessing 模块
multiprocessing 模块提供了进程类和队列类等工具,用于多进程编程。
创建进程multiprocessing.Process(target, args=(), kwargs={}):创建一个进程对象。
target:进程执行的目标函数。
args:目标函数的参数元组。
kwargs:目标函数的关键字参数字典。
import multiprocessing
def print_numbers():
for i in range(1, 6):
print(f"Number: {i}")
# 创建进程
p1 = multiprocessing.Process(target=print_numbers)启动进程
Process.start():启动进程,调用目标函数。
p1.start()等待进程完成
Process.join(timeout=None):阻塞调用进程,直到进程完成。
timeout:等待的时间(秒),可选。
p1.join()进程间通信multiprocessing.Queue():创建一个队列对象,用于进程间通信。
Queue.put(item, block=True, timeout=None):向队列中添加项目。
item:要添加的项目。
block:是否阻塞,默认为 True。
timeout:阻塞等待的时间(秒),可选。
Queue.get(block=True, timeout=None):从队列中获取项目。
block:是否阻塞,默认为 True。
timeout:阻塞等待的时间(秒),可选。
import multiprocessing
def producer(queue):
for i in range(5):
print(f"Producing {i}")
queue.put(i)
time.sleep(1)
def consumer(queue):
while True:
item = queue.get()
if item is None:
break
print(f"Consuming {item}")
queue = multiprocessing.Queue()
p1 = multiprocessing.Process(target=producer, args=(queue,))
p2 = multiprocessing.Process(target=consumer, args=(queue,))
p1.start()
p2.start()
p1.join()
queue.put(None)
p2.join()进程与线程的选择
线程:适用于 I/O 密集型任务,如文件读写、网络操作等。线程切换开销小,但要注意线程间的同步问题。
进程:适用于 CPU 密集型任务,如计算密集的操作。进程切换开销大,但进程间数据独立,适合利用多核 CPU。
理解并掌握多线程和多进程编程,可以提高程序的并发性能,充分利用多核 CPU 资源,提升程序的运行效率。


 9364
9364

 被折叠的 条评论
为什么被折叠?
被折叠的 条评论
为什么被折叠?
 到【灌水乐园】发言


