


springCloud + Eureka + seata 整合
- 环境准备
- springBoot --2.1.7.RELEASE
- springCloud – 2.1.0.RELEASE
- seata --1.4.0
- 这里主要用seata的AT模式,Seata的模块组成
-TC (Transaction Coordinator) - 事务协调者
维护全局和分支事务的状态,驱动全局事务提交或回滚。
-TM (Transaction Manager) - 事务管理器
定义全局事务的范围:开始全局事务、提交或回滚全局事务。
-RM (Resource Manager) - 资源管理器
管理分支事务处理的资源,与TC交谈以注册分支事务和报告分支事务的状态,并驱 动分支事务提交或回滚。
安装seata server
下载地址:https://github.com/seata/seata/releases
seata文档地址:https://seata.io/zh-cn/docs/overview/what-is-seata.html
1.下载好seata server包 开始安装
tar -zxvf seata-server-1.4.1.tar.gz
2.进入cd seata/conf/位置 修改file.conf
-file模式为单机模式,全局事务会话信息内存中读写并持久化本地文件root.data,性能较高;
-db模式为高可用模式,全局事务会话信息通过db共享,相应性能差些;
-redis模式Seata-Server 1.3及以上版本支持,性能较高,存在事务信息丢失风险,请提前配置合适当前场景的redis持久化配置.
#若没有service则手动加上
service {

  #transaction service group mapping
  #这里的命名要注意需要和registry.conf 中eureka配置中的application 命名一致
  vgroup_mapping.tx-service-group = "fsp_tx_group"

  #only support when registry.type=file, please don't set multiple addresses
  #ip地址为seata server安装的服务器的ip ,默认端口8091
  default.grouplist = "192.168.92.128:8091"

  #disable seata
  #是否启用seata的分布式事务
  disableGlobalTransaction = false

}
## transaction log store, only used in seata-server
store {
  ## store mode: file、db、redis
  #选用mysql作为事务日志存储,只配置db即可,其它项不做修改
  mode = "db"

  ## file store property
  file {
    ## store location dir
    dir = "sessionStore"
    # branch session size , if exceeded first try compress lockkey, still exceeded throws exceptions
    maxBranchSessionSize = 16384
    # globe session size , if exceeded throws exceptions
    maxGlobalSessionSize = 512
    # file buffer size , if exceeded allocate new buffer
    fileWriteBufferCacheSize = 16384
    # when recover batch read size
    sessionReloadReadSize = 100
    # async, sync
    flushDiskMode = async
  }

  ## database store property
  db {
    ## the implement of javax.sql.DataSource, such as DruidDataSource(druid)/BasicDataSource(dbcp)/HikariDataSource(hikari) etc.
    datasource = "druid"
    ## mysql/oracle/postgresql/h2/oceanbase etc.
    dbType = "mysql"
    driverClassName = "com.mysql.cj.jdbc.Driver"
    url = "jdbc:mysql:localhost"
    user = "name"
    password = "password"
    minConn = 5
    maxConn = 30
    #持久化全局事务
    globalTable = "global_table"
    #持久化各提交分支的事务
    branchTable = "branch_table"
    #持久化各分支锁定资源事务
    lockTable = "lock_table"
    queryLimit = 100
    maxWait = 5000
  }

  ## redis store property
  redis {
    host = "127.0.0.1"
    port = "6379"
    password = ""
    database = "0"
    minConn = 1
    maxConn = 10
    queryLimit = 100
  }

}
registry.conf
registry {
  # file 、nacos 、eureka、redis、zk、consul、etcd3、sofa
  #选用的是eureka作为注册中心,看需求可灵活修改
  type = "eureka"

  nacos {
    application = "seata-server"
    serverAddr = "127.0.0.1:8848"
    group = "SEATA_GROUP"
    namespace = ""
    cluster = "default"
    username = ""
    password = ""
  }
  eureka {
   #本地Eureka地址,若是集群,用逗号隔开
    serviceUrl = "http://localhost:7001/eureka"
    #命名和file.conf的vgroup_mapping.tx-service-group命名一致
    application = "fsp_tx_group"
    weight = "1"
  }
  redis {
    serverAddr = "localhost:6379"
    db = 0
    password = ""
    cluster = "default"
    timeout = 0
  }
  zk {
    cluster = "default"
    serverAddr = "127.0.0.1:2181"
    sessionTimeout = 6000
    connectTimeout = 2000
    username = ""
    password = ""
  }
  consul {
    cluster = "default"
    serverAddr = "127.0.0.1:8500"
  }
  etcd3 {
    cluster = "default"
    serverAddr = "http://localhost:2379"
  }
  sofa {
    serverAddr = "127.0.0.1:9603"
    application = "default"
    region = "DEFAULT_ZONE"
    datacenter = "DefaultDataCenter"
    cluster = "default"
    group = "SEATA_GROUP"
    addressWaitTime = "3000"
  }
  file {
    name = "file.conf"
  }
}

config {
  # file、nacos 、apollo、zk、consul、etcd3
  type = "file"

  nacos {
    serverAddr = "127.0.0.1:8848"
    namespace = ""
    group = "SEATA_GROUP"
    username = ""
    password = ""
  }
  consul {
    serverAddr = "127.0.0.1:8500"
  }
  apollo {
    appId = "seata-server"
    apolloMeta = "http://192.168.1.204:8801"
    namespace = "application"
  }
  zk {
    serverAddr = "127.0.0.1:2181"
    sessionTimeout = 6000
    connectTimeout = 2000
    username = ""
    password = ""
  }
  etcd3 {
    serverAddr = "http://localhost:2379"
  }
  file {
    name = "file.conf"
  }
}
3.配置好以后启动启动seata server : seata/bin目录下(提前启动Eureka)
sh seata-server.sh -h 127.0.0.1 -p 8091
seata server默认启动的jvm是2G,我们可做调整,位置在 seata/bin/seata-server.sh
vim seata-server.sh

启动成功后如图

 4.新建表格 若解压包里没有,可下载0.9.0版本 seata server里面有sql语句
- 可以单独的建库建表将下面sql全部执行一遍,也可以在已有库中建表
- 表所建的库对应file.conf配置文件中db的数据库
- undo_log表,只要涉及到事务的库都需要这个表
- 表字段长度可能会不够可自行修改
 1)db_store.sql
-- the table to store GlobalSession data
drop table if exists `global_table`;
create table `global_table` (
  `xid` varchar(128)  not null,
  `transaction_id` bigint,
  `status` tinyint not null,
  `application_id` varchar(32),
  `transaction_service_group` varchar(32),
  `transaction_name` varchar(128),
  `timeout` int,
  `begin_time` bigint,
  `application_data` varchar(2000),
  `gmt_create` datetime,
  `gmt_modified` datetime,
  primary key (`xid`),
  key `idx_gmt_modified_status` (`gmt_modified`, `status`),
  key `idx_transaction_id` (`transaction_id`)
);

-- the table to store BranchSession data
drop table if exists `branch_table`;
create table `branch_table` (
  `branch_id` bigint not null,
  `xid` varchar(128) not null,
  `transaction_id` bigint ,
  `resource_group_id` varchar(32),
  `resource_id` varchar(256) ,
  `lock_key` varchar(128) ,
  `branch_type` varchar(8) ,
  `status` tinyint,
  `client_id` varchar(64),
  `application_data` varchar(2000),
  `gmt_create` datetime,
  `gmt_modified` datetime,
  primary key (`branch_id`),
  key `idx_xid` (`xid`)
);

-- the table to store lock data
drop table if exists `lock_table`;
create table `lock_table` (
  `row_key` varchar(128) not null,
  `xid` varchar(96),
  `transaction_id` long ,
  `branch_id` long,
  `resource_id` varchar(256) ,
  `table_name` varchar(32) ,
  `pk` varchar(36) ,
  `gmt_create` datetime ,
  `gmt_modified` datetime,
  primary key(`row_key`)
);
2)db_undo_log.sql
-- the table to store seata xid data
-- 0.7.0+ add context
-- you must to init this sql for you business databese. the seata server not need it.
-- 此脚本必须初始化在你当前的业务数据库中,用于AT 模式XID记录。与server端无关(注:业务数据库)
-- 注意此处0.3.0+ 增加唯一索引 ux_undo_log
drop table `undo_log`;
CREATE TABLE `undo_log` (
  `id` bigint(20) NOT NULL AUTO_INCREMENT,
  `branch_id` bigint(20) NOT NULL,
  `xid` varchar(100) NOT NULL,
  `context` varchar(128) NOT NULL,
  `rollback_info` longblob NOT NULL,
  `log_status` int(11) NOT NULL,
  `log_created` datetime NOT NULL,
  `log_modified` datetime NOT NULL,
  `ext` varchar(100) DEFAULT NULL,
  PRIMARY KEY (`id`),
  UNIQUE KEY `ux_undo_log` (`xid`,`branch_id`)
) ENGINE=InnoDB AUTO_INCREMENT=1 DEFAULT CHARSET=utf8;
搭建项目测试
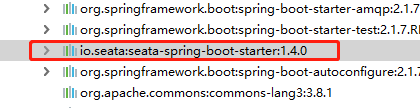
1.pom ,这个只给出seata,其它相关依赖包自行导入
<!--seata-->
<dependency>
     <groupId>io.seata</groupId>
     <artifactId>seata-spring-boot-starter</artifactId>
     <version>1.4.0</version>
 </dependency>
若不知道自己服务端要安装哪个版本,导包后查看
2.修改yml文件,只贴出seata相关配置
seata:
  enabled: true
  application-id: ${spring.application.name}
  #命名注意和seata server命名一致
  tx-service-group: fsp_tx_group
  enable-auto-data-source-proxy: true
  service:
    grouplist:
      #seata服务器地址
      default: 127.0.0.1:8091
    vgroup-mapping:
      fsp_tx_group: default
  config:
    type: file
    file:
      name: file.conf
  registry:
    type: file
    file:
      name: file
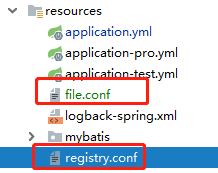
3.seata server 里的file.conf 和 registry.conf文件(一致)放入项目的resources下
4.配置数据源
import com.alibaba.druid.pool.DruidDataSource;
import org.apache.ibatis.session.SqlSessionFactory;
import org.mybatis.spring.SqlSessionFactoryBean;
import org.mybatis.spring.SqlSessionTemplate;
import org.mybatis.spring.annotation.MapperScan;
import org.springframework.beans.factory.annotation.Qualifier;
import org.springframework.boot.context.properties.ConfigurationProperties;
import org.springframework.context.annotation.Bean;
import org.springframework.context.annotation.Configuration;
import org.springframework.core.io.support.PathMatchingResourcePatternResolver;
import org.springframework.jdbc.datasource.DataSourceTransactionManager;

import javax.sql.DataSource;

@Configuration
@MapperScan(basePackages = "com.sunsoft.manage.statistics.dao.db1", sqlSessionTemplateRef = "db1SqlSessionTemplate")
public class DataSource1Config {

    @Bean(name = "db1DataSource")
    @ConfigurationProperties(prefix = "spring.datasource.db1")
    public DataSource db1DataSource() {
        return new DruidDataSource();
    }

    @Bean(name = "db1SqlSessionFactory")
    public SqlSessionFactory db1SqlSessionFactory(@Qualifier("db1DataSource") DataSource dataSource) throws Exception {
        SqlSessionFactoryBean bean = new SqlSessionFactoryBean();
        bean.setDataSource(dataSource);
        bean.setMapperLocations(new PathMatchingResourcePatternResolver().getResources("classpath*:mybatis/mapper/db1/*.xml"));
        return bean.getObject();
    }

    @Bean(name = "db1TransactionManager")
    public DataSourceTransactionManager db1TransactionManager(@Qualifier("db1DataSource") DataSource dataSource) {
        return new DataSourceTransactionManager(dataSource);
    }

    @Bean(name = "db1SqlSessionTemplate")
    public SqlSessionTemplate db1SqlSessionTemplate(@Qualifier("db1SqlSessionFactory") SqlSessionFactory sqlSessionFactory) throws Exception {
        return new SqlSessionTemplate(sqlSessionFactory);
    }

}
5.写个简单的测试类进行测试.这里展示的是实现类
	/**
     *  1.开启全局事务需要在具体的方法上加注解
     * 	@GlobalTransactional(rollbackFor = Exception.class)
     *  2.业务流程为2个不同的库修改数据
     */
	@Override
    @GlobalTransactional(rollbackFor = Exception.class)
    public void update(JSONObject param) {
    	//修改库1表字段值
        accountDao.updateNum(id,num);
        //修改库2表字段值
        userDao.updateUserMoney(id,money);
		//异常逻辑
        int i = 1/0;
    }
在异常处打断点测试,查看表


 异常放掉发现事务回滚,事务数据清空,即测试成功


 3819
3819


 被折叠的 条评论
为什么被折叠?
被折叠的 条评论
为什么被折叠?
 到【灌水乐园】发言


