


1. 前言
一般在电商类业务中经常会遇到这种场景:在一个商品的展示页面,会有一个顶部TabBar结合下面的内容滚动给用户提供快捷访问某部分内容的功能。随着用户向下滚动内容,TabBar的index相应变化,提示用户当前浏览的是哪一部分,同时,点击TabBar也可以快速定位到内容的相对位置。下面记录一下实现过程和里面遇到的问题。以下代码均在Flutter1.17.5下调试运行通过。
2. 通过TabBar点击定位ScrollView
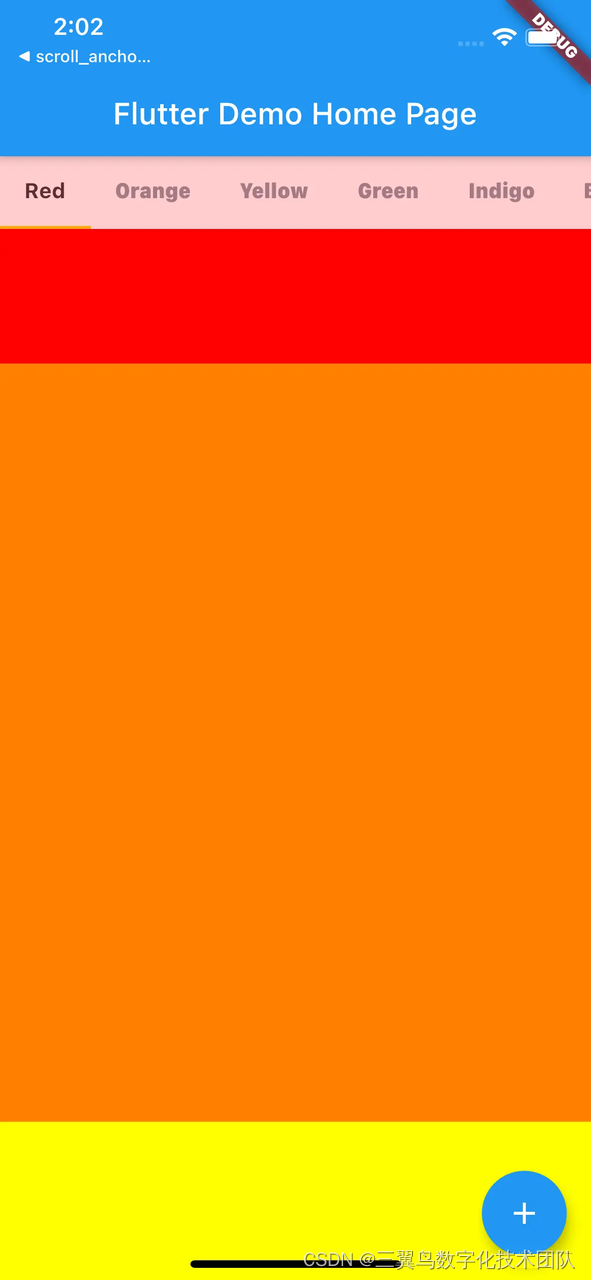
这里先讲一下我们的界面。这里设计了一个很简单的界面,使用CustomScrollView结合SliverList实现了一个总共7节的可上下滑动的内容,每节内容由一个Container来代表,从上到下,分别有7中颜色。点击TabBar对应按钮,可以让ScrollView跳到对应的颜色,同时滑动ScrollView到不同的颜色部位,TabBar的index也会跟随变化。
下面先上build代码:
 Widget build(BuildContext context) {
    return Scaffold(
      appBar: AppBar(
        title: Text(widget.title),
      ),
      body: Center(
        child: Stack(
          alignment: Alignment.topLeft,
          overflow: Overflow.clip,
          children: <Widget>[
            Column(
              mainAxisAlignment: MainAxisAlignment.center,
              children: <Widget>[
                Expanded(
                  child: CustomScrollView(
                    controller: scrollController,
                    slivers: <Widget>[
                      SliverList(
                        delegate: SliverChildBuilderDelegate(
                          (BuildContext context, int index) {
                            return _getListItem(index);
                          },
                          childCount: _getChildCount(),
                        ),
                      ),
                    ],
                  ),
                ),
              ],
            ),
            if (showTabBar)
              Positioned(
                top: 0,
                width: MediaQuery.of(context).size.width,
                child: Opacity(
                  opacity: opacity,
                  child: Container(
                    color: tabBarColor,
                    child: TabBar(
                      controller: tabController,
                      indicatorColor: Color(0xfffdd108),
                      labelColor: Color(0xff343a40),
                      unselectedLabelColor: Color(0xff8E9AA6),
                      unselectedLabelStyle: TextStyle(
                          fontSize: 14, fontWeight: FontWeight.normal),
                      isScrollable: true,
                      labelStyle:
                          TextStyle(fontSize: 14, fontWeight: FontWeight.bold),
                      tabs: _buildTabsWidget(listTitle),
                      onTap: _onTabChanged,
                    ),
                  ),
                ),
              ),
          ],
        ),
        // Center is a layout widget. It takes a single child and positions it
        // in the middle of the parent.
      ),
      floatingActionButton: FloatingActionButton(
        onPressed: null,
        tooltip: 'Increment',
        child: Icon(Icons.add),
      ), // This trailing comma makes auto-formatting nicer for build methods.
    );
  }
这里用Stack,将TabBar浮在ScrollView上面。对于_getListItem,大致的实现是这样:
final GlobalKey redKey = GlobalKey();
final GlobalKey orangeKey = GlobalKey();
Widget _getListItem(int index) {
    double height = 500;
    Widget item;
    switch (index) {
      case 0:
        item = Container(
          key: redKey,
          height: height,
          color: Color(0xffFF0000),
        );
        break;
      case 1:
        item = Container(
          key: orangeKey,
          height: height,
          color: Color(0xffFF7F00),
        );
        break;
        ...
这里的关键点是对于每个Container,都设置了一个GlobalKey。作用就是便于后续定位Scrollview的不同位置。 下面看_onTabChanged,也就是点击TabBar按钮后的逻辑:
void _onTabChanged(int index) {
    // keyList contains all GlobalKey assigned to the Containers in ScrollView
    targetKey = keyList[index];
    _gotoAnchorPoint();
  }
  void _gotoAnchorPoint() async {
    GlobalKey key = targetKey;
    if (key.currentContext != null) {
      scrollController.position
          .ensureVisible(
        key.currentContext.findRenderObject(),
        alignment: 0.0,
      )
          .then((value) {
        if (scrollController.offset - TAB_HEIGHT > 0) {
          scrollController.jumpTo(scrollController.offset - TAB_HEIGHT);
        }
      });
      return;
    }
    int nearestRenderedIndex = 0;
    bool foundIndex = false;
    for (int i = keyList.indexOf(key) - 1; i >= 0; i -= 1) {
      // find first non-null-currentContext key above target key
      if (keyList[i].currentContext != null) {
        try {
          // Only when size is get without any exception,this key can be used in ensureVisible function
          Size size = keyList[i].currentContext.size;
          print("size: $size");
          foundIndex = true;
          nearestRenderedIndex = i;
        } catch (e) {
          print("size not availabel");
        }
        break;
      }
    }
    if (!foundIndex) {
      for (int i = keyList.indexOf(key) + 1; i < keyList.length; i += 1) {
        // find first non-null-currentContext key below target key
        if (keyList[i].currentContext != null) {
          try {
            // Only when size is get without any exception,this key can be used in ensureVisible function
            Size size = keyList[i].currentContext.size;
            print("size: $size");
            foundIndex = true;
            nearestRenderedIndex = i;
          } catch (e) {
            print("size not availabel");
          }
          break;
        }
      }
    }
    int increasedOffset = nearestRenderedIndex < keyList.indexOf(key) ? 1 : -1;
    for (int i = nearestRenderedIndex;
        i >= 0 && i < keyList.length;
        i += increasedOffset) {
      if (keyList[i].currentContext == null) {
        Future.delayed(new Duration(microseconds: 10), () {
          _gotoAnchorPoint();
        });
        return;
      }
      if (keyList[i] != targetKey) {
        await scrollController.position.ensureVisible(
          keyList[i].currentContext.findRenderObject(),
          alignment: 0.0,
          curve: Curves.linear,
          alignmentPolicy: increasedOffset == 1
              ? ScrollPositionAlignmentPolicy.keepVisibleAtEnd
              : ScrollPositionAlignmentPolicy.keepVisibleAtStart,
        );
      } else {
        await scrollController.position
            .ensureVisible(
          keyList[i].currentContext.findRenderObject(),
          alignment: 0.0,
        )
            .then((value) {
          Future.delayed(new Duration(microseconds: 1000), () {
            if (scrollController.offset - TAB_HEIGHT > 0) {
              scrollController.jumpTo(scrollController.offset - TAB_HEIGHT);
            } else {}
          });
        });

        break;
      }
    }
  }
说明一下上面代码的主要流程和逻辑。根据TabBar上对应按钮的点击,找到要跳到的Container对应的key,本来通过scrollController.position.ensureVisible就可以直接跳转了。不过运行时就会发现,key.currentContext.findRenderObject()可能是null,导致跳转失败,这里是第一个坑。所以这里加上了一个对key.currentContext的check null操作,如果为null,继续往下看如何跳转。通过两个for循环,找到离targetKey最近的可跳转的key。对于可跳转的定义是:currentContext != null,并且取currentContext.size不会抛出异常才行,这里是第二个坑。找到这个最近的可跳转key后,就先跳转到这个key对应的Container部分,然后递进跳转,直到跳转到我们的targetKey。完成一次跳转后,下一次跳转可能还不能立即执行,所以需要Future.delayed一下,等待下一个key的currentContext可用后再跳转。由于TabBar是浮在ScrollView上的,所以在最后跳转到targetKey时,加入了一个偏移量TAB_HEIGHT的跳转,目的是让目标widget的上沿刚好和TabBar的下沿平齐,即TabBar不遮挡widget的内容,因为只用ensureVisible跳转,会直接让widget显示在ScrollView的最顶端。到这里,点击TabBar跳转ScollView到指定位置的功能就完成了。 然后说一下上面提到的两个坑。第一个坑,对于一个ScrollView来说,可能有很多内容是没有显示在屏幕上的,那么key.currentContext就可能为null,currentContext是一个BuildContext类型的数据,用来将widget和最终用于绘制屏幕的renderObject关联起来。随着scrollView的滑动,原本不为null的key.currentContext可能就变成null了,原本为null可能也会变得可用。本以为加一个key.currentContext的check null操作就够了,后来在实践的时候,发现有些时候key.currentContext确实不为null,但是无法取到它的size,读取size时会抛出异常:
Exception has occurred.
FlutterError (Cannot get size from a render object that has been marked dirty for layout.
The size of this render object is ambiguous because this render object has been modified since it was last laid out, which typically means that the size getter was called too early in the pipeline (e.g., during the build phase) before the framework has determined the size and position of the render objects during layout.
目前还没有找到更好的办法,不过ScrollView肯定有一部分是显示在界面上的,所以一定会拿到一个size可用的currentContext。
3. 滑动ScrollView来变更TabBar索引
在initState里给scrollController添加一个监听处理:scrollController.addListener(() => _onScrollChanged()); 然后看一下这里面的逻辑:
void _onScrollChanged() {
    double showTabBarOffset;
    try {
      showTabBarOffset = keyList[0].currentContext.size.height - TAB_HEIGHT;
    } catch (e) {
      showTabBarOffset = heightList[0] - TAB_HEIGHT;
    }

    if (scrollController.offset >= showTabBarOffset) {
      setState(() {
        opacity = 1;
      });
    } else {
      setState(() {
        opacity = scrollController.offset / showTabBarOffset;
        if (opacity < 0) {
          opacity = 0;
        }
      });
    }
    if (scrollController.position.userScrollDirection ==
            ScrollDirection.reverse ||
        scrollController.position.userScrollDirection ==
            ScrollDirection.forward) {
      double totalOffset = -TAB_HEIGHT;
      for (int i = 0; i < keyList.length; i++) {
        if (keyList[i].currentContext != null) {
          try {
            heightList[i] = keyList[i].currentContext.size.height;
          } catch (e) {
            // if we can not get the size, this means we can use the height saved in the heightList directly.
            // because if you scroll the list to this position, all the widget ever shown has already saved it's height in the heightList
            print("can not get size, so do not modify heightList[i]");
          }
        }
        if (scrollController.offset >= totalOffset &&
            scrollController.offset < totalOffset + heightList[i]) {
          tabController.animateTo(
            i,
            duration: Duration(milliseconds: 0),
          );
          return;
        }
        totalOffset += heightList[i];
      }
    }
  }
一开始的变量showTabBarOffset是用来保存scrollview下滑多少偏移量后,再显示tabBar的,也就是说本例中Tabbar的初始状态起始是不可见的,这个点就不展开讨论了。下面的逻辑是,判断如果用户上划或者下划scrollview,我们就用一个for循环,从最上一个Container开始,用关联的key取出每个Container的高度,然后根据取到的累计高度之和与scrollController.offset进行比较,如果scrollController.offset超过了之前累计的高度,又没有超过累计高度加上第i个Container的高度,那就修改TabBar的索引到i,完成TabBar和ScrollView的联动。这里需要注意的是,取高度的时候,如果通过keyList[i].currentContext.size.height取到了,就要把值存到heightList里,以便取不到的时候用。对于任何一个位置的高度来说,第一次往往是可以取到的。原因同上一节的两个坑的分析。 至此,TabBar和ScrollView的联动就完成了。以上方案也是基于网上的一个方案进行进一步的修改完善得到的。
参考:
完整的代码:


 1215
1215


 被折叠的 条评论
为什么被折叠?
被折叠的 条评论
为什么被折叠?
 到【灌水乐园】发言


