


IOC主要作用控制反转,依赖注入;用于解决程序间的耦合
SpringIOC环境配置
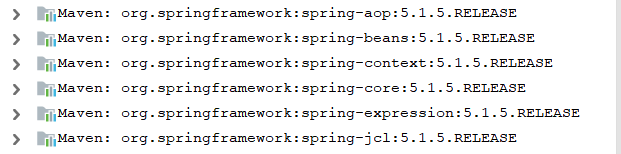
在maven工程中导入spring的jar包
		<dependency>
            <groupId>org.springframework</groupId>
            <artifactId>spring-context</artifactId>
            <version>5.1.5.RELEASE</version>
        </dependency>
spring主要的jar包
bean.xml的头部约束配置
基于xml开发时
<?xml version="1.0" encoding="UTF-8"?>
<beans xmlns="http://www.springframework.org/schema/beans"
    xmlns:xsi="http://www.w3.org/2001/XMLSchema-instance"
    xsi:schemaLocation="http://www.springframework.org/schema/beans
        https://www.springframework.org/schema/beans/spring-beans.xsd">

    <!-- services -->

    <bean id="petStore" class="org.springframework.samples.jpetstore.services.PetStoreServiceImpl">
        <property name="accountDao" ref="accountDao"/>
        <property name="itemDao" ref="itemDao"/>
        <!-- additional collaborators and configuration for this bean go here -->
    </bean>

    <!-- more bean definitions for services go here -->

</beans>
基于注解开发时
<?xml version="1.0" encoding="UTF-8"?>
<beans xmlns="http://www.springframework.org/schema/beans"
       xmlns:xsi="http://www.w3.org/2001/XMLSchema-instance"
       xmlns:context="http://www.springframework.org/schema/context"
       xsi:schemaLocation="http://www.springframework.org/schema/beans
        https://www.springframework.org/schema/beans/spring-beans.xsd
        http://www.springframework.org/schema/context
        https://www.springframework.org/schema/context/spring-context.xsd">

    <context:component-scan base-package="com.demo"></context:component-scan>

</beans>
使用配置文件开发
 <!--通过默认构造方法获取对象-->
    <!--<bean id="UserDao" class="cn.tu.dao.impl.UserDaoImpl"></bean>-->
    <!--通过工厂模式获取对象-->
    <!--<bean id="instanceFactory" class="cn.tu.factory.InstanceFactory"></bean>
    <bean id="UserDao" factory-bean="instanceFactory" factory-method="getUserDao"></bean>-->
    <!--通过工厂模式获取静态对象-->
    <bean id="UserDao" class="cn.tu.factory.StaticFactory" factory-method="getUserDao"></bean>

    <!--
    bean标签中的scope属性
    作用:用于指定bean的作用范围
        singleton:单例的默认值
        prototype:多例的
        requestL作用于web的请求范围
        sessionL作用于web的会话范围
        global-session:作用于集群环境的会话范围
    -->
    <!--
        单例对象:
            出生:当容器创建时对象出生
            活着:只要容器存在时,对象就一直活着
            死亡:单例对象的生命周期和容器相同
        多例对象:
            出生:当使用对象时spring就会创建该对象
            活着:对象只要在使用过程中就一直活着
            死亡:java的垃圾回收机制自动回收
    -->
    <bean id="UserService" class="cn.tu.service.impl.UserServiceImpl" scope="prototype"
    init-method="init" destroy-method="destroy"></bean>
    <!--
    constructor-arg里的属性:
    指定参数传入构造函数
        name:构造函数参数的名称
        index:构造函数中参数的索引
        type:构造函数中参数的类型

        value:用于提供基本数据类型和String类型的数据
        ref:指定别的引用类型
    -->
    <bean id="AccountService" class="cn.tu.service.impl.AccountServiceImpl">
        <constructor-arg name="name" value="test"></constructor-arg>
        <constructor-arg name="age" value="18"></constructor-arg>
        <constructor-arg name="birthday" ref="now"></constructor-arg>
    </bean>
    <!--配置日期对象-->
    <bean id="now" class="java.util.Date"></bean>


    <!--set方法注入
    使用的标签:property
        name:用于指定注入时使用的方法名称
        value:用于提供基本数据类型和String类型的数据
        ref:指定别的引用类型
    -->
    <bean id="AccountService2" class="cn.tu.service.impl.AccountServiceImpl2">
        <property name="name" value="test"></property>
        <property name="age" value="18"></property>
        <property name="birthday" ref="now"></property>
    </bean>
    <!--集合注入
        List结构:list set array
        map结构:map prop
        结构相同可以互换标签-->
    <bean id="AccountService3" class="cn.tu.service.impl.AccountServiceImpl3">
        <property name="array">
            <array>
                <value>aaa</value>
                <value>bbb</value>
                <value>ccc</value>
            </array>
        </property>
        <property name="list">
            <list>
                <value>aaa</value>
                <value>bbb</value>
                <value>ccc</value>
            </list>
        </property>
        <property name="set">
            <set>
                <value>aaa</value>
                <value>bbb</value>
                <value>ccc</value>
            </set>
        </property>
        <property name="map">
            <map>
                <entry key="aaa" value="111"></entry>
                <entry key="bbb" value="222"></entry>
            </map>
        </property>
        <property name="prop">
            <props>
                <prop key="ccc">333</prop>
                <prop key="ddd">444</prop>
            </props>
        </property>
    </bean>
基于注解开发
xml的配置
<?xml version="1.0" encoding="UTF-8"?>
<beans xmlns="http://www.springframework.org/schema/beans"
       xmlns:xsi="http://www.w3.org/2001/XMLSchema-instance"
       xmlns:context="http://www.springframework.org/schema/context"
       xsi:schemaLocation="http://www.springframework.org/schema/beans
        https://www.springframework.org/schema/beans/spring-beans.xsd
        http://www.springframework.org/schema/context
        https://www.springframework.org/schema/context/spring-context.xsd">
    <context:component-scan base-package="cn.tu"></context:component-scan>
    <!--配置QueryRunner-->
    <bean id="runner" class="org.apache.commons.dbutils.QueryRunner" scope="prototype">
        <constructor-arg index="0" ref="dataSource"></constructor-arg>
    </bean>
    <!--配置数据库连接-->
    <bean id="dataSource" class="com.mchange.v2.c3p0.ComboPooledDataSource">
        <property name="driverClass" value="com.mysql.jdbc.Driver"></property>
        <property name="jdbcUrl" value="jdbc:mysql://localhost:3306/case1"></property>
        <property name="user" value="root"></property>
        <property name="password" value="abc123!@#"></property>
    </bean>
</beans>
用于创建对象
Component:
作用:用于把当前类存入spring容器中
属性:value用于指定bean的id,默认当前类名,首字母改小写
Controller:一般用于表现层
Repository:一般用于业务层
Service:一般用于持久层
用于注入数据
Autowired:
作用:自动按照类型注入,只要容器有唯一一个的bean对象类型和要注入类型匹配,就可以注入成功
出现位置:可以是变量,也可以是方法上
细节:使用注解注入时,set方法就不是必须的了
Qualifier:
用于指定bean的id,在按照类中注入的基础上再按照名称注入,不能单独使用必须和Autowired配合使用。
Resource:
直接按照bean的id注入,可以单独使用
Value:
用于指定数据的值,它可以使用spring中的SpEL(也就是spring的el表达式)SpEL的写法:
${表达式}
用于改变作用范围
Scope
用于指定bean的作用范围
属性:value指定范围的取值singleton,prototype
和生命周期相关
PerDestroy 作用:指定销毁方法
PostConstruct作用:指定初始化方法
使用配置类对xml文件配置进行优化
@Configuration
@ComponentScan("cn.tu")
@PropertySource("classpath:JdbcConfig.properties")
public class SpringConfiguration {
@Value("${jdbc.driver}")
    private String driver;
    @Value("${jdbc.url}")
    private String url;
    @Value("${jdbc.user}")
    private String user;
    @Value("${jdbc.password}")
    private String password;
    @Bean(name = "runner")
    @Scope("prototype")
    public QueryRunner creatQueryRunner(DataSource dataSource){
        return new QueryRunner(dataSource);
    }
    @Bean(name = "dataSource")
    public DataSource creatDataSource(){
        try{
            ComboPooledDataSource ds = new ComboPooledDataSource();
            ds.setDriverClass(driver);
            ds.setJdbcUrl(url);
            ds.setUser(user);
            ds.setPassword(password);
            return ds;
        }catch (Exception e){
            throw new RuntimeException(e);
        }
    }
}
对测试类的优化
要导入spring-test包
		<dependency>
            <groupId>org.springframework</groupId>
            <artifactId>spring-test</artifactId>
            <version>5.1.5.RELEASE</version>
        </dependency>
注意:在spring5环境下junit的版本要在4.12以上
@RunWith(SpringJUnit4ClassRunner.class)
@ContextConfiguration(classes = SpringConfiguration.class)
public class AccountServiceTest {
    @Autowired
    private AccountService ac;
    @Test
    public void testFindAll() {
        List<Account> l = ac.findAll();
        for (Account account : l) {
            System.out.println(account);
        }
    }


 142
142


 被折叠的 条评论
为什么被折叠?
被折叠的 条评论
为什么被折叠?
 到【灌水乐园】发言


