


 超级会员免费看
📢📢📢📣📣📣
哈喽!大家好,我是【IT邦德】,江湖人称jeames007,10余年DBA及大数据工作经验
一位上进心十足的【大数据领域博主】!😜😜😜
中国DBA联盟(ACDU)成员,目前服务于工业互联网
擅长主流Oracle、MySQL、PG、高斯及GP 运维开发,备份恢复,安装迁移,性能优化、故障应急处理等。
✨ 如果有对【数据库】感兴趣的【小可爱】,欢迎关注【IT邦德】💞💞💞
❤️❤️❤️感谢各位大可爱小可爱!❤️❤️❤️
文章目录
前言
本篇结合企业实战介绍了openGauss企业版升级实战,版本从3.1升级到5.0版本📣 1.概述
通过https://opengauss.org/zh/download/
登录openGauss开源社区,选择3.1.1版本对应平台企业版安装包
本文将从企业实战角度,从3.1.1版升级到5.0.0版本,并对安装升级的过程中的问题点做了详细的说明

📣 2.环境准备
✨ 2.1 关闭SeLinux
sed -i ‘s/^SELINUX=enforcing/SELINUX=disabled/g’ /etc/selinux/config
setenforce 0

注:然后重启服务器
[root@opengauss ~]# /usr/sbin/sestatus
SELinux status:                 disabled
✨ 2.2 关闭防火墙
1.检查防火墙是否关闭
[root@opengauss ~]# systemctl status firewalld
若防火墙状态显示为active (running),则表示防火墙未关闭
若防火墙状态显示为inactive (dead),则无需再关闭防火墙

2.关闭防火墙并禁止开机重启
[root@opengauss ~]# systemctl disable firewalld.service
[root@opengauss ~]# systemctl stop firewalld.service
✨ 2.3 关闭RemoveIPC
1.修改/etc/systemd/logind.conf文件中的“RemoveIPC”值为“no”
vi /etc/systemd/logind.conf
RemoveIPC=no

##重新加载配置参数
systemctl daemon-reload
systemctl restart systemd-logind
✨ 2.4 关闭HISTORY记录
[root@opengauss ~]# vi /etc/profile
设置HISTSIZE值为0。例如,系统中HISTSIZE默认值为1000,将其修改为0
[root@opengauss ~]# source /etc/profile
✨ 2.5 设置root用户远程登录
[root@opengauss ~]# vi /etc/ssh/sshd_config
## 将“PermitRootLogin”改为“yes”
PermitRootLogin yes

## 注释掉“Banner”所在的行
#Banner none

## 重启生效
systemctl restart sshd.service
✨ 2.6 yum安装依赖
##创建挂载目录
[root@opengauss ~]# mkdir /cdrom

[root@opengauss ~]# ls -lrt /opt/CentOS-7-x86_64-DVD-1810.iso
-rw-r--r-- 1 root root 4712300544 Apr  8 09:28 /opt/CentOS-7-x86_64-DVD-1810.iso

##挂载目录
[root@opengauss ~]# mount -o loop /opt/CentOS-7-x86_64-DVD-1810.iso /cdrom
[root@opengauss ~]# umount -f /cdrom

[root@opengauss ~]# df -TH
Filesystem              Type      Size  Used Avail Use% Mounted on
devtmpfs                devtmpfs  498M     0  498M   0% /dev
tmpfs                   tmpfs     510M     0  510M   0% /dev/shm
tmpfs                   tmpfs     510M  8.0M  502M   2% /run
tmpfs                   tmpfs     510M     0  510M   0% /sys/fs/cgroup
/dev/mapper/centos-root xfs        96G  6.5G   90G   7% /
/dev/sda1               xfs       1.1G  144M  920M  14% /boot
tmpfs                   tmpfs     102M     0  102M   0% /run/user/0
/dev/loop0              iso9660   4.8G  4.8G     0 100% /cdrom


##yum源配置文件
[root@opengauss ~]# cd /etc/yum.repos.d/
[root@opengauss yum.repos.d]# mkdir bak
[root@opengauss yum.repos.d]# mv *.repo bak

[root@opengauss5m yum.repos.d]# vi local.repo
[base-local]
name=CentOS7-local
baseurl=file:///cdrom
enabled=1
gpgcheck=0

#清空并重载yum
yum clean all
yum makecache
##测试yum安装
yum -y install tree


##安装依赖包
yum install libaio-devel flex bison ncurses-devel glibc-devel patch redhat-lsb-core readline-devel libnsl -y
yum install net-tools -y
yum install expect -y
✨ 2.7 host设置
[root@opengauss ~]# cat /etc/hosts
127.0.0.1   localhost localhost.localdomain localhost4 localhost4.localdomain4
::1         localhost localhost.localdomain localhost6 localhost6.localdomain6

192.168.6.30 opengauss
✨ 2.8 Python安装
CentOS:支持Python 3.6.X,python需要通过--enable-shared方式编译
1.依赖包安装
[root@opengauss ~]# yum install -y zlib*
[root@opengauss ~]# rpm -qa | grep zlib
zlib-1.2.7-18.el7.x86_64
zlib-devel-1.2.7-18.el7.x86_64
2.安装包下载
python官网 https://www.python.org/downloads/release/python-3615/下载安装包即可
安装包为:Python-3.6.15.tgz
3.解压并编译
yum -y install openssl-devel bzip2-devel expat-devel gdbm-devel readline-devel zlib-devel
cd /opt
tar -zxvf Python-3.6.15.tgz
cd Python-3.6.15/
./configure --prefix=/usr/local/python3 --enable-shared CFLAGS=-fPIC
有以下报错,安装gcc即可
configure: error: in `/opt/Python-3.6.15':
configure: error: no acceptable C compiler found in $PATH
yum install gcc
make -j4
make install
注意:make编译时间比较长,耐心等待
python3安装遇到 zipimport.ZipImportError: can't decompress data; zlib not available
yum -y install zlib*
4.OS上设置python的软连接
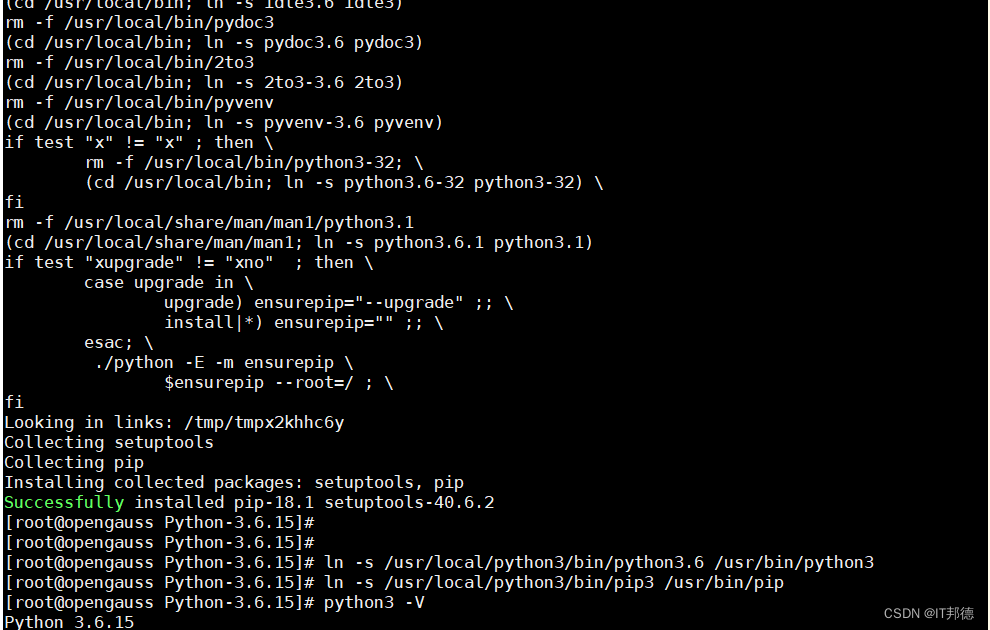
ln -s /usr/local/python3/bin/python3.6 /usr/bin/python3
ln -s /usr/local/python3/bin/pip3 /usr/bin/pip
python3: error while loading shared libraries: libpython3.6m.so.1.0: cannot open shared object file: No such file or directory
出现以上报错处理方法,libpython3.6m.so.1.0复制到/usr/lib64/目录下即可
cp /opt/Python-3.6.15/libpython3.6m.so.1.0 /usr/lib64/
5.环境校验
[root@opengauss ~]# python3
Python 3.6.15 (default, Apr 8 2023, 11:45:45)
[GCC 4.8.5 20150623 (Red Hat 4.8.5-44)] on linux
Type "help", "copyright", "credits" or "license" for more information.
>>>
此处注意有个个坑,在部署过程中,python升级后,结果导致了yum不可用
[root@opengauss ~]# which /usr/bin/yum
/usr/bin/yum
##查看python版本
[root@opengauss ~]# whereis python
python: /usr/bin/python2.7 /usr/lib/python2.7 /usr/lib64/python2.7 /etc/python /usr/include/python2.7 /usr/share/man/man1/python.1.gz
[root@opengauss ~]# which yum
/usr/bin/yum
修改/usr/bin/yum中的第一行,#!/usr/bin/python,替换为#!/usr/bin/python2.7即可。
📣 3.目录创建
##创建数据库软件相关目录
mkdir -p /app
chmod -R 755 /app
📣 4.安装包解压
安装包下载地址: https://opengauss.org/zh/download/
注:从以上网站下载企业版即可
上传到主库所在的目录:/opt
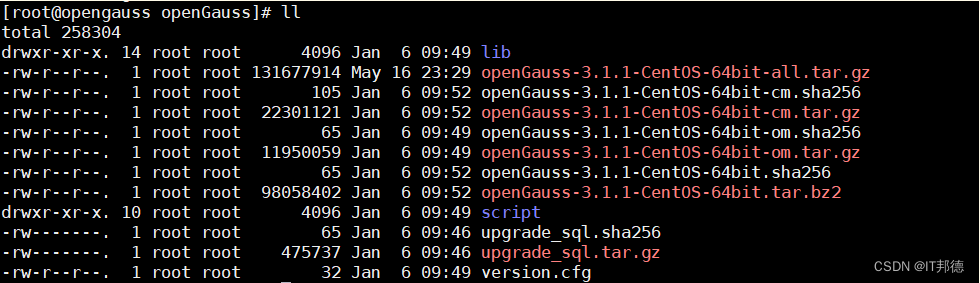
[root@opengauss ~]# cd /opt
[root@opengauss opt]# ll
total 4752948
-rw-r--r--. 1 root root 4712300544 May 16 22:56 CentOS-7-x86_64-DVD-2009.iso
-rw-r--r--. 1 root root 131677914 May 16 23:29 openGauss-3.1.1-CentOS-64bit-all.tar.gz
drwxr-xr-x. 17 501 501 4096 May 16 23:19 Python-3.6.15
-rw-r--r--. 1 root root 23035095 May 16 23:02 Python-3.6.15.tgz
drwxr-xr-x. 3 root root 23 May 16 23:28 software
[root@opengauss opt]# cp openGauss-3.1.1-CentOS-64bit-all.tar.gz software/openGauss
##解压安装包
cd /opt
tar -zxvf openGauss-3.1.1-CentOS-64bit-all.tar.gz
tar -zxvf openGauss-3.1.1-CentOS-64bit-om.tar.gz
📣 5.XML配置文件
安装openGauss前需要创建cluster_config.xml文件。cluster_config.xml文件包含部署openGauss的服务器信息、安装路径、IP地址以及端口号等。
用于告知openGauss如何部署。用户需根据不同场景配置对应的XML文件。

本次部署以单机的方式创建XML配置文件

## 配置数据库名称及各项目录
[root@opengauss ~]# find / -name cluster_config_template.xml
/opt/software/openGauss/script/gspylib/etc/conf/cluster_config_template.xml
说明:获取XML文件模板,按照实际环境配置

编辑配置XML文件:
vi /opt/cluster_config.xml

<?xml version="1.0" encoding="UTF-8"?>
<ROOT>
    <!-- openGauss整体信息 -->
    <CLUSTER>
        <!-- 数据库名称 -->
        <PARAM name="clusterName" value="rptdb" />
        <!-- 数据库节点名称(hostname) -->
        <PARAM name="nodeNames" value="opengauss" />
        <!-- 数据库安装目录-->
        <PARAM name="gaussdbAppPath" value="/app/openGauss/dbhome" />
        <!-- 日志目录-->
        <PARAM name="gaussdbLogPath" value="/app/openGauss/log/omm" />
        <!-- 临时文件目录-->
        <PARAM name="tmpMppdbPath" value="/app/openGauss/tmp" />
        <!-- 数据库工具目录-->
        <PARAM name="gaussdbToolPath" value="/app/openGauss/install/om" />
        <!-- 数据库core文件目录-->
        <PARAM name="corePath" value="/app/openGauss/corefile" />
        <!-- 节点IP,与数据库节点名称列表一一对应 -->
        <PARAM name="backIp1s" value="192.168.6.30"/>
    </CLUSTER>
    <!-- 每台服务器上的节点部署信息 -->
    <DEVICELIST>
        <!-- 节点1上的部署信息 -->
        <DEVICE sn="opengauss">
            <!-- 节点1的主机名称 -->
            <PARAM name="name" value="opengauss"/>
            <!-- 节点1所在的AZ及AZ优先级 -->
            <PARAM name="azName" value="AZ1"/>
            <PARAM name="azPriority" value="1"/>
            <!-- 节点1的IP,如果服务器只有一个网卡可用,将backIP1和sshIP1配置成同一个IP -->
            <PARAM name="backIp1" value="192.168.6.30"/>
            <PARAM name="sshIp1" value="192.168.6.30"/>

	    <!--dbnode-->
	    <PARAM name="dataNum" value="1"/>
	    <PARAM name="dataPortBase" value="15400"/>
	    <PARAM name="dataNode1" value="/app/openGauss/install/data/dn"/>
            <PARAM name="dataNode1_syncNum" value="0"/>
        </DEVICE>
    </DEVICELIST>
</ROOT>
📣 6.初始化安装
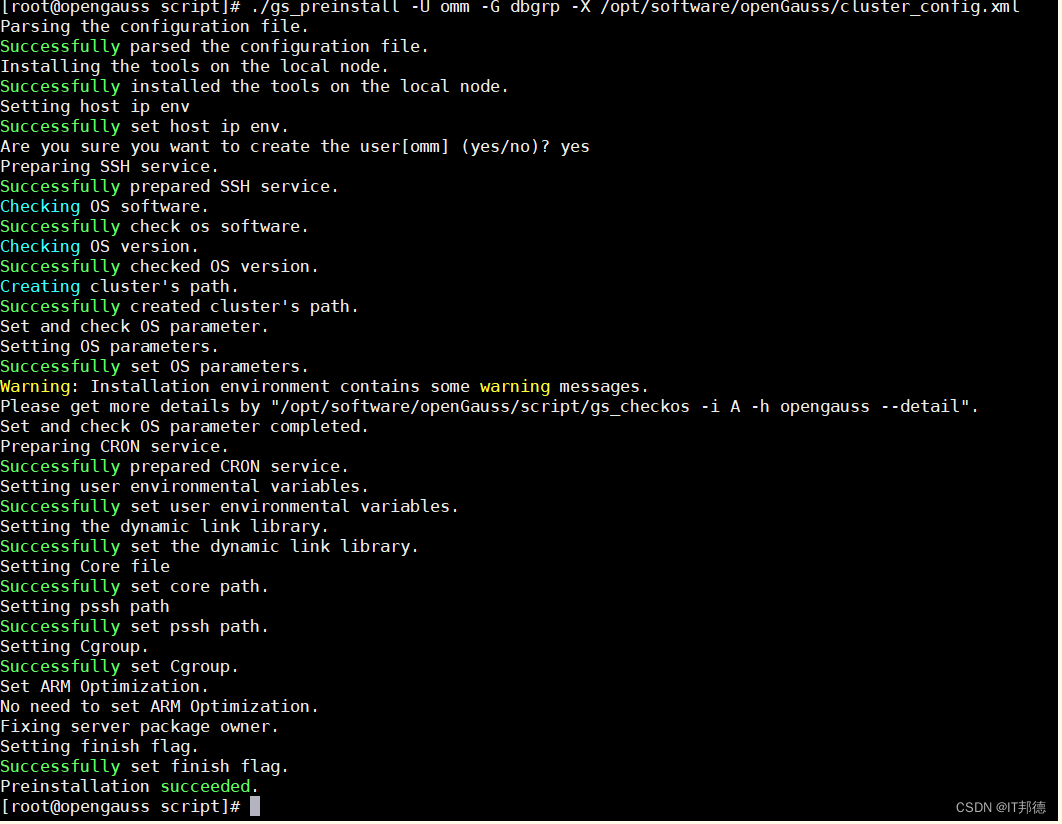
[root@opengauss ~]# cd /opt/script
[root@opengauss script]# ./gs_preinstall -U omm -G dbgrp -X /opt/cluster_config.xml
📣 7.执行安装
[omm@opengauss ~]$ gs_install -X /opt/cluster_config.xml

📣 8.安装验证
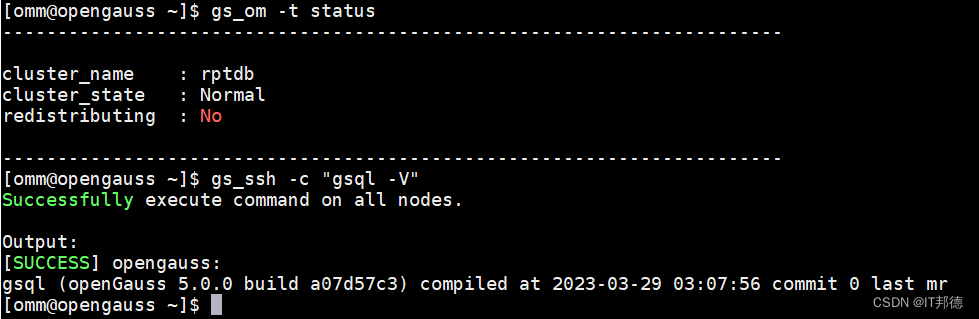
## 通过openGauss提供的gs_om工具可以完成数据库状态检查

以omm用户身份登录服务器。
执行如下命令检查数据库状态是否正常,“cluster_state ”显示“Normal”表示数据库可正常使用

[root@opengauss ~]# su - omm
Last login: Sat Apr  8 12:56:31 CST 2023 on pts/0
[omm@opengauss ~]$ gs_om -t status
-----------------------------------------------------------------------

cluster_name    : rptdb
cluster_state   : Normal
redistributing  : No

-----------------------------------------------------------------------

[omm@opengauss ~]$ gs_om -t status --detail
[   Cluster State   ]

cluster_state   : Normal
redistributing  : No
current_az      : AZ_ALL

[  Datanode State   ]

    node     node_ip         port      instance                               state
---------------------------------------------------------------------------------------------------
1  opengauss 192.168.6.30    15400      6001 /app/openGauss/install/data/dn   P Primary Normal
📣 9. 3.1升级到5.0版本
✨ 9.3.1 升级前注意事项
1.升级期间不要做增删改,生产环境务必按照要求执行。
2.建议升级期间需停止业务进行,一次性升级所有节点。
3.升级一旦失败,有可能会影响到业务的正常开展,故提前做好数据的备份。
✨ 9.3.2 升级前准备
1.OS环境检查
[omm@opengauss ~]$ cat /etc/centos-release
CentOS Linux release 7.6.1810 (Core)

2.高斯版本确认
[omm@opengauss ~]$ gsql --version
gsql (openGauss 3.1.1 build 70980198) compiled at 2023-01-06 09:34:59 commit 0 last mr

3.数据磁盘使用空间检查
[omm@opengauss ~]$ df -TH
Filesystem              Type      Size  Used Avail Use% Mounted on
/dev/mapper/centos-root xfs        49G   12G   38G  24% /
devtmpfs                devtmpfs  2.0G     0  2.0G   0% /dev
tmpfs                   tmpfs     2.0G   13k  2.0G   1% /dev/shm
tmpfs                   tmpfs     2.0G   14M  2.0G   1% /run
tmpfs                   tmpfs     2.0G     0  2.0G   0% /sys/fs/cgroup
/dev/sda1               xfs       1.1G  188M  876M  18% /boot
tmpfs                   tmpfs     396M   50k  396M   1% /run/user/0
tmpfs                   tmpfs     396M   13k  396M   1% /run/user/42
/dev/loop0              iso9660   4.6G  4.6G     0 100% /cdrom

4.数据库状态确认
[omm@opengauss ~]$ gs_om -t status
-----------------------------------------------------------------------

cluster_name    : rptdb
cluster_state   : Normal
redistributing  : No

-----------------------------------------------------------------------

5.OS参数校验
以root用户执行如下命令对服务器的OS参数进行检查。
检查服务器的OS参数的目的是为了保证数据库正常通过预安装,并且在安装成功后可以安全高效的运行。

[root@opengauss ~]# cd /opt/script/
[root@opengauss script]# ./gs_checkos -i A
Checking items:
    A1. [ OS version status ]                                   : Normal
    A2. [ Kernel version status ]                               : Normal
    A3. [ Unicode status ]                                      : Normal
    A4. [ Time zone status ]                                    : Normal
    A5. [ Swap memory status ]                                  : Warning
    A6. [ System control parameters status ]                    : Warning
    A7. [ File system configuration status ]                    : Warning
    A8. [ Disk configuration status ]                           : Normal
    A9. [ Pre-read block size status ]                          : Normal
    A10.[ IO scheduler status ]                                 : Normal
    A11.[ Network card configuration status ]                   : Warning
    A12.[ Time consistency status ]                             : Warning
    A13.[ Firewall service status ]                             : Normal
    A14.[ THP service status ]                                  : Normal
Total numbers:14. Abnormal numbers:0. Warning numbers:5.

6.下载5.0安装包
https://opengauss.org/zh/download/
✨ 9.3.3 数据库备份
使用gs_dumpall一次导出openGauss的所有数据库
[omm@opengauss ~]$ mkdir dump
[omm@opengauss ~]$ gs_dumpall -f  /home/omm/dump/bkpall.sql -p 15400
✨ 9.3.4 升级操作
1.root用户创建新包目录
mkdir -p /opt/gaussdb_upgrade

2.解压5.0安装包
将需要更新的5.0新包上传至目录/opt/gaussdb_upgrade并解压。
[root@opengauss ~]# cd /opt/gaussdb_upgrade
[root@opengauss gaussdb_upgrade]# tar -zxvf openGauss-5.0.0-CentOS-64bit-all.tar.gz
[root@opengauss gaussdb_upgrade]# tar -zxvf openGauss-5.0.0-CentOS-64bit-om.tar.gz


3.执行前置脚本gs_preinstall
cd /opt/gaussdb_upgrade/script
./gs_preinstall -U omm -G dbgrp -X  /opt/cluster_config.xml

注意:root用戶下执行,cluster_config.xml配置为3.1版本的

4.就地升级
切换至omm用户 使用如下命令进行就地升级,最后提示successfully upgrade all nodes.就可以了。
gs_upgradectl -t auto-upgrade -X /opt/cluster_config.xml --grey

Static configuration matched with old static configuration files.
Successfully set upgrade_mode to 0.
Checking upgrade environment.
Successfully checked upgrade environment.
Start to do health check.
Successfully checked cluster status.
Upgrade one node 'opengauss'.
NOTICE: The directory /app/openGauss/dbhome_70980198 will be deleted after commit-upgrade, please make sure there is no personal data.
Performing grey rollback.
No need to rollback.
The directory /app/openGauss/dbhome_70980198 will be deleted after commit-upgrade, please make sure there is no personal data.
Installing new binary.
copy certs from /app/openGauss/dbhome_70980198 to /app/openGauss/dbhome_a07d57c3.
Successfully copy certs from /app/openGauss/dbhome_70980198 to /app/openGauss/dbhome_a07d57c3.
Successfully backup hotpatch config file.
Sync cluster configuration.
Successfully synced cluster configuration.
Switch symbolic link to new binary directory.
Successfully switch symbolic link to new binary directory.
Start check CMS parameter.
Switching all db processes.
Check cluster state.
Cluster state: [   Cluster State   ]

cluster_state   : Normal
redistributing  : No
current_az      : AZ_ALL

[  Datanode State   ]

    node     node_ip         port      instance     state
-------------------------------------------------------------------------
1  opengauss 192.168.6.30    15400      6001       P Primary Normal
Create checkpoint before switching.
Start to wait for om_monitor.
Switching DN processes.
Ready to grey start cluster.
Grey start cluster successfully.
Wait for the cluster status normal or degrade.
Successfully switch all process version
The nodes ['opengauss'] have been successfully upgraded to new version. Then do health check.
Start to do health check.
Successfully checked cluster status.
Waiting for the cluster status to become normal.
.
The cluster status is normal.
Upgrade main process has been finished, user can do some check now.
Once the check done, please execute following command to commit upgrade:

    gs_upgradectl -t commit-upgrade -X /opt/cluster_config.xml

Successfully upgrade all nodes
✨ 9.3.5 升级验证
[omm@opengauss ~]$ gs_om -t status
-----------------------------------------------------------------------

cluster_name    : rptdb
cluster_state   : Normal
redistributing  : No

-----------------------------------------------------------------------

[omm@opengauss ~]$ gs_ssh -c "gsql -V"
Successfully execute command on all nodes.

Output:
[SUCCESS] opengauss:
gsql (openGauss 5.0.0 build a07d57c3) compiled at 2023-03-29 03:07:56 commit 0 last mr
✨ 9.3.6 提交升级
升级完成后,如果验证也没问题,接下来就可以提交升级,需要注意的是,一旦提交操作完成,则不能再执行回滚操作。
以数据库用户(如omm)执行如下命令完成升级提交。

[omm@opengauss ~]$ gs_upgradectl -t commit-upgrade  -X /opt/cluster_config.xml
Start to do health check.
Successfully checked cluster status.
Start check CMS parameter.
Successfully cleaned old install path.
Commit upgrade succeeded.

至此,openGauss3.1.0升级5.0.0版本完成。

如果数据库异常,需要强制回滚,可以使用如下命令:
gs_upgradectl -t auto-rollback -X  /opt/cluster_config.xml --force


 1074
1074


 被折叠的 条评论
为什么被折叠?
被折叠的 条评论
为什么被折叠?
 到【灌水乐园】发言


