


Detectron2:安装与测试
作者是根据Detectron2的官方文档来学习哒,但是到了实际应用上也会有些许差别。也许有很多bug,也许一帆风顺。
动手实践才是真理。一起加油吧!
Detectron2:GitHub地址:https://github.com/facebookresearch/detectron2
Detectron2官网文档:https://detectron2.readthedocs.io/en/latest/tutorials/index.html
选择部署平台
极链AI云平台
优势:价格便宜,按实际使用时间扣费,适合学生进行科研探索;使用灵活,即用即停;选择较多,可以选择不同的Pytorch、Python、CUDA版本。
官网:https://cloud.videojj.com
具体选择哪个产品无所谓,因为选择很多。
本次部署Detectron项目选择的机器是:Tesla T4。
版本是Pytorch 1.7.0、Python 3.8、CUDA 11.0!!!!!!!!!!!!
版本是Pytorch 1.7.0、Python 3.8、CUDA 11.0!!!!!!!!!!!!
版本是Pytorch 1.7.0、Python 3.8、CUDA 11.0!!!!!!!!!!!!
官网的安装要求是:
1)Linux or macOS with Python ≥ 3.6
2)PyTorch ≥ 1.7 and torchvision that matches the PyTorch installation. Install them together at pytorch.org to make sure of this
3)OpenCV is optional but needed by demo and visualization

开始部署
极链AI云创建实例
创建实例后,启动实例。
本次实验用的是MacBook的终端连接。
复制给的ssh连接语句,第一次连接需要输入yes再继续,然后输入密码。

可以使用gcc --version语句查看gcc版本,符合Build Detectron2 from Source的要求:“gcc & g++ ≥ 5.4 are required”

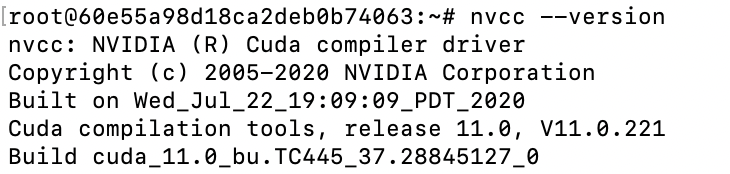
可以使用nvcc --version查看CUDA版本。
安装Detectron2库
安装语句如下。
git clone的时候,有时候出问题可能是网络连接问题。多试几次就行。
git clone https://github.com/facebookresearch/detectron2.git
pip install -e detectron2
安装完后,可以用【pip list】语句来查看安装结果,如图。

可以使用【tree命令】看看detectron2文件下的目录。
apt-get update
apt-get install tree
cd detectron2
tree # 在终端直接展示当前文件夹的目录树
# 或者使用tree >tree.txt语句,将目录树保存到tree.txt(该tree.txt会保存在当前文件夹下)

测试
安装完detectron2库之后,接下来可以用这个示例测试一下。
# 注意以下python语句,应该在detectron2的demo路径下执行
cd demo
其中input后的input1.jpg,是我通过【FileZilla软件】,上传到detectron2/demo文件夹下的。
其中output后的路径位置可以自己制定。
(现在还有一个问题没解决,所以末尾加上【MODEL.DEVICE cpu】,关于这个问题的解决请看下面提到的更新博客)
python demo.py --config-file ../configs/COCO-InstanceSegmentation/mask_rcnn_R_50_FPN_3x.yaml --input input1.jpg --output output --opts MODEL.WEIGHTS detectron2://COCO-InstanceSegmentation/mask_rcnn_R_50_FPN_3x/137849600/model_final_f10217.pkl MODEL.DEVICE cpu
【Filezilla】极链AI云平台上有相应的帮助文档,可以查看。
https://cloud.videojj.com/help/docs/data_manage.html#filezilla
这个软件的方便之处在于,可以同步管理本地的文档和远程的文档。当右键选择了文件进行上传/下载时,会直接上传/下载到另外一边对应的位置。

GPU问题
用官方的语句运行时,会发生一个错误,目前还在解决中。
!!!!!!!!!!!!更新!!!!!!!!!!!!!!
!!!!!!!!!!!!更新!!!!!!!!!!!!!!
!!!!!!!!!!!!更新!!!!!!!!!!!!!!
问题已解决,可查看此博客:
Could not run ‘torchvision::nms‘ with arguments from the ‘CUDA‘ backend的解决;用GPU跑Detectron2的demo
Traceback (most recent call last):
  File "demo.py", line 112, in <module>
    predictions, visualized_output = demo.run_on_image(img)
  File "/root/detectron2/demo/predictor.py", line 48, in run_on_image
    predictions = self.predictor(image)
  File "/root/detectron2/detectron2/engine/defaults.py", line 320, in __call__
    predictions = self.model([inputs])[0]
  File "/opt/conda/lib/python3.8/site-packages/torch/nn/modules/module.py", line 727, in _call_impl
    result = self.forward(*input, **kwargs)
  File "/root/detectron2/detectron2/modeling/meta_arch/rcnn.py", line 146, in forward
    return self.inference(batched_inputs)
  File "/root/detectron2/detectron2/modeling/meta_arch/rcnn.py", line 204, in inference
    proposals, _ = self.proposal_generator(images, features, None)
  File "/opt/conda/lib/python3.8/site-packages/torch/nn/modules/module.py", line 727, in _call_impl
    result = self.forward(*input, **kwargs)
  File "/root/detectron2/detectron2/modeling/proposal_generator/rpn.py", line 477, in forward
    proposals = self.predict_proposals(
  File "/root/detectron2/detectron2/modeling/proposal_generator/rpn.py", line 503, in predict_proposals
    return find_top_rpn_proposals(
  File "/root/detectron2/detectron2/modeling/proposal_generator/proposal_utils.py", line 116, in find_top_rpn_proposals
    keep = batched_nms(boxes.tensor, scores_per_img, lvl, nms_thresh)
  File "/root/detectron2/detectron2/layers/nms.py", line 21, in batched_nms
    return box_ops.batched_nms(boxes.float(), scores, idxs, iou_threshold)
  File "/opt/conda/lib/python3.8/site-packages/torch/jit/_trace.py", line 1100, in wrapper
    return fn(*args, **kwargs)
  File "/opt/conda/lib/python3.8/site-packages/torchvision/ops/boxes.py", line 88, in batched_nms
    keep = nms(boxes_for_nms, scores, iou_threshold)
  File "/opt/conda/lib/python3.8/site-packages/torchvision/ops/boxes.py", line 42, in nms
    return torch.ops.torchvision.nms(boxes, scores, iou_threshold)
RuntimeError: Could not run 'torchvision::nms' with arguments from the 'CUDA' backend. 'torchvision::nms' is only available for these backends: [CPU, BackendSelect, Named, AutogradOther, AutogradCPU, AutogradCUDA, AutogradXLA, Tracer, Autocast, Batched, VmapMode].
一些好玩的运行结果,一起来找茬~


以下的这张多人图源自微博。


以下表情包图源网络。


以下两张图拍自广州的一间猫咖狗咖。在一号线公元前站附近。


以下图源一个漂亮的小姐姐。


 被折叠的 条评论
为什么被折叠?
被折叠的 条评论
为什么被折叠?
 到【灌水乐园】发言


