


Gateway(网关)
与Zuul比较


官方文档
Spring-Cloud-Gateway:WebFlux + Netty (异步非阻塞)
网关
- 反向代理
- 鉴权
- 流量控制
- 熔断
- 日志监控

概念(三大核心)


工作流程
路由转发 + 执行过滤链


搭建
可从YML配置和Java配置二选一
YML配置
spring:
  application:
    name: cloud-gateway
  cloud:
    gateway:  # 9527网关挡在了以下服务的前面,不暴露8001端口
      routes:
        - id: payment_routh  # 路由唯一id
          uri: http://localhost:8001  # 提供服务的路由地址
          predicates:
            - Path=/payment/get/**  # 断言,路径相匹配的进行路由

        - id: payment_routh2
          uri: http://localhost:8001
          predicates:
            - Path=/payment/lb/**
Java配置
@Configuration
public class GatewayConfig {

    /**
     * 配置一个id为指定路由名字的路由规则,访问任意以/guonei结尾的,
     * 都会转发到http://news.baidu.com/guonei,相当做了映射
     * @param builder builder
     * @return msg
     */
    @Bean
    public RouteLocator routes(RouteLocatorBuilder builder) {

        RouteLocatorBuilder.Builder routes = builder.routes();

        routes.route("path_route",
                r -> r.path("/guonei")
                        .uri("http://news.baidu.com/guonei")).build();

        return routes.build();
    }
}
配置动态路由
通过微服务名实现动态路由

gateway:  # 9527网关挡在了以下服务的前面,不暴露8001端口
      discovery:
        locator:
          enabled: true  # 开启从注册中心动态创建路由的功能,利用微服务名进行路由
      routes:
      - id: payment_routh  # 路由唯一id
        #uri: http://localhost:8001  # 提供服务的路由地址
        uri: lb://cloud-payment-service  # lb协议表示启用gateway的负载均衡功能
        predicates:
          - Path=/payment/get/**  # 断言,路径相匹配的进行路由

      - id: payment_routh2
        #uri: http://localhost:8001
        uri: lb://cloud-payment-service
        predicates:
          - Path=/payment/lb/**
Predicate(断言)
Route Predicate Factory
Spring Cloud Gateway将路由匹配作为Spring WebFlux HandlerMapping基础架构的一部分。 Spring Cloud Gateway包括许多内置的Route Predicate工厂。 所有这些断言都与HTTP请求的不同属性匹配。 多个路由断言工厂可以合并,也可以通过逻辑和进行合并。
所有的断言工厂类

PS:可以使用ZonedDateTime.now()获取当前地区时间
主要分时间类、key-value类(cookie,header)…
Filter(过滤器)
routes:
  - filters:
    - AddRequestParameter=foo, bar
@Component
@Slf4j
public class GatewayFilter implements GlobalFilter, Ordered {
    @Override
    public Mono<Void> filter(ServerWebExchange exchange, GatewayFilterChain chain) {

        log.info("***********call the gateway filter: " + new Date());

        // 判断请求是否带着指定参数
        String username = exchange.getRequest().getQueryParams().getFirst("username");

        // 如果为null, 则拒绝
        if (username == null) {
            log.info("**************非法用户名! 拒绝通过!");
            exchange.getResponse().setStatusCode(HttpStatus.NOT_ACCEPTABLE);
            return exchange.getResponse().setComplete();
        }
        return chain.filter(exchange);
    }

    @Override
    public int getOrder() {
        return 0;
    }
}
坑
出现冲突的问题
实际的解决方法是把SpringCloud从SR5降到SR1,把SpringBoot从2.2.1升到2.2.2,都是版本问题。
SpringCloud Config(分布式配置中心)
面临的问题

概念


配置总部与git repo直连,用户端(即Application)和配置总部直连


使用
服务端
pom要加spring-cloud-config-server依赖
先在码云上创建一个总git repo, 里面放各个服务的配置,然后再在本地建一个config服务
config服务配置:
server:
  port: 3344
spring:
  application:
    name: cloud-config-center
  cloud:
    config:
      server:
        git:
          # 使用https不用配置公钥和密钥, 使用SSH就需要
          uri: https://gitee.com/billludwig/springcloud_config_exercise.git
          # 搜索目录
          search-paths:
            - SpringCloud_Config_exercise
      label: master

eureka:
  client:
    service-url:
      defaultZone: http://localhost:7001/eureka
启动类
@SpringBootApplication
@EnableConfigServer
public class ConfigCenterMain3344 {
    public static void main(String[] args) {
        SpringApplication.run(ConfigCenterMain3344.class, args);
    }
}
客户端
pom要加spring-cloud-starter-config依赖

-
bootstrap.yml(bootstrap.properties)用来在程序引导时执行,应用于更加早期配置信息读取,如可以使用来配置application.yml中使用到参数等
-
application.yml(application.properties) 应用程序特有配置信息,可以用来配置后续各个模块中需使用的公共参数等。
-
技术上,bootstrap.yml 是被一个父级的 Spring ApplicationContext 加载的。这个父级的 Spring ApplicationContext是先加载的,在加载application.yml 的 ApplicationContext之前。
-
当使用 Spring Cloud 的时候,配置信息一般是从 config server 加载的,为了取得配置信息(比如密码等),你需要一些提早的引导配置。因此,把 config server 信息放在 bootstrap.yml,用来加载在这个时期真正需要的配置信息。
配置
bootstrap.yml:
server:
  port: 3355

spring:
  application:
    name: config-client
  cloud:
    config:
      label: master
      name: config  # 最终为master + name + profile = master/config-dev
      profile: dev
      uri: http://localhost:3344  # 服务端

eureka:
  client:
    service-url:
      defaultZone: http://localhost:7001/eureka
controller:
/**
 * 将配置信息以REST的形式暴露
 * @author Bill Ludwig; 2020/7/18 22:03
 */
@RestController
public class ConfigClientController {

    @Value("${config.info}")
    private String configInfo;

    @GetMapping("configInfo")
    public String getConfigInfo() {
        return configInfo;
    }
}
再访问http://localhost:3355/configInfo,它就会访问3344, 3344再访问Github或Gitee,获得3355的配置信息。
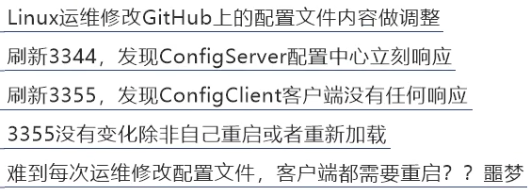
动态刷新
手动配置
yml
# 暴露监控端点, include参数设为*意味着 所有信息都暴露
management:
  endpoints:
    web:
      exposure:
        include: "*"
controller
/**
 * 将配置信息以REST的形式暴露。
 * 注解RefreshScope:
 * 用这种方式注释的Bean可以在运行时刷新,
 * 并且使用它们的任何组件都将在下一个方法调用上获得一个新实例,
 * 该实例将完全初始化并注入所有依赖项。
 * @author Bill Ludwig; 2020/7/18 22:03
 */
@RestController
@RefreshScope
public class ConfigClientController {...}
请求端在github/gitee上改完配置后,需要发送post请求给3355,通知刷新
http://localhost:3355/actuator/refresh
SpringCloud Bus(消息总线)
概念

设计思想


服务/应用间传播(客户端)

中心传播(服务端)

配置
先给消息中心配置依赖
# 暴露bus刷新端点
management:
  endpoints:
    web:
      exposure:
        include: "bus-refresh"
spring:
  # 对rabbitmq支持
  rabbitmq:
    host: localhost
    port: 5672
    username: guest
    password: guest
然后服务再配一样的
7001 -> 3344 -> 3355 -> 3366
http://localhost:3344/actuator/bus-refresh // return nocontent
之后所有app的配置实现了更新
定点通知
只通知局部app。

// config-client 是 app名字,后面是端口号
http://localhost:3344/actuator/bus-refresh/config-client:3355  // return no content
总结

待求证
如果需要多个通知,多个不通知,普通的传参(即用&或者用{})是不可行的,要使用bus-env

SpringCloud Stream(消息驱动)
问题引入
不同的服务,可能使用同一个领域但不同细节的技术。比如一个用RabbitMQ,一个用Kafka,一个用oracle,一个用mysql。Stream的引入解决了问题,可以自动的切换技术。
概念
屏蔽底层消息中间件的差异,降低切换成本,统一消息的编程模型。
Spring Cloud Stream是用于构建消息驱动的微服务应用程序的框架。
Spring Cloud Stream基于Spring Boot来创建独立的生产级Spring应用程序,并使用Spring Integration提供与消息代理的连接。
它提供了来自多家供应商的中间件的合理配置,并介绍了持久性发布-订阅理念,使用者组和分区的概念。

- Destination Binders: 负责与外部消息传递系统集成的组件
- Bindings:外部消息传递系统和应用程序之间提供的消息生成者和消费者(由Destination Binders程序创建)之间的桥梁。
- Message: 生产者和消费者使用的规范数据结构,用于与Destination Binders程序(并因此通过外部消息传递系统与其他应用程序)进行通信。

机制


配置
基于函数式编程
最新版Stream提供了基于函数式编程的Binding,形式如下:
关于函数式编程Binding的方式
@SpringBootApplication
public class SampleApplication {

	@Bean
	public Function<String, String> uppercase() {
	    return value -> value.toUpperCase();
	}
}
基于注解
生产者
yml
server:
  port: 8801

spring:
  application:
    name: cloud-stream-provider
  cloud:
    stream:
      binders:  # 在这里配置要绑定的rabbitmq的服务信息
        defaultRabbit:  # 自定义的,用于binding整合
          type: rabbit  # MQ的类型
          environment:  # MQ的相关配置
            spring:
              rabbitmq:
                host: localhost
                port: 5672
                username: guest
                password: guest
      bindings:  # 服务的整合处理
        output:  # 通道的名称
          destination: studyExchange  # 要使用的exchange的名称定义
          content-type: application/json  # 消息类型
          binder: defaultRabbit  # 绑定的消息服务的具体名称

eureka:
  client:
    service-url:
      defaultZone: http://localhost:7001/eureka
  instance:
    instance-id: send-8801.com  # 信息列表显示主机名称
    prefer-ip-address: true  # 访问的路径变更为ip地址
    lease-renewal-interval-in-seconds: 2  # 检测心跳的时间间隔
    lease-expiration-duration-in-seconds: 5  # 指示自eureka服务器接收到上一次心跳以来,可以从其视图中删除该实例并通过禁止到该实例的流量等待的秒数。
service
/**
 * 发送消息的接口
 * @author Bill Ludwig; 2020/7/19 11:12
 */
public interface MessageProvider {

    String send();
}

/**
 * 不再使用Service注解,而是使用Binding注解,表示与这里的
 * 发送管道绑定。注解的参数表示这里定义一个发送管道。
 * @author Bill Ludwig; 2020/7/19 11:13
 */
@EnableBinding(Source.class)
@Slf4j
public class MessageProviderImpl implements MessageProvider {

    /**
     * 消息发送管道
     */
    @Resource
    private MessageChannel output;

    @Override
    public String send() {
        String s = IdUtil.randomUUID();
        // 发送消息
        output.send(MessageBuilder.withPayload(s).build());
        log.info("===========send method done, serial: [{}]", s);
        return null;
    }
}
controller
/**
通过REST暴露
 * @author Bill Ludwig; 2020/7/19 11:40
 */
@RestController
public class SendMessageController {

    @Resource
    private MessageProvider mp;

    @GetMapping("sendMsg")
    public String sendMsg() {

        return mp.send();
    }
}
发送请求,并在MQ GUI界面观察波峰
http://localhost:8801/sendMsg
消费者
yml
server:
  port: 8802

spring:
  application:
    name: cloud-stream-provider
  cloud:
    stream:
      binders:  # 在这里配置要绑定的rabbitmq的服务信息
        defaultRabbit:  # 自定义的,用于binding整合
          type: rabbit  # MQ的类型
          environment:  # MQ的相关配置
            spring:
              rabbitmq:
                host: localhost
                port: 5672
                username: guest
                password: guest
      bindings:  # 服务的整合处理
        input:  # 通道的名称, 接收消息
          destination: studyExchange  # 要使用的exchange的名称定义
          content-type: application/json  # 消息类型
          binder: defaultRabbit  # 绑定的消息服务的具体名称

eureka:
  client:
    service-url:
      defaultZone: http://localhost:7001/eureka
  instance:
    instance-id: receive-8802.com  # 信息列表显示主机名称
    prefer-ip-address: true  # 访问的路径变更为ip地址
    lease-renewal-interval-in-seconds: 2  # 检测心跳的时间间隔
    lease-expiration-duration-in-seconds: 5  # 指示自eureka服务器接收到上一次心跳以来,可以从其视图中删除该实例并通过禁止到该实例的流量等待的秒数。
controller
@RestController
@EnableBinding(Sink.class)
@Slf4j
public class ReceiveMessageController {

    @Value("${server.port}")
    private String serverPort;

    @StreamListener(Sink.INPUT)
    public void receiveMsg(Message<String> msg) {
        log.info("==============consumer1, consumes msg: [{}], port: [{}]", msg.getPayload(), serverPort);

    }
}
故障现象
启动两个消费者和一个生产者。
重复消费
导致原因是默认分组不同:

上面两个组分别有两个微服务(消费者)
订单案例:

解决:

	bindings:  # 服务的整合处理
        input:  # 通道的名称, 接收消息
          destination: studyExchange  # 要使用的exchange的名称定义
          content-type: application/json  # 消息类型
          binder: defaultRabbit  # 绑定的消息服务的具体名称
          group: killerA  # 加group的名字
持久化
分组后就能获得持久化功能,比如8802,没有自定义分组,8803自定了分组,如果队列中有消息,那么8803会消费,但8802不会去消费信息。没有持久化意味着消息错漏或丢失!
SpringCloud Sleuth(分布式链路请求跟踪)
官网,包含一些术语Span,Tracing…
推荐使用docker安装zipkin,默认端口为9411

配置
在安装号zipkin后:
在cloud-provider-payment8001(普通的生产者)和cloud-consumer-order80(普通的消费者)
pom:
加zipkin依赖
yml:


 847
847


 被折叠的 条评论
为什么被折叠?
被折叠的 条评论
为什么被折叠?
 到【灌水乐园】发言


