


Navigation是Fragment的一个容器,用于管理Fragment。
我们可以通过它实现Fragment的跳转以及传值等操作。
1、先写Fragment的xml文件
<?xml version="1.0" encoding="utf-8"?>
<androidx.constraintlayout.widget.ConstraintLayout xmlns:android="http://schemas.android.com/apk/res/android"
    android:layout_width="match_parent"
    android:layout_height="match_parent"
    xmlns:app="http://schemas.android.com/apk/res-auto">

    <TextView
        android:id="@+id/tv"
        android:gravity="center"
        app:layout_constraintBottom_toBottomOf="parent"
        app:layout_constraintTop_toTopOf="parent"
        app:layout_constraintRight_toRightOf="parent"
        app:layout_constraintLeft_toLeftOf="parent"
        android:layout_width="200dp"
        android:layout_height="60dp"
        android:text="跳转到第二个Fragment"
        android:background="@color/white"
        />

</androidx.constraintlayout.widget.ConstraintLayout>
2、写Fragment的java文件
public class FirstFragment extends Fragment {
    @Nullable
    @Override
    public View onCreateView(@NonNull LayoutInflater inflater, @Nullable ViewGroup container, @Nullable Bundle savedInstanceState) {
        return inflater.inflate(R.layout.first_fragment,container,false);
    }

    @Override
    public void onViewCreated(@NonNull View view, @Nullable Bundle savedInstanceState) {
        super.onViewCreated(view, savedInstanceState);
        TextView b  = view.findViewById(R.id.tv);
        b.setOnClickListener(new View.OnClickListener() {
            @Override
            public void onClick(View v) {
                Navigation.findNavController(getActivity(),R.id.fragment).navigate(R.id.secondFragment);
            }
        });
    }
}
findNavController()方法就是获取NavController,id指向的是navigation,navigate方法就是跳转到指定id的fragment。第二个Fragment也同上两个步骤
3、先定义一个fragment容器,Navgtion的xml文件
![]()
<?xml version="1.0" encoding="utf-8"?>
<navigation xmlns:android="http://schemas.android.com/apk/res/android"
    xmlns:app="http://schemas.android.com/apk/res-auto"
    xmlns:tools="http://schemas.android.com/tools"
    android:id="@+id/nav_fragment"
    app:startDestination="@id/firstFragment">

    <fragment
        android:id="@+id/firstFragment"
        android:name="com.example.myapplication.FirstFragment">
        <action
            app:enterAnim="@anim/fragment_fast_out_extra_slow_in"
            app:exitAnim="@anim/nav_default_pop_exit_anim"
            android:id="@+id/toSecondFragment"
            app:destination="@+id/secondFragment"/>
    </fragment>

    <fragment
        android:id="@+id/secondFragment"
        android:name="com.example.myapplication.SecondFragment">
        <action
            app:enterAnim="@anim/fragment_fade_enter"
            app:popExitAnim="@anim/fragment_close_exit"
            android:id="@+id/toFirstFragment"
            app:destination="@+id/firstFragment"/>
    </fragment>


</navigation>
将两个fragment都添加进容器,为其添加action,可指定进出动画等。
4、在activity布局中添加navigation,之前是把所有fragment都加进去,现在只需加一个navigation
<?xml version="1.0" encoding="utf-8"?>
<androidx.constraintlayout.widget.ConstraintLayout xmlns:android="http://schemas.android.com/apk/res/android"
    xmlns:app="http://schemas.android.com/apk/res-auto"
    xmlns:tools="http://schemas.android.com/tools"
    android:layout_width="match_parent"
    android:layout_height="match_parent"
    tools:context=".MainActivity">

    <fragment
        android:name="androidx.navigation.fragment.NavHostFragment"
        app:navGraph = "@navigation/nav_fragment"
        android:id="@+id/fragment"
        android:layout_height="500dp"
        android:layout_width="500dp"
        app:layout_constraintTop_toTopOf="parent"
        app:layout_constraintLeft_toLeftOf="parent"
        app:layout_constraintBottom_toBottomOf="parent"
        app:layout_constraintRight_toRightOf="parent"
        />

</androidx.constraintlayout.widget.ConstraintLayout>
name字段是固定的。
通过navGraph字段fragment标签与navigation的xml文件绑定。
直接运行就可以实现点击Fragment中的textView进行跳转。
关于BootomNavigation的使用
需要在activity中让底部导航栏与navigation绑定
public class MainActivity extends AppCompatActivity {

    @Override
    protected void onCreate(Bundle savedInstanceState) {
        super.onCreate(savedInstanceState);
        setContentView(R.layout.activity_main);
        BottomNavigationView navView = findViewById(R.id.nav_view);
        AppBarConfiguration appBarConfiguration = new AppBarConfiguration.Builder(
                R.id.navigation_home, R.id.navigation_dashboard, R.id.navigation_notifications1, R.id.a, R.id.b)
                .build();
        NavController navController = Navigation.findNavController(this, R.id.nav_host_fragment);
        NavigationUI.setupActionBarWithNavController(this, navController, appBarConfiguration);
        NavigationUI.setupWithNavController(navView, navController);
    }

}
AppBarConfiguration appBarConfiguration = new AppBarConfiguration.Builder( R.id.navigation_home, R.id.navigation_dashboard, R.id.navigation_notifications1, R.id.a, R.id.b) .build();
Builder参数的id需要与navigation中fragment的id和menu中的id保持一致。前后顺序不影响。fragment的xml和java文件和menu文件就不展示了。
setupWithNavController()方法中就是通过比较fragment的id与menu的id进行联动。
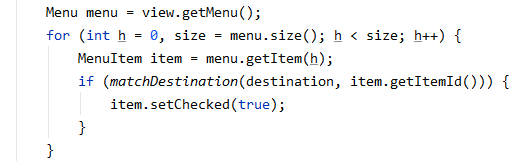
   static boolean matchDestination(@NonNull NavDestination destination,
            @IdRes int destId) {
        NavDestination currentDestination = destination;
        while (currentDestination.getId() != destId && currentDestination.getParent() != null) {
            currentDestination = currentDestination.getParent();
        }
        return currentDestination.getId() == destId;
    }
acitvity的布局:
<?xml version="1.0" encoding="utf-8"?>
<androidx.constraintlayout.widget.ConstraintLayout xmlns:android="http://schemas.android.com/apk/res/android"
    xmlns:app="http://schemas.android.com/apk/res-auto"
    android:id="@+id/container"
    android:layout_width="match_parent"
    android:layout_height="match_parent"
    android:paddingTop="?attr/actionBarSize">

    <com.google.android.material.bottomnavigation.BottomNavigationView
        android:id="@+id/nav_view"
        android:layout_width="0dp"
        android:layout_height="wrap_content"
        android:layout_marginStart="0dp"
        android:layout_marginEnd="0dp"
        app:itemIconTint="@color/teal_200"
        app:itemTextColor="@color/teal_700"
        app:layout_constraintBottom_toBottomOf="parent"
        app:layout_constraintLeft_toLeftOf="parent"
        app:layout_constraintRight_toRightOf="parent"
        app:menu="@menu/bottom_nav_menu" />

    <fragment
        android:id="@+id/nav_host_fragment"
        android:name="androidx.navigation.fragment.NavHostFragment"
        android:layout_width="match_parent"
        android:layout_height="match_parent"
        app:defaultNavHost="true"
        app:layout_constraintBottom_toTopOf="@id/nav_view"
        app:layout_constraintLeft_toLeftOf="parent"
        app:layout_constraintRight_toRightOf="parent"
        app:layout_constraintTop_toTopOf="parent"
        app:navGraph="@navigation/mobile_navigation" />

</androidx.constraintlayout.widget.ConstraintLayout>
itemIconTint和itemTextColor可以改变底部图标颜色和字体颜色。
Navigation的缺点是跳转方法
navigate(int)会不断创建新的fragment,不支持复用。


 被折叠的 条评论
为什么被折叠?
被折叠的 条评论
为什么被折叠?
 到【灌水乐园】发言


