


移动设备
1.基本界面控件
1.1用户界面框架
1.View是构建用户界面控件的父类,所有的用户界面可见控件以及布局类都是由View派生来的。
2.View中常用的xml属性?
-
设置背景:background
-
绑定单击事件监听器:onClick
-
控件是否可见:visibility
-
控制view能否获取焦点:focusable
-
设置标识符:id
-
设置高度:layout_height
-
设置宽度:layout_width
-
控件之间的距离:layout_margin
-
控件内容和控件边缘之间的距离:padding
1.2TextView
1.文本控件类:主要包含TextView和EditText。都可以用来显示文本,但是前者不允许编辑,后者可以进行编辑。前者重在显示文本的内容。
2.常见的xml属性:
layout_height和height的区别:
带layout的一般针对的是控件相对父控件,而height相对自己本身而言的。后者不可以单独使用的,可以理解为设置控件内部文本的高度,两者是配合起来进行使用的。
-
height和width:设置控件内文本的高度和宽度
-
hint:当文本为空时显示的内容
-
ellipsize:当控件里的内容超过了显示的长度的时候会对内容进行省略,可以指定省略的样式。none,start,middle,end和marquee。
-
控件允许的最大宽度:maxLength
-
设置控件内容在控件中的位置:gravity
-
设置文字的显示风格:textStyle。取值,normal:正常;bold:粗体;italic:斜体。可以一下设置多个,bold|italic。
-
等等
3.android:id?
-
分配一个资源id
4.android:layout_width和android:layout_height?
-
定义控件本身的宽度和高度
常见的两种取值:
-
match_parent:以父控件的尺寸作为参考尺寸
-
wrap_content:以包裹内容的尺寸作为参考尺寸
5.padding?
-
显示的文字内容与控件边界的距离
6.layout_margin?
-
本控件与其它相邻控件及父控件上下左右的距离
7.inputType=“textPassword”?
-
设置文本显示的方式
<TextView
        android:layout_width="wrap_content"
        android:layout_height="wrap_content"
        android:inputType="textPassword"
        android:text="安卓安卓"
        />
8.background?
-
设置背景
9.android:drawableRight="@mipmap/ic_launcher"?
-
将图片显示在文本的右侧
-
可以指定后面的位置Right可以换成其他不同的单词,达到不同的位置效果
10.设置文字的阴影?
设置阴影涉及到多个变量
android:shadowRadius,阴影的范围,范围越大,阴影宽度越大,从而越模糊 类似细毛笔,粗毛笔的不同。
-
android:shadowColor 阴影颜色
-
android:shadowDx 阴影的水平偏移量
-
android:shadowDy 阴影的垂直偏移量
-
android:shadowRadius 阴影的半径,即阴影的范围
android:shadowDy="10"
android:shadowDx="10"
android:shadowColor="@color/cardview_dark_background"
android:shadowRadius="10"
10.android:autoLink?
-
用来设置当前的url是不是一个url的链接。可以链接到好多地方,none是无任何链接,web是匹配web网址,email是匹配email地址,必须手机上有邮件的客户端,phone,会跳转到打电话的地方,map,匹配映射地址,all,匹配所有的链接。
11.ellipsize?
-
设置当文本的内容超过了TextView要求的宽度的时候,文本该如何显示的问题。
必须设置android:lines="1"或者设置android:singleLine="true",建议用前者。
android:ellipsize使用时不能与android:autoLink同时存在。否则android:ellipsize效果显示不出来。
常见的文本显示的方式:
-
”start”—-省略号显示在开头;
-
”end” ——省略号显示在结尾;
-
”middle”—-省略号显示在中间;
-
”marquee” ——以跑马灯的方式显示(动画横向移动)
12.如何设置跑马灯的效果?
我有一个问题?如何设置启动软件就可以看见跑马灯的效果?而不是再点击一次。欢迎留言指点。
参考代码:
<TextView
    android:layout_width="wrap_content"
    android:layout_height="wrap_content"
    android:text="你好 我是xx大学 我是一名来自山东xx的学生 欢迎您的到来 我来到这里非常的开心 快乐"
    android:singleLine="true"
    android:ellipsize="marquee"
    android:focusable="true"
    android:focusableInTouchMode="true"
    android:marqueeRepeatLimit="marquee_forever"
    android:clickable="true"
    />
运行截图:

1.3使用样式表定义TextView
如果要在一个项目中定义多个文本控件,可能会存在许多重复的配置属性。我们可以使用样式表进行统一的属性配置。
1.找到values文件夹,设置style.xml。
语法格式:
<?xml version=“1.0” encoding=“utf-8”?>
<resources>
<style name=“样式名称” parent=“父样式表”>
<item name=“定义的属性”>属性内容</item>
</style>
</resources>
现在需要我们去编写样式代码:
其实编写的样式就是标签内部的属性
<?xml version="1.0" encoding="utf-8"?>
<resources>
<style name="msg_style">
    <item name="android:textSize">45px</item>
    <item name="android:textStyle">bold</item>
    <item name="android:layout_width">wrap_content</item>
    <item name="android:layout_height">wrap_content</item>
</style>
</resources>
如何去引用刚刚创建的标签:
-
设置style属性引用@style包下的,刚刚定义的msg_style样式就可以了
style="@style/msg_style"
1.4设置TextView的渐变背景(没写完)
1.用到的标签就是android:shape?
shape默认就是矩形
-
android:shape=["rectangle" | "oval" | "line" | "ring"]
-
shape的形状,默认为矩形,可以设置为矩形、椭圆、线性、环形
-
Shape的子标签包括: corners(圆角)、gradient(渐变)、 solid(填充)、 padding(内边距)、 stroke(描边)、size(大小)
2.下面的属性只有在android:shape="ring"时可用:
-
android:innerRadius =“50dp”:尺寸,内环的半径。
-
android:innerRadiusRatio:浮点型,内环的厚度比(一般不用)
-
android:thickness =“100dp” :尺寸,环的厚度
-
android:thicknessRatio :浮点型,环的厚度比(一般不用)
-
android:useLevel =“false”:boolean值,一般为false,如果当做是LevelListDrawable使用时值为true.
3.shape的简单案例
基本语法:
<?xml version="1.0" encoding="utf-8"?>
<shape xmlns:android=“http://schemas.android.com/apk/res/android” … shape属性列表…   >
  <corners   ... /> <!–圆角 -->
  <gradient    ... /> <!– 颜色渐变 -->
  <padding   ...  /> <!-- 内边距 -->
  <size   ...     /><!-- 大小 -->
  <solid android:color="color" // shape的填充色        />
  <stroke   ...  /><!-- 描边 -->
</shape>
在res/drawable下创建一个myshape.xml
-
注意命名方式必须全是小写,不能出现大写
4.corners子标签
-
定义圆角用
5.gradient子标签
-
渐变用
6.stroke子标签
-
描边用,设置边的宽度,颜色
7.size和padding子标签
-
size定义大小
-
padding定义内边距
1.5使用TextView的方法
1.使用TxetView?
-
在Java中编写
name=(TextView) this.findViewById(R.id.mytext1);
name.setText("张三");
2.可以用代码直接编写TextView而不用布局文件?
-
不推荐
protected void onCreate(Bundle savedInstanceState) {
super.onCreate(savedInstanceState);
LinearLayout linear=new LinearLayout(this);
linear.setOrientation(LinearLayout.VERTICAL);
TextView tvTextView=new TextView(this);
tvTextView.setText(super.getString(R.string.button));
linear.addView(tvTextView);
super.setContentView(linear);
}
1.6EditText
1.EditView:是用来输入和编辑字符串的控件。继承于TextView。EditView最大的特点就是可以对用户输入的信息进行编辑,设置监听器,用来检测用户的输入是不是合法的。
2.常见的属性:
-
设置光标可不可见:cursorVisible
-
设置行数:lines
-
限制输入的字符的数量:maxLength
-
设置文本的行数:singleLine
-
去掉边框:background="@null",指定为颜色可以设置背景的颜色
-
在EditText左边显示图片:drawableLeft
-
在EditText右边显示图片:drawableRight
-
控制虚拟键盘的显示方式:inputType
-
text文本为空时显示的提示文字:hint
-
默认在初始状态下全部全选中:selectAllOnFocus
-
设置不可使用:enabled,值为false是不可以使用
3.singleLine和maxLines的搭配使用?
android:singleLine="false"
android:maxLines="3"
android:minLines="2"
4.inputType详解
-
android:inputType="none"--输入普通字符
-
android:inputType="text"--输入普通字符
-
android:inputType="textCapCharacters"--输入普通字符
-
android:inputType="textCapWords"--单词首字母大小
-
android:inputType="textCapSentences"--仅第一个字母大小
-
android:inputType="textAutoCorrect"--前两个自动完成
-
android:inputType="textAutoComplete"--前两个自动完成
-
android:inputType="textMultiLine"--多行输入
-
android:inputType="textImeMultiLine"--输入法多行(不一定支持)
-
android:inputType="textNoSuggestions"--不提示
-
android:inputType="textUri"--URI格式
-
android:inputType="textEmailAddress"--电子邮件地址格式
-
android:inputType="textEmailSubject"--邮件主题格式
-
android:inputType="textShortMessage"--短消息格式
-
android:inputType="textLongMessage"--长消息格式
-
android:inputType="textPersonName"--人名格式
-
android:inputType="textPostalAddress"--邮政格式
-
android:inputType="textPassword"--密码格式
-
android:inputType="textVisiblePassword"--密码可见格式
-
android:inputType="textWebEditText"--作为网页表单的文本格式
-
android:inputType="textFilter"--文本筛选格式
-
android:inputType="textPhonetic"--拼音输入格式
-
android:inputType="number"--数字格式
-
android:inputType="numberSigned"--有符号数字格式
-
android:inputType="numberDecimal"--可以带小数点的浮点格式
-
android:inputType="phone"--拨号键盘
-
android:inputType="datetime"
-
android:inputType="date"--日期键盘
-
android:inputType="time"--时间键盘
5.android:inputType="textPassword" 等价于android:password="true"
6.设置圆角矩形?
-
使用
<?xml version="1.0" encoding="utf-8"?>
<shape xmlns:android="http://schemas.android.com/apk/res/android"
    android:shape="rectangle">
<!--填充的颜色-->
<solid android:color="#a600ff"/>
<!--    设置矩形的四个角为弧形-->
<corners android:radius="7dp"/>
</shape>
调用创建的背景:
-
调用的方式android:background="@drawable/myshape"
<EditText
    android:id="@+id/mytext1"
    android:layout_width="200dp"
    android:layout_height="wrap_content"
    android:inputType="text"
    android:background="@drawable/myshape"
    />
运行截图:

1.7EditText案例
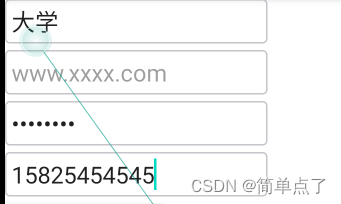
参考代码:
layout中的代码:
<!--地址-->
<EditText
android:id="@+id/mytext1"
android:layout_width="200dp"
android:layout_height="wrap_content"
android:inputType="text"
android:padding="5dp"
android:background="@drawable/myshape"
/>
<!-- 网址-->
<EditText
android:layout_marginTop="5dp"
android:id="@+id/mytext4"
android:layout_width="200dp"
android:layout_height="wrap_content"
android:inputType="textWebEditText"
android:hint="www.xxxx.com"
android:enabled="false"
android:padding="5dp"
android:background="@drawable/myshape"
/>
<!-- 密码-->
<EditText
android:layout_marginTop="5dp"
android:id="@+id/mytext3"
android:layout_width="200dp"
android:layout_height="wrap_content"
android:inputType="textPassword"
android:padding="5dp"
android:background="@drawable/myshape"
/>
<!-- 手机号-->
<EditText
android:layout_marginTop="5dp"
android:id="@+id/mytext2"
android:layout_width="200dp"
android:layout_height="wrap_content"
android:inputType="phone"
android:padding="5dp"
android:background="@drawable/myshape"
/>
<Button
android:id="@+id/btn"
android:layout_width="wrap_content"
android:layout_height="wrap_content"
android:text="点我显示内容"
android:gravity="center"
/>背景样式代码:
-
就设置了一个边框和一个圆角
<?xml version="1.0" encoding="utf-8"?>
<shape xmlns:android="http://schemas.android.com/apk/res/android"
    android:shape="rectangle">
<!--设置边框的颜色-->
<stroke android:width="1dip" android:color="#c9c4cc" />
<!--    设置矩形的四个角为弧形-->
<corners android:radius="3dip"/>
</shape>
1.8事件监听
1.如何给EditText设置以恶搞监听事件?当EditText中内容发生变化的时候,就会触发TextChangedListener事件,调用TextWatcher接口里的抽象方法。
-
常见的案例:网上往输入框中输入内容的时候会自动的检测还剩下多少个字符
-
TextWacher本身就是一个接口,需要实现其中的三个方法,分别是在内容变化前,变化时和变化后进行触发。
2.设置监听
第一种方式:在主activity上实现TextWacher接口,重写三个方法。
-
text.addTextChangedListener(this);这句是最重要的。
public class MainActivity extends AppCompatActivity implements TextWatcher {
TextView text=null;
TextView num=null;
public static int textnum=50;
@Override
protected void onCreate(Bundle savedInstanceState) {
super.onCreate(savedInstanceState);
setContentView(R.layout.activity_main);
text=(TextView) this.findViewById(R.id.mytext1);
num=(TextView) this.findViewById(R.id.mytext2);
text.addTextChangedListener(this);
}
@Override
public void beforeTextChanged(CharSequence charSequence, int i, int i1, int i2) {
}
@Override
public void onTextChanged(CharSequence charSequence, int i, int i1, int i2) {
num.setText("当前可以输入字符的数量为:"+(textnum-charSequence.length()));
}
@Override
public void afterTextChanged(Editable editable) {
}
}第二种方式:匿名内部类的形式。
-
案例:监听EditText的变化
// 采用匿名内部类的方式
name.addTextChangedListener(new TextWatcher() {
@Override
public void beforeTextChanged(CharSequence charSequence, int i, int i1, int i2) {
Log.d(TAG, charSequence.toString());
}
@Override
public void onTextChanged(CharSequence charSequence, int i, int i1, int i2) {
Log.d(TAG, charSequence.toString());
}
@Override
public void afterTextChanged(Editable editable) {
Log.d(TAG, editable.toString());
}
});1.9事件监听案例
1.实现实时检测字符的数量
如何将文本域显示成多行?求教!
第一步:编写布局文件
<TextView
android:layout_width="wrap_content"
android:layout_height="wrap_content"
android:text="请输入您对当代大学生的看法"
android:background="@drawable/myshape2"
android:padding="5dp"
/>
<!--评论区-->
<EditText
android:id="@+id/mytext1"
android:layout_width="200dp"
android:layout_height="wrap_content"
android:inputType="textMultiLine"
android:padding="5dp"
android:minLines="1"
android:maxLines="5"
android:maxLength="50"
android:background="@drawable/myshape"
/>
<!-- 显示当前的字符数量-->
<TextView
android:id="@+id/mytext2"
android:layout_width="wrap_content"
android:layout_height="wrap_content"
android:text="当前可以输入字符的数量为:50"
/>
<!-- 按钮-->
<Button
android:id="@+id/btn"
android:layout_width="wrap_content"
android:layout_height="wrap_content"
android:text="提交"
android:gravity="center"
/>第二步:编写背景
myshape:
<?xml version="1.0" encoding="utf-8"?>
<shape xmlns:android="http://schemas.android.com/apk/res/android"
    android:shape="rectangle">
<!--设置边框的颜色-->
<stroke android:width="1dip" android:color="#c9c4cc" />
<!--    设置矩形的四个角为弧形-->
<corners android:radius="3dip"/>
</shape>
myshape2:
<?xml version="1.0" encoding="utf-8"?>
<shape xmlns:android="http://schemas.android.com/apk/res/android"
    android:shape="rectangle">
<!--    设置矩形的四个角为弧形-->
<corners android:radius="5dip"/>
<!--    设置填充的颜色-->
<solid android:color="#8fd9b6"></solid>
</shape>
第三步:编写监听器
public class MainActivity extends AppCompatActivity  {
    TextView text=null;
    TextView  num=null;
    public static int textnum=50;
    @Override
    protected void onCreate(Bundle savedInstanceState) {
        super.onCreate(savedInstanceState);
        setContentView(R.layout.activity_main);
        text=(TextView) this.findViewById(R.id.mytext1);
        num=(TextView) this.findViewById(R.id.mytext2);
        text.addTextChangedListener(new TextWatcher() {
            @Override
            public void beforeTextChanged(CharSequence charSequence, int i, int i1, int i2) {

            }

            @Override
            public void onTextChanged(CharSequence charSequence, int i, int i1, int i2) {
                Log.d(TAG, charSequence.length()+"");
                String s="当前可以输入字符的数量为:"+(textnum-charSequence.length());
                num.setText(s);
            }

            @Override
            public void afterTextChanged(Editable editable) {

            }
        });


    }


}
1.10按钮控件
1.按钮在人机交互界面上使用的是最多的,当提示用户进行某些选择时可以通过按钮的操作来接收用户的选择
2.安卓中的按钮主要包括:
-
Button控件
-
ImageButton控件
-
RadioButton控件
-
CheckBox控件
3.button常见的属性
-
在按钮上显示文字:android:text。对于ImageButton来说只能显示图片。
-
background,可以给按钮设置背景图片或者颜色
-
调整边框以适应图片大小:adjustViewBounds="true"
案例:
<!--    按钮-->
    <Button
        android:id="@+id/btn"
        android:layout_width="wrap_content"
        android:layout_height="wrap_content"
        android:text="提交"
        android:gravity="center"
        android:maxLength="3"
        />
4.实现点击按钮换图片
一个需要补充的小问题,设置好了第一步和第二步都不出现设置的背景怎们办?
解决的方法:去themes包下,找到themes.xml文件,把 <style name="Theme.MyApplication3" parent="Theme.MaterialComponents.DayNight.DarkActionBar">改为<style name="Theme.MyApplication3" parent="Theme.MaterialComponents.DayNight.DarkActionBar.Bridge">
就是在最后面加上以恶搞Bridge
第一步:drawable下创建一个xml文件
-
android:drawable指定图片的位置
-
android:state_pressed说明点击时的样子
<?xml version="1.0" encoding="utf-8"?>
<selector xmlns:android="http://schemas.android.com/apk/res/android">
<!--    按下去的界面-->
<item android:drawable="@mipmap/girl" android:state_pressed="true"/>
<!--    抬起时的界面-->
<item android:drawable="@mipmap/girl2"/>
</selector>
第二步:引用布局文件
<Button
            android:layout_width="wrap_content"
            android:layout_height="wrap_content"
            android:background="@drawable/changeimage"
            />
运行截图:

注意:要是button显示不出来的时候,参考“引用”里面的解释。
1.11Button的事件监听
1.Button的事件监听有两种方式。
-
在Activity中进行设置监听器
-
监听器绑定到标签
2.采用匿名内部类的形式绑定监听器
第一步:创建布局文件
<?xml version="1.0" encoding="utf-8"?>
<LinearLayout xmlns:android="http://schemas.android.com/apk/res/android"
    xmlns:app="http://schemas.android.com/apk/res-auto"
    xmlns:tools="http://schemas.android.com/tools"
    android:layout_width="match_parent"
    android:layout_height="match_parent"
    android:orientation="vertical"
    tools:context=".ButtonMainActivity">

<!--账号区域-->
    <LinearLayout
        android:layout_width="wrap_content"
        android:layout_height="wrap_content"
        android:orientation="horizontal">
        <TextView
            android:layout_width="wrap_content"
            android:layout_height="wrap_content"
            android:text="账号"
            />
        <EditText
            android:id="@+id/account"
            android:layout_width="200dp"
            android:layout_height="wrap_content"
            android:inputType="text"
            />
    </LinearLayout>
<!--密码区域-->
    <LinearLayout
        android:layout_width="200dp"
        android:layout_height="wrap_content"
        android:orientation="horizontal">
        <TextView
            android:layout_width="wrap_content"
            android:layout_height="wrap_content"
            android:text="密码"
            />
        <EditText
            android:id="@+id/pswd"
            android:layout_width="200dp"
            android:layout_height="wrap_content"
            android:inputType="textPassword"
            />
    </LinearLayout>
<!--    按钮区域-->
    <Button
        android:id="@+id/btn"
        android:layout_width="wrap_content"
        android:layout_height="wrap_content"
        android:text="登录"
        />
</LinearLayout>
第二步:编写Actibity
-
先采用匿名内部类的方式(最常用的一种形式)
public class MainActivity extends AppCompatActivity  {
    TextView text=null;
    TextView  num=null;
    public static int textnum=50;
    @Override
    protected void onCreate(Bundle savedInstanceState) {
        super.onCreate(savedInstanceState);
        setContentView(R.layout.activity_main);
        text=(TextView) this.findViewById(R.id.mytext1);
        num=(TextView) this.findViewById(R.id.mytext2);
        text.addTextChangedListener(new TextWatcher() {
            @Override
            public void beforeTextChanged(CharSequence charSequence, int i, int i1, int i2) {

            }

            @Override
            public void onTextChanged(CharSequence charSequence, int i, int i1, int i2) {
                Log.d(TAG, charSequence.length()+"");
                String s="当前可以输入字符的数量为:"+(textnum-charSequence.length());
                num.setText(s);
            }

            @Override
            public void afterTextChanged(Editable editable) {

            }
        });


    }


}
运行截图:
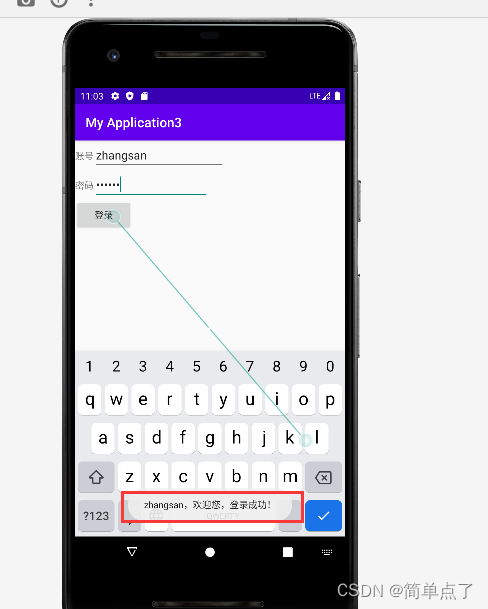
3.采用Activity继承OnClickListener接口的方式
第一步:创建布局文件,和上面的一样
第二步:实现监听器的方法
注意点
button.setOnClickListener(this);注意传递的是this,调用自己的onClick的方法
public class ButtonMainActivity extends AppCompatActivity implements View.OnClickListener {

    EditText account=null;
    EditText pswd=null;
    Button button=null;
    @Override
    protected void onCreate(Bundle savedInstanceState) {
        super.onCreate(savedInstanceState);
        setContentView(R.layout.button_main);
//        获取相应的对象
        account=findViewById(R.id.account);
        pswd=findViewById(R.id.pswd);
        button=findViewById(R.id.btn);
//        调用自己的onClick方法
        button.setOnClickListener(this);
    }

//采用实现接口的方式
    @Override
    public void onClick(View view) {
        if (view==button){
            Toast.makeText(ButtonMainActivity.this, account.getText()+",欢迎您,登录成功!", Toast.LENGTH_SHORT).show();
        }

    }
}
运行的截图:
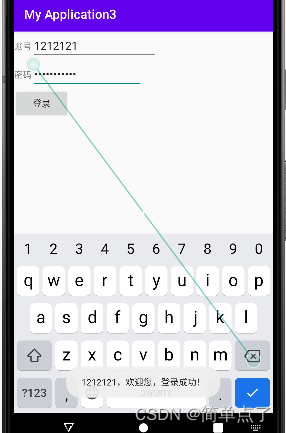
4.采用标签的形式
在Button中的标签内部有一个属性就是onClick指定绑定的方法的名字,在Activity中再去实现相应的功能就可以了。
第一步:创建布局文件,和上面的那个一样
第二步:Button中加入onClick属性
<!--    按钮区域-->
    <Button
        android:id="@+id/btn"
        android:layout_width="wrap_content"
        android:layout_height="wrap_content"
        android:text="登录"
        android:onClick="btnListener"
        />
第三步:在Activity中实现自定义监听器的方法
//验证button的事件监听器
public class ButtonMainActivity extends AppCompatActivity {

    EditText account=null;
    EditText pswd=null;
    Button button=null;
    @Override
    protected void onCreate(Bundle savedInstanceState) {
        super.onCreate(savedInstanceState);
        setContentView(R.layout.button_main);
//        获取相应的对象
        account=findViewById(R.id.account);
        pswd=findViewById(R.id.pswd);
        button=findViewById(R.id.btn);

    }

//实现自定义监听器的方法
    public void btnListener(View view) {
        Toast.makeText(ButtonMainActivity.this, account.getText()+",欢迎您,登录成功!", Toast.LENGTH_SHORT).show();

    }
}
运行截图:
1.12Toast
1.Toast:用来显示信息的一种机制,包含提醒用户的快捷短信息的窗口,没有焦点,显示的时间是有限的,过段时间就会消失。
2.创建的两种方式?
创建Toast对象,调用makeText方法就可以实现。两种不同的创建方式,区别在于里面的参数不同。
第一种创建方式:
-
static Toast makeText(Context context, int resId, int duration)
context是toast显示在哪个上下文,通常是当前Activity。resId指显示内容,使用string.xml中定义的显示的消息内容,通过R.java来引用;
duration指定显示时间,Toast默认有LENGTH_SHORT和LENGTH_LONG两常量,分别表示短时间显示和长时间显示。不过时间长短没有太大的感觉。
第二种创建方式:
-
static Toast makeText(Context context, CharSequence text, int duration)
参数context和duration与第一个方法相同,参数text是消息内容。
3.如何显示Toast对象的内容?
-
调用show方法就可以
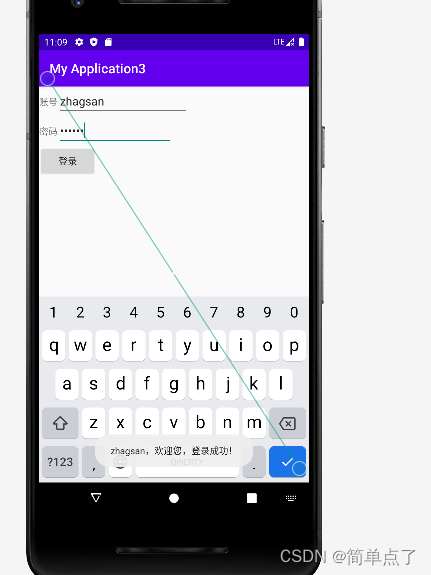
4.如何设置Toast显示的位置?
调用setGravity(Gravity.CENTER, 0, 0);方法就可以
三个参数分别表示(起点位置,水平向右位移,垂直向下位移)
以上面的案例为基础将Toast显示的内容放到手机的中间位置?
原先显示的位置:见下图
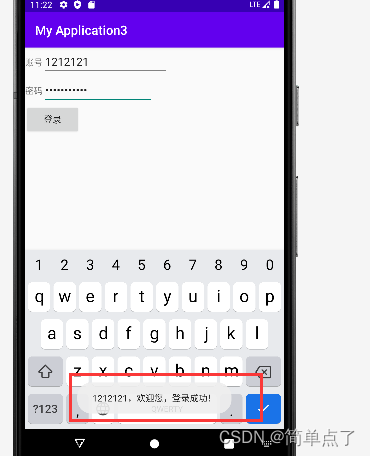
设置显示在中间位置?
我发现我一直都运行不出来,研究了好久,才发现是因为当前的版本不支持该属性了。只能设置30版本以下的才可以。
报错: setGravity() shouldn't be called on text toasts, the values won't be used
去build.grade中将targetSdk 29
-
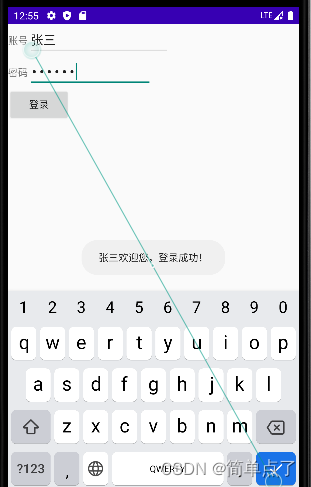
调用setGravity(Gravity.CENTER,0,0)方法就可以设置显示在手机屏幕的中间
//实现自定义监听器的方法
    public void btnListener(View view) {
        Toast toast=Toast.makeText(ButtonMainActivity.this, account.getText()+",欢迎您,登录成功!", Toast.LENGTH_SHORT);
        toast.setGravity(Gravity.CENTER,0,0);
        toast.show();
    }
运行截图:


 416
416


 被折叠的 条评论
为什么被折叠?
被折叠的 条评论
为什么被折叠?
 到【灌水乐园】发言


