


目录
1.SpringBoot下的SpringMVC快速使用
1.基于restful http接口 的CURD
package com.springboot.controller;

import com.springboot.entity.Result;
import com.springboot.entity.User;
import com.springboot.service.UserService;
import org.springframework.beans.factory.annotation.Autowired;
import org.springframework.web.bind.annotation.*;

@RestController
@RequestMapping("/user")
public class UserController {

    @Autowired
    UserService userService;

    //查询 /user/1
    @GetMapping("/{id}")
    public Result getUser(@PathVariable Integer id){
        User user = userService.getUserById(id);
        return new Result<>(200, "查询成功", user);
    }


    //新增  /user/add
    @PostMapping("/add")
    public Result addUser(User user){
        userService.add(user);
        return new Result<>(200, "新增成功");
    }

    //修改 /user/1
    @PutMapping("/{id}")
    public Result updateUser(User user){
        userService.update(user);
        return new Result<>(200, "修改成功");
    }

    //删除 /1
    @DeleteMapping("/{id}")
    public Result deleteUser(@PathVariable Integer id){
        userService.delete(id);
        return new Result<>(200, "删除成功");
    }
}
2.通过RestTemplate调用
RestTemplate是Spring提供的用于访问Rest服务的,RestTemplate提供了多种便捷访问远程Http服务的方法,传统情况下在java代码里访问restful服务,一般使用Apache的HttpClient。不过此种方法使用起来太过繁琐。spring提供了一种简单便捷的模板类来进行操作,这就是RestTemplate。适用于微服务架构下 服务之间的远程调用 ps: 以后使用微服务架构, spring cloud feign
WebClient 都可以调用远程服务, 区别:webclient 依赖webflux , webclient 请求远程服务是无阻塞的,响应的。 RestTemplate 它是阻塞的,需要等待请求响应后才能执行下一句代码
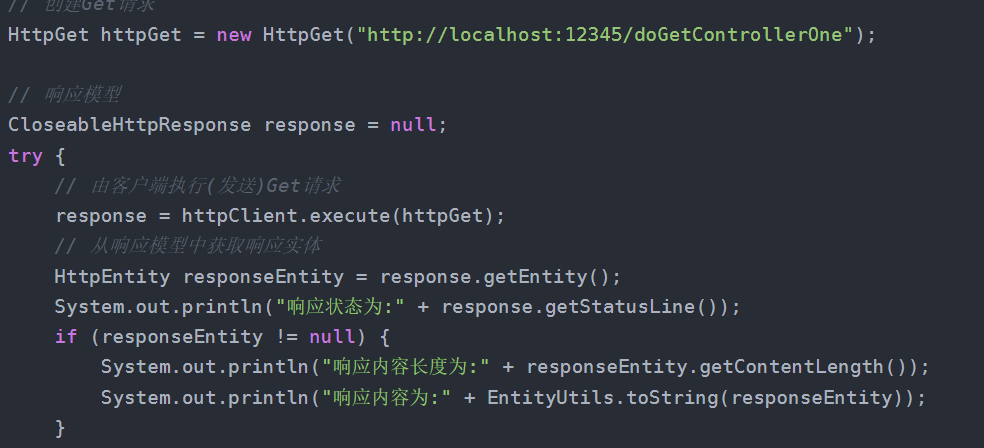
以前通过HttpClient
官网资料
| DELETE | delete |
| GET | getForObject 按照指定Class返回对象 |
| getForEntity 返回对象为ResponseEntity对象,包含了响应中的一些重要信息,比如响应头、响应状态码、响应体等 | |
| HEAD | headForHeaders |
| OPTIONS | optionsForAllow |
| POST | postForLocation |
| postForObject | |
| PUT | put |
| any 支持任何请求方法类型 | exchange |
| execute |
package com.springboot.controller;

import com.springboot.entity.Result;
import com.springboot.entity.User;
import org.springframework.boot.web.client.RestTemplateBuilder;
import org.springframework.http.HttpEntity;
import org.springframework.http.HttpMethod;
import org.springframework.http.ResponseEntity;
import org.springframework.web.bind.annotation.RequestMapping;
import org.springframework.web.bind.annotation.RestController;
import org.springframework.web.client.RestTemplate;

@RestController
public class WebRestController {

    // 声明了RestTemplate
    private final RestTemplate restTemplate;

    // 当bean 没有无参构造函数的时候,spring将自动拿到有参的构造函数,参数进行自动注入
    public WebRestController(RestTemplateBuilder restTemplateBuilder) {
        this.restTemplate = restTemplateBuilder.build();
    }
    @RequestMapping("/webRest")
    public String webRest(){

        // 需要远程访问rest服务

        // 基于restTemplate 调用查询
        /*Result result = restTemplate.getForObject("http://localhost:8080/user/{id}", Result.class, 1);
        return result.toString();*/

        // 基于restTemplate 调用 新增
        /*User user = new User("fztx", "bj");
        // url: 请求的远程rest url
        // object : post请求的参数
        // Class<T>:返回的类型
        // ...Object: 是@PathVariable 占位符的参数
        ResponseEntity<Result> entity = restTemplate.postForEntity("http://localhost:8080/user/add", user, Result.class);
        System.out.println(entity.toString());
        return entity.getBody().toString();*/

        // 基于restTemplate 调用 修改

        /*User user = new User(1, "fztx", "aaa");
        //put  delete没有返回值
        //restTemplate.put("http://localhost:8080/user/{id}",user,1);
        HttpEntity<User> userHttpEntity = new HttpEntity<>(user);
        ResponseEntity<Result> entity = restTemplate.exchange("http://localhost:8080/user/{id}", HttpMethod.PUT, userHttpEntity, Result.class, 1);
        System.out.println(entity.toString());
        return entity.getBody().toString();*/


        // 基于restTemplate 调用 删除
        //put  delete没有返回值
        //restTemplate.delete("http://localhost:8080/user/{id}",1);
        ResponseEntity<Result> entity = restTemplate.exchange("http://localhost:8080/user/{id}", HttpMethod.DELETE, null, Result.class, 1);
        System.out.println(entity.toString());
        return entity.getBody().toString();

    }
}
也可以在单元测试下使用:
@SpringBootTest()
class ApplicationTests {
@Test
void contextLoads() {
TestRestTemplate restTemplate=new TestRestTemplate();
// 基于restTemplate 调用删除
ResponseEntity<Result> resultResponseEntity = restTemplate.exchange("http://localhost:8080/user/{id}", HttpMethod.DELETE, null, Result.class, 1);
System.out.println(resultResponseEntity.toString());
}
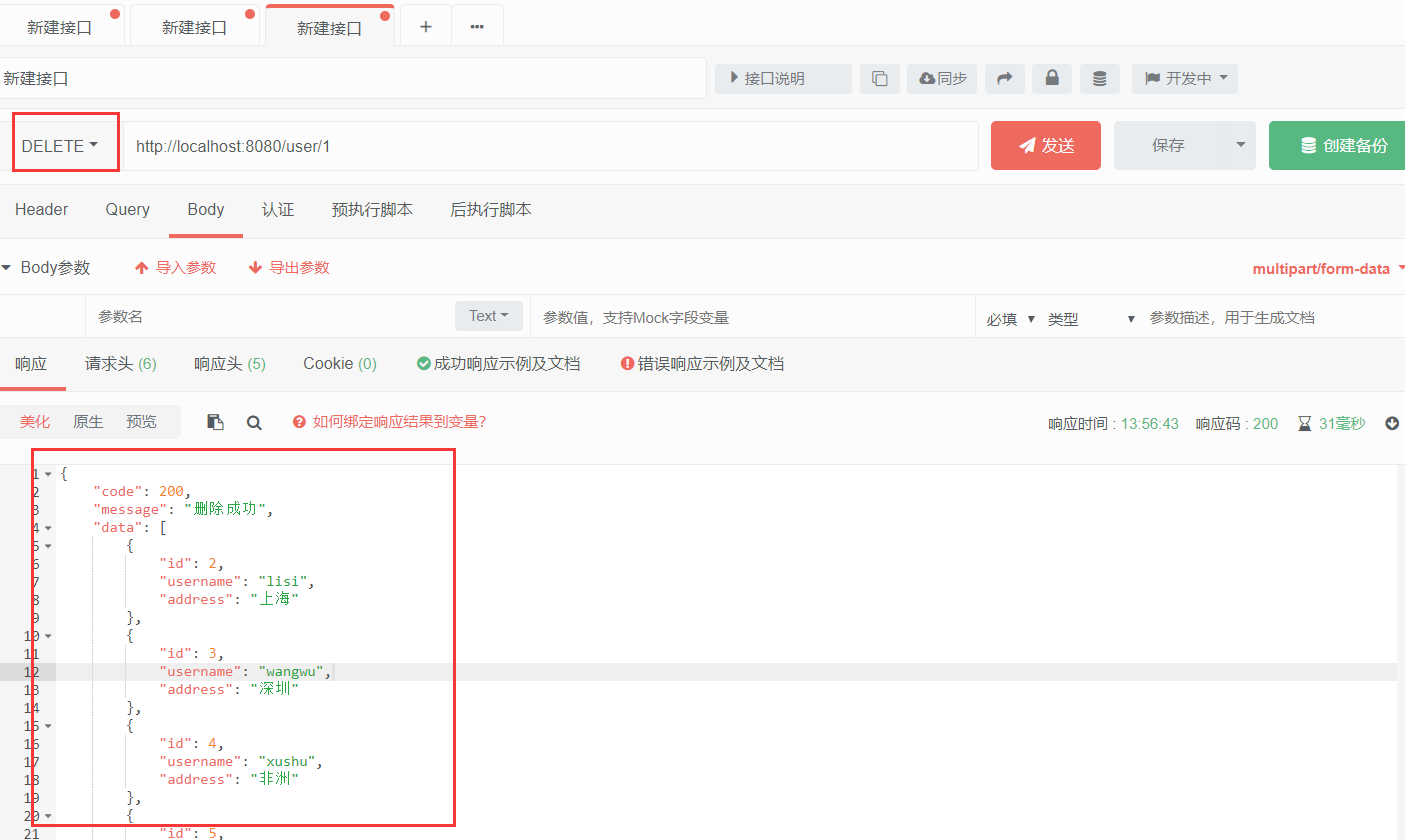
}3.通过postman调用
4.通过MockMvc测试
MockMvc是由spring-test包提供,实现了对Http请求的模拟,能够直接使用网络的形式,转换到Controller的调用,使得测试速度快、不依赖网络环境。同时提供了一套验证的工具,结果的验证十分方便。

SpringBoot中使用MockMvc
编写测试类。实例化MockMvc有两种形式,一种是使用StandaloneMockMvcBuilder,另外一种是使用DefaultMockMvcBuilder。测试类及初始化MockMvc初始化:
package com.springboot;

import org.junit.jupiter.api.Test;
import org.springframework.beans.factory.annotation.Autowired;
import org.springframework.boot.test.autoconfigure.web.servlet.AutoConfigureMockMvc;
import org.springframework.boot.test.context.SpringBootTest;
import org.springframework.http.MediaType;
import org.springframework.test.web.client.match.MockRestRequestMatchers;
import org.springframework.test.web.servlet.MockMvc;
import org.springframework.test.web.servlet.request.MockMvcRequestBuilders;
import org.springframework.test.web.servlet.result.MockMvcResultHandlers;
import org.springframework.test.web.servlet.result.MockMvcResultMatchers;

@SpringBootTest
@AutoConfigureMockMvc   //专门用于做mockmvc的, 由spring-test提供, 依赖junit5, 如果没有该注解需要通过代码构建MockMvc
public class MockMvcTest {

    @Autowired
    MockMvc mockMvc;

/*
	 * 1、mockMvc.perform执行一个请求。
	 * 2、MockMvcRequestBuilders.get("XXX")构造一个请求。
	 * 3、ResultActions.param添加请求传值
	 * 4、ResultActions.accept(MediaType.TEXT_HTML_VALUE))设置返回类型
	 * 5、ResultActions.andExpect添加执行完成后的断言。
	 * 6、ResultActions.andDo添加一个结果处理器,表示要对结果做点什么事情
	 *   比如此处使用MockMvcResultHandlers.print()输出整个响应结果信息。
	 * 7、ResultActions.andReturn表示执行完成后返回相应的结果。
	 */
    @Test
    public void test() throws Exception {
        // 发起一个模拟请求 ,不依赖网络,不依赖web服务,  不需要启动web应用
        mockMvc.perform(
                MockMvcRequestBuilders.get("/user/{id}",1)  // 发送了get请求
                .accept(MediaType.APPLICATION_JSON_UTF8)// 设置响应的文本类型
                //.param(name,value)   ?name=xx&age=xx
        )
                // 响应断言
                .andExpect(MockMvcResultMatchers.status().isOk()) // 断言状态码为200
                .andExpect(MockMvcResultMatchers.jsonPath("$.data.username").value("zhangsanzzz"))
                .andDo(MockMvcResultHandlers.print());
    }


    @Test
    public void test02() throws Exception {

        String jsonUser = "{\n" +
                "  \"username\": \"fztx\",\n" +
                "  \"address\": \"mockmvc\"\n" +
                "}";
        // 发起一个模拟请求 ,不依赖网络,不依赖web服务,  不需要启动web应用
        mockMvc.perform(
                MockMvcRequestBuilders.post("/user/add")  // 发送了post请求
                        .accept(MediaType.APPLICATION_JSON_UTF8)// 设置响应的文本类型
                        .contentType(MediaType.APPLICATION_JSON_UTF8)// 设置请求的文本类型
                        .content(jsonUser)  json数据
        )
                // 响应断言
                .andExpect(MockMvcResultMatchers.status().isOk()) // 断言状态码为200
                .andExpect(MockMvcResultMatchers.jsonPath("$.data.length()").value(6))
                .andDo(MockMvcResultHandlers.print());
    }

}
测试结果打印:

5.通过swagger调用
相信无论是前端还是后端开发,都或多或少地被接口文档折磨过。前端经常抱怨后端给的接口文档与实际情况不一致。后端又觉得编写及维护接口文档会耗费不少精力,经常来不及更新。其实无论是前端调用后端,还是后端调用后端,都期望有一个好的接口文档。但是这个接口文档对于程序员来说,就跟注释一样,经常会抱怨别人写的代码没有写注释,然而自己写起代码起来,最讨厌的,也是写注释。所以仅仅只通过强制来规范大家是不够的,随着时间推移,版本迭代,接口文档往往很容易就跟不上代码了。
SpringBoot 整合swagger2.x

1.添加依赖
        <dependency>
            <groupId>io.springfox</groupId>
            <artifactId>springfox-swagger2</artifactId>
            <version>2.9.2</version>
        </dependency>
        <dependency>
            <groupId>io.springfox</groupId>
            <artifactId>springfox-swagger-ui</artifactId>
            <version>2.9.2</version>
        </dependency>
2. 添加swagger配置类
package com.springboot.config;

import org.springframework.context.annotation.Bean;
import org.springframework.context.annotation.Configuration;
import springfox.documentation.builders.ApiInfoBuilder;
import springfox.documentation.builders.PathSelectors;
import springfox.documentation.builders.RequestHandlerSelectors;
import springfox.documentation.service.Contact;
import springfox.documentation.spi.DocumentationType;
import springfox.documentation.spring.web.plugins.Docket;
import springfox.documentation.swagger2.annotations.EnableSwagger2;

@Configuration
@EnableSwagger2
public class SwaggerConfig {
    //用来告诉springfox 怎么去生成swagger所需要的数据规范
    @Bean
    public Docket createRestApi() {
        return new Docket(DocumentationType.SWAGGER_2) //生成swagger2规范的文档
                .pathMapping("/")//设置哪些接口会映射到swagger文档中
                .select()  //接口选择器
                //告诉springfox哪些接口要生成swagger文档
                .apis(RequestHandlerSelectors.basePackage("com.springmvc.controller"))
                //设置哪些接口生成在swagger文档上
                .paths(PathSelectors.any())
                //描述文档的主题信息
                .build().apiInfo(new ApiInfoBuilder()
                        .title("SpringBoot整合Swagger")
                        .description("SpringBoot整合Swagger,详细信息......")
                        .version("1.0")
                        .contact(new Contact("fztx","www.baidu.cn","123@qq.com"))
                        .build());
    }
}
访问:http://localhost:8080/swagger-ui.html
3. 配置htpp接口
@RestController
@Api(value="用户controller",tags={"用户操作接口"})
@RequestMapping("/user")
public class UserController {

    @GetMapping("/{id}")
    @ApiOperation("根据id查询用户的接口")
    @ApiImplicitParam(name = "id", value = "用户id", defaultValue = "99", required = true)
    public User getUserById(@PathVariable Integer id) {
        User user = new User();
        user.setId(id);
        return user;
    }
}
4. 配置pojo类
@ApiModel(value="user对象",description="用户对象user")
public class User {
    @ApiModelProperty(value = "用户id")
    private Integer id;
    @ApiModelProperty(value = "用户名")
    private String username;
    @ApiModelProperty(value = "用户地址")
    private String address;

    public Integer getId() {
        return id;
    }

    public void setId(Integer id) {
        this.id = id;
    }

    public String getUsername() {
        return username;
    }

    public void setUsername(String username) {
        this.username = username;
    }

    public String getAddress() {
        return address;
    }

    public void setAddress(String address) {
        this.address = address;
    }
}访问:http://localhost:8080/swagger-ui.html
扩展: 实现通过aop和swagger记录请求日志
pom依赖
<!--aop的场景启动器 -->
        <dependency>
            <groupId>org.springframework.boot</groupId>
            <artifactId>spring-boot-starter-aop</artifactId>
        </dependency>
LogAspect
package com.springboot.aspect;

import io.swagger.annotations.Api;
import io.swagger.annotations.ApiOperation;
import org.aspectj.lang.ProceedingJoinPoint;
import org.aspectj.lang.annotation.Around;
import org.aspectj.lang.annotation.Aspect;
import org.slf4j.Logger;
import org.slf4j.LoggerFactory;
import org.springframework.stereotype.Component;

@Aspect
@Component
public class LogAspect {
    Logger logger = LoggerFactory.getLogger(LogAspect.class);
    @Around("execution(* com.springboot.controller.*.*(..)) && @annotation(apiOperation)")
    public Object around(ProceedingJoinPoint joinPoint, ApiOperation apiOperation) throws Throwable {

        StringBuilder loginfo = new StringBuilder("用户访问了:");
        Class<?> controller = joinPoint.getThis().getClass();
        Api api = controller.getAnnotation(Api.class);
        if(api != null){
            loginfo.append(api.value());
        }
        String value = apiOperation.value();

        loginfo.append(value);

        logger.info(loginfo.toString());

        return joinPoint.proceed();
    }
}
测试:

swagger2 注解整体说明
用于 controller 类上:
| 注解 | 说明 |
| @Api | 对请求类的说明 |
用于方法上面 (说明参数的含义):
| 注解 | 说明 |
| @ApiOperation | 方法的说明 |
| @ApiImplicitParams、@ApiImplicitParam | 方法的参数的说明;@ApiImplicitParams 用于指定单个参数的说明 |
用于方法上面 (返回参数或对象的说明):
| 注解 | 说明 |
| @ApiResponses、@ApiResponse | 方法返回值的说明 ;@ApiResponses 用于指定单个参数的说明 |
对象类:
| 注解 | 说明 |
| @ApiModel | 用在 JavaBean 类上,说明 JavaBean 的 用途 |
| @ApiModelProperty | 用在 JavaBean 类的属性上面,说明此属性的的含议 |
@API: 请求类的说明
@API: 放在 请求的类上, 与 @Controller 并列, 说明类的作用, 如用户模块, 订单类等.
tags="说明该类的作用" value="该参数没什么意义, 所以不需要配置"示例:
@API(tags="订单模块")
@Controller
public class OrderController {

}
@API 其它属性配置:
| 属性名称 | 备注 |
| value | url 的路径值 |
| tags | 如果设置这个值、value 的值会被覆盖 |
| description | 对 api 资源的描述 |
| basePath | 基本路径 |
| position | 如果配置多个 Api 想改变显示的顺序位置 |
| produces | 如, “application/json, application/xml” |
| consumes | 如, “application/json, application/xml” |
| protocols | 协议类型,如: http, https, ws, wss. |
| authorizations | 高级特性认证时配置 |
| hidden | 配置为 true ,将在文档中隐藏 |
@ApiOperation: 方法的说明
@ApiOperation:"用在请求的方法上, 说明方法的作用"
    value="说明方法的作用"
    notes="方法的备注说明"
@ApiImplicitParams,@ApiImplicitParam: 方法参数的说明
@ApiImplicitParams: 用在请求的方法上, 包含一组参数说明
@ApiImplicitParam: 对单个参数的说明
name: 参数名
value: 参数的汉字说明, 解释
required: 参数是否必须传
paramType: 参数放在哪个地方
. header --> 请求参数的获取:@RequestHeader
. query --> 请求参数的获取:@RequestParam
. path(用于 restful 接口)--> 请求参数的获取:@PathVariable
. body(请求体)--> @RequestBody User user . form(普通表单提交)
dataType: 参数类型, 默认 String, 其它值 dataType="Integer"
defaultValue: 参数的默认值
示列:
@API(tags="用户模块")
@Controller
public class UserController {
    @ApiOperation(value="用户登录",notes="随边说点啥")
    @ApiImplicitParams({
        @ApiImplicitParam(name="mobile",value="手机号",required=true,paramType="form"),
        @ApiImplicitParam(name="password",value="密码",required=true,paramType="form"),
        @ApiImplicitParam(name="age",value="年龄",required=true,paramType="form",dataType="Integer")
    })
    @PostMapping("/login")
    public JsonResult login(@RequestParam String mobile, @RequestParam String password,
    @RequestParam Integer age){
        //...
        return JsonResult.ok(map);
    }
}
@ApiResponses,@ApiResponse: 方法返回值的说明
@ApiResponses: 方法返回对象的说明
@ApiResponse: 每个参数的说明
code: 数字, 例如 400
message: 信息, 例如 "请求参数没填好"
response: 抛出异常的类
示例:
@API(tags="用户模块")
@Controller
public class UserController {
    @ApiOperation("获取用户信息")
    @ApiImplicitParams({
        @ApiImplicitParam(paramType="query", name="userId", dataType="String", required=true, value="用户 Id")
    })
    @ApiResponses({
        @ApiResponse(code = 400, message = "请求参数没填好"),
        @ApiResponse(code = 404, message = "请求路径没有或页面跳转路径不对")
    })
    @ResponseBody
    @RequestMapping("/list")
    public JsonResult list(@RequestParam String userId) {
        ...
        return JsonResult.ok().put("page", pageUtil);
    }
}
@ApiModel: 用于 JavaBean 上面, 表示一个 JavaBean(如: 响应数据) 的信息
@ApiModel: 用于 JavaBean 的类上面, 表示此 JavaBean 整体的信息
(这种一般用在 post 创建的时候, 使用 @RequestBody 这样的场景,
请求参数无法使用 @ApiImplicitParam 注解进行描述的时候 )
@ApiModelProperty: 用在 JavaBean 类的属性上面, 说明属性的含义
示例:
@ApiModel(description= "返回响应数据")
public class RestMessage implements Serializable{
    @ApiModelProperty(value = "是否成功")
    private boolean success=true;
    @ApiModelProperty(value = "返回对象")
    private Object data;
    @ApiModelProperty(value = "错误编号")
    private Integer errCode;
    @ApiModelProperty(value = "错误信息")
    private String message;
    /* getter/setter 略 */
}
2.SpringMVC自动配置原理分析
Spring Boot为Spring MVC提供了自动配置,可与大多数应用程序完美配合。自动配置在Spring的默认值之上添加了以下功能:
1.包含ContentNegotiatingViewResolver和BeanNameViewResolver。
ViewResolver 都是SpringMVC内置的视图解析器
ContentNegotiatingViewResolver:他并不会解析视图、而是委派给其他视图解析器进行解析
所有视图解析器,都会根据返回的视图名称进行解析视图 resolveViewName
ContentNegotiatingViewResolver
委派给其他视图解析器进行解析:
    public View resolveViewName(String viewName, Locale locale) throws Exception {
        RequestAttributes attrs = RequestContextHolder.getRequestAttributes();
        Assert.state(attrs instanceof ServletRequestAttributes, "No current ServletRequestAttributes");
        List<MediaType> requestedMediaTypes = this.getMediaTypes(((ServletRequestAttributes)attrs).getRequest());
        if (requestedMediaTypes != null) {
            //获取所有匹配的视图
            List<View> candidateViews = this.getCandidateViews(viewName, locale, requestedMediaTypes);
            // 获取最终的这个
            View bestView = this.getBestView(candidateViews, requestedMediaTypes, attrs);
            if (bestView != null) {
                return bestView;
            }
        }

        String mediaTypeInfo = this.logger.isDebugEnabled() && requestedMediaTypes != null ? " given " + requestedMediaTypes.toString() : "";
        if (this.useNotAcceptableStatusCode) {
            if (this.logger.isDebugEnabled()) {
                this.logger.debug("Using 406 NOT_ACCEPTABLE" + mediaTypeInfo);
            }

            return NOT_ACCEPTABLE_VIEW;
        } else {
            this.logger.debug("View remains unresolved" + mediaTypeInfo);
            return null;
        }
    }
加载所有的视图解析器ViewResolver
    protected void initServletContext(ServletContext servletContext) {
        Collection<ViewResolver> matchingBeans = BeanFactoryUtils.beansOfTypeIncludingAncestors(this.obtainApplicationContext(), ViewResolver.class).values();
        ViewResolver viewResolver;
        if (this.viewResolvers == null) {
            this.viewResolvers = new ArrayList(matchingBeans.size());
            Iterator var3 = matchingBeans.iterator();

            while(var3.hasNext()) {
                viewResolver = (ViewResolver)var3.next();
                if (this != viewResolver) {
                    this.viewResolvers.add(viewResolver);
                }
            }
        } else {
            for(int i = 0; i < this.viewResolvers.size(); ++i) {
                viewResolver = (ViewResolver)this.viewResolvers.get(i);
                if (!matchingBeans.contains(viewResolver)) {
                    String name = viewResolver.getClass().getName() + i;
                    this.obtainApplicationContext().getAutowireCapableBeanFactory().initializeBean(viewResolver, name);
                }
            }
        }

        AnnotationAwareOrderComparator.sort(this.viewResolvers);
        this.cnmFactoryBean.setServletContext(servletContext);
    }
由以上代码可以得出结论,它是从Spring IOC容器获得ViewResolver类型Bean,那么我们可以自己定制一个ViewResolver,ContentNegotiatingViewResolver也会帮我们委派解析
@Bean
public ViewResolver fztxViewResolver(){
    InternalResourceViewResolver resolver = new InternalResourceViewResolver();
    resolver.setPrefix("/");
    resolver.setSuffix(".html");
    return resolver;
}- BeanNameViewResolver
- 会根据handler方法返回的视图名称 (fztx), 去ioc容器中到到名字叫fztx的一个Bean,并且这个bean要实现了View接口
- 示例:
@RequestMapping("/test")
    public String test() {
        return "fztx";
    }
可以配置一个名字叫fztx的视图(View)
package com.springboot.view;

import org.springframework.stereotype.Component;
import org.springframework.web.servlet.View;

import javax.servlet.http.HttpServletRequest;
import javax.servlet.http.HttpServletResponse;
import java.util.Map;

@Component
public class Fztx implements View {
    @Override
    public String getContentType() {
        return "text/html";
    }

    @Override
    public void render(Map<String, ?> map, HttpServletRequest httpServletRequest, HttpServletResponse httpServletResponse) throws Exception {
        httpServletResponse.getWriter().print("Welcome to FztxView");
    }
}
2.支持提供静态资源。包括对WebJars的支持(在本文档的后面部分中有介绍)
以前要访问jpg\css、js 等 这些静态资源文件, 需要在web.xml配置 ,在springboot不需要配置,只需要放在约定文件夹中就可以(约定大于配置)
原理:
WebJars: 就是将静态资源放在jar包中进行访问,webjars官网:WebJars - Web Libraries in Jars
		@Override
		public void addResourceHandlers(ResourceHandlerRegistry registry) {
			if (!this.resourceProperties.isAddMappings()) {
				logger.debug("Default resource handling disabled");
				return;
			}
			addResourceHandler(registry, "/webjars/**", "classpath:/META-INF/resources/webjars/");
			addResourceHandler(registry, this.mvcProperties.getStaticPathPattern(), (registration) -> {
				registration.addResourceLocations(this.resourceProperties.getStaticLocations());
				if (this.servletContext != null) {
					ServletContextResource resource = new ServletContextResource(this.servletContext, SERVLET_LOCATION);
					registration.addResourceLocations(resource);
				}
			});
}- 当访问/webjars/** 时 就会去classpath:/META-INF/resources/webjars/ 对应进行映射
- 当访问http://localhost:8080/webjars/jquery/3.5.1/jquery.js 对应映射到 /META-INF/resources/webjars/jquery/3.5.1/jquery.js

- 在static文件中访问的静态资源: 又是什么原理呢?:

getStaticLocations()
public String[] getStaticLocations() {
			return this.staticLocations;
		}
对应的映射路径

配置欢迎页:
private Optional<Resource> getWelcomePage() {
    // 拿到上面静态资源地址
   String[] locations = getResourceLocations(this.resourceProperties.getStaticLocations());
   // 去里面找一个index.html的首页
   return Arrays.stream(locations).map(this::getIndexHtml).filter(this::isReadable).findFirst();
}也可以通过配置文件指定具体的静态资源地址:
spring.resources.static-locations=classpath:/static/3.自动注册Converter,GenericConverter和Formatter Bean类。
		@Bean
		@Override
		public FormattingConversionService mvcConversionService() {
			Format format = this.mvcProperties.getFormat();
			WebConversionService conversionService = new WebConversionService(new DateTimeFormatters()
					.dateFormat(format.getDate()).timeFormat(format.getTime()).dateTimeFormat(format.getDateTime()));
			addFormatters(conversionService);
			return conversionService;
		}
使用方式大家可以参考SpringMVC基于注解使用:类型转换&数据格式化&数据验证
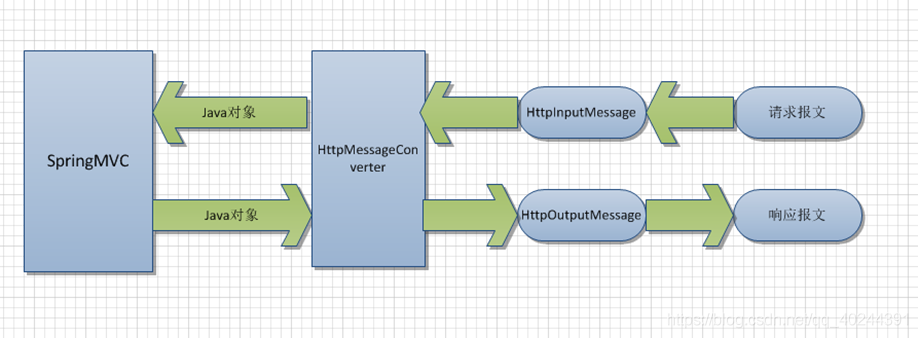
4.支持HttpMessageConverters(在本文档后面介绍)。
HttpMessageConverters 负责http请求和响应的报文处理

5.自动注册MessageCodesResolver(在本文档后面介绍)。
修改4xx 错误下 格式换转换出错 类型转换出错的 错误代码:
以前的格式:errorCode + "." + object name + "." + field
typeMismatch.user.birthday
可以通过
spring.mvc.message-codes-resolver-format=postfix_error_code将格式修改为:object name + "." + field + "." + errorCode
6.静态index.html支持。
在springboot中可以直接返回html的视图
因为在自动WebMvcAutoConfiguration配置类配置
		@Bean
		@ConditionalOnMissingBean
		public InternalResourceViewResolver defaultViewResolver() {
			InternalResourceViewResolver resolver = new InternalResourceViewResolver();
			resolver.setPrefix(this.mvcProperties.getView().getPrefix());
			resolver.setSuffix(this.mvcProperties.getView().getSuffix());
			return resolver;
		}
所以就可以通过在配置文件中完成
spring.mvc.view.prefix=/pages/
spring.mvc.view.suffix=.html
7.自动使用ConfigurableWebBindingInitializer bean(在本文档后面部分中介绍)。
		@Override
		protected ConfigurableWebBindingInitializer getConfigurableWebBindingInitializer(
				FormattingConversionService mvcConversionService, Validator mvcValidator) {
			try {
				return this.beanFactory.getBean(ConfigurableWebBindingInitializer.class);
			}
			catch (NoSuchBeanDefinitionException ex) {
				return super.getConfigurableWebBindingInitializer(mvcConversionService, mvcValidator);
			}
		}


 563
563


 被折叠的 条评论
为什么被折叠?
被折叠的 条评论
为什么被折叠?
 到【灌水乐园】发言


