


 该博客介绍了如何使用Labelme进行图像标注,然后通过json_to_dataset.py脚本将标注转换为PNG格式,用于DeepLabv3+分割网络训练。首先收集图片并用Labelme标注,接着将标注文件与图片合并,运行脚本生成PNG标注图,最后将图片和标注分别存入指定目录。此外,还涉及了数据集的切分,通过voc_annotation.py完成训练集和验证集划分。
Tensorflow2.0—DeepLab v3+分割网络原理及代码解析(二)-数据生成
这篇blog主要介绍下数据的生成~
一、原始图片的标注
首先,第一步就是要收集你训练的图片,这个毋庸置疑哈,然后用labelme去标注。这里选择labelme而不是选择labelimg标注工具的原因是labelme支持分割网络的标注。标注之后,应该是这样的~
一张图片对应一个标注好的json文件~~~~
二、转换png格式标注文件
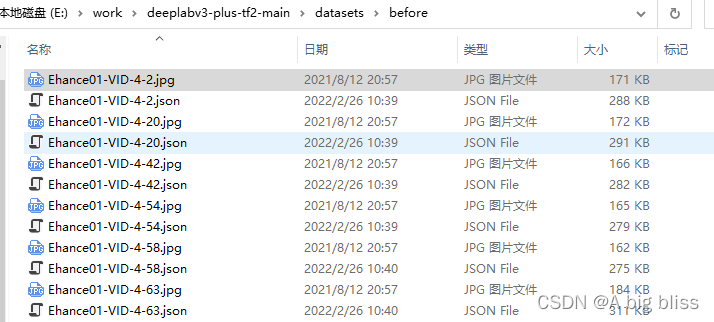
然后,将图片和标注文件一起放到datasets/before里面,然后运行json_to_dataset.py:
import base64
import json
import os
import os.path as osp
import numpy as np
import PIL.Image
from labelme import utils

if __name__ == '__main__':
    jpgs_path = "datasets/JPEGImages" #保存原图
    pngs_path = "datasets/SegmentationClass" #保存转换后的png标注图片
    classes = ["_background_", "dog"] # _background_ 不能丢

    count = os.listdir("./datasets/before/")
    for i in range(0, len(count)):
        path = os.path.join("./datasets/before", count[i])

        if os.path.isfile(path) and path.endswith('json'):
            data = json.load(open(path, encoding='utf-8'))

            if data['imageData']:
                imageData = data['imageData']
            else:
                imagePath = os.path.join(os.path.dirname(path), data['imagePath'])
                with open(imagePath, 'rb') as f:
                    imageData = f.read()
                    imageData = base64.b64encode(imageData).decode('utf-8')

            img = utils.img_b64_to_arr(imageData)
            label_name_to_value = {'_background_': 0}
            for shape in data['shapes']:
                label_name = shape['label']
                if label_name in label_name_to_value:
                    label_value = label_name_to_value[label_name]
                else:
                    label_value = len(label_name_to_value)
                    label_name_to_value[label_name] = label_value

            # label_values must be dense
            label_values, label_names = [], []
            for ln, lv in sorted(label_name_to_value.items(), key=lambda x: x[1]):
                label_values.append(lv)
                label_names.append(ln)
            assert label_values == list(range(len(label_values)))

            lbl = utils.shapes_to_label(img.shape, data['shapes'], label_name_to_value)

            PIL.Image.fromarray(img).save(osp.join(jpgs_path, count[i].split(".")[0] + '.jpg'))

            new = np.zeros([np.shape(img)[0], np.shape(img)[1]])
            for name in label_names:
                index_json = label_names.index(name)
                index_all = classes.index(name)
                new = new + index_all * (np.array(lbl) == index_json)

            utils.lblsave(osp.join(pngs_path, count[i].split(".")[0] + '.png'), new)
            print('Saved ' + count[i].split(".")[0] + '.jpg and ' + count[i].split(".")[0] + '.png')
其中,有两个函数值得注意一点(都是labelme库中的)
def img_b64_to_arr(img_b64):
    f = io.BytesIO()
    f.write(base64.b64decode(img_b64))
    img_arr = np.array(PIL.Image.open(f))
    return img_arr
该函数将json文件中"iamgeData"字段的字符转换为原始图像
def shapes_to_label(img_shape, shapes, label_name_to_value, type='class'):
    assert type in ['class', 'instance']

    cls = np.zeros(img_shape[:2], dtype=np.int32)
    if type == 'instance':
        ins = np.zeros(img_shape[:2], dtype=np.int32)
        instance_names = ['_background_']
    for shape in shapes:
        points = shape['points']
        label = shape['label']
        shape_type = shape.get('shape_type', None)
        if type == 'class':
            cls_name = label
        elif type == 'instance':
            cls_name = label.split('-')[0]
            if label not in instance_names:
                instance_names.append(label)
            ins_id = instance_names.index(label)
        cls_id = label_name_to_value[cls_name]
        mask = shape_to_mask(img_shape[:2], points, shape_type)
        cls[mask] = cls_id
        if type == 'instance':
            ins[mask] = ins_id

    if type == 'instance':
        return cls, ins
    return cls
该函数的作用是经过掩码生成png格式的标注文件
最后,会将before里面的图片和标注文件分别存放至JPEGImages和SegmentationClass中。
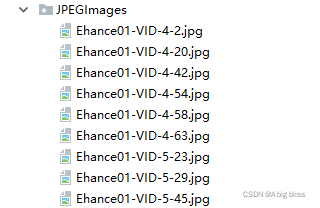
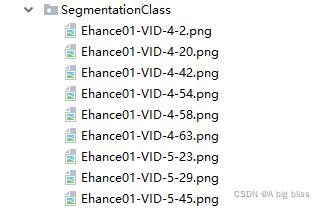
然后将JPEGImages的所有图片复制到VOCdevkit/VOC2007/JPEGImages中,将SegmentationClass的所有png文件复制到VOCdevkit/VOC2007/SegmentationClass中。
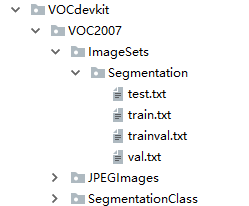
三、数据集切分
运行voc_annotation.py,即可完成训练集,验证集的切分,并且生成train.txt、trainval.txt、test.txt、val.txt


 被折叠的 条评论
为什么被折叠?
被折叠的 条评论
为什么被折叠?
 到【灌水乐园】发言


