


一、安装Tensorflow
我的之前就已经安装好Anaconda了,所以直接打开Anconda Prompt,输入指令:pip install tensorflow -i https://pypi.tuna.tsinghua.edu.cn/simple
此时我出现了这样的一个错误:
ERROR: Cannot uninstall 'wrapt'. It is a distutils installed project and thus we cannot accurately determine which files belong to it which would lead to only a partial uninstall.
大概的意思就是在安装tensorflow时需要卸载wrapt这个包,但是无法完全卸载导致下载tensorflow下载失败,所以为了解决这个问题,输入了如下指令:
pip install wrapt --ignore-installed
这条指令允许了wrapt已存在的前提下,重新再加载wrap包。
ok,接下去就可以再次运行pip install tensorflow -i https://pypi.tuna.tsinghua.edu.cn/simple继续下tensorflow了。
下载成功后,当我们在python中导入tensorflow包时:import tensorflow,会出现如下提示:

二、安装CUDA
这说明我们还需配置cudnn和cuda这两个包。
那么我们就安装cuda和cudnn的包,首先确认电脑是有显卡的,然后就可以打开显卡驱动查看适合的cuda版本。具体步骤如下:
- 打开显卡驱动:

2. 点击系统信息

3. 点击组件:

这下知道我们要下载的cuda版本为11.1,那开始下载:
各版本cuda的官方下载链接
下载步骤我忘记截图了,反正就是下载下来这个:

然后下载完后在cmd中输入nvcc -V出现这个:
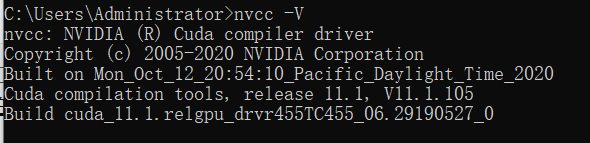
如果输入nvcc -V没有反应呢,就把CUDA的bin目录(C:\Program Files\NVIDIA GPU Computing Toolkit\CUDA\v11.1\bin)添加到环境变量。
三、安装cudnn
这个要在这个链接上下载:https://developer.nvidia.com/cudnn 这个需要自己申请个账号才能下载。
下载下来的是这样的一个压缩包:

然后选择第二个压缩包将里面的bin,include,lib/x64 三个文件夹与C:\Program Files\NVIDIA GPU Computing Toolkit\CUDA\v11.1中这三个对应的文件夹合并在一起。

测试下是否成功

测试代码如下:
import tensorflow as tf
a = tf.constant(1.)
b = tf.constant(2.)
print(a+b)
print('GPU:', tf.test.is_gpu_available())


 9757
9757


 被折叠的 条评论
为什么被折叠?
被折叠的 条评论
为什么被折叠?
 到【灌水乐园】发言


