


目录
1、使用
1.使用Servlet API
主启动类写ServletComponentScan注解
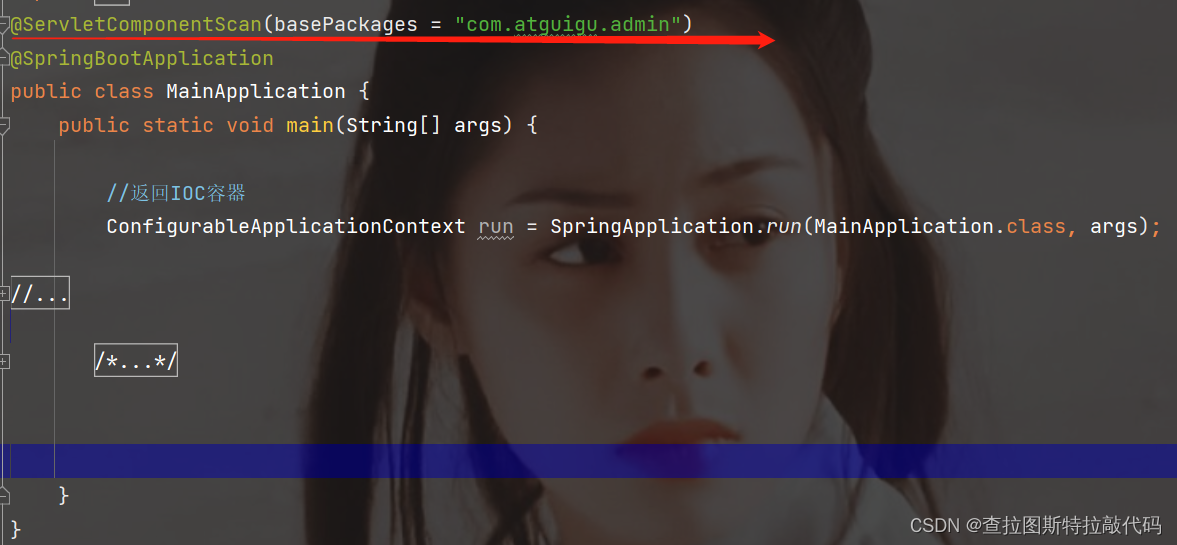
Servlet类写@WebServlet(@WebFilter、@WebListener)注解

注意:
直接响应,没有经过Spring的拦截器
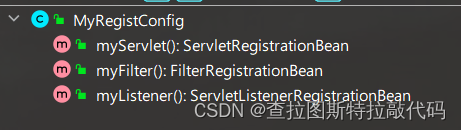
2、使用RegistrationBean,
ServletRegistrationBean、FilterRegistrationBean、ServletListenerRegistrationBean
准备好MyServlet、MyFilter、MyServletContextListener类,无需在其上写注解。
编写MyRegistConfig类,如下图
/**
 * 1、MyServlet --> /my
 * 2、DispatcherServlet --> /
 */
// (proxyBeanMethods = true):保证依赖的组件始终是单实例的
@Configuration(proxyBeanMethods = true)
public class MyRegistConfig {

    @Bean
    public ServletRegistrationBean myServlet(){
        MyServlet myServlet = new MyServlet();

        return new ServletRegistrationBean(myServlet,"/my","/my02");
    }


    @Bean
    public FilterRegistrationBean myFilter(){

        MyFilter myFilter = new MyFilter();
//        return new FilterRegistrationBean(myFilter,myServlet());
        FilterRegistrationBean filterRegistrationBean = new FilterRegistrationBean(myFilter);
        filterRegistrationBean.setUrlPatterns(Arrays.asList("/my","/css/*"));
        return filterRegistrationBean;
    }

    @Bean
    public ServletListenerRegistrationBean myListener(){
        MySwervletContextListener mySwervletContextListener = new MySwervletContextListener();
        return new ServletListenerRegistrationBean(mySwervletContextListener);
    }
}
2、源码解析
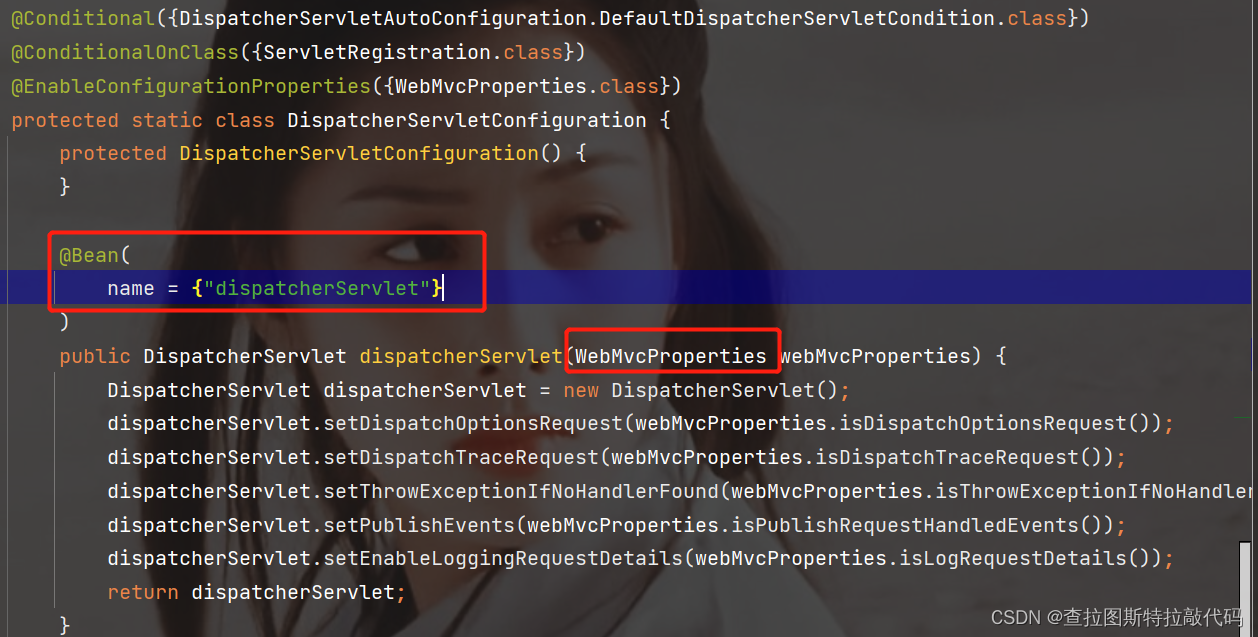
1、DispatcherServlet如何注册进来
容器中自动配置dispatcherServlet,属性绑定在WebMvcProperties中。
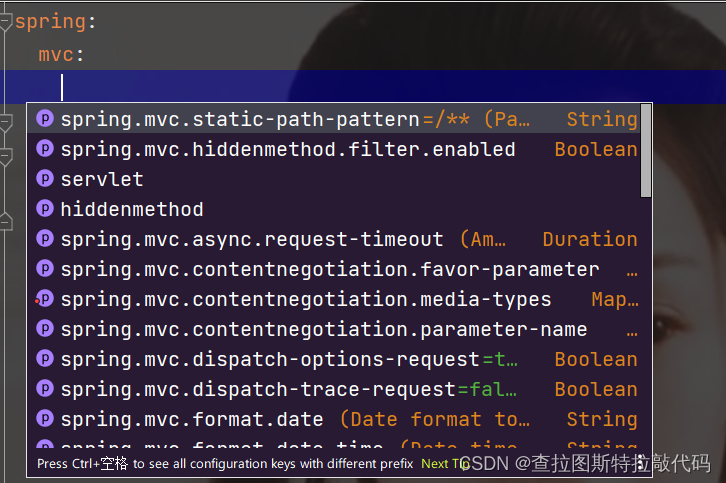
 若要修改默认,在yml文件中写如下图:
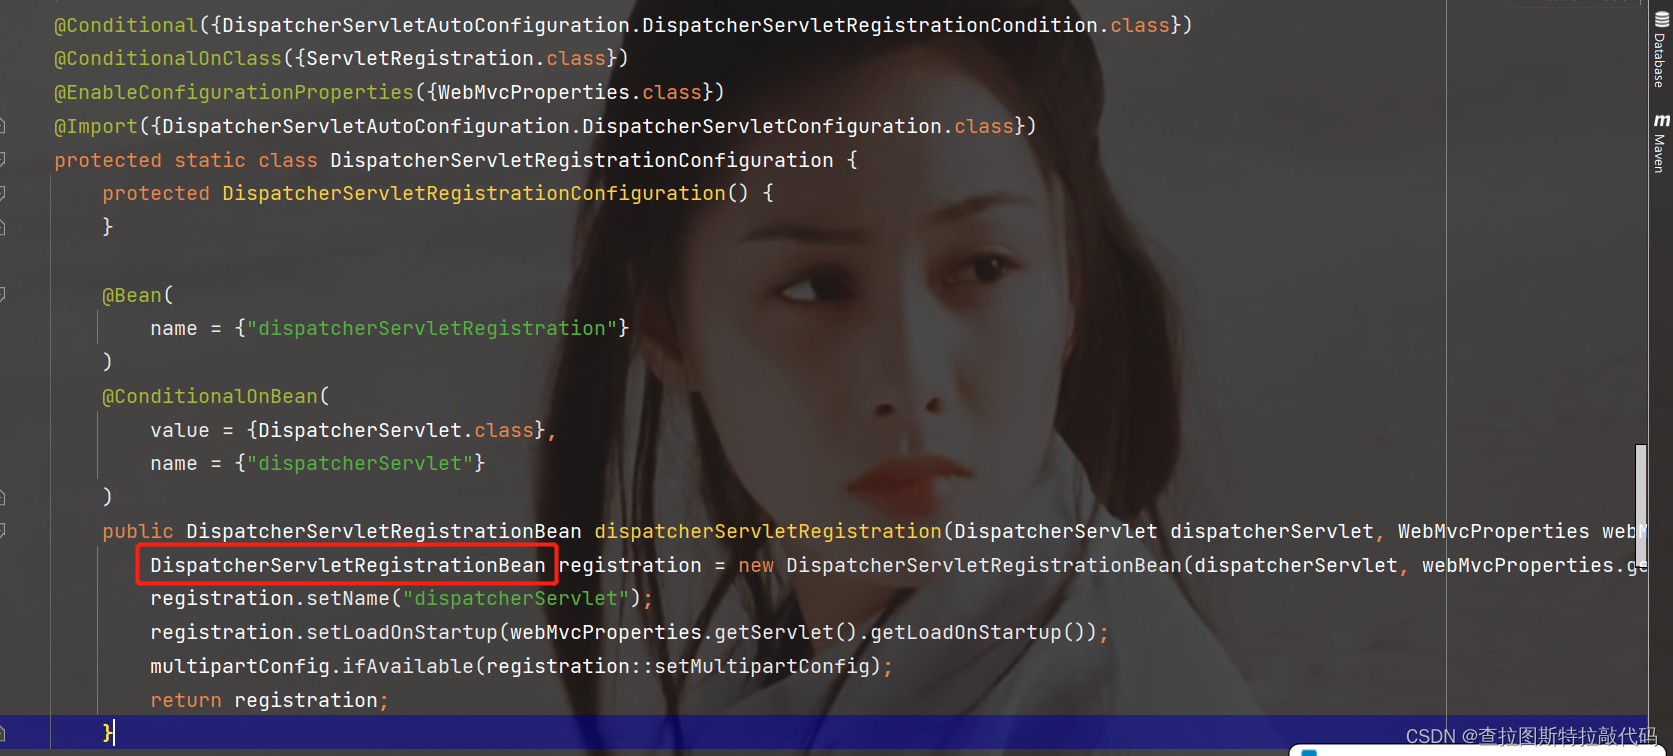
通过DispatcherServletRegistrationBea把dispatcherServlet注册进来,如下图
而 DispatcherServletRegistrationBea继承自ServletRegistrationBean,如下下图
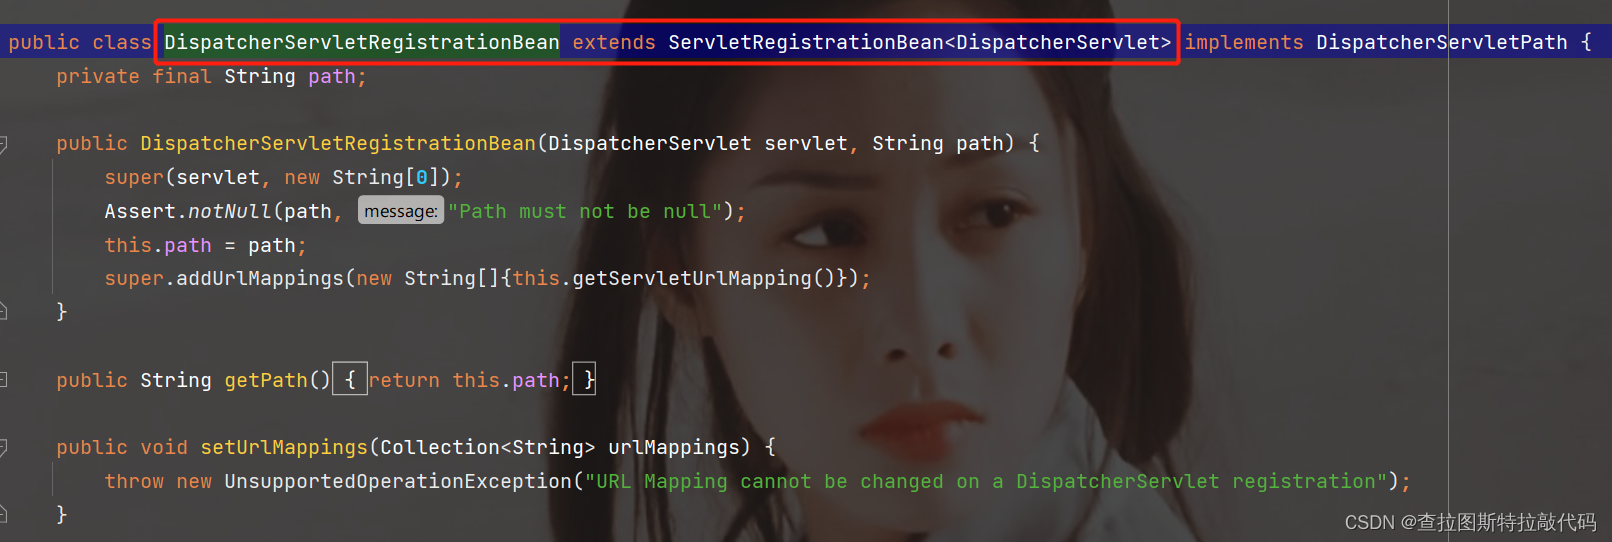
它的拦截路径由下列语句设置:
DispatcherServletRegistrationBean registration = new DispatcherServletRegistrationBean(dispatcherServlet, webMvcProperties.getServlet().getPath());其中,getPath最终在WebMvcProperties中设置,如下图

默认映射的是/路径,若想修改dispatchServlrt的拦截路径,需要在yml文件中如下图设置

2、优先匹配原则
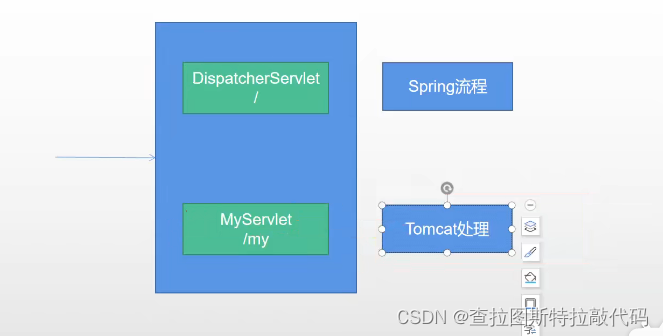
DispatchServlet可以处理/路径的请求,但是如果容器中存在MyServlet可以处理更精准的/My请求。则/My请求交由MyServlet处理,并不走Spring的流程


 319
319


 被折叠的 条评论
为什么被折叠?
被折叠的 条评论
为什么被折叠?
 到【灌水乐园】发言


