


前言
在做java接口自动化中,我们常常需要依赖多个接口,A接口依赖B,C,D接口的响应作为请求参数;或者URL中的参数是从其他接口中提取返回值作获取参数这是必不可少的。那么怎么实现呢?下面就来介绍多业务依赖多接口的代码思路。
思路:
1、先new一个HttpClientUtils对象,构造一个queryParam的Map用来放请求参数 ,再构造 一个headers的Map用来放请求头
2、调用get/post请求 获得请求返回值
3、用jsonpath技术, 对A接口中的响应值data取出来
4、遍历获取到的list 然后for循环每条数据
5、close关闭HttpClientUtils对象 释放资源
首先,我们来看下 getCategoryBookList 根据分类名称查询书籍接口 在Controller层代码实现如图所示
 /**
     * 根据分类名称查询书籍
     *
     * @return
     */
    @GetMapping("/getCategoryBookList")
    @ResponseBody
    public CommonResponse<List<Book>> getCategoryBookList(@RequestParam(value = "categoryName") String name) {
        List<Book> categoryList = bookService.getCategoryBookList(name);
        CommonResponse response = CommonResponse.successInstance(categoryList);
        return response;
    }
代码解释
CommonResponse这个类 是与前端交互用的 因为这个类里面还有请求的statusCode msg
data,如果你想把httpClient调用接口的返回值 返给前端
就将返回值设置到CommonResponse的data中就行@RequestParam(value = "categoryName")如果是问号后面拼的参数 这个用@RequestParam来取,告诉springboot这个name对应的就是参数中的categoryName,就是说前端页面给你传的参数名叫categoryName但是你代码中写的变量名是name如果不加这个参数 是接收不到的 所以需要注解映射CommonResponse.successInstance(categoryList)通用返回值,返回成功message,返回数据data,返回总条数count
其次,我们需要提取/getCategoryBookList接口返回的bookName值
使用JsonPath提取,代码如下
    @GetMapping("/returnHttpGet")
    @ResponseBody
    public CommonResponse returnHttpGet(@RequestParam(value = "categoryName") String categoryName) {
        String url = "http://localhost:9527/book/getCategoryBookList";
        HttpClientUtils client = new HttpClientUtils(null);
        Map<String, String> headers = new HashMap<>();
        headers.put("Content-Type", "application/x-www-form-urlencoded");
        Map<String, String> queryParam = new HashMap<>();
        queryParam.put("categoryName", categoryName);

        String result = "";
        try {
            result = client.get(String.class, url, queryParam, headers);
            System.out.println(result);
            //使用jsonpath取出响应数据中的bookName值
            List<String> bookNames = JsonPath.read(result, "$.data.[*].bookName");
           return CommonResponse.successInstance(bookNames);//这个return返回来的值就是个json字符串,可以用jsonpath获取了
                client.close();
        }
        return CommonResponse.errorInstance(result);
     }
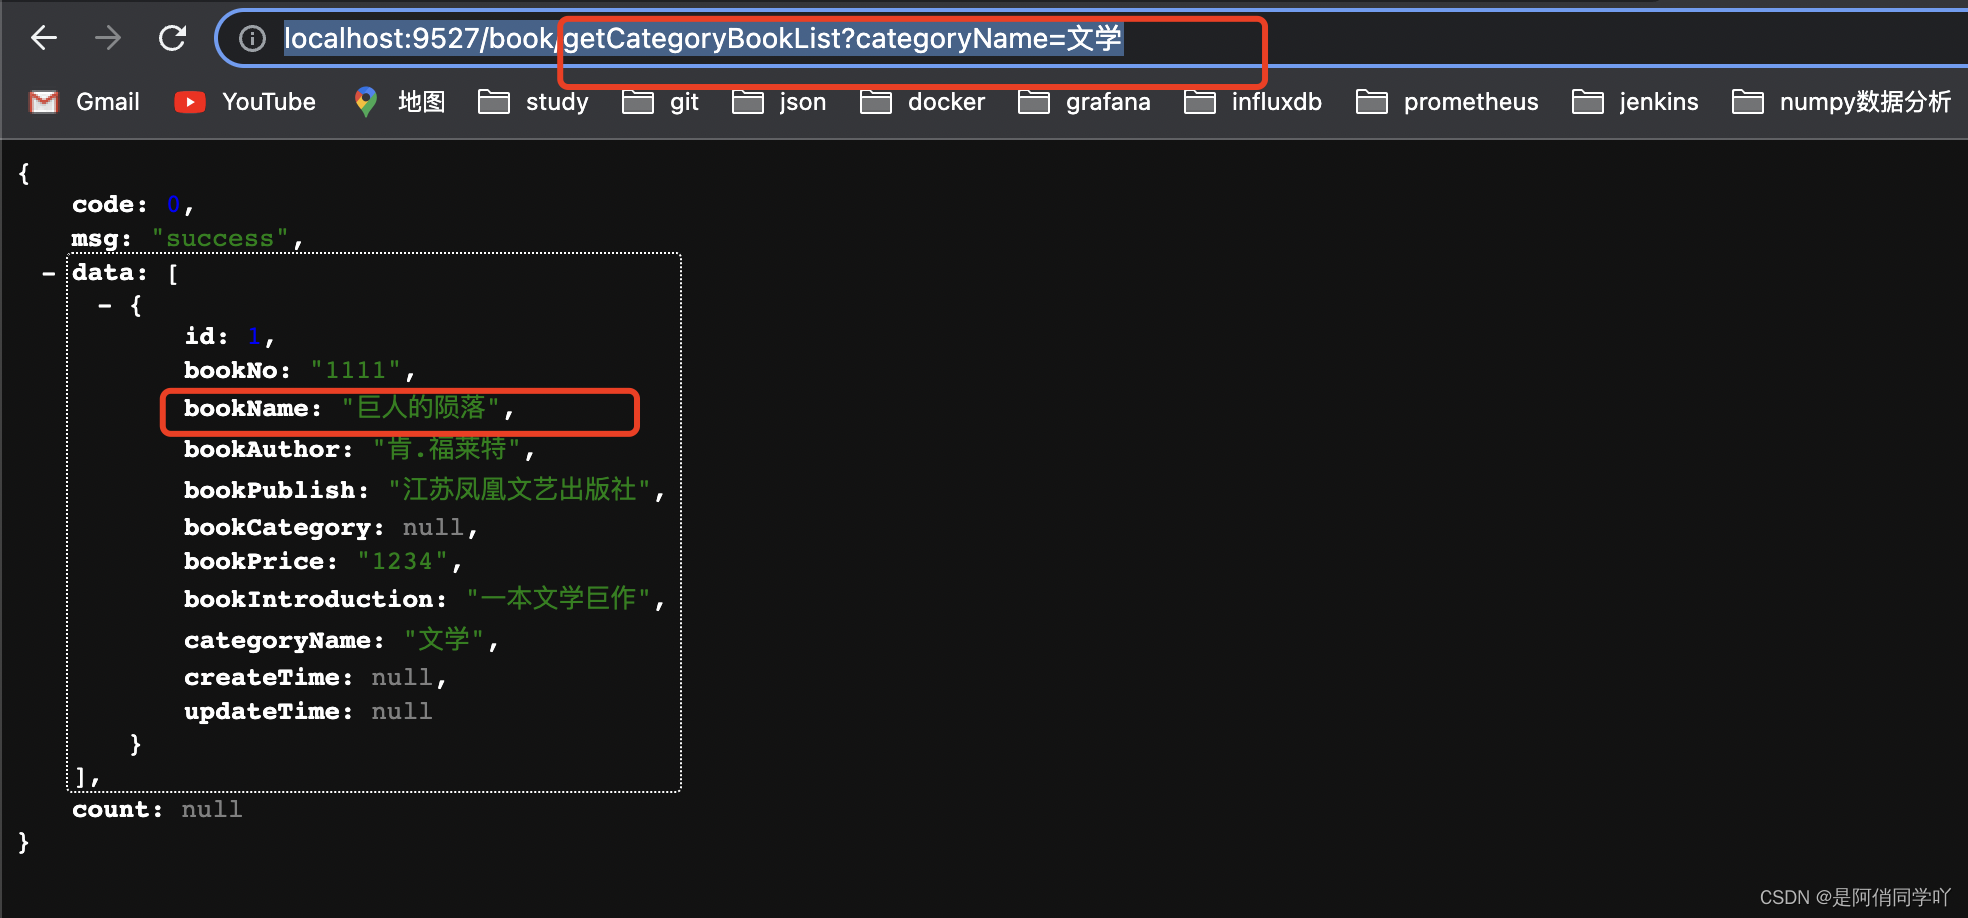
我们来在浏览器输入URL请求,已经成功提取到了这个bookName值

接下来,我们先看下下一个接口/getBookByBookName在Controler层的代码
 /**
     * 根据书的名称获取书籍信息
     * @param bookName
     * @return
     */
    @GetMapping("/getBookByBookName/{bookName}")
    @ResponseBody
    public CommonResponse<Book> getBookByBookName(@PathVariable String bookName){
        Book bName =   bookService.getBookByBookName(bookName);
        CommonResponse response = CommonResponse.successInstance(bName);
        return response;
    }
代码解释
@PathVariable String bookName@PathVariable是取url中的变量 ,会自动进行赋值拼接在URL后面
将bookName作为getBookByBookName`接口的请求参数,代码如下
 String result = "";
        try {
            result = client.get(String.class, url, queryParam, headers);
            System.out.println(result);
            //使用jsonpath取出响应数据中的bookName值
            List<String> bookNames = JsonPath.read(result, "$.data.[*].bookName");
            String bookName = "";
//            for (String str : bookNames) {
//                bookName = str; 这种遍历我注视掉了 每遍历一次书名就走一次请求 而且遍历出来的书名都不一样
//            }
            String urls = "http://localhost:9527/getBookByBookName";
            HttpClientUtils htp = new HttpClientUtils(null);
            Map<String, String> header = new HashMap<>();
            headers.put("Content-Type", "application/x-www-form-urlencoded");
            Map<String, String> param = new HashMap<>();
            param.put("bookName",  bookNames.get(0));

            String res = "";
            try {
                //将jsonpath取出的bookName作为请求参数
                res = client.get(String.class, urls, param, header);
                System.out.println(res);
            } catch (Exception e) {
                e.printStackTrace();
            }
            return CommonResponse.successInstance(bookNames);//这个return返回来的值就是个json字符串,可以用jsonpath获取了
        } catch (Exception e) {
            e.printStackTrace();
        } finally {
            client.close();
        }
        return CommonResponse.errorInstance(result);
    }
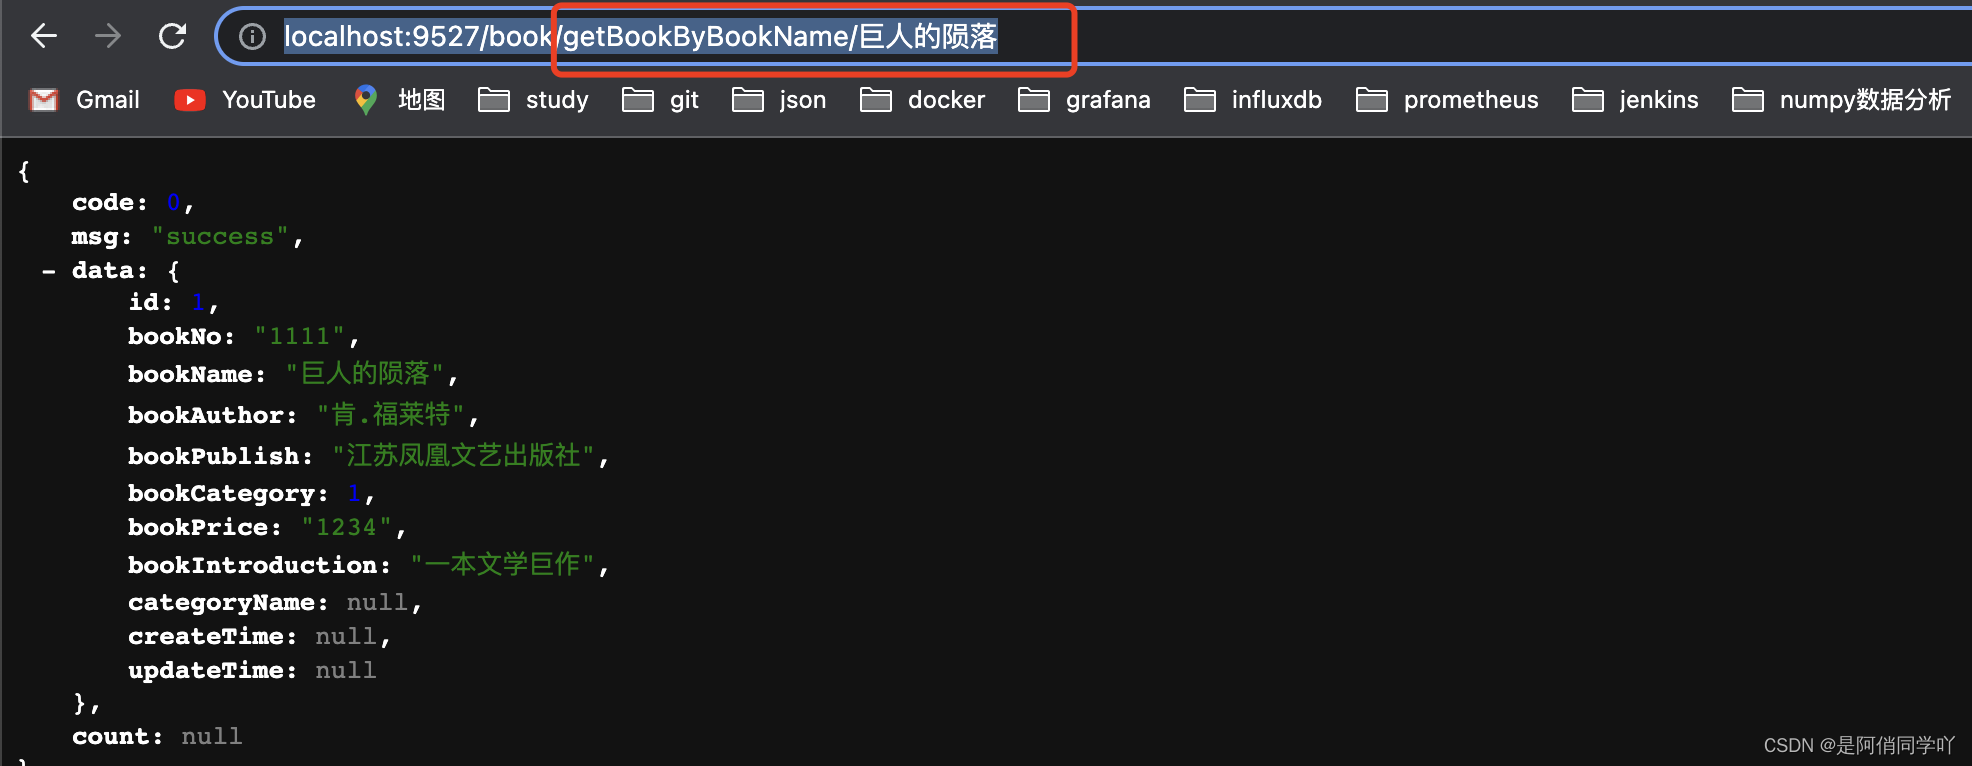
最后我们在浏览器输入URL请求,已经成功返回了第二个接口的返回值
到此就大功告成,完成了HttpClient+JsonPath提取响应值作为多个接口请求参数,解决多业务依赖关联


 778
778


 被折叠的 条评论
为什么被折叠?
被折叠的 条评论
为什么被折叠?
 到【灌水乐园】发言


