


SpringBoot笔记
2021年本科写毕业设计所学的笔记,此篇为补上传,本科的大量博客部署在Github上。
1 Spring
1.1 Spring降低耦合,控制反转的逻辑
前台通过调Service才能去掉Dao中的东西
2
   //service层
   private UserDao userDao;
       public void setUserDao(UserDao userDao) {
           this.userDao = userDao;
       }//set动态实现值得注入,不需要程序控制对象怎么来的,userDao接口的子类都可以!
3
  //service层
  private UserDao userDao = new UserDaoImpl();
  //这种就已经定死了 不行!
4
   public class MyTest {
       public static void main(String[] args) {
           //用户实际调用的是业务层,dao层不需要接触
           UserServiceImpl userService = new UserServiceImpl();
           UserDaoMySqlImpl userDaoMySql = new UserDaoMySqlImpl();
           UserDaoImpl userDao = new UserDaoImpl();

           userService.setUserDao(userDaoMySql);//这一次就是写userDao或者userDaoMySql进去都会自适应,不需要调整Service层
           userService.getUser();
       }
   }
**3.**程序主动创建对象,控制权在程序员手上!2.4.:程序不再具有主动性,控制器在Test程序里,也就是用户手上!**这就叫做控制反转!**这种思想,从本质上解决了问题,不再是去管理对象的创建了。系统的耦合性大大降低!可以更加专注在业务的实现上!这就是IOC原型!
而SpringBoot就实现了以上的
1.2 Spring的配置原理
xml文件中
  <?xml version="1.0" encoding="UTF-8"?>
  <beans xmlns="http://www.springframework.org/schema/beans"
         xmlns:xsi="http://www.w3.org/2001/XMLSchema-instance"
         xsi:schemaLocation="http://www.springframework.org/schema/beans
          https://www.springframework.org/schema/beans/spring-beans.xsd">
      <!--使用Spring来创建对象,在Spring这些都称为Bean

      类型 变量名 = new 类型();
      Hello hello = new Hello();

      bean = 对象 new Hello();
      id = 变量名
      class = new 的对象
      property 相当于给对象中的属性设置一个值!
      -->

      <bean id="hello" class="com.zixi.pojo.Hello">
          <property name="str" value="Spring"/>
      </bean>
  <!--    这是其中的一个bean叫hello-->

  </beans>
Test文件中
     public class MyTest {
   public static void main(String[] args) {
       //获取Spring的上下文对象!
       ApplicationContext context = new ClassPathXmlApplicationContext("beans.xml");
       //拿到了Spring的容器,容器在手天下我有,需要什么就get就完事了
       //输入“new CPX”即可弹出
       //用XML加载必须要写这句话 写死的 括号内穿配置文件地址
       //我们的对象现在都在Spring中管理了,我们要使用,直接去里面取出来就可以了!
       //XML文件中也注释了,Spring中每一个对象都成为Bean,所以拿它就getBean
       Hello hello = (Hello) context.getBean("hello");//XML文件中就有一个bean叫hello,这就是取那个叫Hello的Bean
       System.out.println(hello.toString());
       //输出
       // ”Hello{str='Spring'}“
       //在XML设置了其value为Spring
   }
}
全程没有new对象,对象是由Spring创建的,对象的属性是由Spring容器创建的也就是代码中的<property name="str" value="Spring"/>
控制:传统应用程序对象是由程序员本身控制创建的,使用Spring后,对象是由Spring来创建的
反转:程序本身不创建对象,而变成被动的接收对象
依赖注入:利用set方法注入的 POJO必须要有set方法
![[外链图片转存失败,源站可能有防盗链机制,建议将图片保存下来直接上传(img-9bDzDYxZ-1678353488971)(.\Snipaste_2021-03-11_19-58-04.png)]](https://img-blog.csdnimg.cn/8a094e441ad14494bf4c74bf60d9c9b8.png)
到现在,我们彻底不用再去程序中改动了,要实现不同的操作只需要在xml配置文件中进行修改,所谓IOC,一句话:对象由Spring来创建,管理,装配!
<bean id="mysqlimpl" class="com.zixi.dao.UserDaoMySqlImpl">
        <!-- collaborators and configuration for this bean go here -->
    </bean>

    <bean id="impl" class="com.zixi.dao.UserDaoImpl">
        <!-- collaborators and configuration for this bean go here -->
    </bean>

<bean id="serviceimpl" class="com.zixi.service.UserServiceImpl">
        <!--
         ref:引用Spring 容器中创建好的对象
         value:具体的值,基本数据类型!
         -->
        <property name="userDao" ref="mysqlimpl"/>
    </bean>
1.3 IOC创建对象的方式
-
使用无参构造创建对象,默认的!
-
使用有参构造对象
- 第一种,用下标
<bean id="user" class="com.zixi.pojo.User"> <constructor-arg index="0" value="kuangshenshuojava"/> </bean>- 第二种,用类型(不建议使用,两个参数类型一样就炸了)
<bean id="user" class="com.zixi.pojo.User"> <constructor-arg type="java.lang.String" value="kuangshenshuojava"/> </bean>- 第三种,直接通过参数名来设置(最重要常用)
<bean id="user" class="com.zixi.pojo.User">
        <constructor-arg name="name" value="kuangshenshuojava"/>
    </bean>
以后每写一个pojo类就去写一个Beans
-
Spring容器,就类似于婚介网站!不论用不用,都会把Beans实例化,你想娶谁就get就好了
总结:在容器加载的时候,容器中管理的对象就已经初始化了!
1.4 Spring的配置
1.4.1 别名
    <bean id="user" class="com.zixi.pojo.User">
        <constructor-arg name="userName" value="kuangshenshuojava2"/>
    </bean>

    <alias name="user" alias="ndfgkjabdklfagsdl"/>//写一个上面user bean的别名“ndfgkjabdklfagsdl”
User user = (User) classPathXmlApplicationContext.getBean("ndfgkjabdklfagsdl");//这样也可以取出user bean
其实可以直接写到bean标签内,这个<alias/>没啥用,如
<bean id="user" class="com.zixi.pojo.User" name="ndfgkjabdklfagsdl">
        <constructor-arg name="userName" value="kuangshenshuojava2"/>
    </bean>
1.4.2 Bean配置
  <!--
    id:bean的唯一标识符,也就是相当于对象名
    class:bean对象所对于的全限定名:包名+类名
    name:也是别名,而且可以取多个别名
    -->
    <bean id="user" class="com.zixi.pojo.User" name="u1,u2 u3;u4">
        <constructor-arg name="userName" value="kuangshenshuojava2"/>
    </bean>
1.4.3 import
这个import,一般用于团队开发,导入别人的xml。
![[外链图片转存失败,源站可能有防盗链机制,建议将图片保存下来直接上传(img-slSJw4DG-1678353488972)(.\Snipaste_2021-03-12_14-20-43.png)]](https://img-blog.csdnimg.cn/931988a272b5447bbdd4ff3ac60a2e39.png)
1.5 依赖注入
1.5.1 构造器注入
前面讲的就是
1.5.2 set方式注入(重要)
-
依赖注入:set 注入!
- 依赖:bean对象的创建依赖于容器
- 注入:bean对象中的所有属性,由容器来注入
- Student.java
public class Student {
    private String name;
    private Address address;//只有String一个属性的类
    private String[] books;
    private List<String> hobbys;
    private Map<String,String> card;
    private Set<String> games;
    private Properties info;
    private String wife;
}
- bean.xml
<?xml version="1.0" encoding="UTF-8"?>
<beans xmlns="http://www.springframework.org/schema/beans"
       xmlns:xsi="http://www.w3.org/2001/XMLSchema-instance"
       xsi:schemaLocation="http://www.springframework.org/schema/beans
        https://www.springframework.org/schema/beans/spring-beans.xsd">

    <!--
    id:bean的唯一标识符,也就是相当于对象名
    class:bean对象所对于的全限定名:包名+类名
    name:也是别名,而且可以取多个别名
    -->

    <bean id="address" class="com.zixi.pojo.Address">
        <property name="address" value="桂林市叠彩区"/>
    </bean>

    <bean id="student" class="com.zixi.pojo.Student">
<!--        普通值注入,value-->
        <property name="name" value="方子希"/>
<!--        Bean注入,ref-->
        <property name="address" ref="address"/>
<!--        数组注入-->
        <property name="books">
            <array>
                <value>红楼梦</value>
                <value>西游记</value>
                <value>三国演义</value>
                <value>水浒传</value>
            </array>
        </property>
<!--        List注入-->
        <property name="hobbys">
            <list>
                <value>睡觉</value>
                <value>吃饭</value>
                <value>LOL</value>
            </list>
        </property>
<!--        map注入-->
        <property name="card">
            <map>
                <entry key="身份证" value="1018"/>
                <entry key="电话号码" value="2129"/>
            </map>
        </property>
<!--        Set注入-->
        <property name="games">
            <set>
                <value>LOL</value>
                <value>CF</value>
                <value>DNF</value>
            </set>
        </property>
<!--        null注入-->
        <property name="wife">
            <null/>
        </property>
<!--        Properties注入
            key=value
            key=value
-->
        <property name="info">
            <props>
                <prop key="学号">201710405328</prop>
                <prop key="性别">boy</prop>
                <prop key="driver">...</prop>
                <prop key="url">...</prop>
                <prop key="username">root</prop>
                <prop key="password">root</prop>
            </props>
        </property>
    </bean>
</beans>
- 测试类
import com.zixi.pojo.Student;
import org.springframework.context.ApplicationContext;
import org.springframework.context.support.ClassPathXmlApplicationContext;

public class MyTest {
    public static void main(String[] args) {
        ApplicationContext context = new ClassPathXmlApplicationContext("beans.xml");
        Student student = (Student) context.getBean("student");
        System.out.println(student.toString());
    }
}
- 输出
Student{name='方子希', address=Address{address='桂林市叠彩区'}, books=[红楼梦, 西游记, 三国演义, 水浒传], hobbys=[睡觉, 吃饭, LOL], card={身份证=1018, 电话号码=2129}, games=[LOL, CF, DNF], info={学号=201710405328, 性别=boy, password=root, url=..., driver=..., username=root}, wife='null'}
1.5.3 拓展方式
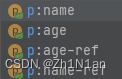
p命名空间注入,可以直接注入属性的值:property
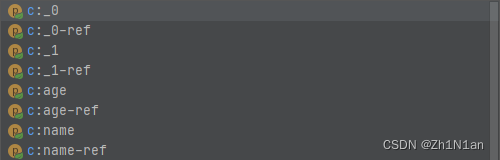
c命名空间注入,通过构造器注入:construct-args
1.5.4 Bean的作用域
-
单例模式 (默认的,可以不用写就是)
<bean name="user" class="com.zixi.pojo.User" p:name="方子希" p:age="18" scope="singleton"/>Test中
Object user1 = context.getBean("user1"); Object user2 = context.getBean("user1"); System.out.println(user1 == user2); //结果是true -
原型模式
<bean name="user" class="com.zixi.pojo.User" p:name="方子希" p:age="18" scope="prototype"/>Test中
    Object user1 = context.getBean("user1");
    Object user2 = context.getBean("user1");
    System.out.println(user1 == user2);
    //结果是false
虽然同一个类实例化的,但是此时的对象就不相等了,是两个对象
每次从容器中get都会产生一个新对象
1.6 Bean的自动装配
- 自动装配是Spring满足bean依赖一种方式
- Spring会在上下文中自动寻找,并自动给bean装配属性
在Spring中有三种自动装配的方式
- 在xml中显示的配置
- 在java中显示配置
- 隐式的自动装配bean【重要】
1.6.1测试
- 环境搭建
- 一个人有俩个宠物!
1.6.2 ByName自动装配
beans.xml
    <bean id="dog" class="com.zixi.pojo.Dog"/>
    <bean id="cat" class="com.zixi.pojo.Cat"/>

    <bean id="people" class="com.zixi.pojo.People" autowire="byName">
        <property name="name" value="方子希" />
<!--        <property name="cat" ref="cat"/>-->
<!--        <property name="dog" ref="dog"/>-->
<!--        不需要再定义了,自动装配通过byName 装配, 但是要保证“ <bean id="dog" class="com.zixi.pojo.Dog"/>”的id和自己对象set方法后面的值对于的bean_id-->
    </bean>
people.java
public void setDog(Dog dog) {
        this.dog = dog;
    }
public void setCat(Cat cat) {
        this.cat = cat;
    }
保证所有bean的id唯一,与set方法的值一致
byName:会自动在容器上下文中查找,和自己对象set方法后面的值对于的bean id!
1.6.3 ByType自动装配
beans.xml
    <bean id="dog1" class="com.zixi.pojo.Dog"/>
    <bean class="com.zixi.pojo.Cat"/>

    <bean id="people" class="com.zixi.pojo.People" autowire="byType">
        <property name="name" value="方子希" />
    </bean>
id不一样也可以,id没有都可以,保证class唯一
byType:会自动在容器上下文中查找,和自己对象属性类型相同的bean!
1.6.4 使用注解实现自动装配
The introduction of annotation-based configuration raised the question of whether this approach is “better” than XML.
要使用注解须知:
- 导入约束:contex约束
- 配置注解的支持: <context:annotation-config/>
beans.xml
<?xml version="1.0" encoding="UTF-8"?>
<beans xmlns="http://www.springframework.org/schema/beans"
    xmlns:xsi="http://www.w3.org/2001/XMLSchema-instance"
    xmlns:context="http://www.springframework.org/schema/context"
    xsi:schemaLocation="http://www.springframework.org/schema/beans
        https://www.springframework.org/schema/beans/spring-beans.xsd
        http://www.springframework.org/schema/context
        https://www.springframework.org/schema/context/spring-context.xsd">

    <context:annotation-config/>

</beans>
然后在people.java实现自动装配
    @Autowired
    private Cat cat;
    @Autowired
    private Dog dog;
也可以放在set方法上
    @Autowired(required = false)
    //如果显示定义了Autowired的required属性为false,说明这个对象可以为null,否则不允许为空
    public void setDog(Dog dog) {
        this.dog = dog;
    }
    @Autowired
    public void setCat(Cat cat) {
        this.cat = cat;
    }
注解在属性上都可以不需要set方法!!
使用Autowired 我们可以不用写Set方法了,前提是这个自动装配的属性在IOC(Spring)容器中存在,且符合名字byType,当多个Type一样就会去找Name,Name又找不到的话就无法找到了,只能加@Qualifier("")去指定一个*
1.7 使用注解开发
在Spring4之后,要使用注解开发,必须要保证aop的包导入了(在webmvc下)
使用注解要导入contex约束,1.6.4
遇到坑!
今天在Idea中配置spring-cloud时,配置了两个module,结果其中一个module的pom.xml失效了。。
解决方法!
-
点击Idea右侧的Maven Project
-
点击"+"号选中失效的 pom.xml
-
bean
applicationContext.xml
<!--    指定要扫描的包,这个包下的注解就会生效-->
<context:component-scan base-package="com.zixi.pojo"/>
User.java
//自动匹配注入
@Component//组件,说明这个类呗Spring管理了
public class User {
    public String name = "方子希";
}
- 属性如何注入
@Component
public class User {
    @Value("方子希")//注入属性
    public String name;
}
-
衍生的注解
-
@Component有几个衍生注解,我们在web开发中,会按照mvc三层架构分层!
- dao【@Repository】
- service【@Service】
- controller【@Contoller】
这四个注解功能是一样的,都是代表将某个类注册到Spring容器中,装配Bean
-
-
自动装配装置
1.6.4 -
作用域
替代1.5.4@Component @Scope("singleton")//标记为单例模式 public class User { @Value("方子希")//注入属性 public String name; } -
小结
xml与注解:- xml更加万能,适用任何场合!维护简单方便
- 注解不是自己的类使用不了,维护相对复杂
xml与注解最佳实践
- xml 管理bean
- 注解 注入属性
- 使用过程中,只需要注意:必须让注解生效,就需要开始注解支持
    <!--    注解驱动-->
    <context:annotation-config/>
    <!--    指定要扫描的包,这个包下的注解就会生效-->
    <context:component-scan base-package="com.zixi.pojo"/>
1.8 完全使用Java的方式配置Spring
不适用Spring的XML配置了,全权交给Java来做!
配置扫描
配置类
//配置类

@ComponentScan("com.zixi.pojo")
public class MyConfig {

}
实体类
@Controller //被扫描到
public class User {
    @Value("方子希")
    private String name;

    public String getName() {
        return name;
    }

    public void setName(String name) {
        this.name = name;
    }

    @Override
    public String toString() {
        return "User{" +
                "name='" + name + '\'' +
                '}';
    }
}
不配置扫描,用@Bean
配置类
public class MyConfig {
    //注册一个Bean 相当于我们之前写的一个Bean标签
    //这个方法的名字,就相当于bean标签中的id
    //这个方法的返回值,就相当于bean标签中的class属性
    @Bean
    public User user(){
        return new User();//就是返回要注入到Bean的对象
    }
}
实体类
//@Controller //不需要写,因为压根没有xml扫描器
public class User {
测试类 也不是用CPX了 是用ACAC
public class MyTest {
    public static void main(String[] args) {
        ApplicationContext context = new AnnotationConfigApplicationContext(MyConfig.class);
        User user = (User) context.getBean("user");//id 也就是上面的方法名字
        System.out.println(user.getName());
    }
}
2 SpringBoot
2.1 第一个SpringBoot程序
- jdk 1.8
- maven3.6.1
- springboot
- IDEA
直接使用IDEA创建一个SpringBoot项目
2.1 第一个SpringBoot程序
2.1.1 @RestController注解相当于@ResponseBody + @Controller合在一起的作用。
-
如果只是使用@RestController注解Controller,则Controller中的方法无法返回jsp页面,或者html,配置的视图解析器 InternalResourceViewResolver不起作用,返回的内容就是Return 里的内容。
-
如果需要返回到指定页面,则需要用 @Controller配合视图解析器InternalResourceViewResolver才行。
如果需要返回JSON,XML或自定义mediaType内容到页面,则需要在对应的方法上加上@ResponseBody注解。
2.1.2 第一个Controller层的Java
@RestController
public class HelloController {
    //接口 http://localhost:8080/hello
    @RequestMapping("/hello")
    public String hello(){
        return "hello,world!";
    }
}
2.2 原理初探
pom.xml
- spring-boot-dependencies:核心依赖在父工程中!
- 我们在写或引入一些SpringBoot依赖的时候不需要指定版本,就因为有这些版本仓库
启动器
-
<!-- web依赖:tomcat,dispatcjerServlet,xml...xml--> <dependency> <groupId>org.springframework.boot</groupId> <artifactId>spring-boot-starter-web</artifactId> </dependency> -
启动器:说白了就是Springboot的启动场景;
-
比如spring-boot-starter-web,他会自动帮我们导入web环境所有的依赖
-
springboot会将所有的功能场景变成一个个启动器
-
我们要使用什么功能,就只要找到对应的启动器就可以了
主程序
//程序主入口
@SpringBootApplication//标注这个类是一个SpringBoot的应用
public class HelloworldApplication {

    public static void main(String[] args) {
        //将SpringBoot应用启动
        SpringApplication.run(HelloworldApplication.class, args);
    }
}
springboot所有自动配置都是在启动的时候扫描并加载
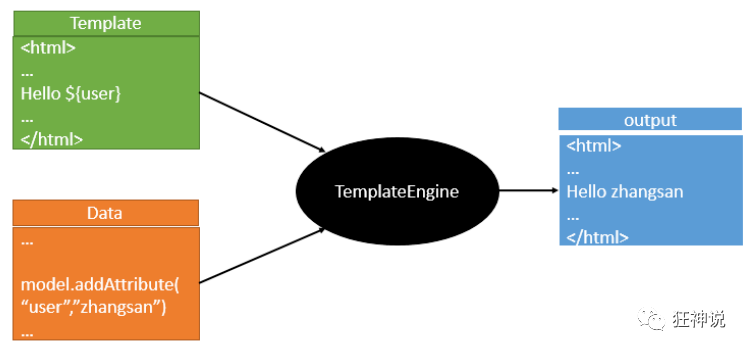
2.3 YAML
SpringBoot使用一个全局的配置文件 , 配置文件名称是固定的
-
application.properties
-
- 语法结构 :key=value
-
application.yml
-
- 语法结构 :key:空格 value
2.3.1 yaml概述
YAML是 “YAML Ain’t a Markup Language” (YAML不是一种标记语言)的递归缩写。在开发的这种语言时,YAML 的意思其实是:“Yet Another Markup Language”(仍是一种标记语言)
这种语言以数据作为中心,而不是以标记语言为重点!
以前的配置文件,大多数都是使用xml来配置;比如一个简单的端口配置,我们来对比下yaml和xml
传统xml配置:
<server>
    <port>8081<port>
</server>
yaml配置:
server:
  prot: 8080
2.3.2 yaml基础语法
说明:语法要求严格!
1、空格不能省略
2、以缩进来控制层级关系,只要是左边对齐的一列数据都是同一个层级的。
3、属性和值的大小写都是十分敏感的。
字面量:普通的值 [ 数字,布尔值,字符串 ]
字面量直接写在后面就可以 , 字符串默认不用加上双引号或者单引号;
k: v
注意:
-
“ ” 双引号,不会转义字符串里面的特殊字符 , 特殊字符会作为本身想表示的意思;
比如 :name: “kuang \n shen” 输出 :kuang 换行 shen -
‘’ 单引号,会转义特殊字符 , 特殊字符最终会变成和普通字符一样输出
比如 :name: ‘kuang \n shen’ 输出 :kuang \n shen
对象、Map(键值对)
#对象、Map格式
k:
    v1:
    v2:
在下一行来写对象的属性和值得关系,注意缩进;比如:
student:
    name: qinjiang
    age: 3
行内写法
student: {name: qinjiang,age: 3}
数组( List、set )
用 - 值表示数组中的一个元素,比如:
pets:
 - cat
 - dog
 - pig
行内写法
pets: [cat,dog,pig]
修改SpringBoot的默认端口号
配置文件中添加,端口号的参数,就可以切换端口;
server:
  port: 8082
2.3.3 yaml 注入属性
Test.java
@SpringBootTest
class Springboot02ConfigApplicationTests {
    @Autowired
    private Person person;
    @Test
    void contextLoads() {
        System.out.println(person);
    }
}
Person.java & Dog.java
@ConfigurationProperties作用:
将配置文件中配置的每一个属性的值,映射到这个组件中;
告诉SpringBoot将本类中的所有属性和配置文件中相关的配置进行绑定
参数 prefix = “person” : 将配置文件中的person下面的所有属性一一对应
@Component
@ConfigurationProperties(prefix = "person")//prefix与yaml绑定!!!!!
public class Person {
    private String name;
    private Integer age;
    private Boolean happy;
    private Date birth;
    private Map<String,Object> maps;
    private List<Object> lists;
    private Dog dog;

@Component
public class Dog {
    private String name;
    private Integer age;
yaml
person:
  name: zixi
  age: 3
  happy: false
  birth: 1999/04/30
  maps: {k1: v1,k2: v2}
  lists:
    - code
    - music
    - girl
  dog:
    name: 旺财
    age: 3
还可以这样玩,随便用占位符,yaml的优势
person:
  name: zixi${random.uuid}
  age: ${random.int}
  #随机数
  happy: false
  birth: 1999/04/30
  maps: {k1: v1,k2: v2}
  lists:
    - code
    - music
    - girl
  dog:
    name: ${person.hello:hello},旺财
    #hello不存在就输出hello,旺财
    age: 3
当hello有值时
hello: hi

dog:
  name: ${person.hello:hello},旺财
  #hello不存在就输出hello,旺财,存在就写hello
结果就是
dog=Dog{name='hi,旺财', age=3}
-
@ConfigurationProperties只需要写一次即可 , @Value则需要每个字段都添加
-
松散绑定:这个什么意思呢? 比如我的yml中写的last-name,这个和lastName是一样的, - 后面跟着的字母默认是大写的。这就是松散绑定。可以测试一下
-
JSR303数据校验 , 这个就是我们可以在字段是增加一层过滤器验证 , 可以保证数据的合法性
-
复杂类型封装,yml中可以封装对象 , 使用value就不支持
2.4 JSR303校验
结论
- 配置yml和配置properties都可以获取到值 , 强烈推荐 yml;
- 如果我们在某个业务中,只需要获取配置文件中的某个值,可以使用一下 @value;
- 如果说,我们专门编写了一个JavaBean来和配置文件进行一一映射,就直接@configurationProperties,不要犹豫!
遇坑!
Person.java
@Validated//数据校验
public class Person {
    @Email//很可能会爆红!!!!
    private String name;
当Email注解爆红的时候,是因为没有装一个依赖。
<dependency>
    <groupId>org.springframework.boot</groupId>
    <artifactId>spring-boot-starter-validation</artifactId>
</dependency>
加上再刷新Maven就可以了!
测试,当name不是一个邮箱地址的时候的输出的错误
Description:
Binding to target org.springframework.boot.context.properties.bind.BindException: Failed to bind properties under 'person' to com.zixi.pojo.Person failed:

Property: person.name
Value: zixie36d11c8-ea01-424e-87ff-614adeeb9f9f
Origin: class path resource [application.yaml] - 2:9
Reason: 不是一个合法的电子邮件地址
Action:

Update your application's configuration
直接就显示了 不是一个合法的邮件地址 !
注解后面可以自定义
@Email(message = "邮件格式错误!")
输出变为
Reason: 邮件格式错误!
2.5 多环境配置及配置文件位置
以下为优先级排名:
- ./config/
- ./
- ./ClassPath(一般放resources里)/config
- ./ClassPath(一般放resources里)
总结:config里的比外卖的优先级高,外层比内层高
application.yaml
# springboot的多环境配置:可以选中激活哪个配置文件
spring:
  profiles:
    active: dev
server:
  port: 8081
application-dev.yaml
server:
  port: 8082
application-test.yaml
server:
  port: 8083
输出
2021-03-15 15:34:57.441 INFO 15764 --- [ restartedMain] o.s.b.w.embedded.tomcat.TomcatWebServer : Tomcat started on port(s): 8082 (http) with context path ''
结论,默认先进application.yaml然后如果有多环境配置代码就跳转到对于的那个
还可以这样
server:
  port: 8081
spring:
#  以下不写则自动加载第一层的8081,下面写了dev,则响应下面的dev文件
  profiles:
    active: dev
--- #分离
server:
  port: 8082
spring:
  profiles: dev
---
server:
  port: 8083
spring:
  profiles: test
三个同级配置写一个文件里
2.6 自动配置原理再理解
一句话总结 :根据当前不同的条件判断,决定这个配置类是否生效!
- 一但这个配置类生效;这个配置类就会给容器中添加各种组件;
- 这些组件的属性是从对应的properties类中获取的,这些类里面的每一个属性又是和配置文件绑定的;
- 所有在配置文件中能配置的属性都是在xxxxProperties类中封装着;
- 配置文件能配置什么就可以参照某个功能对应的这个属性类
精髓
1、SpringBoot启动会加载大量的自动配置类
2、我们看我们需要的功能有没有在SpringBoot默认写好的自动配置类当中;
3、我们再来看这个自动配置类中到底配置了哪些组件;(只要我们要用的组件存在在其中,我们就不需要再手动配置了)
4、给容器中自动配置类添加组件的时候,会从properties类中获取某些属性。我们只需要在配置文件中指定这些属性的值即可;
**xxxxAutoConfigurartion:自动配置类;**给容器中添加组件
xxxxProperties:封装配置文件中相关属性;
2.7 SpringBoot Web开发
jar:webpp!
自动装配
还需要解决的问题:
- 导入静态资源
- 首页
- jsp,模板引擎Thymeleaf
- 装配扩展SpringMVC
- 增删改查
- 拦截器
2.7.1 导入静态资源
SpringBoot中的classpath:
classpath 等价于 main/java + main/resources(为主) + 第三方jar包的根目录。
一般在main/resource处理静态资源
-
在springboot,我们可以使用以下方式处理静态资源
- webjars: http://localhost:8080/webjars/
- public,static,/**,resources:http://localhost:8080/
-
默认优先级:resource>static>public
2.7.2 首页和图标定制
resources下放index.html / favicon.ico
2.7.3 模板引擎Thymeleaf
ThymeleafProperties.class
    private String prefix = "classpath:/templates/";//前缀
    private String suffix = ".html";//后缀
    private String mode = "HTML";
结论:只需要使用thymeleaf,只需要导入对应的依赖就可以了!我们将html放在我们的templates目录下即可!
2.7.4 Thymeleaf语法
| Order | Feature | Attributes | |
|---|---|---|---|
| 1 | Fragment inclusion | th:insert th:replace | |
| 2 | Fragment iteration | th:each | |
| 3 | Conditional evaluation | th:if th:unless th:switch th:case | |
| 4 | Local variable definition | th:object th:with | |
| 5 | General attribute modification | th:attr th:attrprepend th:attrappend | |
| 6 | Specific attribute modification | th:value th:href th:src ... | |
| 7 | Text (tag body modification) | th:text | 不转义 |
th:utext | 转义 | ||
| 8 | Fragment specification | th:fragment | |
| 9 | Fragment removal | th:remove |
- Simple expressions:
- Variable Expressions:
${...} - Selection Variable Expressions:
*{...} - Message Expressions:
#{...} - Link URL Expressions:
@{...} - Fragment Expressions:
~{...}
- Variable Expressions:
- Literals
- Text literals:
'one text','Another one!',… - Number literals:
0,34,3.0,12.3,… - Boolean literals:
true,false - Null literal:
null - Literal tokens:
one,sometext,main,…
- Text literals:
- Text operations:
- String concatenation:
+ - Literal substitutions:
|The name is ${name}|
- String concatenation:
- Arithmetic operations:
- Binary operators:
+,-,*,/,% - Minus sign (unary operator):
-
- Binary operators:
- Boolean operations:
- Binary operators:
and,or - Boolean negation (unary operator):
!,not
- Binary operators:
- Comparisons and equality:
- Comparators:
>,<,>=,<=(gt,lt,ge,le) - Equality operators:
==,!=(eq,ne)
- Comparators:
- Conditional operators:
- If-then:
(if) ? (then) - If-then-else:
(if) ? (then) : (else) - Default:
(value) ?: (defaultvalue)
- If-then:
- Special tokens:
- No-Operation:
_
- No-Operation:
前端写这个 多爽啊!
2.7.5 MVC配置原理和拓展
在springboot中,有非常多的xxxx Configuration 帮助我们进行拓展控制,只要看见了这个东西,需要关注以下给我们拓展了什么功能
3 实战
3.1 Start
bootstrap模板可下
css,img,js,放到static下
页面放到 templates下
所有页面静态资源都需要使用thymeleaf接管
3.2 首页
html页面加上
<html lang="en" xmlns:th="http://www.thymeleaf.org">
有关的静态资源改成th:hreforth:src,链接加@,如2.7.4的语法
3.3 国际化
需要配置i8n文件
我们如果需要在项目中进行按钮自动切换,我们需要自定义一个 组件LocaleResolver
记得将组件配置到spring容器 @Bean
测试代码
@ResponseBody
public String login() {
    return "OK";
先这样看看能不能进来
3.4 登录+拦截器
public String login(@RequestParam("username") String username,
                    @RequestParam("password") String password,
                    Model model) {
这样去接收值,model用来回传
3.5 前端+CURD
复用组件
从其他网页抽取
![[外链图片转存失败,源站可能有防盗链机制,建议将图片保存下来直接上传(img-Lkv2kGNE-1678353488977)(image-20210319213026364.png)]](https://img-blog.csdnimg.cn/3bd94e124c664295bc6e6d7725b9b82d.png)
然后再另一个网页写出来,会有自动提示
![[外链图片转存失败,源站可能有防盗链机制,建议将图片保存下来直接上传(img-wq0u1C02-1678353488978)(image-20210319212920893.png)]](https://img-blog.csdnimg.cn/d9eed1ef7cff48d8b10223825e51a4cf.png)
thymeleaf格式,组件化(现在的版本好像也不用这个格式也可以),代码复用!好用!
<div th:insert="~{dashboard::siderbar}"></div>
所以以后组件写在一个html下
其他的html去调用,不仅省事,而且统一
commens.html
<!DOCTYPE html>
<html lang="en" xmlns:th="http://www.thymeleaf.org">
<!--头部导航栏-->
<nav class="navbar navbar-dark sticky-top bg-dark flex-md-nowrap p-0" th:fragment="navbar">
    <a class="navbar-brand col-sm-3 col-md-2 mr-0" href="http://getbootstrap.com/docs/4.0/examples/dashboard/#">[[${session.loginUser}]]</a>
    <input class="form-control form-control-dark w-100" type="text" placeholder="Search" aria-label="Search">
    <ul class="navbar-nav px-3">
        <li class="nav-item text-nowrap">
            <a class="nav-link" href="http://getbootstrap.com/docs/4.0/examples/dashboard/#">Sign out</a>
        </li>
    </ul>
</nav>
<!--侧边栏-->
<nav class="col-md-2 d-none d-md-block bg-light sidebar" th:fragment="siderbar">
    <div class="sidebar-sticky">
        <ul class="nav flex-column">
            <li class="nav-item">
                <a class="nav-link active" href="http://getbootstrap.com/docs/4.0/examples/dashboard/#">
                    <svg xmlns="http://www.w3.org/2000/svg" width="24" height="24" viewBox="0 0 24 24" fill="none" stroke="currentColor" stroke-width="2" stroke-linecap="round" stroke-linejoin="round" class="feather feather-home">
                        <path d="M3 9l9-7 9 7v11a2 2 0 0 1-2 2H5a2 2 0 0 1-2-2z"></path>
                        <polyline points="9 22 9 12 15 12 15 22"></polyline>
                    </svg>
                    Dashboard <span class="sr-only">(current)</span>
                </a>
            </li>
            <li class="nav-item">
                <a class="nav-link" href="http://getbootstrap.com/docs/4.0/examples/dashboard/#">
                    <svg xmlns="http://www.w3.org/2000/svg" width="24" height="24" viewBox="0 0 24 24" fill="none" stroke="currentColor" stroke-width="2" stroke-linecap="round" stroke-linejoin="round" class="feather feather-file">
                        <path d="M13 2H6a2 2 0 0 0-2 2v16a2 2 0 0 0 2 2h12a2 2 0 0 0 2-2V9z"></path>
                        <polyline points="13 2 13 9 20 9"></polyline>
                    </svg>
                    Orders
                </a>
            </li>
            <li class="nav-item">
                <a class="nav-link" href="http://getbootstrap.com/docs/4.0/examples/dashboard/#">
                    <svg xmlns="http://www.w3.org/2000/svg" width="24" height="24" viewBox="0 0 24 24" fill="none" stroke="currentColor" stroke-width="2" stroke-linecap="round" stroke-linejoin="round" class="feather feather-shopping-cart">
                        <circle cx="9" cy="21" r="1"></circle>
                        <circle cx="20" cy="21" r="1"></circle>
                        <path d="M1 1h4l2.68 13.39a2 2 0 0 0 2 1.61h9.72a2 2 0 0 0 2-1.61L23 6H6"></path>
                    </svg>
                    Products
                </a>
            </li>
            <li class="nav-item">
                <a class="nav-link" th:href="@{/emps}">
                    <svg xmlns="http://www.w3.org/2000/svg" width="24" height="24" viewBox="0 0 24 24" fill="none" stroke="currentColor" stroke-width="2" stroke-linecap="round" stroke-linejoin="round" class="feather feather-users">
                        <path d="M17 21v-2a4 4 0 0 0-4-4H5a4 4 0 0 0-4 4v2"></path>
                        <circle cx="9" cy="7" r="4"></circle>
                        <path d="M23 21v-2a4 4 0 0 0-3-3.87"></path>
                        <path d="M16 3.13a4 4 0 0 1 0 7.75"></path>
                    </svg>
                    员工管理
                </a>
            </li>
            <li class="nav-item">
                <a class="nav-link" href="http://getbootstrap.com/docs/4.0/examples/dashboard/#">
                    <svg xmlns="http://www.w3.org/2000/svg" width="24" height="24" viewBox="0 0 24 24" fill="none" stroke="currentColor" stroke-width="2" stroke-linecap="round" stroke-linejoin="round" class="feather feather-bar-chart-2">
                        <line x1="18" y1="20" x2="18" y2="10"></line>
                        <line x1="12" y1="20" x2="12" y2="4"></line>
                        <line x1="6" y1="20" x2="6" y2="14"></line>
                    </svg>
                    Reports
                </a>
            </li>
            <li class="nav-item">
                <a class="nav-link" href="http://getbootstrap.com/docs/4.0/examples/dashboard/#">
                    <svg xmlns="http://www.w3.org/2000/svg" width="24" height="24" viewBox="0 0 24 24" fill="none" stroke="currentColor" stroke-width="2" stroke-linecap="round" stroke-linejoin="round" class="feather feather-layers">
                        <polygon points="12 2 2 7 12 12 22 7 12 2"></polygon>
                        <polyline points="2 17 12 22 22 17"></polyline>
                        <polyline points="2 12 12 17 22 12"></polyline>
                    </svg>
                    Integrations
                </a>
            </li>
        </ul>

        <h6 class="sidebar-heading d-flex justify-content-between align-items-center px-3 mt-4 mb-1 text-muted">
            <span>Saved reports</span>
            <a class="d-flex align-items-center text-muted" href="http://getbootstrap.com/docs/4.0/examples/dashboard/#">
                <svg xmlns="http://www.w3.org/2000/svg" width="24" height="24" viewBox="0 0 24 24" fill="none" stroke="currentColor" stroke-width="2" stroke-linecap="round" stroke-linejoin="round" class="feather feather-plus-circle"><circle cx="12" cy="12" r="10"></circle><line x1="12" y1="8" x2="12" y2="16"></line><line x1="8" y1="12" x2="16" y2="12"></line></svg>
            </a>
        </h6>
        <ul class="nav flex-column mb-2">
            <li class="nav-item">
                <a class="nav-link" href="http://getbootstrap.com/docs/4.0/examples/dashboard/#">
                    <svg xmlns="http://www.w3.org/2000/svg" width="24" height="24" viewBox="0 0 24 24" fill="none" stroke="currentColor" stroke-width="2" stroke-linecap="round" stroke-linejoin="round" class="feather feather-file-text">
                        <path d="M14 2H6a2 2 0 0 0-2 2v16a2 2 0 0 0 2 2h12a2 2 0 0 0 2-2V8z"></path>
                        <polyline points="14 2 14 8 20 8"></polyline>
                        <line x1="16" y1="13" x2="8" y2="13"></line>
                        <line x1="16" y1="17" x2="8" y2="17"></line>
                        <polyline points="10 9 9 9 8 9"></polyline>
                    </svg>
                    Current month
                </a>
            </li>
            <li class="nav-item">
                <a class="nav-link" href="http://getbootstrap.com/docs/4.0/examples/dashboard/#">
                    <svg xmlns="http://www.w3.org/2000/svg" width="24" height="24" viewBox="0 0 24 24" fill="none" stroke="currentColor" stroke-width="2" stroke-linecap="round" stroke-linejoin="round" class="feather feather-file-text">
                        <path d="M14 2H6a2 2 0 0 0-2 2v16a2 2 0 0 0 2 2h12a2 2 0 0 0 2-2V8z"></path>
                        <polyline points="14 2 14 8 20 8"></polyline>
                        <line x1="16" y1="13" x2="8" y2="13"></line>
                        <line x1="16" y1="17" x2="8" y2="17"></line>
                        <polyline points="10 9 9 9 8 9"></polyline>
                    </svg>
                    Last quarter
                </a>
            </li>
            <li class="nav-item">
                <a class="nav-link" href="http://getbootstrap.com/docs/4.0/examples/dashboard/#">
                    <svg xmlns="http://www.w3.org/2000/svg" width="24" height="24" viewBox="0 0 24 24" fill="none" stroke="currentColor" stroke-width="2" stroke-linecap="round" stroke-linejoin="round" class="feather feather-file-text">
                        <path d="M14 2H6a2 2 0 0 0-2 2v16a2 2 0 0 0 2 2h12a2 2 0 0 0 2-2V8z"></path>
                        <polyline points="14 2 14 8 20 8"></polyline>
                        <line x1="16" y1="13" x2="8" y2="13"></line>
                        <line x1="16" y1="17" x2="8" y2="17"></line>
                        <polyline points="10 9 9 9 8 9"></polyline>
                    </svg>
                    Social engagement
                </a>
            </li>
            <li class="nav-item">
                <a class="nav-link" href="http://getbootstrap.com/docs/4.0/examples/dashboard/#">
                    <svg xmlns="http://www.w3.org/2000/svg" width="24" height="24" viewBox="0 0 24 24" fill="none" stroke="currentColor" stroke-width="2" stroke-linecap="round" stroke-linejoin="round" class="feather feather-file-text">
                        <path d="M14 2H6a2 2 0 0 0-2 2v16a2 2 0 0 0 2 2h12a2 2 0 0 0 2-2V8z"></path>
                        <polyline points="14 2 14 8 20 8"></polyline>
                        <line x1="16" y1="13" x2="8" y2="13"></line>
                        <line x1="16" y1="17" x2="8" y2="17"></line>
                        <polyline points="10 9 9 9 8 9"></polyline>
                    </svg>
                    Year-end sale
                </a>
            </li>
        </ul>
    </div>
</nav>
</html>
list.html
<!--    顶部导航栏-->
<div th:insert="commens/commens::navbar"></div>
<div class="container-fluid">
    <div class="row">
        <!--         侧边栏-->
        <div th:insert="commens/commens.html::siderbar"></div>
进行调用即可
组件的妙用
在thymeleaf中这样这样互相读取变量
list.html
<div th:insert="commens/commens.html::siderbar(active='list.html')"></div>
(active=‘list.html’),然后再其他的地方读取active
dashboard.html
<div th:insert="commens/commens.html::siderbar(active='main.html')"></div>
在组件中 commens.html
若点击了list,则active变为list.html,则以下三元运算符生效
<a class=th:class="${active=='list.html'?'nav-link active':'nav-link'}" th:href="@{/emps}">
另一个同样如此
遍历输出
控制层
Collection<Employee> employees = emplyeeDao.getAll();
model.addAttribute("emps", employees);
在前端接受的是个集合,遍历
<thead>
<tr>
    <th>ID</th>
    <th>LastNameHeader</th>
    <th>EmailHeader</th>
    <th>Gender</th>
    <th>Department</th>
    <th>Birth</th>
</tr>
</thead>
<tbody>
    <tr th:each="emp:${emps}">
        <td th:text="${emp.getId()}"></td>
        <td th:text="${emp.getLastName()}"></td>
        <td th:text="${emp.getEmail()}"></td>
        <td th:text="${emp.getGender()}"></td>
        <td th:text="${emp.getDepartment()}"></td>
        <td th:text="${emp.getBirth()}"></td>
    </tr>
</tbody>
前端!!!查样式
日期格式最好改成
spring.mvc.date-format=yyyy-mm-dd
才好对应前端


 2493
2493


 被折叠的 条评论
为什么被折叠?
被折叠的 条评论
为什么被折叠?
 到【灌水乐园】发言


