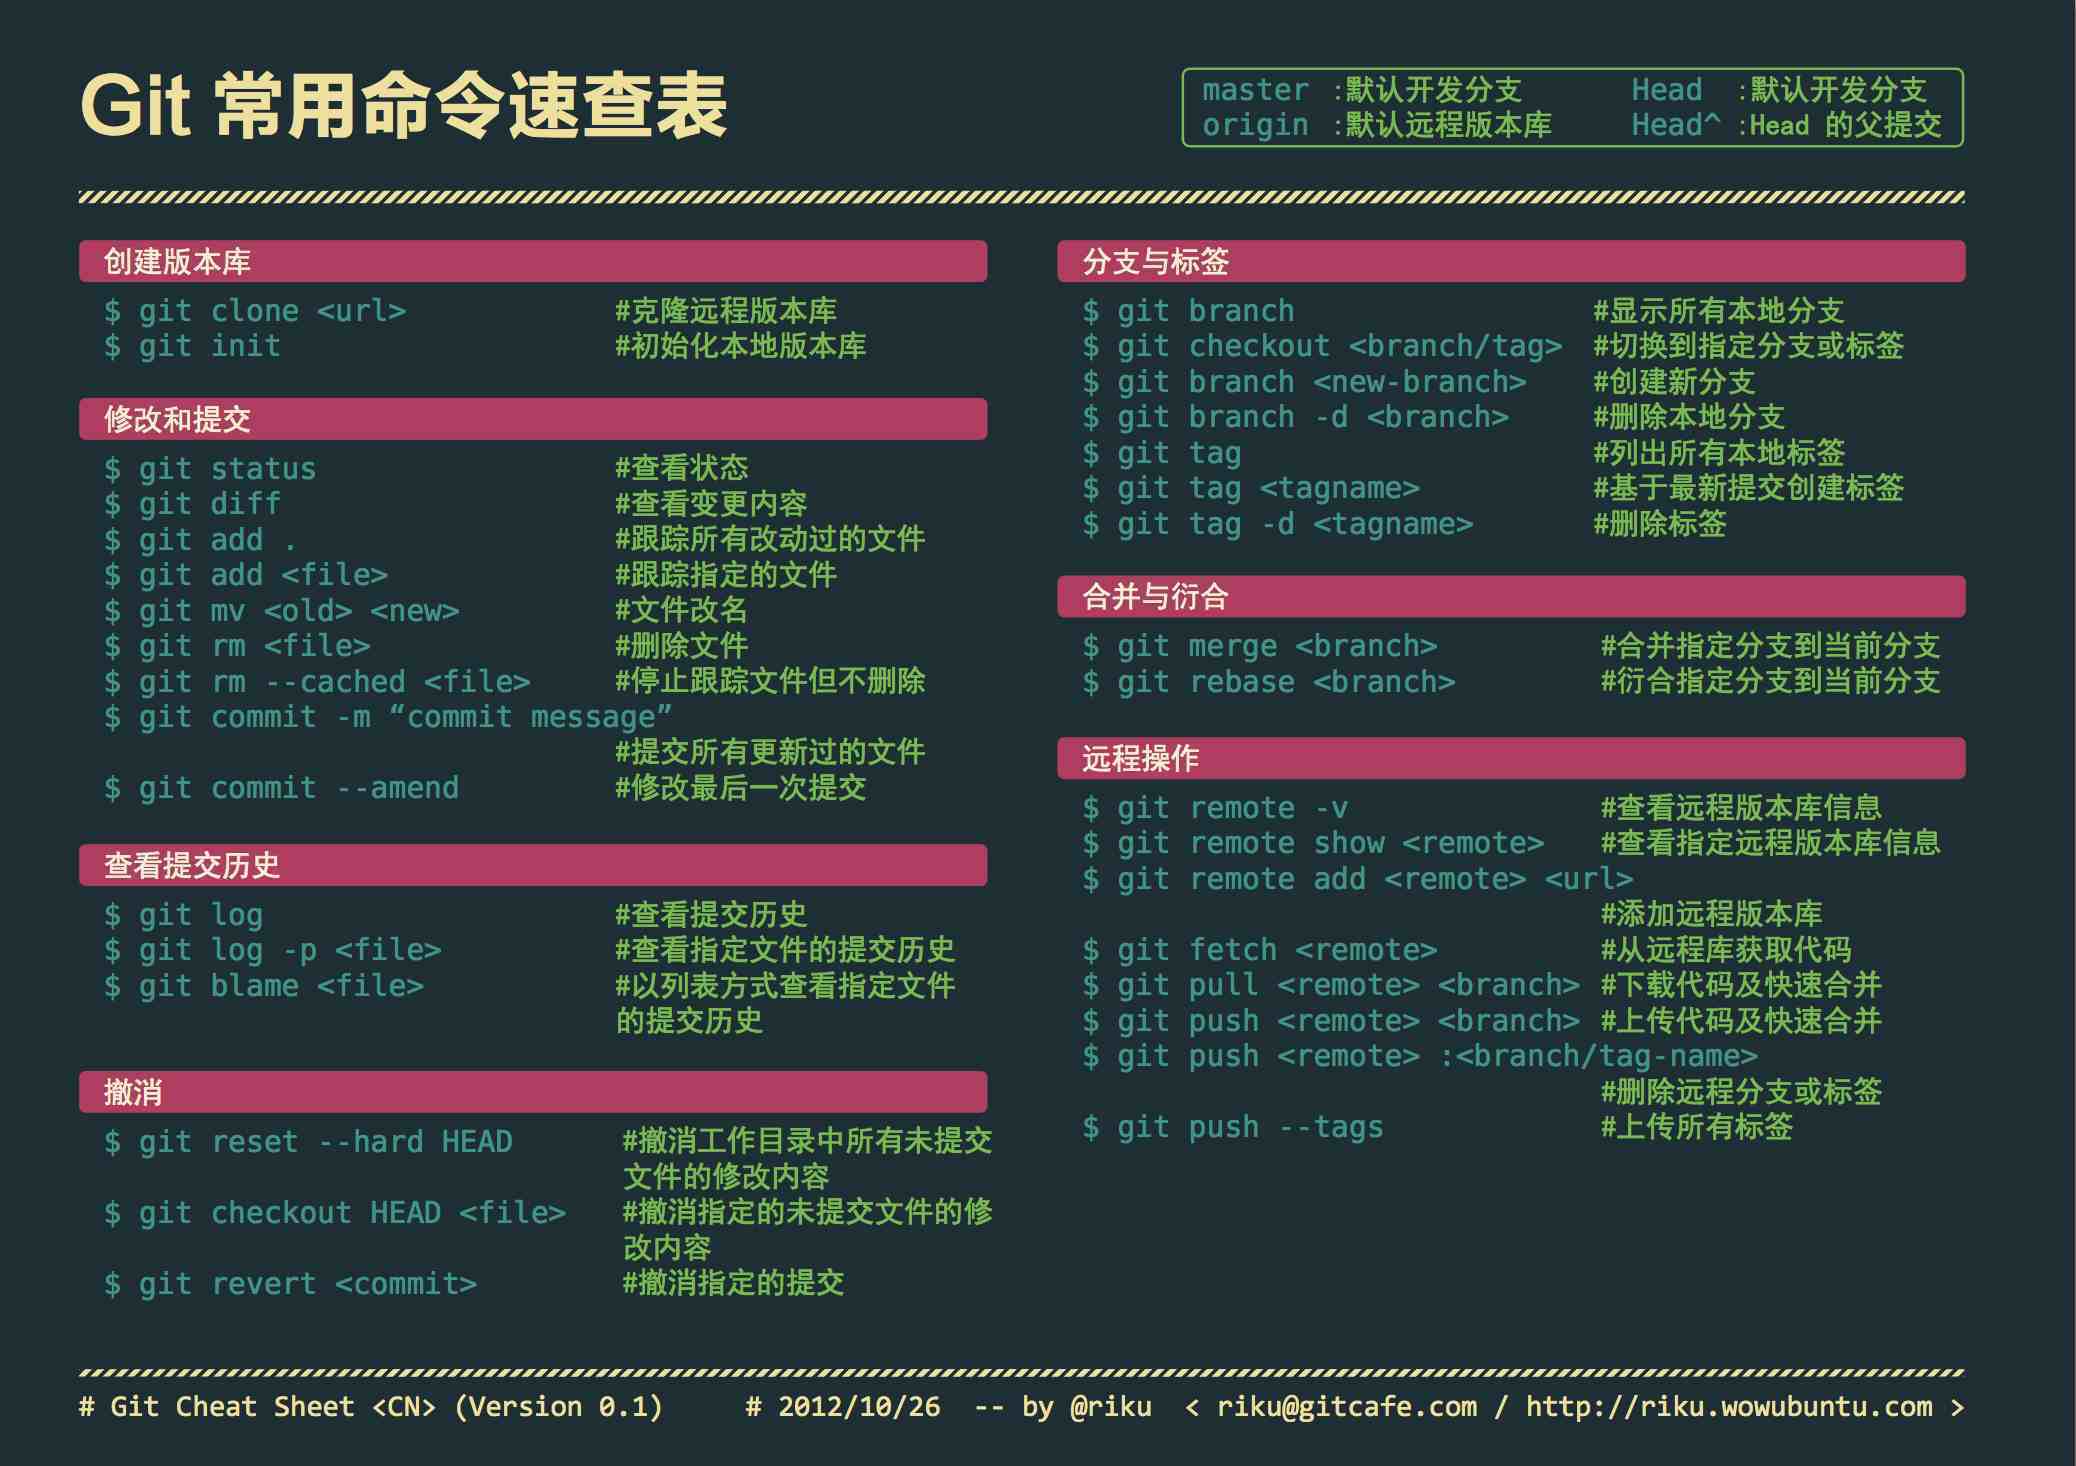
git
本文章是我个人怕忘记命令而写,可能不太适合做教程。 现在没有写处理冲突的命令。还有一些其他的命令后续可能会补上,现在就写这么多了
git的安装
windows 下:
https://git-scm.com/download/winlinux 下:
// 先运行git,看看有没有安装
git
// 如果没有安装可以通过下面的命令安装
sudo apt-get install git
mac os 下: 1. 安装homebrew,然后通过homebrew安装Git,具体方法请参考homebrew的文档:http://brew.sh/ 2. 推荐的方法,就是直接从AppStore安装Xcode,Xcode集成了Git,不过默认没有安装,你需要运行Xcode,选择菜单“Xcode”->“Preferences”,在弹出窗口中找到“Downloads”,选择“Command Line Tools”,点“Install”就可以完成安装了
安装完成后,全局设置git user.name 和 user.email
git config --global user.name "you name"
git config --global user.email "email@example.com"

注意这步一定要进行设置
使用git
一般我使用git的流程就是现在GitHub上或者在码云上创建一个项目然后在clone到本地,然后生成ssh公钥,生成方法码云和github通用
clone下来之后就可以新建一个分支
// 让本地的代码跟远程仓库建立连接
git remote add origin 远程ssh地址或http地址
// 初始化本地仓库
git init
// 把远程代码down下来
git pull origin master // --allow-unrelated-histories 可以把两段不相干的 分支进行强行合并
// 然后一套常规操作
git add .
git commit -m '添加注释做了什么'
git push origin master  // -u 第一次提交可以加上,一个在push代码就不需要加上origin master


git checkout master -b 新分支的名字
git status   // 查看有哪些改变
git add .    // 把所以文件添加到本地仓库
git commit -m ''  // 添加到缓存区
git push origin 新分支的名字  // 推到服务器
git checkout master          // 切换到主分支
git merge 新分支的名字        // 合并分支
git branch                   // 查看分支
git push                     // 将合并后的push到主分支

git branch -d 新分支的名字    // 删除分支

git cherry-pick 版本号       // 合并分支的某一次commit

某部分
git checkout -b newBranch 最后的版本号
git rebase --onto 分支名 想从那开始的版本号^
回退版本
// 显示提交日志
1. git log -3

************************************************
commit 4dc08bb8996a6ee02f
Author: Mark <xxx@xx.com>
Date:   Wed Sep 7 08:08:53 2016 +0800

    xxxxx

commit 9cac9ba76574da2167
Author: xxx<xx@qq.com>
Date:   Tue Sep 6 22:18:59 2016 +0800

    improved the requst

commit e377f60e28c8b84158
Author: xxx<xxx@qq.com>
Date:   Tue Sep 6 14:42:44 2016 +0800

    changed the password from empty to max123
*************************************************
// 回滚到指定版本
2. git reset --hard e377f60e28c8b84158
// 强制提交
3. git push -f origin 分支名称

// 强制覆盖本地代码

git fetch --all
git reset --hard origin/master
git pull

或者一条组合命令:  git fetch --all && git reset --hard origin/master && git pull
剔除git管理
rm -rf .git 在项目根目录运行


 1万+
1万+

 被折叠的 条评论
为什么被折叠?


