


js 实时显示不同时区时间钟表
先讲一个与时间有关“千年虫”事件,千年虫是一种年份只用两位十进制数来处理的程序来处理日期上的bug(计算机程序故障),会引发各种各样的系统功能紊乱,瘫痪。那你是否遇到过与时间有关的程序处理呢?
由于世界各国家与地区经度不同,地方时也有所不同,因此会划分为不同的时区。地球表面按经线从东到西,划成一个个区域,并且规定相邻区域的时间相差1小时。在同一区域内的东端和西端的人看到太阳升起的时间最多相差不过1小时。当人们跨过一个区域,就将自己的时钟校正1小时(向西减1小时,向东加1小时),跨过几个区域就加或减几小时。现今全球共分为24个时区:英国(格林尼治天文台旧址)为中时区(零时区)、东1—12区,西1—12区。每个时区横跨经度15度,时间正好是1小时。最后的东、西第12区各跨经度7.5度,以东、西经180度为界。每个时区的中央经线上的时间就是这个时区内统一采用的时间,称为区时,相邻两个时区的时间相差1小时。
那么如何使用实时显示不同地区时间钟表呢?
初始化钟表的配置项
先创建一个Clock 的构建函数,可以接收一个关于钟表的配置对象,然后在this上设置所有的默认配置项,如果传入的配置与默认不同优先使用传入的配置,根据画布的宽高计算出来圆心的坐标位置,之后调用初始化的创建元素方法。
// config 钟表的配置对象
let Clock = function (config = {}) {
  // 钟表的所有配置属性
  this.config = {
    //  钟表的放的盒子父级元素
    parentEle: document.body,
    // 桌布宽度
    width: 400,
    // 桌布高度
    height: 400,
    // 钟表的盒子
    clockBox: null,
    //钟表的表盘 容器
    bgCtx: null,
    // 钟表的指针 容器
    ptCtx: null,
    // 圆点位置 x
    xDot: 0,
    // 圆点位置 y
    yDot: 0,
    // 圆点半径
    radiusDot: 6,
    // 圆点 颜色
    colorDot: '#000',
    // 圆半径
    radius: 120,
    // 圆边框宽度
    borderWidth: 6,
    // 圆边框颜色
    borderColor: '#000',
    // 外圆边框宽度
    outBorderWidth: 3,
    // 外圆边框颜色
    outBorderColor: '#666',
    // 圆边框与外圆边框的间距
    outBorderSpacing: 10,
    // 指针多出来的到圆点的距离
    markDotSpacing: 10,
    // 表盘 长刻度 边框宽度
    borderWidthMarkL: 5,
    // 表盘 长刻度 边框长度
    borderHeightMarkL: 12,
    // 表盘 长刻度 边框颜色
    borderColorMarkL: '#000',
    // 表盘 短刻度 边框宽度
    borderWidthMarkS: 2,
    // 表盘 短刻度 边框长度
    borderHeightMarkS: 6,
    // 表盘 短刻度 边框颜色
    borderColorMarkS: '#999',
    // 表盘 指针 秒 边框宽度
    borderWidthPtS: 2,
    // 表盘 指针 秒 边框长度
    borderHeightPtS: 100,
    // 表盘 指针 秒 边框颜色
    borderColorPtS: '#0f0',
    // 表盘 指针 分 边框宽度
    borderWidthPtM: 4,
    // 表盘 指针 分 边框长度
    borderHeightPtM: 80,
    // 表盘 指针 分 边框颜色
    borderColorPtM: '#000',
    // 表盘 指针 时 边框宽度
    borderWidthPtH: 6,
    // 表盘 指针 时 边框长度
    borderHeightPtH: 65,
    // 表盘 指针 时 边框颜色
    borderColorPtH: '#000',
    //刻度数字大小
    fontsize: 26,
    // 刻度与数字的间距
    fontSpacing: 5,
    // 刻度数字颜色
    fontColor: '#ff9000',
    // 时区值数字,比如北京为东八区为 8,西5为 -5, 默认为当前时区
    dateUtc: null,
    // 日期格式
    dateFormat: 'yyyy.MM.dd HH:mm:ss',
    //日期文字大小
    dateTextFontSize: 13,
    // 日期文字颜色
    dateTextFontColor: '#333',
    // 文字大小
    textFontSize: 16,
    // 文字颜色
    textFontColor: '#000',
    ...config
  }
  this.config.xDot = this.config.width / 2
  this.config.yDot = this.config.height / 2
  this.init()
}
初始化 创建元素
创建钟表的盒子并且将钟表盒子放到钟表的父元素里并将钟表盒子放到配置对象里,接着先创建钟表表盘画布,将画布元素放到钟表盒子里,再将钟表表盘放到配置对象里。
Clock.prototype = {
  // 初始化 创建元素
  init() {
    // 钟表的盒子
    let clockBox = document.createElement('div')
    clockBox.style.position = 'relative'
    clockBox.classList.add('clock_box')
    this.config.parentEle.appendChild(clockBox)
    this.config.clockBox = clockBox

    // 钟表的表盘
    let clockBg = document.createElement('canvas')
    clockBg.width = this.config.width
    clockBg.height = this.config.height
    clockBox.appendChild(clockBg)

    // 钟表的表盘
    this.config.bgCtx = clockBg.getContext('2d')
  },
 }
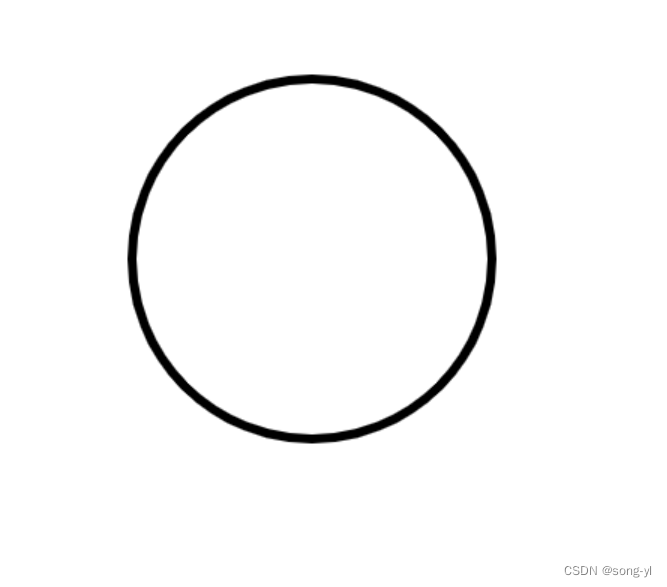
绘制表盘 边框
在钟表表盘画布里绘制出钟表的边框,边框的半径、边框粗细、边框颜色和边框的中心点都以配置对象信息为准。样式可参考代码块下方图片。
  // 绘制表盘 边框
  drawInnerBorder() {
    this.drawBorder({
      ctx: this.config.bgCtx,
      x: this.config.xDot,
      y: this.config.yDot,
      radius: this.config.radius,
      lineWidth: this.config.borderWidth,
      strokeStyle: this.config.borderColor
    })
    return this
  },
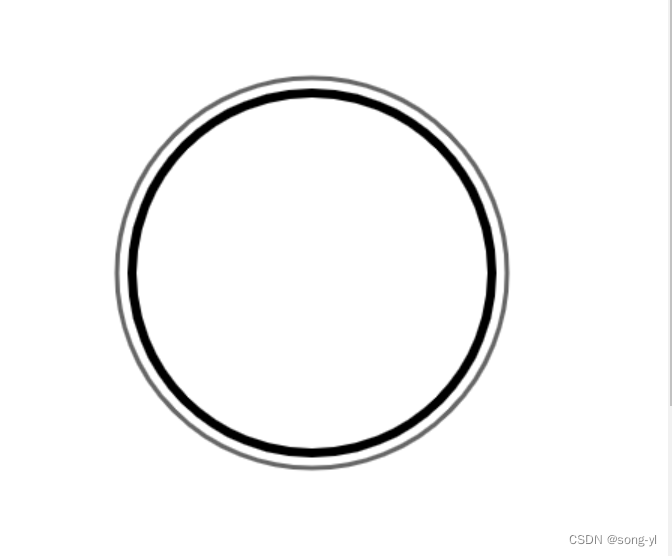
绘制表盘 外边框
在钟表表盘画布里绘制出钟表的外边框,外边框的半径(等于边框半径加上外边框到边框的距离)、外边框粗细、外边框颜色和外边框的中心点都以配置对象信息为准。样式可参考代码块下方图片。
  // 绘制表盘 外边框
  drawOutBorder() {
    this.drawBorder({
      ctx: this.config.bgCtx,
      x: this.config.xDot,
      y: this.config.yDot,
      radius: this.config.radius + this.config.outBorderSpacing,
      lineWidth: this.config.outBorderWidth,
      strokeStyle: this.config.outBorderColor
    })
    return this
  },
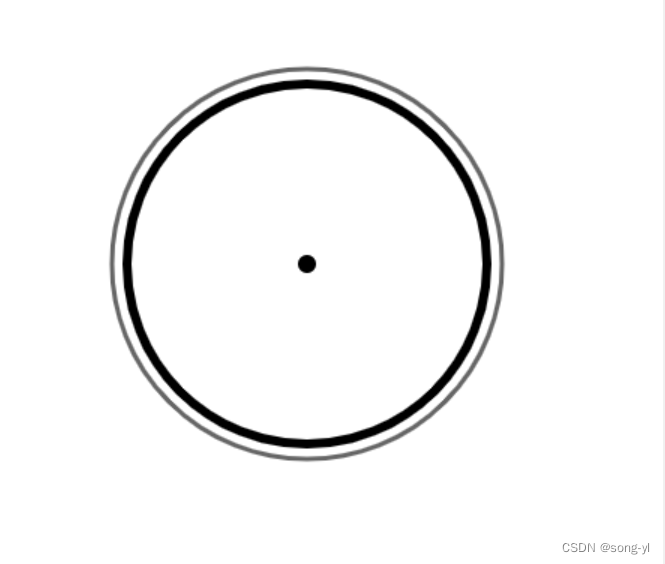
绘制表盘 圆点
在钟表表盘画布里绘制出钟表的圆点,圆点的半径、圆点颜色和圆点的中心点都以配置对象信息为准。样式可参考代码块下方图片。
  // 绘制表盘 圆点
  drawDot() {
    let config = {
      ...this.config
    }
    let ctx = this.config.bgCtx
    // 表盘-圆点
    ctx.beginPath()
    ctx.fillStyle = config.colorDot
    ctx.arc(config.xDot, config.yDot, config.radiusDot, 0, 2 * Math.PI, true)
    ctx.fill()
    ctx.closePath()
    return this
  },
绘制表盘 刻度
在钟表表盘画布里绘制出钟表的刻度,刻度的半径、刻度的长度、刻度颜色和刻度的中心点都以配置对象信息为准,短刻度应有60,长刻度应有12,所以以60为标准进行for循环计算出绘制出每一个刻度线,两个刻度之间的偏移角度为2Math.PI/60。样式可参考代码块下方图片。
  // 绘制表盘 刻度
  drawMark() {
    let config = {
      ...this.config
    }
    // 钟表的表盘
    let ctx = this.config.bgCtx

    // 表盘-刻度
    for (let i = 0, angle = 0, tmp, len; i < 60; i++) {
      ctx.beginPath()
      // 突出显示能被5除尽的刻度
      if (0 === i % 5) {
        ctx.lineWidth = config.borderWidthMarkL
        len = config.borderHeightMarkL
        ctx.strokeStyle = config.borderColorMarkL
      } else {
        ctx.lineWidth = config.borderWidthMarkS
        len = config.borderHeightMarkS
        ctx.strokeStyle = config.borderColorMarkS
      }
      // 因为圆有边框,所以要减去边框宽度
      tmp = config.radius - config.borderWidth / 2
      ctx.moveTo(config.xDot + tmp * Math.cos(angle), config.yDot + tmp * Math.sin(angle))
      tmp -= len
      ctx.lineTo(config.xDot + tmp * Math.cos(angle), config.yDot + tmp * Math.sin(angle))
      ctx.stroke()
      ctx.closePath()
      // 每次递增1/30π
      angle += Math.PI / 30
    }
    return this
  },

绘制表盘 刻度数字
在钟表表盘画布里绘制出钟表的刻度数字,刻度数字的半径、刻度数字的字体大小、刻度数字的字体颜色、刻度数字到刻度的距离和刻度数字的中心点都以配置对象信息为准。样式可参考代码块下方图片。
  // 绘制表盘 刻度数字
  drawMarkNum() {
    let config = {
      ...this.config
    }
    let ctx = this.config.bgCtx

    // 表盘-刻度
    for (let i = 0; i < 12; i++) {
      ctx.beginPath()
      ctx.font = 'bold ' + config.fontsize + 'px impack'
      ctx.textAlign = 'center'
      ctx.fillStyle = config.fontColor
      let textIndex = i + 1
      let textTmp = config.radius - config.borderHeightMarkL * 2 - config.fontSpacing * 2
      ctx.fillText(textIndex > 9 ? textIndex - 9 : textIndex + 3, config.xDot + textTmp * Math.cos(((2 * Math.PI) / 12) * textIndex), config.yDot + config.fontsize / 3 + textTmp * Math.sin(((2 * Math.PI) / 12) * textIndex))
      ctx.stroke()
      ctx.closePath()
    }
    return this
  },
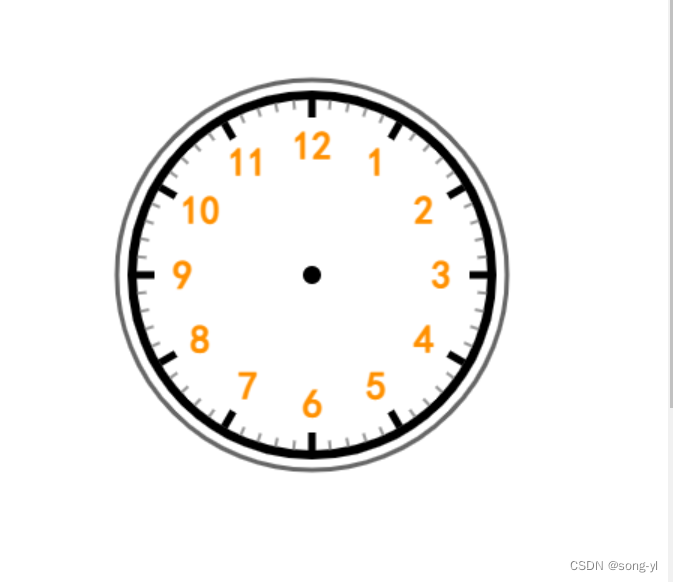
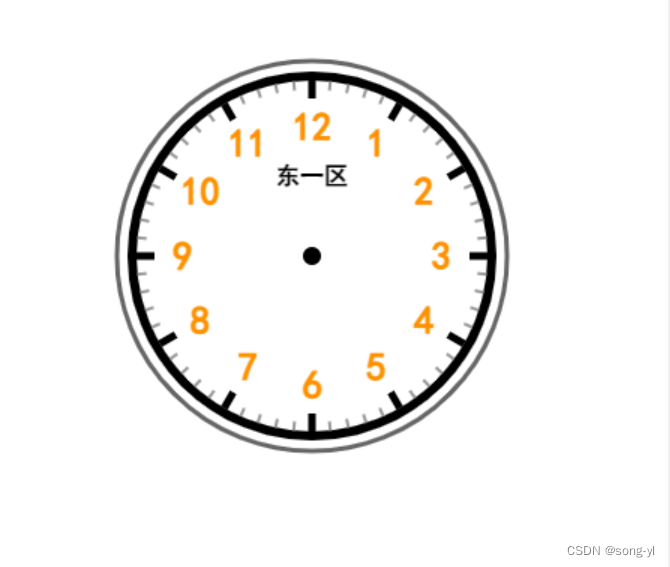
绘制表盘 上方文字
在钟表表盘画布里绘制出表盘上方文字:展示当前时间展示的时区文字,上方文字的时区、上方文字的字体大小、上方文字的字体颜色和上方文字的中心点都以配置对象信息为准。样式可参考代码块下方图片。
  // 绘制表盘 上方文字
  drawUpText() {
    let config = {
      ...this.config
    }
    let now = this.getTimeObj(config.dateUtc, config.dateFormat)
    // 上方文字
    this.drawText(config.bgCtx, now.utcText, config.xDot, config.yDot - config.radius / 2.5, config.textFontSize, config.textFontColor)
    return this
  },
获取当前时间对象
将获取当前时间对象封装为一个方法,可以接收展示时间的时区和展示时间文字的格式,返回一个包含日期、时区、时区文字和时间文字的对象。
  //转换服务器时区时间
  //t传入的时间参数
  //utc传入的时区参数 为时区值数字,比如北京为东八区则输入8,西5输入-5,
  formatTime(t, utc) {
    if (!t) {
      return
    }
    //获取本地时间
    let d = new Date()
    //获得本地时区
    utc = utc ? parseFloat(utc) : d.getTimezoneOffset() / 60
    //格式化传入时间
    let time = new Date(t)
    //转换传入时间为本地时间(默认传入服务器时间为东八区时间)
    time.setHours(time.getHours() + (utc - 8))
    return date
  },
  // 数字转中文数字枚举
  handleCNnum(val) {
    let CNnum = ''
    switch (val) {
      case '1':
        CNnum = '一'
        break
      case '2':
        CNnum = '二'
        break
      case '3':
        CNnum = '三'
        break
      case '4':
        CNnum = '四'
        break
      case '5':
        CNnum = '五'
        break
      case '6':
        CNnum = '六'
        break
      case '7':
        CNnum = '七'
        break
      case '8':
        CNnum = '八'
        break
      case '9':
        CNnum = '九'
        break
      case '10':
        CNnum = '十'
        break
      case '11':
        CNnum = '十一'
        break
      case '12':
        CNnum = '十二'
        break
      case '0':
        CNnum = '零'
        break
      default:
        break
    }
    return CNnum
  },
  // utc传入的时区参数 为时区值数字,比如北京为东八区则输入8,西5输入-5
  getTextUtc(utc) {
    if (!utc) {
      return
    }
    let str = ''
    if (utc > 0) {
      str = '东'
    } else {
      str = '西'
    }
    str += this.handleCNnum(Math.abs(utc).toString()) + '区'
    return str
  },
  // 格式化日期 yyyy.MM.dd HH:mm:ss
  formatDate(dateStr, fmtStr) {
    let date = new Date(dateStr)
    let fmt = fmtStr || 'yyyy.MM.dd'
    let resultStr = fmt
    let o = {
      'yyy+': date.getFullYear(),
      'M+': date.getMonth() + 1,
      'd+': date.getDate(),
      'H+': date.getHours(),
      'm+': date.getMinutes(),
      's+': date.getSeconds()
    }
    for (const k in o) {
      if (new RegExp(`(${k})`).test(fmt)) {
        const str = o[k] + ''
        let seize = ''
        for (let i = 0; i < k.length; i++) {
          seize += '0'
        }
        resultStr = resultStr.replace(RegExp.$1, RegExp.$1.length === 1 ? str : (seize + str).substr(str.length))
      }
    }
    return resultStr
  },
  // 获取时间对象
  // 默认为本地当前时间
  // utc传入的时区参数 为时区值数字,比如北京为东八区则输入8,西5输入-5, 默认为当前时区
  getTimeObj(utc, dateFormat) {
    //时间对象
    let obj = {
      //日期时间
      data: new Date(),
      // 日期时区
      utc: utc
    }
    if (utc) {
      obj.data = this.getLocalTime(utc)
    } else {
      obj.utc = this.getLocalUct()
    }
    obj.utcText = this.getTextUtc(obj.utc)
    obj.dateText = this.formatDate(obj.data, dateFormat || 'yyyy.MM.dd HH:mm:ss')
    return obj
  },
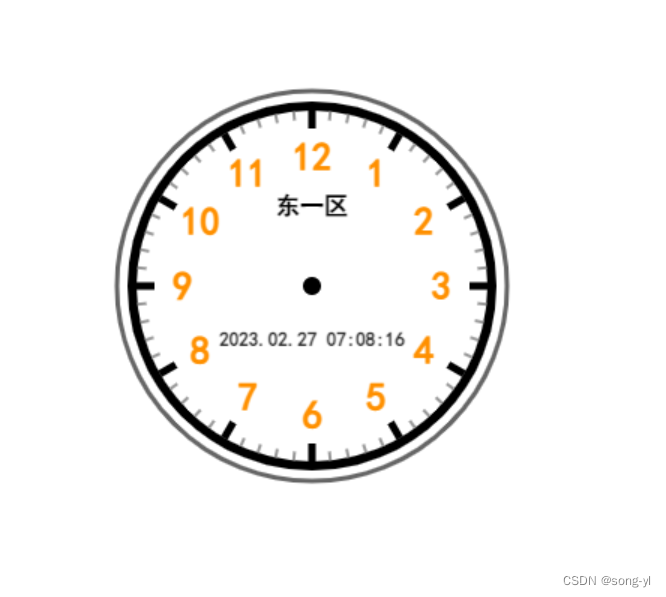
绘制 下方文字 日期变更
在钟表表盘画布里绘制出表盘下方文字:展示当前时间展示的时区时间,下方文字的时区、下方文字的展示的时间格式、下方文字的字体大小、下方文字的字体颜色和下方文字的中心点都以配置对象信息为准,因为时间会不断变更,所以新建一个画布专门来绘制日期文字。样式可参考代码块下方图片。
  // 绘制 下方文字 日期变更
  drawBelowTextRun() {
    // 初始 绘制表盘 下方文字
    this.drawBelowText()
    // 每隔1s更新一次指针
    setInterval(() => {
      this.drawBelowText()
    }, 1000)
    return this
  },
  // 绘制表盘 下方文字
  drawBelowText() {
    let config = {
      ...this.config
    }
    ctx = this.createCanvas('textCtx')
    let now = this.getTimeObj(config.dateUtc, config.dateFormat)
    // 清掉原来的指针
    ctx.clearRect(0, 0, config.width, config.height)
    // 时间文字
    this.drawText(ctx, now.dateText, config.xDot, config.yDot + config.radius / 3, config.dateTextFontSize, config.dateTextFontColor)
    return this
  },
创建画布方法
创建画布方法:可以根据传入的画布名称去看配置里是否存在,若存在则返回配置已有的画布,否则新建一个画布并将画布放到钟表盒子里,再放到配置对象里,方便之后使用。
  // 创建画布
  // 获取canvasName元素
  createCanvas(canvasName) {
    // 创建画布
    // 如果已经存在画布则不创建 将画布放到 钟表盒子里,并放到this里
    if (!this.config[canvasName]) {
      // 钟表的指针
      let canvasEle = document.createElement('canvas')
      canvasEle.width = this.config.width
      canvasEle.height = this.config.height
      canvasEle.style.position = 'absolute'
      canvasEle.style.zIndex = '-1'
      canvasEle.style.left = 0
      canvasEle.style.top = 0
      this.config.clockBox.appendChild(canvasEle)
      this.config[canvasName] = canvasEle.getContext('2d')
    }
    return this.config[canvasName]
  },
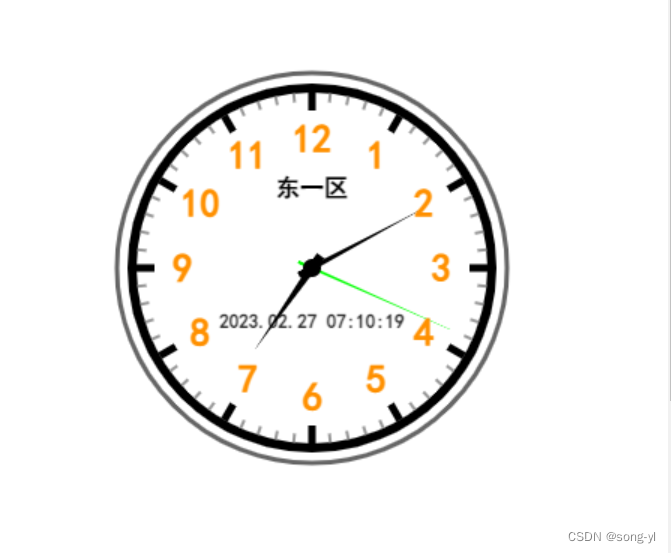
绘制 指针 转动
在钟表表盘画布里绘制出指针:指针指向当前时间,指针的时区、指针的长度、指针的宽度、指针的颜色和指针的中心点都以配置对象信息为准,因为时间会不断变更,所以新建一个画布专门来绘制指针。样式可参考代码块下方图片。
  // 绘制 指针 转动
  drawPointersRun() {
    // 初始指针
    this.drawPointers()
    // 每隔1s更新一次指针
    setInterval(() => {
      this.drawPointers()
    }, 1000)
    return this
  },
  // 绘制 指针
  drawPointers() {
    let config = {
      ...this.config
    }
    // 钟表的指针
    let ctx = this.createCanvas('ptCtx')
    let now = this.getTimeObj(config.dateUtc, config.dateFormat)
    // 清掉原来的指针
    ctx.clearRect(0, 0, config.width, config.height)
    // 获取当前时间的时分秒
    let h = now.data.getHours()
    let m = now.data.getMinutes()
    let s = now.data.getSeconds()
    // 算出时分秒指针现在应指向圆的几分之几处
    h = h > 12 ? h - 12 : h
    h = h + m / 60
    m = m + s / 60
    h = ((h - 3) * 2 * Math.PI) / 12
    m = ((m - 15) * 2 * Math.PI) / 60
    s = ((s - 15) * 2 * Math.PI) / 60
    // 画时针
    this.drawPointer(h, config.borderWidthPtH, config.borderHeightPtH, config.borderColorPtH)
    // 画分针
    this.drawPointer(m, config.borderWidthPtM, config.borderHeightPtM, config.borderColorPtM)
    // 画秒针
    this.drawPointer(s, config.borderWidthPtS, config.borderHeightPtS, config.borderColorPtS)

    return this
  },
  // 由粗变细
  // angle是角度,
  // lineWidth是指针宽度,
  // length是指针长度
  drawPointer(angle, lineWidth, length, color) {
    let ctx = this.createCanvas('ptCtx')
    let markDotSpacing = this.config.markDotSpacing

    ctx.save()
    ctx.translate(this.config.xDot, this.config.yDot)
    ctx.rotate(angle)
    ctx.beginPath()
    ctx.moveTo(-markDotSpacing, -lineWidth / 2)
    ctx.lineTo(-markDotSpacing, lineWidth / 2)
    ctx.lineTo(length, 0)
    ctx.lineTo(length, 0)
    ctx.fillStyle = color
    ctx.fill()
    ctx.restore()
    ctx.closePath()
  }
24时区的钟表调用构造函数方法创建
调用钟表构造函数可以创建出24时区的不同时区的钟表时间。样式可参考代码块下方视频。
// 24时区
for (let i = 1; i <= 24; i++) {
  let clock = new Clock({
    dateUtc: i > 12 ? 12 - i : i
  })
  console.log('clock:', clock)
  clock.drawInnerBorder().drawOutBorder().drawDot().drawMark().drawMarkNum().drawUpText().drawBelowTextRun().drawPointersRun()
}
24时区钟表


 618
618


 被折叠的 条评论
为什么被折叠?
被折叠的 条评论
为什么被折叠?
 到【灌水乐园】发言


