前言
最近,项目中有一个需求是这样:用户上传图片之前,先对图片进行裁剪,然后上传裁剪后的图片。这个大家都不陌生,基本所有的 APP 中,用户头像都有裁剪功能。那么,在 React 项目中,如何实现呢?
第一步 下载组件
Google 一下,我们可以找到很多的 React 裁剪组件,这里我们使用的是 react-easy-crop,对移动端友好,基本可以满足需要。
安装组件
yarn add react-easy-crop
// or
npm install react-easy-crop
第二步 使用组件
下面是一部分主要代码
import { useState, useCallback } from "react";
import Cropper from "react-easy-crop";

const imageUrl = '你的图片链接'
const [crop, setCrop] = useState({ x: 0, y: 0 });
const [rotation, setRotation] = useState(0);
const [zoom, setZoom] = useState(1);
const [croppedAreaPixels, setCroppedAreaPixels] = useState(null);

 const onCropComplete = useCallback((croppedArea, croppedAreaPixels) => {
    setCroppedAreaPixels(croppedAreaPixels);
  }, []);

<Cropper
    showGrid={false}
    image={imageUrl}
    crop={crop}
    zoom={zoom}
    aspect={aspect}
    cropShape={cropShape}
    rotation={rotation}
    onCropChange={setCrop}
    onRotationChange={setRotation}
    onCropComplete={onCropComplete}
     onZoomChange={setZoom}
/>
其中 croppedAreaPixels 保存的是要裁剪图片上的坐标和大小,所以,我们还需要一个方法获取到图片的裁剪部分。下面是代码,行数有点多,大家酌情查看。
export const createImage = (url) =>
  new Promise((resolve, reject) => {
    const image = new Image();
    image.addEventListener("load", () => resolve(image));
    image.addEventListener("error", (error) => reject(error));
    image.setAttribute("crossOrigin", "anonymous"); // needed to avoid cross-origin issues on CodeSandbox
    image.src = url;
  });

export function getRadianAngle(degreeValue) {
  return (degreeValue * Math.PI) / 180;
}

/**
 * Returns the new bounding area of a rotated rectangle.
 */
export function rotateSize(width, height, rotation) {
  const rotRad = getRadianAngle(rotation);

  return {
    width:
      Math.abs(Math.cos(rotRad) * width) + Math.abs(Math.sin(rotRad) * height),
    height:
      Math.abs(Math.sin(rotRad) * width) + Math.abs(Math.cos(rotRad) * height),
  };
}

/**
 * This function was adapted from the one in the ReadMe of https://github.com/DominicTobias/react-image-crop
 */
export default async function getCroppedImg(
  imageSrc,
  pixelCrop,
  rotation = 0,
  flip = { horizontal: false, vertical: false }
) {
  const image = await createImage(imageSrc);
  const canvas = document.createElement("canvas");
  const ctx = canvas.getContext("2d");

  if (!ctx) {
    return null;
  }

  const rotRad = getRadianAngle(rotation);

  // calculate bounding box of the rotated image
  const { width: bBoxWidth, height: bBoxHeight } = rotateSize(
    image.width,
    image.height,
    rotation
  );

  // set canvas size to match the bounding box
  canvas.width = bBoxWidth;
  canvas.height = bBoxHeight;

  // translate canvas context to a central location to allow rotating and flipping around the center
  ctx.translate(bBoxWidth / 2, bBoxHeight / 2);
  ctx.rotate(rotRad);
  ctx.scale(flip.horizontal ? -1 : 1, flip.vertical ? -1 : 1);
  ctx.translate(-image.width / 2, -image.height / 2);

  // draw rotated image
  ctx.drawImage(image, 0, 0);

  // croppedAreaPixels values are bounding box relative
  // extract the cropped image using these values
  const data = ctx.getImageData(
    pixelCrop.x,
    pixelCrop.y,
    pixelCrop.width,
    pixelCrop.height
  );

  // set canvas width to final desired crop size - this will clear existing context
  canvas.width = pixelCrop.width;
  canvas.height = pixelCrop.height;

  // paste generated rotate image at the top left corner
  ctx.putImageData(data, 0, 0);

  // As Base64 string
  // return canvas.toDataURL('image/jpeg');

  // As a blob
  return new Promise((resolve, reject) => {
    canvas.toBlob((file) => {
      resolve(file);
      // resolve(URL.createObjectURL(file));
    }, "image/jpeg");
  });
}
我们可以增加一个确认按钮,获取到裁剪的图片(我这里返回的是base64格式的),下面是主要代码,其中 getCroppedImg 方法代码行数有点多,大家可以移步我的博客详情页面查看。
<button onClick={handleSaveClick}>确定</button>

function handleSaveClick() {
    const croppedImage = await getCroppedImg(
        imageUrl,
        croppedAreaPixels,
        rotation
      );
    // upload image function
    // uploadImage(croppedImage)
}
最后
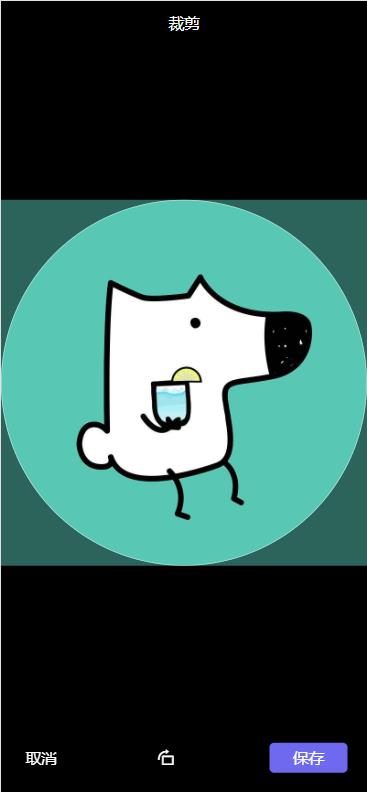
到此,我们就完成了这个需求,看一下效果。

我的博客详情页面:
React项目中裁剪图片组件使用 - Cikayo的博客![]() https://www.cikayo.com/article/154
https://www.cikayo.com/article/154


 2075
2075


 被折叠的 条评论
为什么被折叠?


