


1. 查看操作系统有没有安装Nginx
which nginx
2. 使用epel的方式进行安装(方法二)
先安装epel
sudo yum install yum-utils
安装完成后,查看安装的epel包即可
sudo yum install epel
3 开始安装nginx
上面的两个方法不管选择哪个,都可以使用yum进行安装
sudo yum install nginx
4 启动Nginx并进行测试
# 查看nginx版本
$ nginx -v
nginx version: nginx/1.24.0
# 设置开机自启动
$ sudo systemctl enable nginx
Created symlink from /etc/systemd/system/multi-user.target.wants/nginx.service to /usr/lib/systemd/system/nginx.service.
# 启动nginx
$ sudo systemctl start nginx
在浏览器输入服务器地址 默认端口为80

5. 查找Nginx配置文件,把其他服务器端口指向Nginx默认端口号80
$ whereis nginx.conf
nginx: /usr/sbin/nginx /usr/lib64/nginx /etc/nginx /usr/share/nginx /usr/share/man/man8/nginx.8.gz
查看配置文件是否正确
$ sudo nginx -t
nginx: the configuration file /etc/nginx/nginx.conf syntax is ok
nginx: configuration file /etc/nginx/nginx.conf test is successful
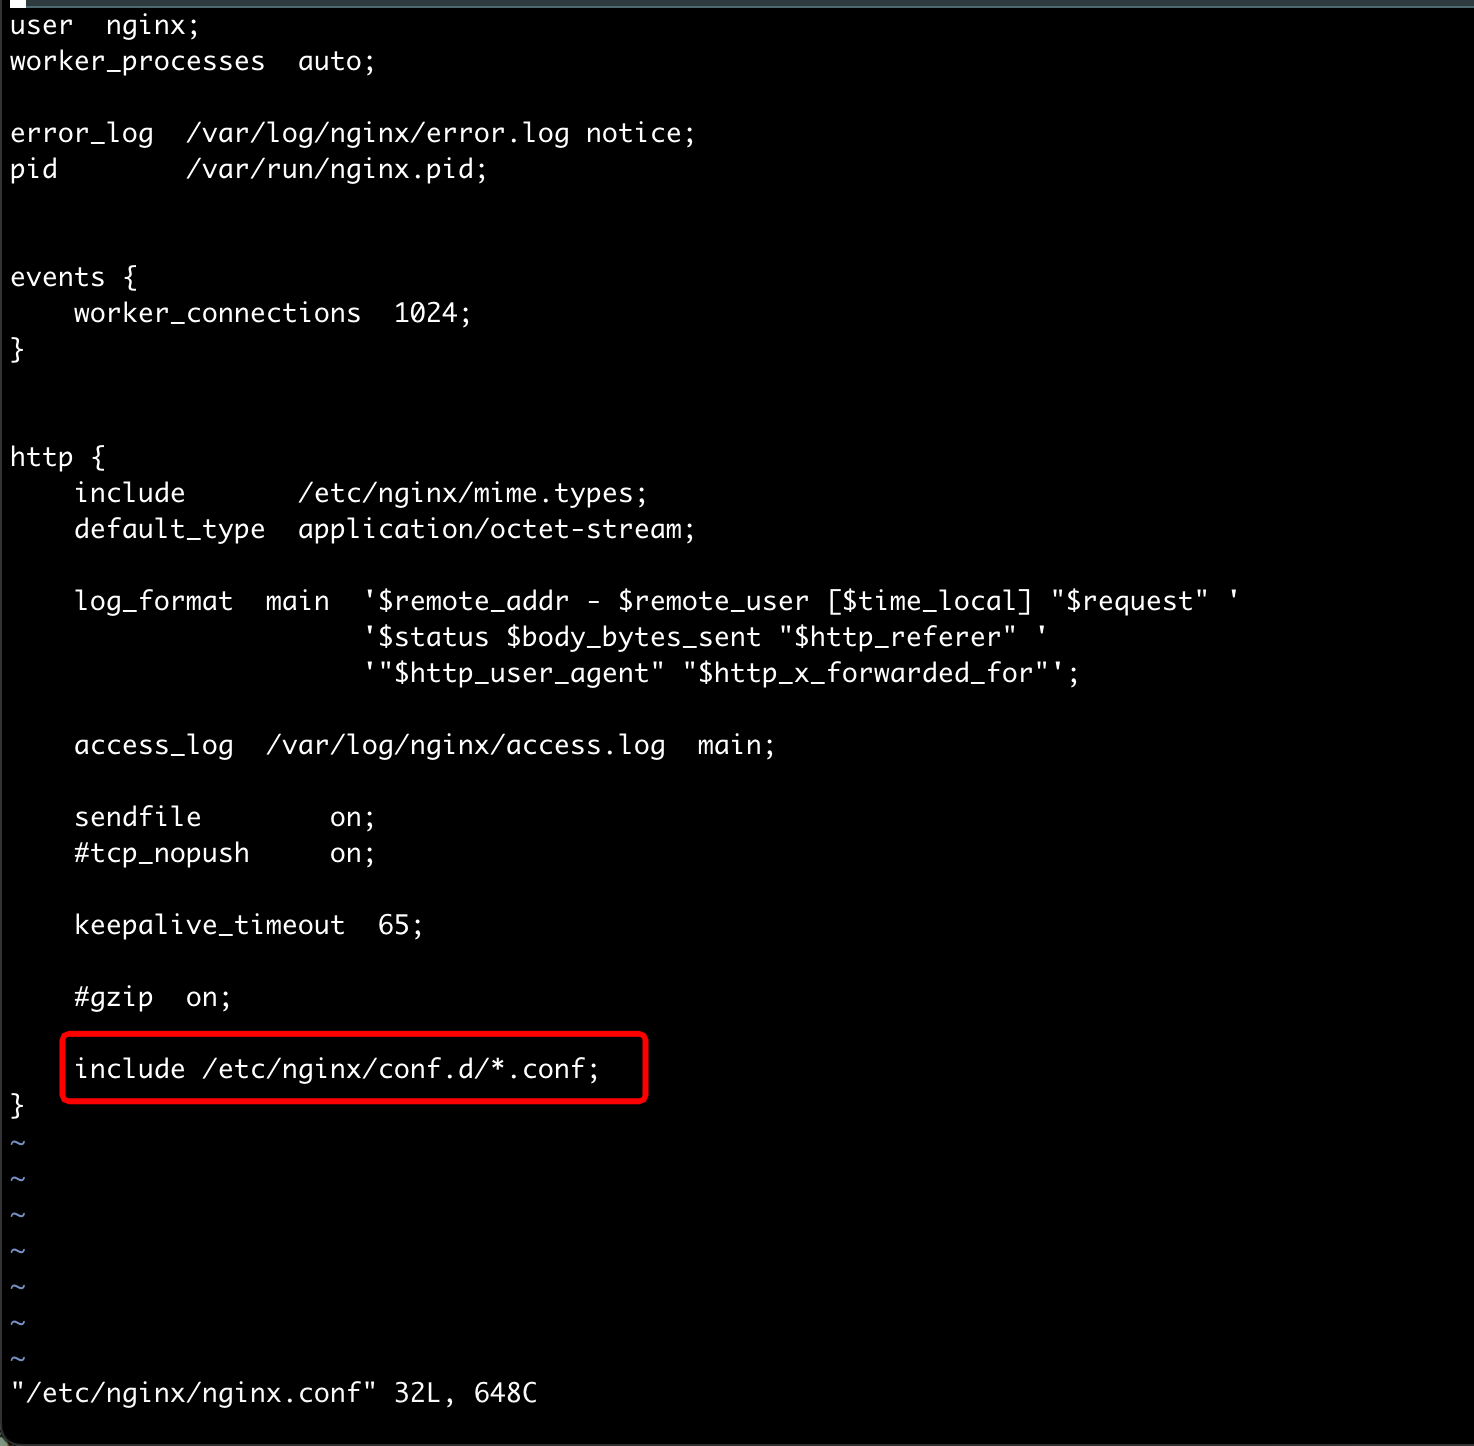
位置在 /etc/nginx/nginx.conf
查看include 指向Nginx的配置文件,include /etc/nginx/conf.d/*.conf 养成好习惯,修改之前先备份
/etc/nginx/conf.d 目录下有default.conf 文件
sudo vim /etc/nginx/conf.d/default.conf
添加如下location

查看配置文件是否正确
$ sudo nginx -t
重启nginx
$ sudo systemctl restart nginx
查看服务器 nginx的log日志
位置
/var/log/nginx
的 access.log error.log
修改权限为777 sudo chmod 777 *.log
在浏览器访问不带端口的地址 http://10.110.xx,xx/devices
10.112.98.23 - - [28/Aug/2023:15:26:44 +0800] "GET /static/vendor/fontawesome-5.7.2/css/fonts/element-icons.ttf HTTP/1.1" 404 69 "http://10.110.xx.xx/static/vendor/fontawesome-5.7.2/css/index.css" "Mozilla/5.0 (Macintosh; Intel Mac OS X 10_15_7) AppleWebKit/537.36 (KHTML, like Gecko) Chrome/116.0.0.0 Safari/537.36" "-"
6. 解决nginx访问Permission denied) while connecting to upstream问题
2023/08/28 14:41:51 [crit] 27956#27956: *1 connect() to 10.110.xx.xx:4000 failed (13: Permission denied) while connecting to upstream, client: 10.112.98.23, server: localhost, request: "GET / HTTP/1.1", upstream: "http://10.110.xx.xx:4000/", host: "10.110.xx.xx"
$ sudo vim /etc/selinux/config
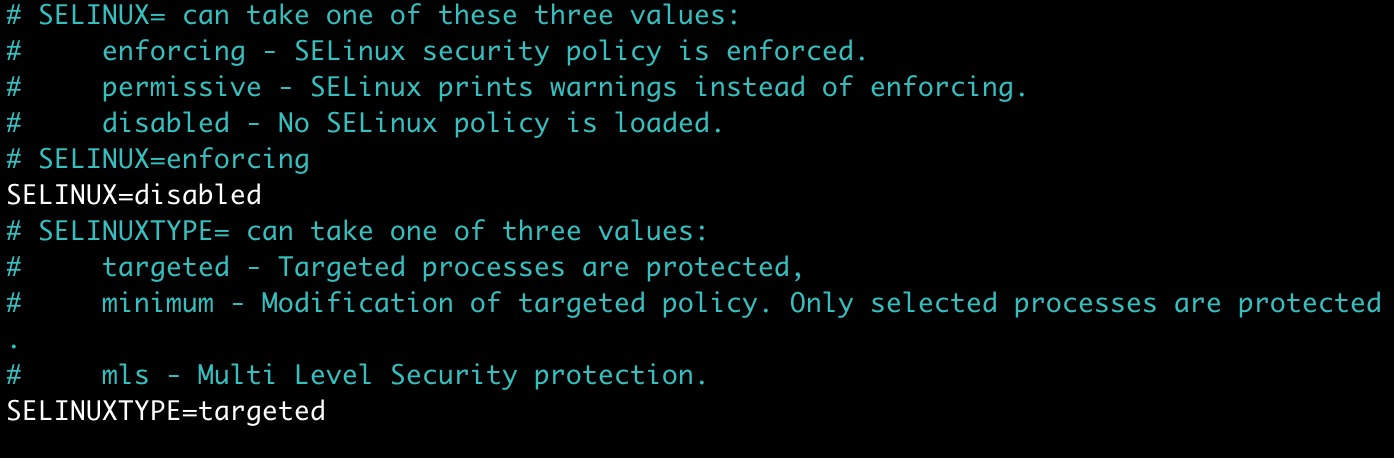
但还是不行
sudo setsebool -P httpd_can_network_connect 1 生效了
5. 其他的一些用法
停止服务:
sudo systemctl restart nginx
重新加载nginx
sudo systemctl reload nginx
打开防火墙的80端口:
firewall-cmd --zone=public --perm
anent --add-service=http
success
firewall-cmd --reload
success
命令的作用是将 http 服务添加到 public 区域的永久规则中,即允许通过防火墙访问 http 服务。
其中,
–zone=public 指定了作用的区域为 public
–permanent 表示该规则将被永久保存
–add-service=http 指定添加的服务为 http
7. nginx配置http
location / {
proxy_pass http://10.110.133.57:4000; # 或 http://www.baidu.com
proxy_read_timeout 300s;
proxy_set_header Host $host;
proxy_set_header X-Real-IP $remote_addr;
proxy_set_header X-Forwarded-For $proxy_add_x_forwarded_for;
}
8. nginx配置websocket
nginx代理
在 server 节点内,增加如下:
location /websocket {
proxy_pass http://127.0.0.1:9502;
proxy_http_version 1.1;
proxy_set_header Upgrade $http_upgrade;
proxy_set_header Connection "Upgrade";
}
配置完后,如果 server_name 为 www.test.com,就可以在 JavaScript 中这样访问:
ws://www.test.com/websocket
wss
只需在 server 节点内正常配置 ssl 即可,如下:
ssl on;
ssl_certificate ***.crt;
ssl_certificate_key ***.key;
8. nginx配置静态资源
参考
CentOS7操作系统安装nginx实战(多种方法,超详细)
nginx反向代理websocket,nginx配置websocket转发,nginx socket反向代理, nginx支持websocket-腾讯云开发者社区-腾讯云


 9708
9708


 被折叠的 条评论
为什么被折叠?
被折叠的 条评论
为什么被折叠?
 到【灌水乐园】发言


