java nio实例_java NIO使用示例

package com.mine;

import java.net.InetSocketAddress;

import java.net.ServerSocket;

import java.nio.ByteBuffer;

import java.nio.channels.SelectableChannel;

import java.nio.channels.SelectionKey;

import java.nio.channels.Selector;

import java.nio.channels.ServerSocketChannel;

import java.nio.channels.SocketChannel;

import java.util.Iterator;

public class SelectorDemo {

public static int PORT_NUMBER = 1234;

public static void main(String[] argv) throws Exception {

new SelectorDemo().go(argv);

}

public void go(String[] argv) throws Exception {

int port = PORT_NUMBER;

if (argv.length > 0) {

// Override default listen port

port = Integer.parseInt(argv[0]);

}

System.out.println("Listening on port " + port); // Allocate an unbound server socket channel

ServerSocketChannel serverChannel = ServerSocketChannel.open(); // 新建一个通道

ServerSocket serverSocket = serverChannel.socket(); // 从通道获得一个socket连接

Selector selector = Selector.open(); // 新建一个选择器

serverSocket.bind(new InetSocketAddress(port)); // 把socket连接绑定到一个端口上

serverChannel.configureBlocking(false); // 设置通道为非阻塞模式,只有非阻塞模式才能使用nio带来的好处,socket通道能设置为非阻塞的,文件通道不能设置为非阻塞的

serverChannel.register(selector, SelectionKey.OP_ACCEPT); //把这个通道注册到一个选择器上,感兴趣的操作时OP_ACCEPT,等待连接

while (true) {// 从选择器中循环选择已经准备好的选择器键,键就是保持通道跟选择器的对应关系

int n = selector.select(); //从选择器中获得已经准备好的选择器键的个数

if (n == 0) {

continue; // nothing to do

}// Get an iterator over the set of selected keys

Iterator it = selector.selectedKeys().iterator(); // 遍历所有已经准备好的选择器键

while (it.hasNext()) {

SelectionKey key = (SelectionKey) it.next();

if (key.isAcceptable()) { //如果该键是等待连接的状态

ServerSocketChannel server = (ServerSocketChannel) key.channel(); //从改键中获取已经准备连接好的server socket通道

SocketChannel channel = server.accept(); //从server socket通道获得本次socket连接

registerChannel(selector, channel, SelectionKey.OP_READ); //把该连接注册为可读的操作状态

sayHello(channel);//往该socket连接发送数据

}// Is there data to read on this channel?

if (key.isReadable()) { //下次当该链接为可读的时候

readDataFromSocket(key);//接收该socket链接的数据,并显示

}// Remove key from selected set; it's been handled

it.remove();//删除本次已经执行过的准备好的键,下次再执行selector.select(),仍然能选出所有已经准备好的键

}

}

}

protected void registerChannel(Selector selector, SelectableChannel channel, int ops) throws Exception {

if (channel == null) {

return;

}

channel.configureBlocking(false); //设置通道为非阻塞模式

channel.register(selector, ops);//把该连接注册为可读的操作状态

}

private ByteBuffer buffer = ByteBuffer.allocateDirect(1024);

protected void readDataFromSocket(SelectionKey key) throws Exception {

SocketChannel socketChannel = (SocketChannel) key.channel();

int count;

buffer.clear();

while ((count = socketChannel.read(buffer)) > 0) { //从通道里面独处数据

buffer.flip(); //标准该通道的数据是可读的

while (buffer.hasRemaining()) {

socketChannel.write(buffer);//往通道里面写数据

}

buffer.clear();

if (count < 0) {

socketChannel.close();

}

}

}

private void sayHello(SocketChannel channel) throws Exception {

buffer.clear();

buffer.put("Hi there!\r\n".getBytes());

buffer.flip();

channel.write(buffer);

}

}

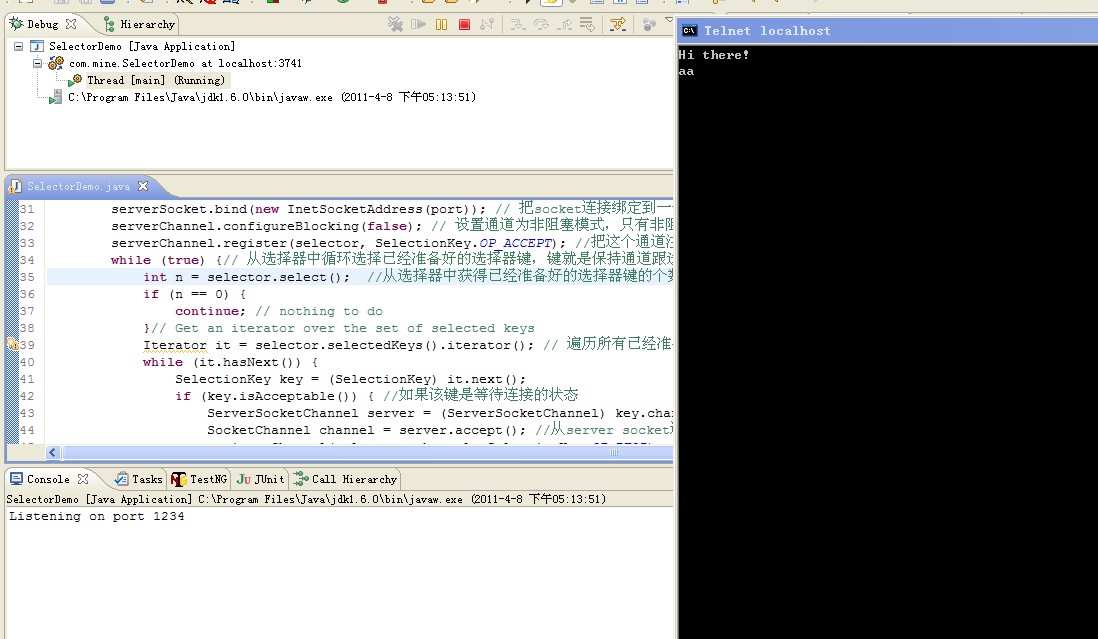
执行该程序,用telnet登陆本机的1234端口,你输入一个字符,程序把接收到的字符发送出去。

257ceaa3948064934899edba0248c2c7.png

  • 0
    点赞
  • 0
    收藏
    觉得还不错? 一键收藏
  • 0
    评论
### 回答1: Java NIO 中的 Selector 可以用于多路复用 I/O,它可以同时监控多个 Channel 的 IO 状态,如读写就绪等,从而让你的程序可以同时处理多个网络连接。 使用 Selector 的基本流程如下: 1. 创建 Selector 对象:使用 `Selector.open()` 方法。 2. 创建并配置 Channel:每个 Channel 都必须注册到 Selector 上。 3. 向 Selector 注册感兴趣的事件:使用 `SelectionKey` 对象将 Channel 和感兴趣的事件绑定。 4. 通过 `select()` 方法监控 Channel:该方法会阻塞,直到至少有一个 Channel 处于就绪状态。 5. 处理就绪的 Channel:通过 `selectedKeys()` 方法获取所有就绪的 Channel,然后遍历每一个 Key,并根据 Key 的事件状态进行相应的处理。 6. 关闭 Selector:使用 `close()` 方法关闭 Selector。 以上就是 Selector 的基本使用方法。希望这些信息能帮助你理解和使用 Java NIO 中的 Selector。 ### 回答2: Java NIO(New Input/Output)提供了一种非阻塞I/O的能力,其中的selector是一种重要的组件。它允许程序通过一个单线程来监听多个通道上的事件并做出相应的处理。 使用Selector主要包括以下步骤: 1. 创建Selector实例: Selector selector = Selector.open(); 2. 创建Channel并设置为非阻塞模式: 在使用Selector之前,需要确保Channel处于非阻塞模式,例如SocketChannel或ServerSocketChannel: SocketChannel socketChannel = SocketChannel.open(); socketChannel.configureBlocking(false); 3. 将Channel注册到Selector上: 通过SelectionKey来表示Channel的注册状态,包括感兴趣的操作集合及其附加的数据。可以使用以下方法将Channel注册到Selector上: SelectionKey key = socketChannel.register(selector, SelectionKey.OP_READ); 4. 进行事件监听: 使用Selector的select()方法进行事件监听,它会阻塞,直到有一个或多个事件发生: int readyChannels = selector.select(); if (readyChannels == 0) { continue; } 5. 获取已就绪的事件集合: 通过调用selector.selectedKeys()方法获取已经就绪的事件集合: Set<SelectionKey> selectedKeys = selector.selectedKeys(); 6. 遍历已就绪的事件集合并处理: 遍历selectedKeys集合,处理每一个就绪的事件: Iterator<SelectionKey> keyIterator = selectedKeys.iterator(); while (keyIterator.hasNext()) { SelectionKey key = keyIterator.next(); if (key.isReadable()) { // 可读事件处理逻辑 } if (key.isWritable()) { // 可写事件处理逻辑 } keyIterator.remove(); // 处理完毕后需要手动移除该事件,避免重复处理 } 7. 关闭Selector: 使用完Selector后需要及时关闭: selector.close(); 使用Selector可以实现多个通道的事件监听和处理,极大地提高了应用程序的性能和资源利用率。需要注意的是,在使用Selector时,一个线程可以管理多个Channel,但要谨慎处理每个Channel上的事件,以避免阻塞整个Selector处理线程。 ### 回答3: Java NIO(New I/O)是一种非阻塞I/O操作的Java API。它提供了一组用于高效处理I/O操作的类和接口。其中,Selector是NIO的核心组件之一,用于实现非阻塞I/O。 Selector是一个类似于调度员的对象,它可以同时监视多个通道的I/O事件。使用Selector可以实现单线程同时管理多个通道的I/O操作,提高了系统的效率。 使用Selector的主要步骤如下: 1. 创建一个Selector对象:通过调用Selector.open()方法创建一个Selector对象。 2. 将通道注册到Selector上:将需要监视的通道注册到Selector上,例如SocketChannel、ServerSocketChannel等。通过调用通道的register()方法完成注册。 3. 设置通道的非阻塞模式:通过调用通道的configureBlocking(false)方法将通道设置为非阻塞模式。 4. 选择通道:通过调用Selector的select()方法选择通道,并返回已准备就绪的通道的数量。 5. 处理选择的通道:通过调用Selector的selectedKeys()方法获取选择的通道集合,可以通过遍历通道集合进行相应的读写操作。 6. 取消选择的通道:通过调用SelectionKey的cancel()方法取消选择的通道的注册。 示例代码如下: ```java Selector selector = Selector.open(); SocketChannel socketChannel = SocketChannel.open(); socketChannel.configureBlocking(false); socketChannel.connect(new InetSocketAddress("example.com", 80)); socketChannel.register(selector, SelectionKey.OP_CONNECT); while (true) { int readyChannels = selector.select(); if (readyChannels == 0) { continue; } Set<SelectionKey> selectedKeys = selector.selectedKeys(); Iterator<SelectionKey> keyIterator = selectedKeys.iterator(); while (keyIterator.hasNext()) { SelectionKey key = keyIterator.next(); if (key.isConnectable()) { // 处理连接就绪的通道 SocketChannel channel = (SocketChannel) key.channel(); if (channel.isConnectionPending()) { channel.finishConnect(); } channel.configureBlocking(false); channel.register(selector, SelectionKey.OP_READ); } else if (key.isReadable()) { // 处理读就绪的通道 SocketChannel channel = (SocketChannel) key.channel(); ByteBuffer buffer = ByteBuffer.allocate(1024); channel.read(buffer); buffer.flip(); // 处理读取到的数据 } keyIterator.remove(); } } ``` 以上是一个简单的Selector的使用示例,通过这些步骤,可以实现对多个通道的非阻塞I/O操作的监视和处理。需要注意的是,Selector是基于事件驱动的,可以实现高效的I/O操作。

“相关推荐”对你有帮助么?

  • 非常没帮助
  • 没帮助
  • 一般
  • 有帮助
  • 非常有帮助
提交
评论
添加红包

请填写红包祝福语或标题

红包个数最小为10个

红包金额最低5元

当前余额3.43前往充值 >
需支付:10.00
成就一亿技术人!
领取后你会自动成为博主和红包主的粉丝 规则
hope_wisdom
发出的红包
实付
使用余额支付
点击重新获取
扫码支付
钱包余额 0

抵扣说明:

1.余额是钱包充值的虚拟货币,按照1:1的比例进行支付金额的抵扣。
2.余额无法直接购买下载,可以购买VIP、付费专栏及课程。

余额充值