


一起来用tf.data API!(5)——使用tf.data API读取TFRecords文件
(一)前 言
在上一节中,我们成功将图像数据制作成了TFRecords文件,在这一节中我们要使用tf.data API将其读取出来,并使用matplotlib对其进行显示。
(二)使用tf.data API读取文件
我们通过如下的代码实现这一操作:
(1)定义数据预处理操作
注意在进行tfrecords读取的时候,还原特征列的属性一定要与写入时创建的example相同
def _parse_function(example_proto):
# 还原数据特征
  features = {'label':tf.FixedLenFeature([], tf.int64),
              'img_raw':tf.FixedLenFeature([], tf.string)}

  parsed_features = tf.parse_single_example(example_proto, features)
  # 对原数据进行解码
  img = tf.decode_raw(parsed_features['img_raw'], tf.uint8)
  img = tf.reshape(img, [128, 128, 3])
    # 在流中抛出img张量和label张量,并进行数据类型的转换
  img = tf.cast(img, tf.float32) / 255
  label = tf.cast(parsed_features['label'], tf.int32)
  return img, label
(2)创建dataset
filenames = ["要读取的文件序列"]
dataset = tf.data.TFRecordDataset(filenames)
# 使用map方法对dataset进行处理
dataset = dataset.map(_parse_function)
(3)创建迭代器
# 创建一个可初始化迭代器
iterator = dataset.make_initializable_iterator()
next_element = iterator.get_next()
(4)定义会话取出数据
with tf.Session() as sess:
    sess.run(iterator.initializer)
    for i in range(2):
        image, label = sess.run(next_element)
        plt.imshow(image)
(5)完整代码
import tensorflow as tf
import matplotlib.pyplot as plt
def _parse_function(example_proto):
features = {'label':tf.FixedLenFeature([], tf.int64),
'img_raw':tf.FixedLenFeature([], tf.string)}
parsed_features = tf.parse_single_example(example_proto, features)
img = tf.decode_raw(parsed_features['img_raw'], tf.uint8)
img = tf.reshape(img, [128, 128, 3])
# 在流中抛出img张量和label张量
img = tf.cast(img, tf.float32) / 255
label = tf.cast(parsed_features['label'], tf.int32)
return img, label
filenames = ["要读取的文件序列"]
dataset = tf.data.TFRecordDataset(filenames)
dataset = dataset.map(_parse_function)
iterator = dataset.make_initializable_iterator()
next_element = iterator.get_next()
with tf.Session() as sess:
sess.run(iterator.initializer)
for i in range(2):
image, label = sess.run(next_element)
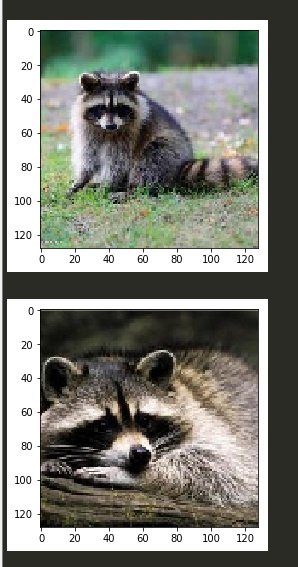
plt.imshow(image)
plt.show()
运行上述源码,显示如下:
(三)总 结
在本节中我们介绍了如何使用tf.data API读取生成的TFRecords,并将其重新显示,有任何的疑问可以在评论区留言,我会尽快回复,谢谢支持!


 3万+
3万+


 被折叠的 条评论
为什么被折叠?
被折叠的 条评论
为什么被折叠?
 到【灌水乐园】发言


