


1.使用Centos 6部署PXE+Kickstart,安装centos6系统,ks文件自定义
-
准备工作
- 关闭selinux:
setenforce 0 - 安装软件
yum install tftp-server dhcp syslinux vsftpd - 挂载光盘
mkdir /var/ftp/pub/cd
mount -t iso9660 /dev/cdrom /var/ftp/pub/cd
最好写到/etc/fstab中
- 关闭selinux:
-
配置tftp服务
- vim /etc/xinetd.d/tftp
设置disable = no - 重启tftp服务:
service xinetd restart
- vim /etc/xinetd.d/tftp
-
配置dhcp服务
vim /etc/dhcp/dhcpd.conf
  6 subnet 192.168.253.0 netmask 255.255.255.0 {
  7   range 192.168.253.110 192.168.253.160;
  8   option domain-name-servers 114.114.114.114;
  9   option routers 192.168.253.1;
 10   next-server 192.168.253.100;
 11   filename "pxelinux.0";
 12 }
- 重启dhcpd服务:
service dhcpd restart
-
启动ftp服务
service vsftpd restart -
准备相关文件
- pxe程序文件:
cp /usr/share/syslinux/pxelinux.0 /var/lib/tftpboot/ - 配置文件目录:
mkdir /var/lib/tftpboot/pxelinux.cfg - 内核及initrd文件
cp /var/ftp/pub/cd/images/pxeboot/initrd.img /var/ftp/pub/cd/images/pxeboot/vmlinuz /var/lib/tftpboot/ - 引导菜单配置文件
cp /var/ftp/pub/cd/isolinux/isolinux.cfg /var/lib/tftpboot/pxelinux.cfg/default
修改default文件:
- pxe程序文件:
	default centos6
	label centos6
  	menu label ^Install CentOS6.9
  	menu default
 	 kernel vmlinuz
  	append initrd=initrd.img ks=ftp://192.168.253.100/pub/ks.cfg
- 测试
VMware上新建一台虚拟机(操作省略)
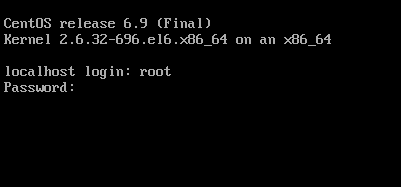
会自动配置IP,然后进入加载ks文件界面,此时没有创建ks文件,故会卡在此界面

7. 自定义ks文件:
保存为ks文件到/var/ftp/pub/ks.cfg
  1 #platform=x86, AMD64, or Intel EM64T
  2 #version=DEVEL
  3 # Firewall configuration
  4 firewall --disabled
  5 # Install OS instead of upgrade
  6 install
  7 # Use network installation
  8 url --url="ftp://192.168.253.100/pub/cd"
  9 # Root password
 10 rootpw --iscrypted $1$TnptLP2Q$CiPMDAMOMaj31.elCi7zq1
 11 # System authorization information
 12 auth  --useshadow  --passalgo=sha512
 13 # Use text mode install
 14 text
 15 # System keyboard
 16 keyboard us
 17 # System language
 18 lang en_US
 19 # SELinux configuration
 20 selinux --disabled
 21 # Do not configure the X Window System
 22 skipx
 23 # Installation logging level
 24 logging --level=info
 25 # Reboot after installation
 26 reboot
 27 # System timezone
 28 timezone  Asia/Shanghai
 29 # Network information
 30 network  --bootproto=dhcp --device=eth0 --onboot=on
 31 # System bootloader configuration
 32 bootloader --location=mbr
 33 # Clear the Master Boot Record
 34 zerombr
 35 # Partition clearing information
 36 clearpart --all --initlabel
 37 # Disk partitioning information
 38 part /boot --fstype="ext4" --size=200
 39 part / --fstype="ext4" --size=2048
 40
 41 %packages
 42 @base
 43 @console-internet
 44 @network-tools
 45
 46 %end
然后点击上述界面OK键,系统会自行安装:

系统安装成功
2.使用Centos 7部署Cobbler,安装Centos7和Ubuntu
2.1. 基础环境部署
- 关闭selinux
setenforce 0 - yum配置:
#将旧仓库配置转移到某目录中
mkdir /etc/yum.repos.d/old && mv /etc/yum.repos.d/C* /etc/yum.repos.d/old/
#安装wget,添加aliyun Base仓库及epel仓库
yum install -y wget
wget -O /etc/yum.repos.d/CentOS-Base.repo http://mirrors.aliyun.com/repo/Centos-7.repo
wget -O /etc/yum.repos.d/epel.repo http://mirrors.aliyun.com/repo/epel-7.repo
2.2. Cobbler服务部署
- 安装服务:
yum install cobbler cobbler-web dhcp tftp-server pykickstart httpd xinetd -y
- 服务自启动:
systemctl enable httpd
systemctl enable xinetd
systemctl enable rsyncd
systemctl enable tftp
systemctl enable cobblerd
- 启动服务:
systemctl restart httpd
systemctl restart xinetd
systemctl restart tftp
systemctl restart cobblerd
- 执行cobbler check检查运行环境:

- 解决问题:
问题1,2,6:
生成新的默认密码(默认密码,setting,和dhcp)(注意: 此密码是系统安装后的默认密码,建议使用强密码)
openssl passwd -1 -salt `openssl rand 15 -base64` 'pinginglab.net'

修改setting配置文件 vim /etc/cobbler/settings
server: 192.168.253.199
next_server: 192.168.253.199
manage_dhcp: 1
default_password_crypted: "$1$9jqa+Mak$xXaJQF5/FKuqCkvNuwCCa/"
...
配置DHCP
vim /etc/dhcp/dhcpd.conf
 21 subnet 192.168.253.0 netmask 255.255.255.0 {
 22      option routers             192.168.253.254;
 23      option domain-name-servers 114.114.114.114;
 24      option subnet-mask         255.255.255.0;
 25      range dynamic-bootp        192.168.253.110 192.168.253.200;
 26      default-lease-time         21600;
 27      max-lease-time             43200;
 28      next-server                $next_server;
问题3
启动tftp服务:编辑tftp服务配置文件/etc/xinetd.d/tftp
disable = no #修改此处值为no
问题4:
获取引导文件
cobbler get-loaders
问题5:
debian相关文件获取(如不需要部署debian系统可省略)
yum -y install debmirror
vim /etc/debmirror.conf
 ...
 28 #@dists="sid";
 29 @sections="main,main/debian-installer,contrib,non-free";
 30 #@arches="i386";
 ...
问题7:
电源管理工具(可选)
yum -y install fence-agents
重启服务并同步状态
systemctl restart cobblerd
cobbler check

2.3. cobbler基础配置
- 同步配置使配置生效
cobbler sync
- (1) 安装ubuntu1604:
配置distro:
distro主要用来定义和设置系统发行版本,里包含了系统的内核,引导文件,以及安装包等内容,就相当于一个LINUX系统的ISO镜像。如:多个发行版本,同一发行版不同版本号。
- 首先上传系统iso镜像文件,此处以ubuntu16.04镜像为例,其他镜像做法类似
(将本地的ubuntu镜像上传到linux家目录或直接下载镜像文件)
mkdir -p /system/ubuntu1604
mount -t iso9660 ~/ubuntu-16.04.5-server-amd64.iso /system/ubuntu1604
- 导入镜像
cobbler import --name=ubuntu1204 --path=/system/ubuntu1204 --arch=x86_64
-
查看distro配置
cobbler distro report

-
查看ubuntu相关文件:
cobbler list -
查看配置profile文件:
cobbler profile report -
测试
新建一台虚拟机,启动看到如下界面
(注意服务器的防火墙策略)

-
(2)安装centos7 :
-
上传系统iso镜像文件:
mkdir /mnt/cd
mount -t iso9660 /dev/cdrom /mnt/cd
- 导入镜像
cobbler import --name=centos7 --path=/mnt/cd --arch=x86_64
-
查看distro配置
cobbler distro report -
查看ubuntu相关文件:
cobbler list

-
查看配置profile文件:
cobbler profile report -
测试
新建一台虚拟机,启动看到如下界面

系统将会自动完成安装


 437
437


 被折叠的 条评论
为什么被折叠?
被折叠的 条评论
为什么被折叠?
 到【灌水乐园】发言


