package org.springframework.beans.factory.myspring;/** * @Authror ayo * @Date 2020/11/16 18:33 */public class MyTestBean { private String testStr = "testStr"; public String getTestStr() { return testStr; } public void setTestStr(String testStr) { this.testStr = testStr; }}<?xml version="1.0" encoding="UTF-8"?><beans xmlns="http://www.springframework.org/schema/beans" xmlns:xsi="http://www.w3.org/2001/XMLSchema-instance" xsi:schemaLocation="http://www.springframework.org/schema/beans http://www.springframework.org/schema/beans/spring-beans.xsd"> <bean id="myTestBean" class="org.springframework.beans.factory.myspring.MyTestBean"/>beans>package org.springframework.beans.factory.myspring;import org.junit.Test;import org.springframework.beans.factory.BeanFactory;import org.springframework.beans.factory.xml.XmlBeanFactory;import org.springframework.core.io.ClassPathResource;/** * @Authror ayo * @Date 2020/11/16 17:52 */public class BeanFactoryTest { @Test public void testSimpleLoad(){ BeanFactory beanFactory = new XmlBeanFactory(new ClassPathResource("org/springframework/beans/factory/myspring/beanFactoryTest.xml")); MyTestBean myTestBean = (MyTestBean)beanFactory.getBean("myTestBean"); System.out.println(myTestBean.getTestStr()); }}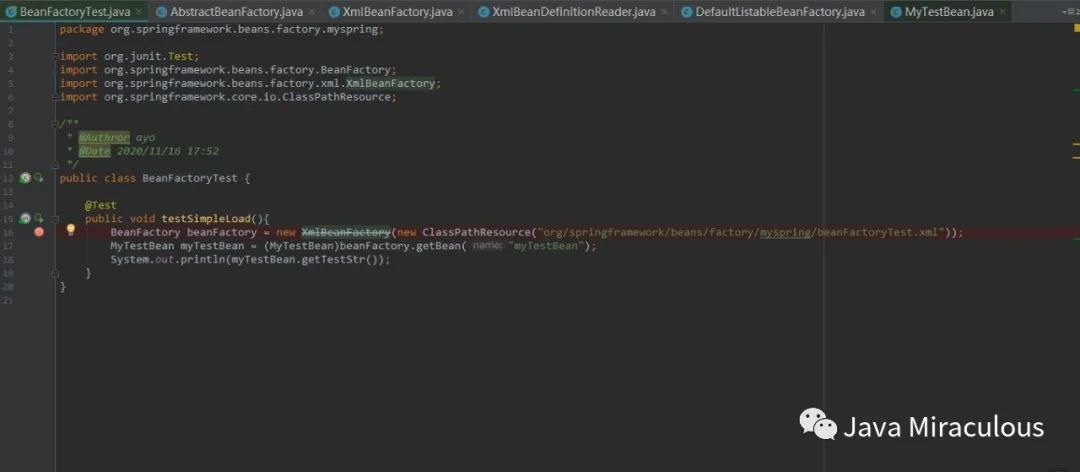
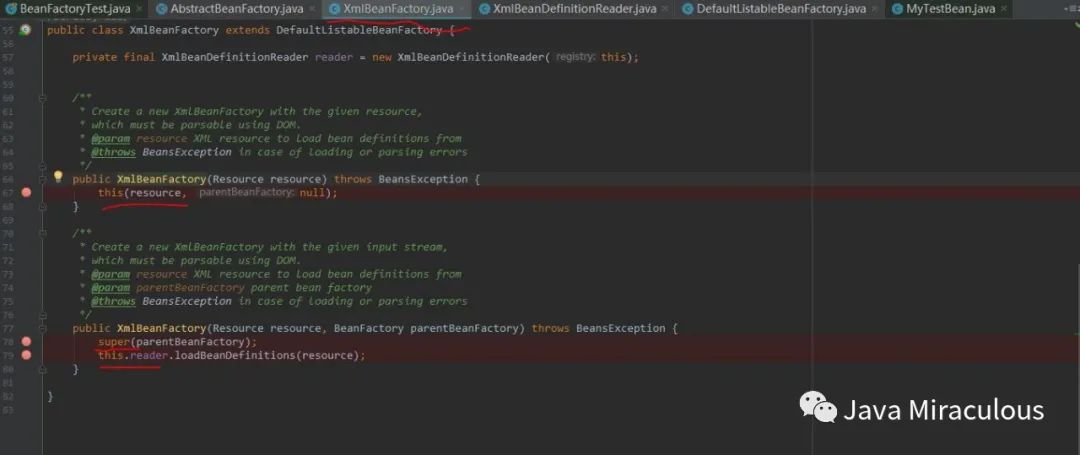
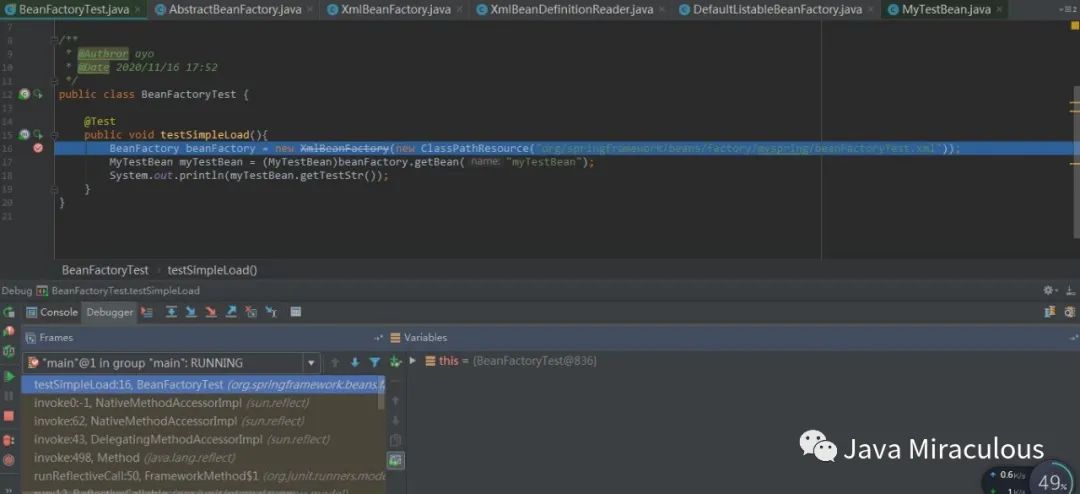
进去之后调用了XmlBeanFactory的一个构造方法
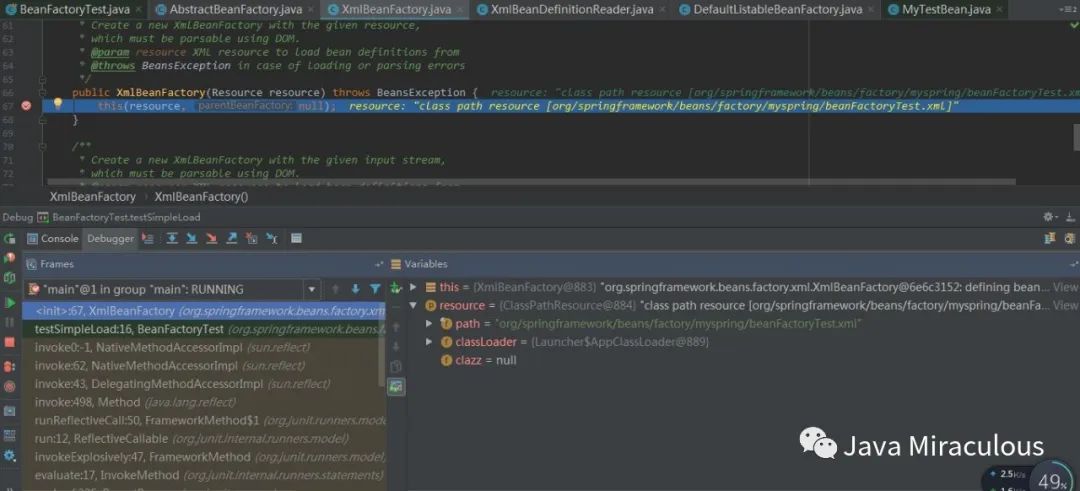
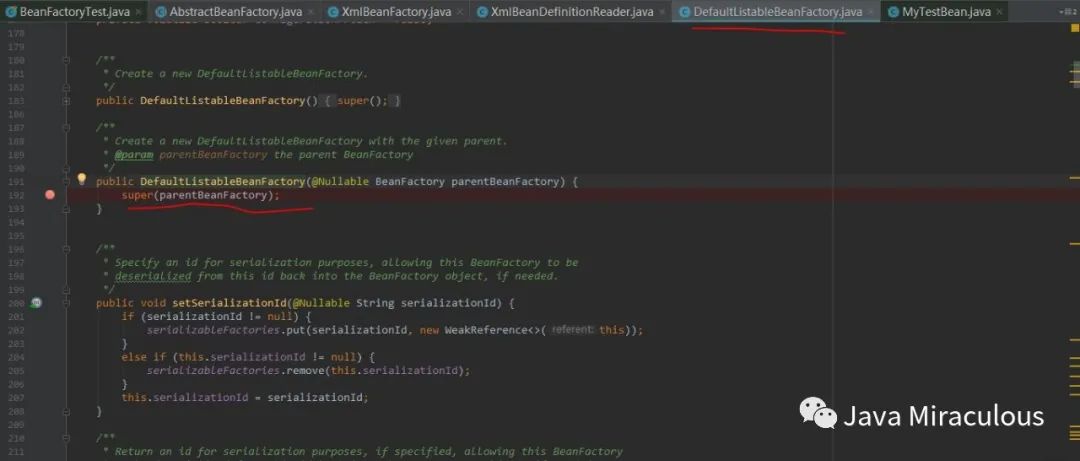
点进去构造方法继续看,可以看到分成了两步,首先调用的是父类DefaultListableBeanFactory的构造
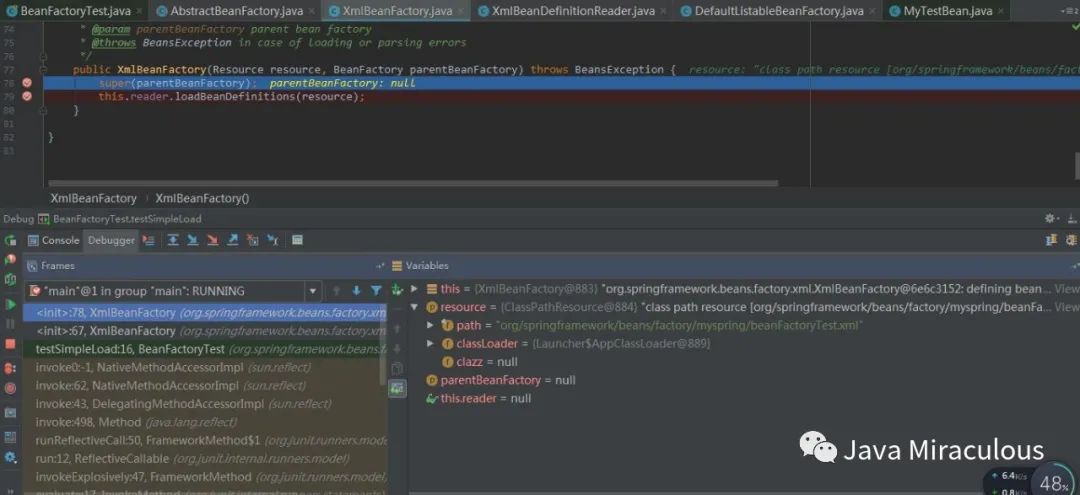
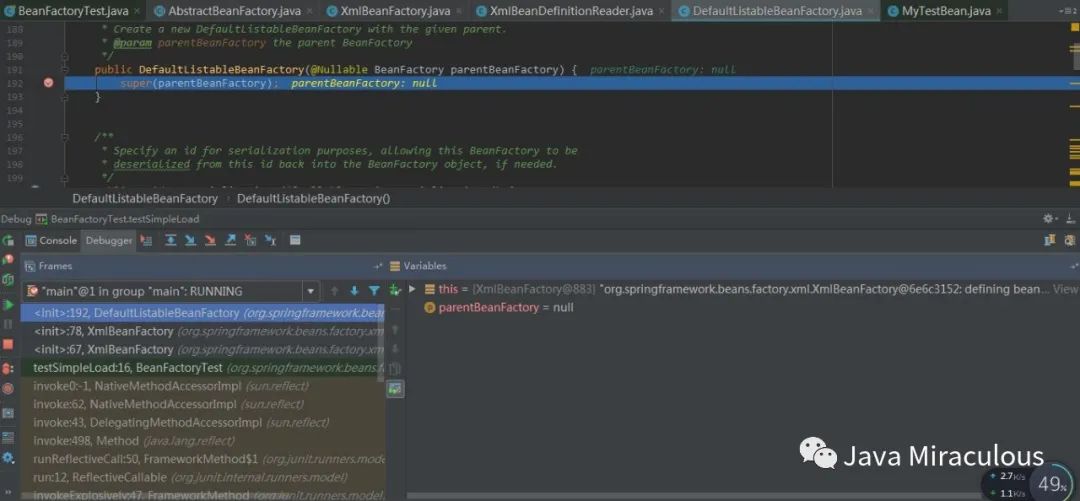
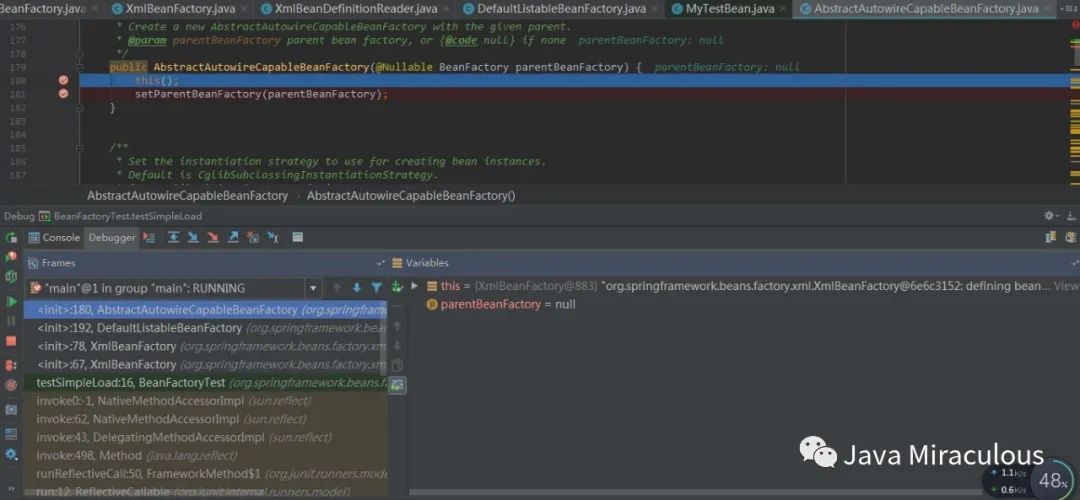
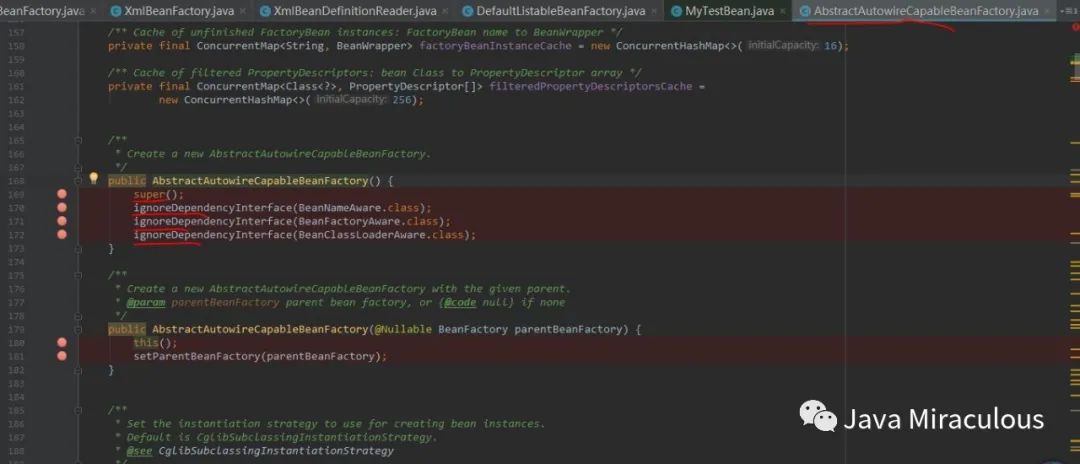
可以看到初始化了很多的属性,虽然没值
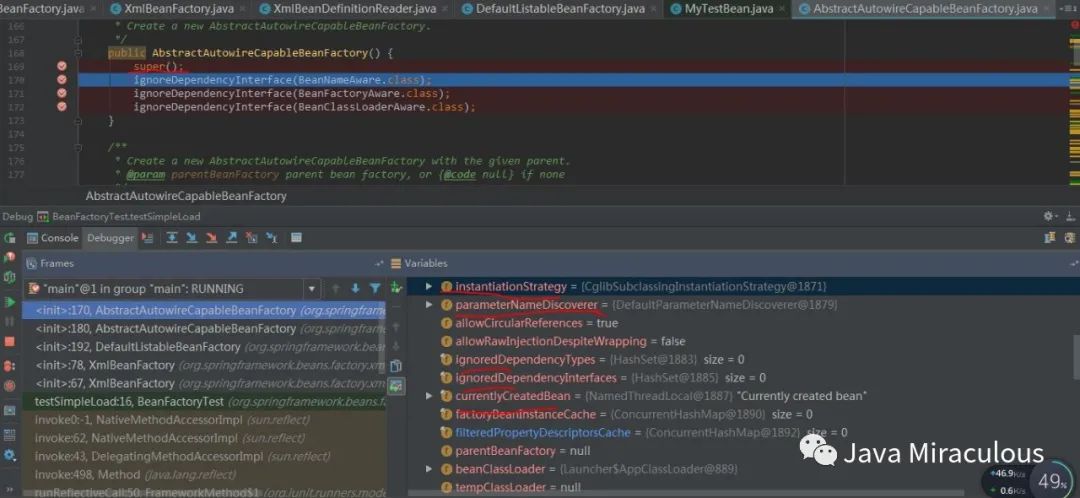
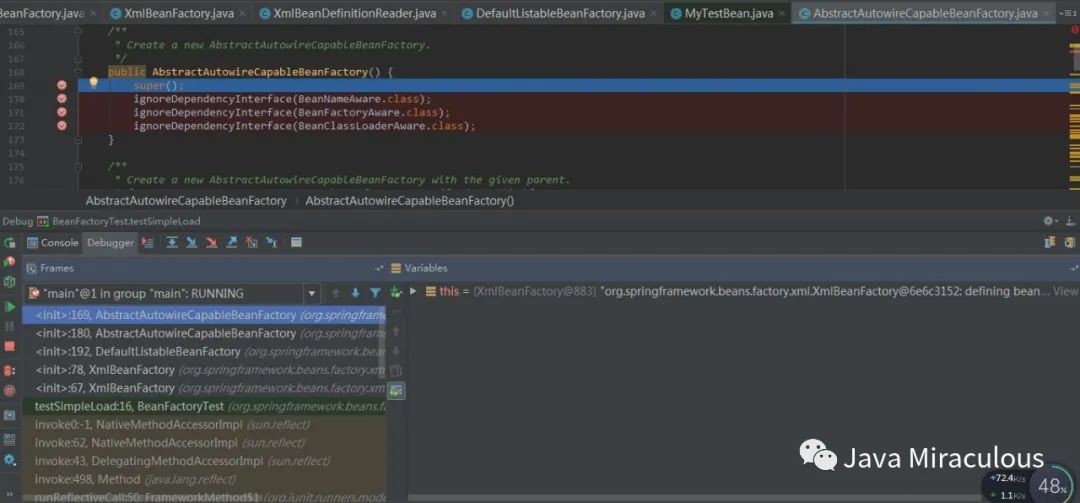
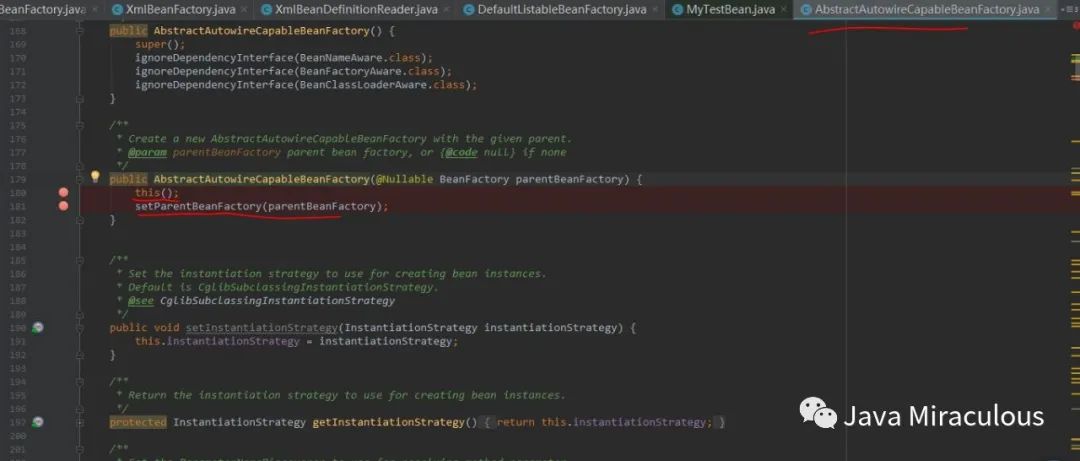
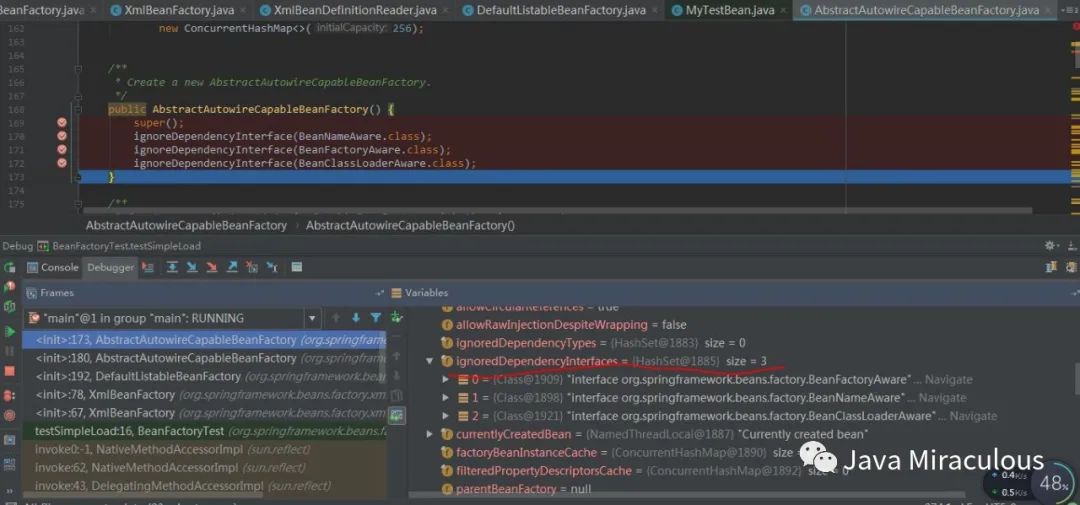
可以看到经过下面三个方法之后,ignoredDependencyInterfaces这个属性中添加了三个元素,这里有必要说下ignoreDependencyInterface这个方法,这个方法的主要功能是忽略给定接口的自动装配功能,那么这样做的目的是什么?会产生什么样的效果呢?举例来说,当A中有属性B,那么当Spring在获取A的Bean的时候如果其属性B还没有初始化,那么Spring会自动初始化B,这也是Spring中提供的一个重要特性。但是,某些情况下,B不会被初始化,其中的一种情况就是B实现了BeanNameAware接口。Spring中是这样介绍的:自动装配时忽略给定的依赖接口,典型应用是通过其他方式解析Application上下文注册依赖,类似于BeanFactory通过BeanFactoryAware进行注入或者ApplicationContext通过ApplicationContextAware进行注入。
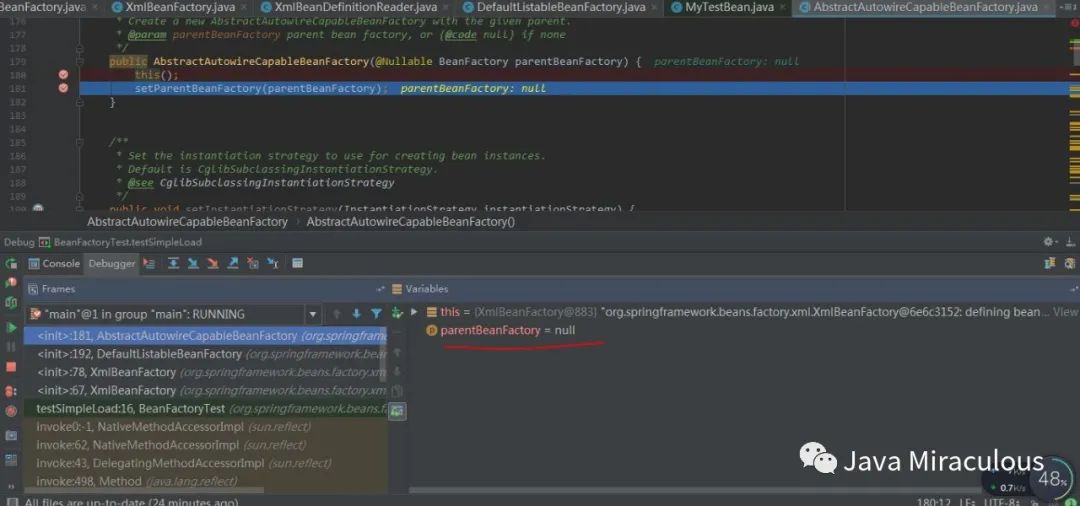
完事后进行下一步,这一步很简单,就是设置下parentBeanFactory,必须为空,不为空就抛出异常了
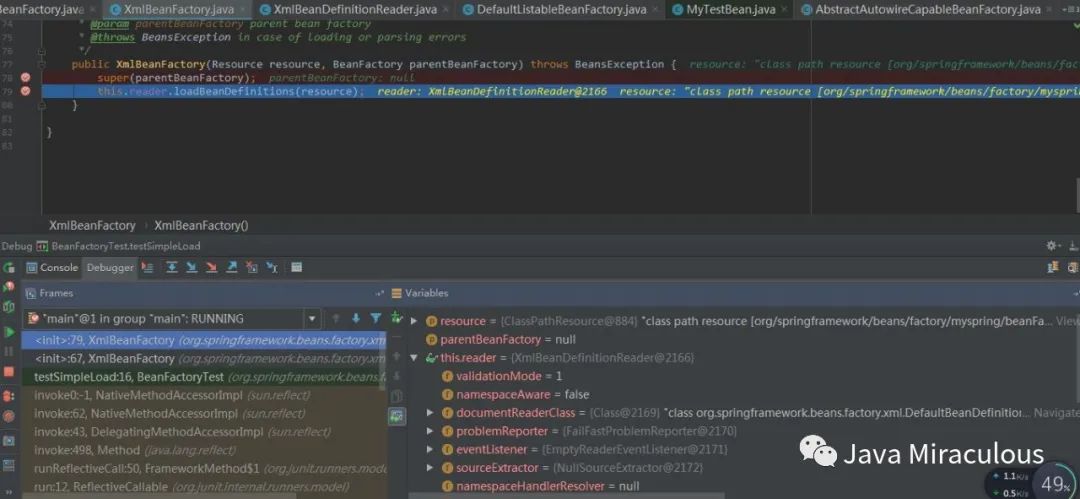
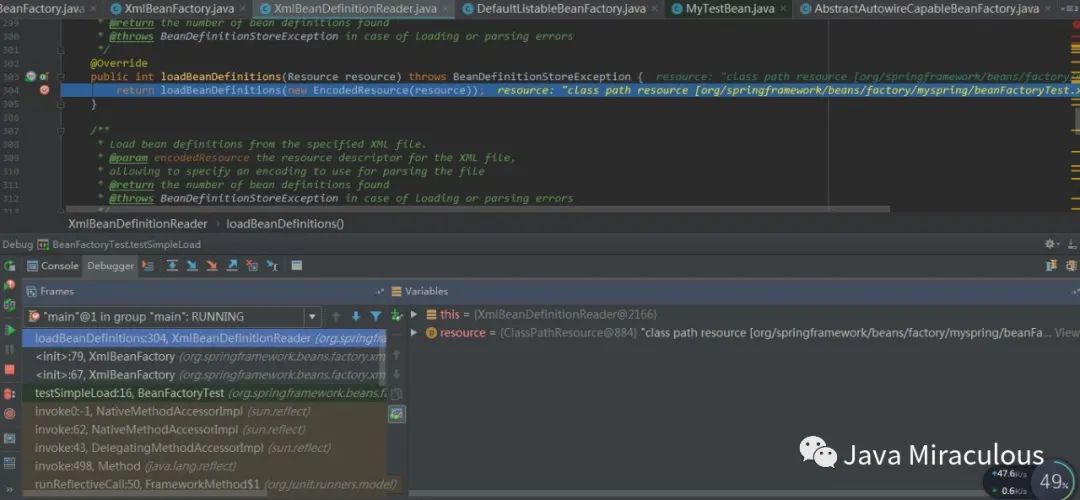
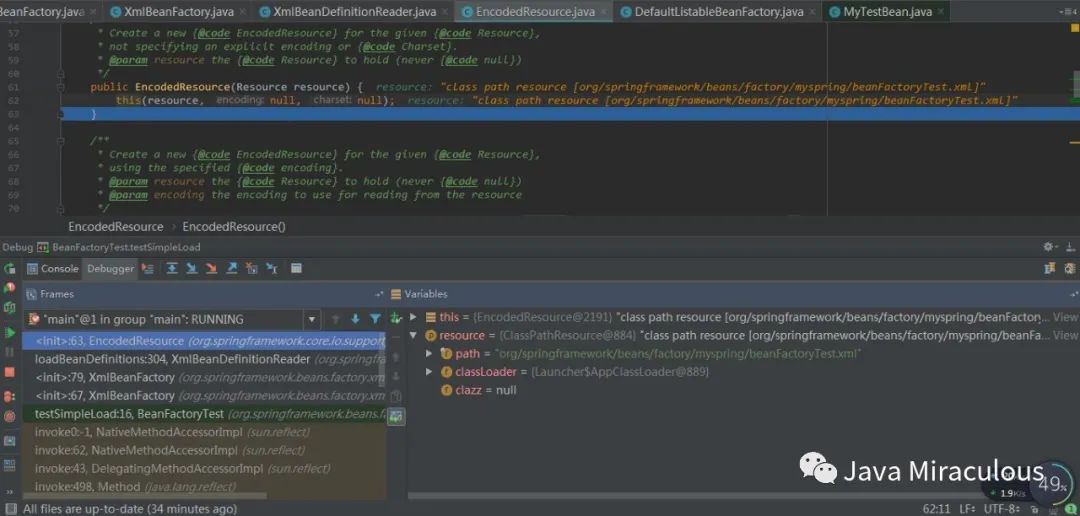
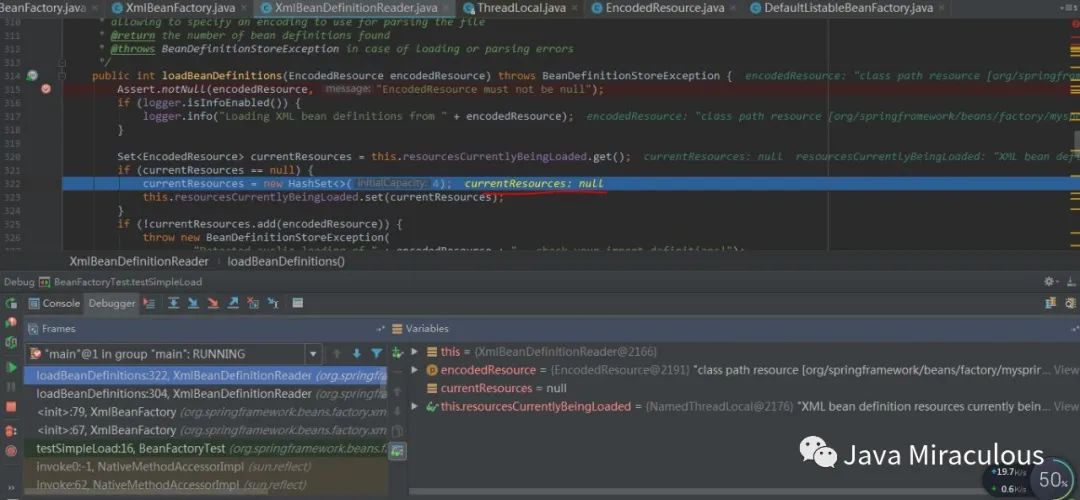
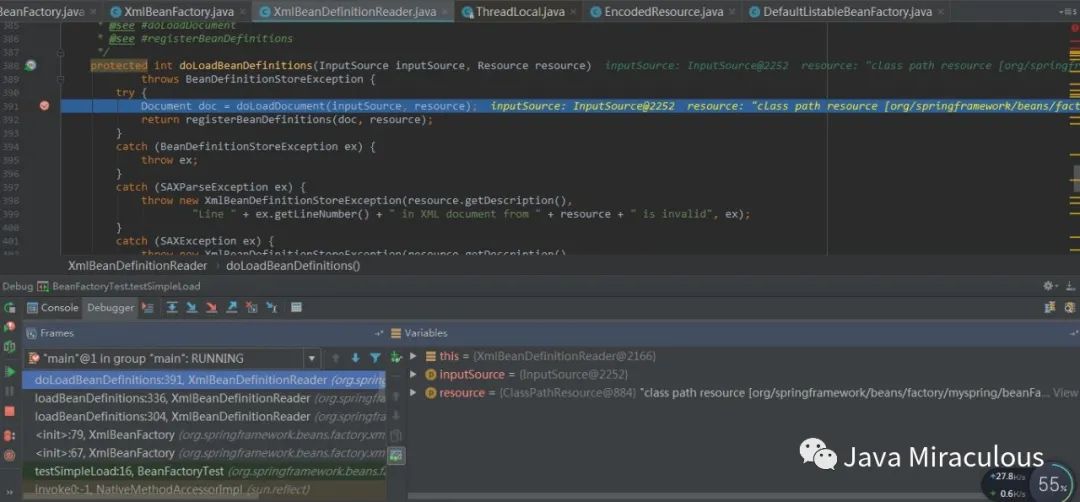
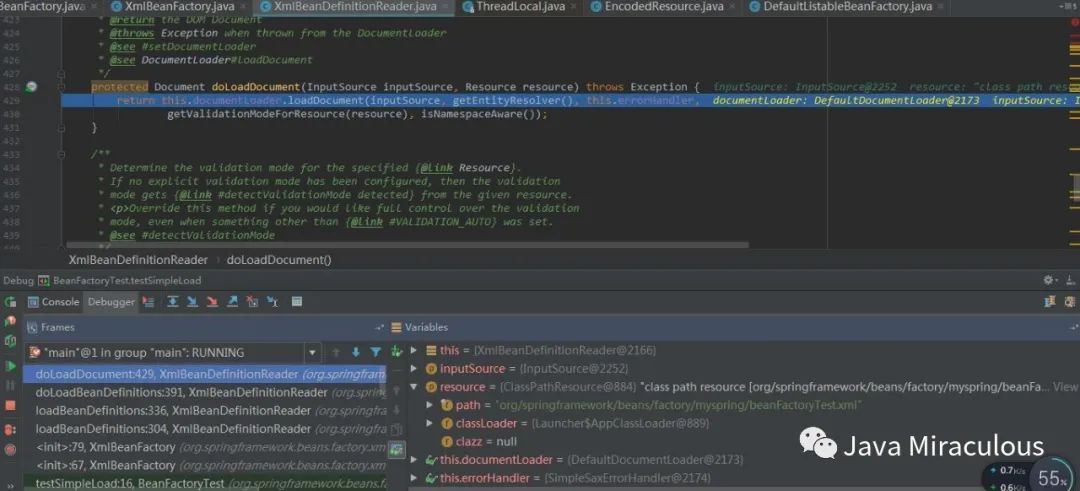
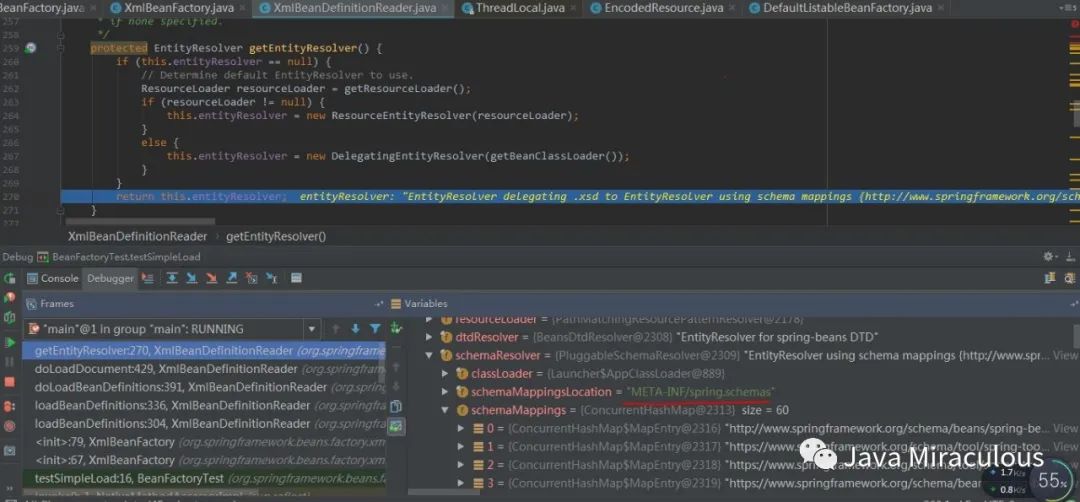
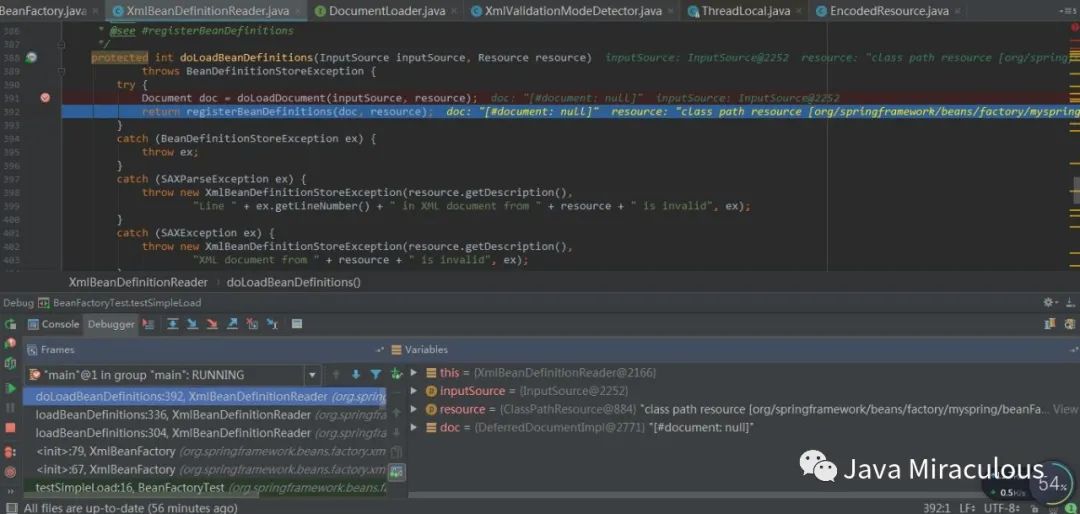
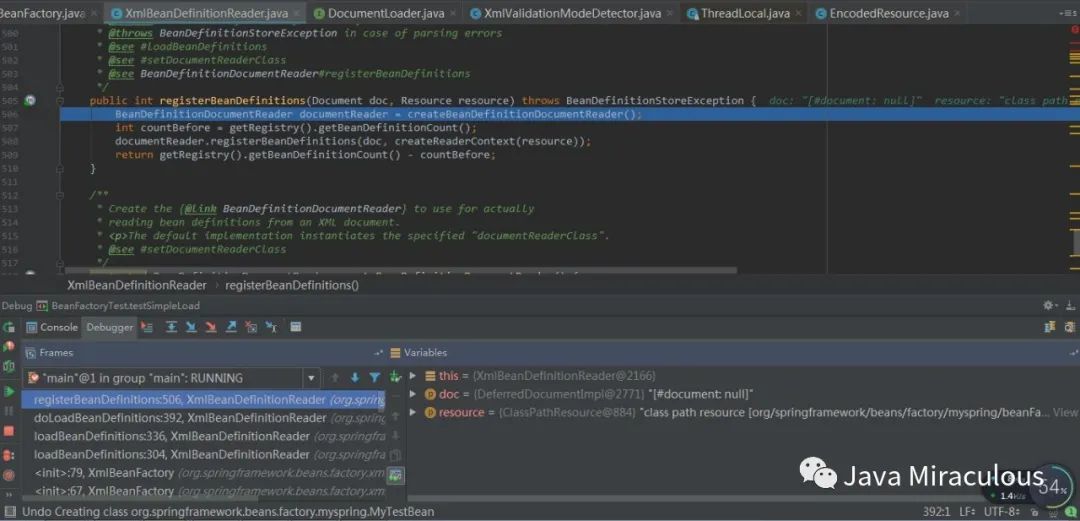
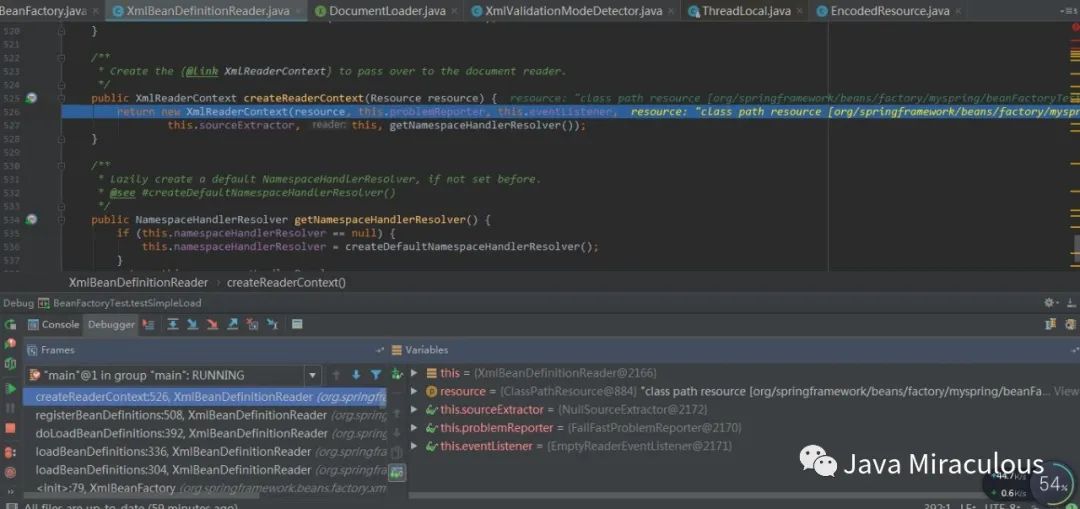
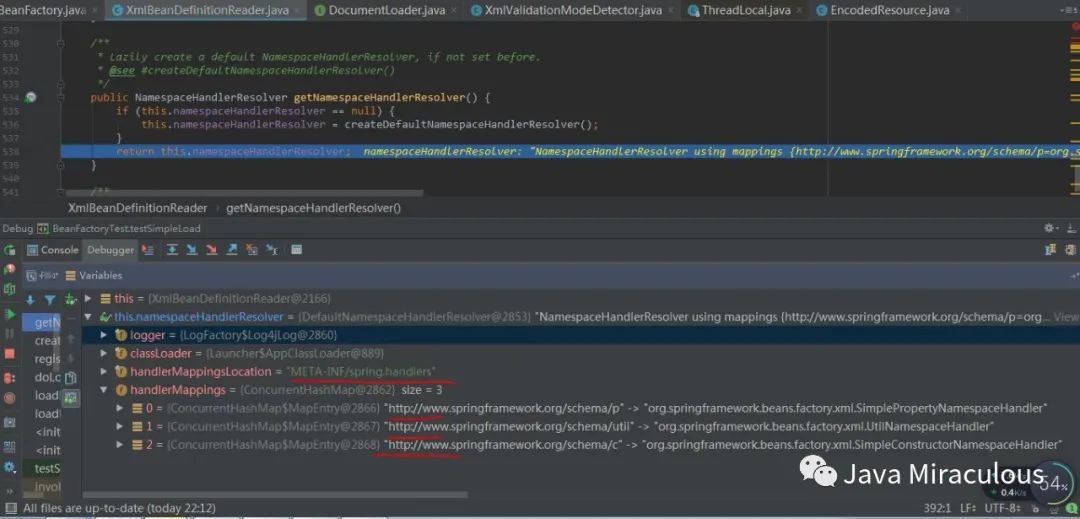
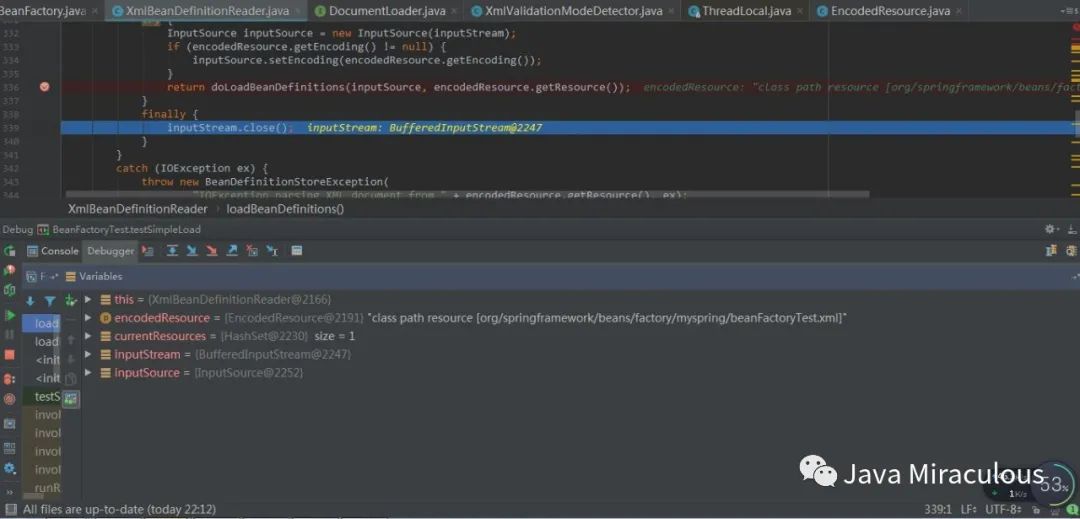
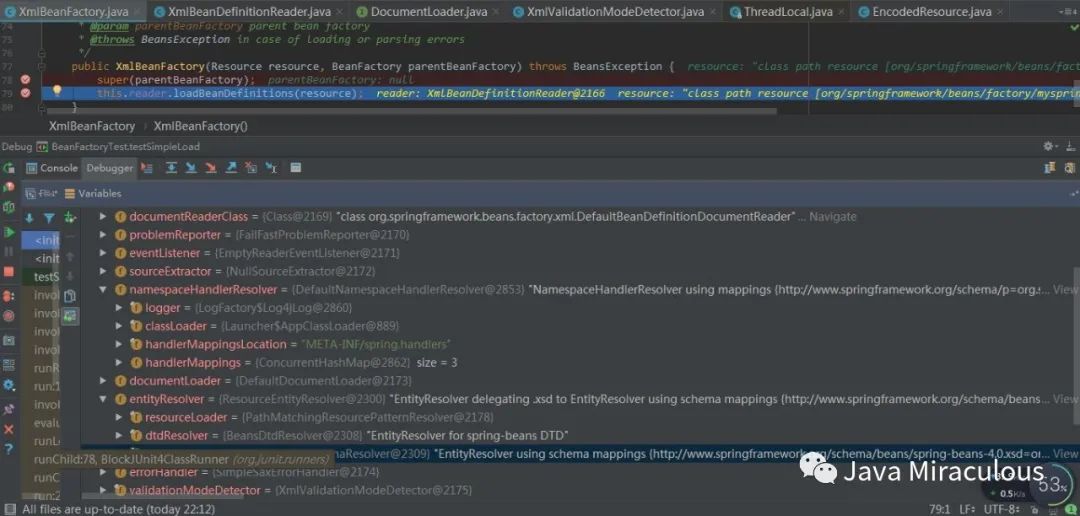
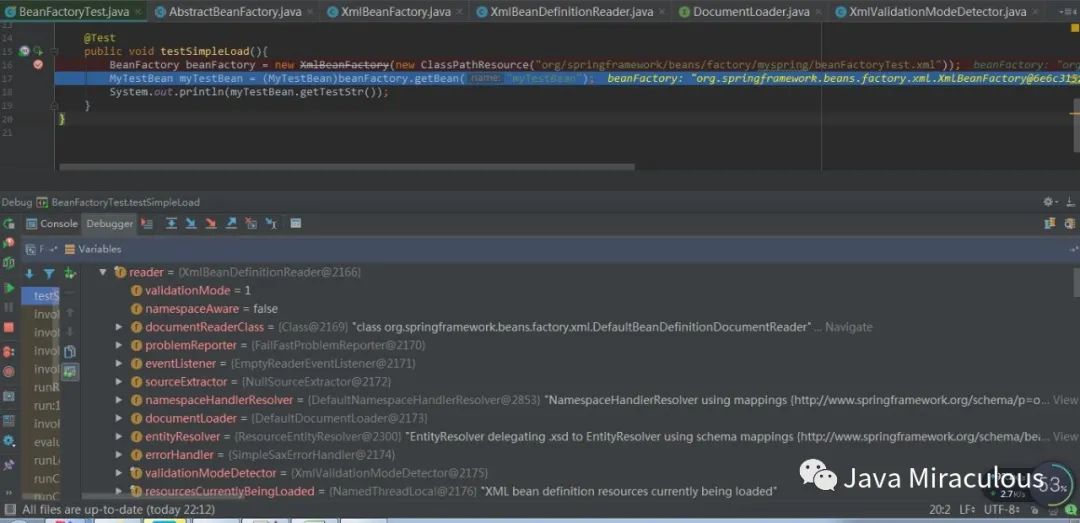

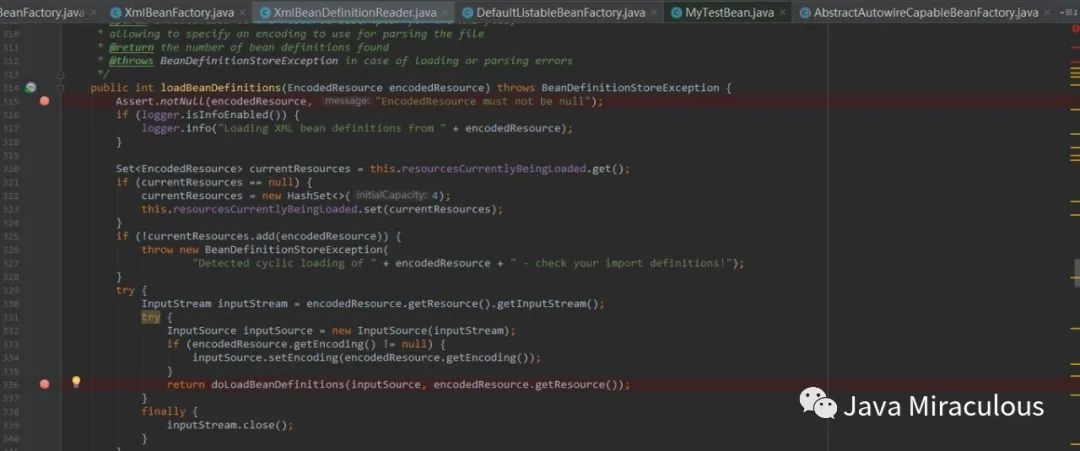
//首先说下这个入参的encodedResource,看名字就知道,spring对资源文件进行了编码public int loadBeanDefinitions(EncodedResource encodedResource) throws BeanDefinitionStoreException { //这里首先判断下资源肯定不能是null,就是读取到了xml配置文件 Assert.notNull(encodedResource, "EncodedResource must not be null"); if (logger.isInfoEnabled()) { logger.info("Loading XML bean definitions from " + encodedResource); } //这里先从属性resourcesCurrentlyBeingLoaded中获取,意思就是看配置文件是否加载过了,这里设计的非常巧妙,基于ThreadLocal,线程之间数据隔离,不会有线程不安全的现象 Set currentResources = this.resourcesCurrentlyBeingLoaded.get(); if (currentResources == null) { //如果当前的Threadlocal里没有,说明没有加载,那就加载呗 currentResources = new HashSet<>(4); this.resourcesCurrentlyBeingLoaded.set(currentResources); } //如果当前资源添加载失败,证明已经加载过,抛出重复加载的异常 if (!currentResources.add(encodedResource)) { throw new BeanDefinitionStoreException( "Detected cyclic loading of " + encodedResource + " - check your import definitions!"); } try { //从encodeResource中获取已经封装的Resource对象并再次从Resource中获取其中的inputSream InputStream inputStream = encodedResource.getResource().getInputStream(); try { //InputSource这个类并不来自于Spring,它的全路径是org.xml.sax.InputSource InputSource inputSource = new InputSource(inputStream); if (encodedResource.getEncoding() != null) { inputSource.setEncoding(encodedResource.getEncoding()); } //真正的进入核心逻辑,还记得我上面说的吗,do开头的方法才是真正干活的方法 return doLoadBeanDefinitions(inputSource, encodedResource.getResource()); } finally { //关闭输入流 inputStream.close(); } } catch (IOException ex) { throw new BeanDefinitionStoreException( "IOException parsing XML document from " + encodedResource.getResource(), ex); } finally { currentResources.remove(encodedResource); if (currentResources.isEmpty()) { this.resourcesCurrentlyBeingLoaded.remove(); } } }protected int doLoadBeanDefinitions(InputSource inputSource, Resource resource) throws BeanDefinitionStoreException { try { //这一步做了两件事,1:获取对XML文件的验证模式,2:加载XML文件得到对应的Document Document doc = doLoadDocument(inputSource, resource); //根据返回的Document注册bean的信息 return registerBeanDefinitions(doc, resource); } catch (BeanDefinitionStoreException ex) { throw ex; } catch (SAXParseException ex) { throw new XmlBeanDefinitionStoreException(resource.getDescription(), "Line " + ex.getLineNumber() + " in XML document from " + resource + " is invalid", ex); } catch (SAXException ex) { throw new XmlBeanDefinitionStoreException(resource.getDescription(), "XML document from " + resource + " is invalid", ex); } catch (ParserConfigurationException ex) { throw new BeanDefinitionStoreException(resource.getDescription(), "Parser configuration exception parsing XML from " + resource, ex); } catch (IOException ex) { throw new BeanDefinitionStoreException(resource.getDescription(), "IOException parsing XML document from " + resource, ex); } catch (Throwable ex) { throw new BeanDefinitionStoreException(resource.getDescription(), "Unexpected exception parsing XML document from " + resource, ex); } }protected Document doLoadDocument(InputSource inputSource, Resource resource) throws Exception { return this.documentLoader.loadDocument(inputSource, getEntityResolver(), this.errorHandler, getValidationModeForResource(resource), isNamespaceAware()); }我们可以看到有这个方法getValidationModeForResource,继续点进去:
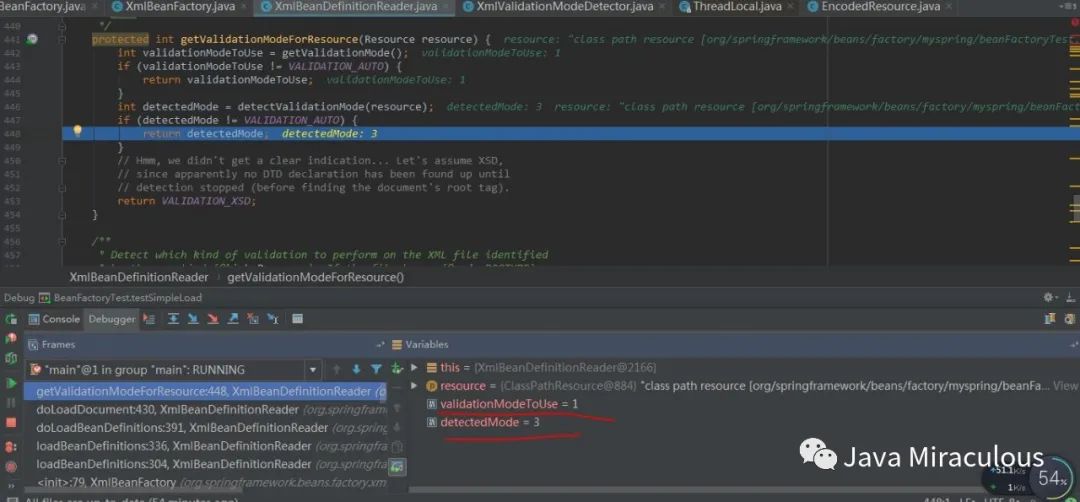
protected int getValidationModeForResource(Resource resource) { int validationModeToUse = getValidationMode(); //如果手动指定了验证模式则使用指定的验证模式 if (validationModeToUse != VALIDATION_AUTO) { return validationModeToUse; } //如果未指定就自动检测 int detectedMode = detectValidationMode(resource); if (detectedMode != VALIDATION_AUTO) { return detectedMode; } // Hmm, we didn't get a clear indication... Let's assume XSD, // since apparently no DTD declaration has been found up until // detection stopped (before finding the document's root tag). return VALIDATION_XSD; }这个方法不复杂,就是判断下如果设定了验证模式就使用设定的验证模式,设定方法是XmlBeanDefinitionReader#setValidationMode,否则就使用自动检测的方式,自动检测的方法是detectValidationMode,点进去看下:
protected int detectValidationMode(Resource resource) { if (resource.isOpen()) { throw new BeanDefinitionStoreException( "Passed-in Resource [" + resource + "] contains an open stream: " + "cannot determine validation mode automatically. Either pass in a Resource " + "that is able to create fresh streams, or explicitly specify the validationMode " + "on your XmlBeanDefinitionReader instance."); } InputStream inputStream; try { inputStream = resource.getInputStream(); } catch (IOException ex) { throw new BeanDefinitionStoreException( "Unable to determine validation mode for [" + resource + "]: cannot open InputStream. " + "Did you attempt to load directly from a SAX InputSource without specifying the " + "validationMode on your XmlBeanDefinitionReader instance?", ex); } try { return this.validationModeDetector.detectValidationMode(inputStream); } catch (IOException ex) { throw new BeanDefinitionStoreException("Unable to determine validation mode for [" + resource + "]: an error occurred whilst reading from the InputStream.", ex); } }不说别的,spring里的异常信息是真求多,上面的代码关键的就是22行,继续点进去22行的方法detectValidationMode:
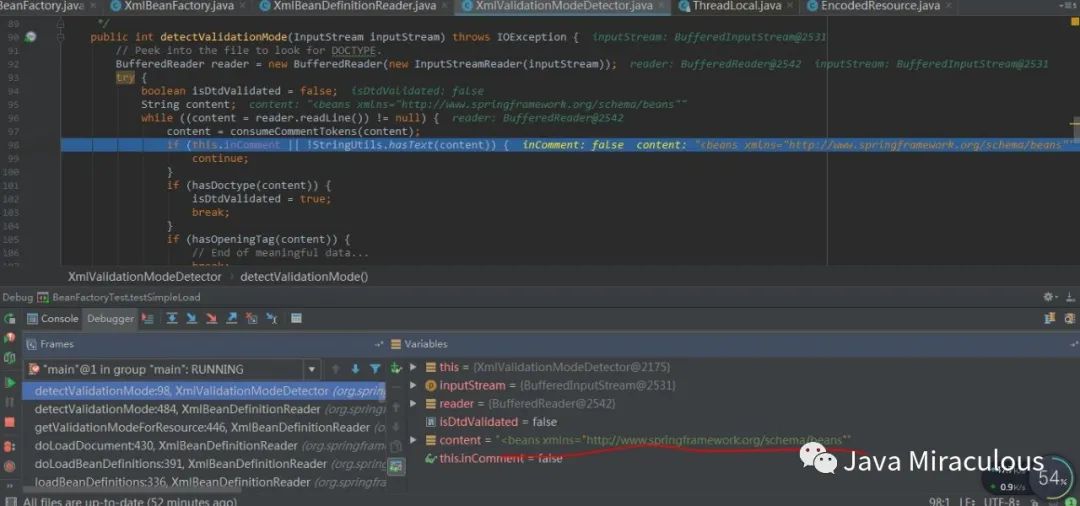
public int detectValidationMode(InputStream inputStream) throws IOException { // Peek into the file to look for DOCTYPE. BufferedReader reader = new BufferedReader(new InputStreamReader(inputStream)); try { boolean isDtdValidated = false; String content; while ((content = reader.readLine()) != null) { content = consumeCommentTokens(content); //如果读取的行是空或者是注释则略过 if (this.inComment || !StringUtils.hasText(content)) { continue; } if (hasDoctype(content)) { isDtdValidated = true; break; } //读取到 if (hasOpeningTag(content)) { // End of meaningful data... break; } } return (isDtdValidated ? VALIDATION_DTD : VALIDATION_XSD); } catch (CharConversionException ex) { // Choked on some character encoding... // Leave the decision up to the caller. return VALIDATION_AUTO; } finally { reader.close(); } }只要我们了解XSD和DTD的使用方法,基本就能理解这段代码了,Spring用来检测验证模式的方法就是判断是否包含DOCTYPE,如果包含了就是DTD,否则就是XSD。
经过了验证模式的准备后就可以加载Document了,看上面doLoadDocument方法的第二行,点进去方法loadDocument:
Document loadDocument( InputSource inputSource, EntityResolver entityResolver, ErrorHandler errorHandler, int validationMode, boolean namespaceAware) throws Exception;这时候你会发现是一个接口方法,查看它的实现类,你会发现它只有一个实现类DefaultDocumentLoader,那就看下这个实现类中的loadDocument方法:
public Document loadDocument(InputSource inputSource, EntityResolver entityResolver, ErrorHandler errorHandler, int validationMode, boolean namespaceAware) throws Exception { DocumentBuilderFactory factory = createDocumentBuilderFactory(validationMode, namespaceAware); if (logger.isDebugEnabled()) { logger.debug("Using JAXP provider [" + factory.getClass().getName() + "]"); } DocumentBuilder builder = createDocumentBuilder(factory, entityResolver, errorHandler); return builder.parse(inputSource); }上面这部分代码就不说了,就是通过SAX解析XML文档,想深入了解的童鞋可以上网查下相关资料。
最后一步了,就是方法registerBeanDefinitions了:
public int registerBeanDefinitions(Document doc, Resource resource) throws BeanDefinitionStoreException { //使用DefaultBeanDefinitionDocumentReader实例化BeanDefinitionDocumentReader BeanDefinitionDocumentReader documentReader = createBeanDefinitionDocumentReader(); //记录统计前BeanDefinition的加载个数 int countBefore = getRegistry().getBeanDefinitionCount(); //加载以及注册bean documentReader.registerBeanDefinitions(doc, createReaderContext(resource)); //记录本次加载的BeanDefinition个数 return getRegistry().getBeanDefinitionCount() - countBefore; }然后再点进去registerBeanDefinitions方法:
void registerBeanDefinitions(Document doc, XmlReaderContext readerContext) throws BeanDefinitionStoreException;可以看到,是一个接口,查看它的实现类发现也是只有一个,叫做DefaultBeanDefinitionDocumentReader,继续看方法:
public void registerBeanDefinitions(Document doc, XmlReaderContext readerContext) { this.readerContext = readerContext; logger.debug("Loading bean definitions"); Element root = doc.getDocumentElement(); doRegisterBeanDefinitions(root); }继续点doRegisterBeanDefinitions进去看:
protected void doRegisterBeanDefinitions(Element root) { BeanDefinitionParserDelegate parent = this.delegate; this.delegate = createDelegate(getReaderContext(), root, parent); if (this.delegate.isDefaultNamespace(root)) { String profileSpec = root.getAttribute(PROFILE_ATTRIBUTE); if (StringUtils.hasText(profileSpec)) { String[] specifiedProfiles = StringUtils.tokenizeToStringArray( profileSpec, BeanDefinitionParserDelegate.MULTI_VALUE_ATTRIBUTE_DELIMITERS); if (!getReaderContext().getEnvironment().acceptsProfiles(specifiedProfiles)) { if (logger.isInfoEnabled()) { logger.info("Skipped XML bean definition file due to specified profiles [" + profileSpec + "] not matching: " + getReaderContext().getResource()); } return; } } } //解析前处理,子类实现 preProcessXml(root); //核心解析方法 parseBeanDefinitions(root, this.delegate); //解析后处理,子类实现 postProcessXml(root); this.delegate = parent; }如果说以前一直是XML加载解析的准备阶段,那么doRegisterBeanDefinitions算是真正的开始解析了,我们期待的核心部分真正开始了,这里注意下preProcessXml和postProcessXml方法,点进去看你会发现这俩方法是空的:
protected void preProcessXml(Element root) { }protected void postProcessXml(Element root) { }听说过模板模式吗?百度一下,你会收益良多,这是一个非常重要的设计模式,spring中大量用到,这里就不详细介绍了。
最后就看下parseBeanDefinitions这个解析方法:
protected void parseBeanDefinitions(Element root, BeanDefinitionParserDelegate delegate) { if (delegate.isDefaultNamespace(root)) { NodeList nl = root.getChildNodes(); for (int i = 0; i < nl.getLength(); i++) { Node node = nl.item(i); if (node instanceof Element) { Element ele = (Element) node; if (delegate.isDefaultNamespace(ele)) { //对bean的处理,处理默认标签 parseDefaultElement(ele, delegate); } else { //对bean的处理,处理自定义标签 delegate.parseCustomElement(ele); } } } } else { delegate.parseCustomElement(root); } }由于bean标签是默认标签,所以看下parseDefaultElement这个方法:
private void parseDefaultElement(Element ele, BeanDefinitionParserDelegate delegate) { if (delegate.nodeNameEquals(ele, IMPORT_ELEMENT)) { importBeanDefinitionResource(ele); } else if (delegate.nodeNameEquals(ele, ALIAS_ELEMENT)) { processAliasRegistration(ele); } else if (delegate.nodeNameEquals(ele, BEAN_ELEMENT)) { //咱要解析的是bean标签,所以看这个方法就行了 processBeanDefinition(ele, delegate); } else if (delegate.nodeNameEquals(ele, NESTED_BEANS_ELEMENT)) { // recurse doRegisterBeanDefinitions(ele); } }bean标签嘛,看下processBeanDefinition这个方法:
protected void processBeanDefinition(Element ele, BeanDefinitionParserDelegate delegate) { BeanDefinitionHolder bdHolder = delegate.parseBeanDefinitionElement(ele); if (bdHolder != null) { bdHolder = delegate.decorateBeanDefinitionIfRequired(ele, bdHolder); try { //核心方法在此,点进去看 BeanDefinitionReaderUtils.registerBeanDefinition(bdHolder, getReaderContext().getRegistry()); } catch (BeanDefinitionStoreException ex) { getReaderContext().error("Failed to register bean definition with name '" + bdHolder.getBeanName() + "'", ele, ex); } // Send registration event. getReaderContext().fireComponentRegistered(new BeanComponentDefinition(bdHolder)); } }看下第7行代码registerBeanDefinition:
public static void registerBeanDefinition( BeanDefinitionHolder definitionHolder, BeanDefinitionRegistry registry) throws BeanDefinitionStoreException { // Register bean definition under primary name. String beanName = definitionHolder.getBeanName(); //擦,又是一层,继续点 registry.registerBeanDefinition(beanName, definitionHolder.getBeanDefinition()); // Register aliases for bean name, if any. String[] aliases = definitionHolder.getAliases(); if (aliases != null) { for (String alias : aliases) { registry.registerAlias(beanName, alias); } } }继续看上面的第8行registerBeanDefinition
void registerBeanDefinition(String beanName, BeanDefinition beanDefinition) throws BeanDefinitionStoreException;是个抽象方法,看下实现类,里面都有一个操作:this.beanDefinitionMap.put(beanName, beanDefinition);
public void registerBeanDefinition(String beanName, BeanDefinition beanDefinition) throws BeanDefinitionStoreException { Assert.hasText(beanName, "'beanName' must not be empty"); Assert.notNull(beanDefinition, "BeanDefinition must not be null"); //核心步骤,分析了这么久就是看这一句话,是不是感觉很fuck this.beanDefinitionMap.put(beanName, beanDefinition); }最后解析完拿到的东西是这样的:
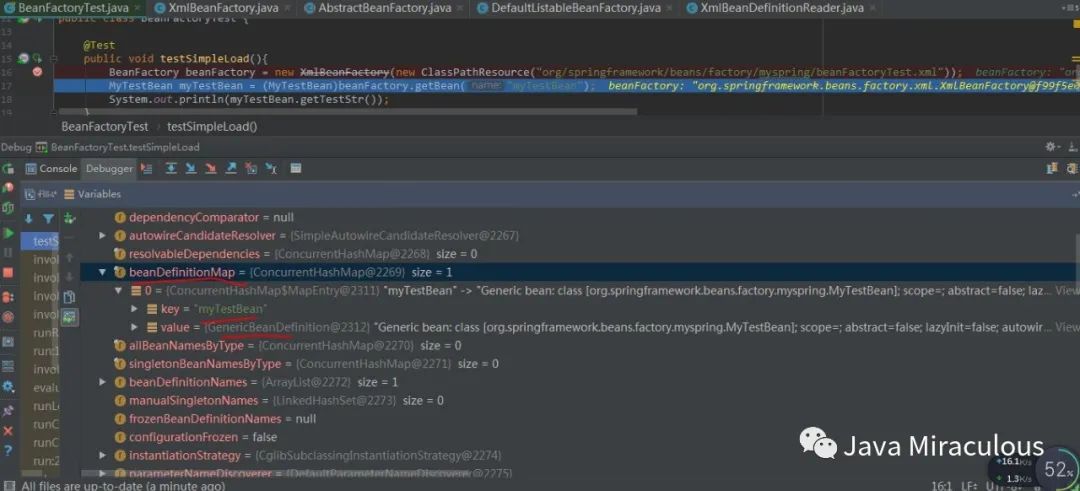
好了,测试类的第16行代码分析完毕,两晚上,分析了一行代码,spring源码,博大精深~~


 312
312


 被折叠的 条评论
为什么被折叠?


