mysql_config_editor/login-path使用
一、设计缘由说明:
login-path是MySQL5.6开始支持的新特性。通过借助mysql_config_editor工具将登陆MySQL服务的认证信息加密保存在.mylogin.cnf文件(默认位于用户主目录),
之后,MySQL客户端工具可通过读取该加密文件连接MySQL,避免重复输入登录信息,避免敏感信息暴露。
二、工具使用帮助
mysql_config_editor使用帮助:
2.1配置:
mysql_config_editor set --login-path=test --user=test_user --host=127.0.0.1 --port=3306 --password
或者
mysql_config_editor set -G test001 -uroot -p -hlocalhost -P3306 -S /tmp/mysql.sock
mysql_config_editor set -G test001 -uroot -p
采用哪种方式,具体要根据my.cnf配置文件的中MySQL的登陆参数以及MySQL中的数据库的具体授权来设定
其中可配置项介绍:
-h,–host=name 添加host到登陆文件中
-G,–login-path=name 在登录文件中为login path添加名字(默认为client)
-p,–password 在登陆文件中添加密码(该密码会被mysql_config_editor自动加密)
-u,–user 添加用户名到登陆文件中
-S,–socket=name 添加sock文件路径到登陆文件中
-P,–port=name 添加登陆端口到登陆文件中
2.2、实例演示
此处以MySQL的root登陆账户来实例演示:
很多同学都是这样登陆MySQL的
[root@git-server ~]# mysql -uroot -p'wujianwei'
工具使用
[root@git-server ~]# mysql_config_editor set --login-path=test001 --user=root --host=localhost --port=3306 --password
Enter password:
同时会在位于用户主目录生成一个加密的二进制文件
[root@git-server ~]# ll /root/.mylogin.cnf
-rw------- 1 root root 156 Jul 21 10:36 /root/.mylogin.cnf
[root@git-server ~]#
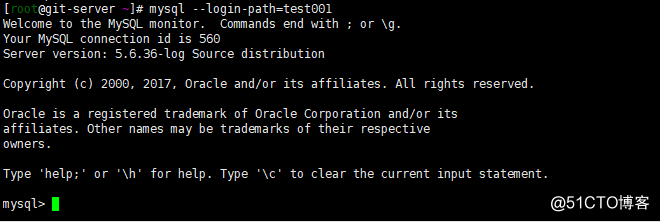
此时登陆MySQL截图演示:

或者以下的方式也是可以的:
[root@git-server ~]# mysql_config_editor set -G test001 -uroot -hlocalhost -P3306 -S /tmp/mysql.sock -p
Enter password:
[root@git-server ~]# ll .mylogin.cnf
-rw------- 1 root root 192 Jul 21 11:05 .mylogin.cnf
2.3显示配置:
mysql_config_editor print --login-path=test #显示执行的login-path配置
mysql_config_editor print --all #显示所有的login-path信息
实例演示:
[root@git-server ~]# mysql_config_editor print --login-path=test001
[test001]
user = root
password = *****
host = localhost
socket = /tmp/mysql.sock
port = 3306
查看指定的登陆名称登陆信息:
[root@git-server ~]# mysql_config_editor print -Gtest001
[test001]
user = root
password = *****
host = localhost
socket = /tmp/mysql.sock
port = 3306
[root@git-server ~]# mysql_config_editor set -G test002 -uroot -hlocalhost -P3306 -S /tmp/mysql.sock -p
Enter password:
[root@git-server ~]# mysql_config_editor print -Gtest002
[test002]
user = root
password = *****
host = localhost
socket = /tmp/mysql.sock
port = 3306
查看所有的登陆名称的登陆信息:
[root@git-server ~]# mysql_config_editor print --all
[test001]
user = root
password = *****
host = localhost
socket = /tmp/mysql.sock
port = 3306
[test002]
user = root
password = *****
host = localhost
socket = /tmp/mysql.sock
port = 3306
2.4删除配置:
mysql_config_editor remove --login-path=test
[root@git-server ~]# mysql_config_editor remove --login-path=test002
或者是:
[root@git-server ~]# mysql_config_editor remove -Gtest002
[root@git-server ~]# mysql_config_editor print --all
[test001]
user = root
password = *****
host = localhost
socket = /tmp/mysql.sock
port = 3306
重置配置:
mysql_config_editor reset --login-path=test
2.5、采用默认的登陆方式
[root@git-server ~]#mysql_config_editor set -uroot -p
[root@git-server ~]# mysql_config_editor print --all
[test001]
user = root
password = *****
host = localhost
socket = /tmp/mysql.sock
port = 3306
[client]
user = root
password = *****
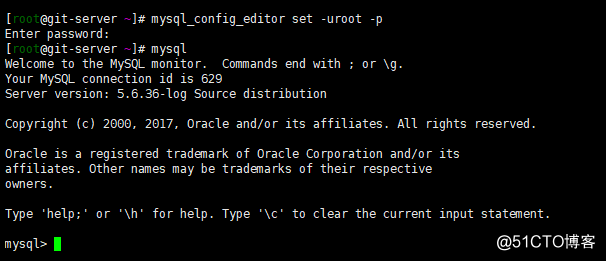
登陆截图:

2.6其中可删除项介绍
-h,–host=name 添加host到登陆文件中
-G,–login-path=name 在登录文件中为login path添加名字(默认为client)
-p,–password 在登陆文件中添加密码(该密码会被mysql_config_editor自动加密)
-u,–user 添加用户名到登陆文件中
-S,–socket=name 添加sock文件路径到登陆文件中
-P,–port=name 添加登陆端口到登陆文件中
2.7、远程登陆其他机器的MySQL
若要登录其他主机、其他端口,或者添加其他额外参数,直接在上述命令后添加即可
shell>mysql --login-path=test -h host1 -P port1 #登录host1:poet1上的MySQL
shell>mysql --login-path=test -h host1 -P port1 test_db #登录host1:poet1上的MySQL中的test_db库


 253
253


 被折叠的 条评论
为什么被折叠?


