


更新 2023 0506
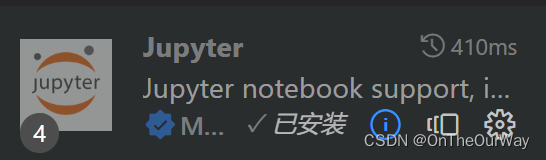
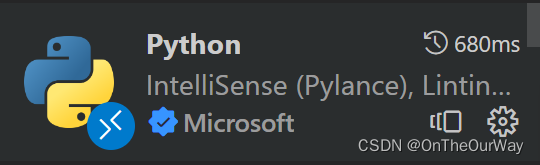
如果vscode连接远程服务器,jupyter无法选择内核,需要在插件中安装jupyter和python解释器。如下图所示。
更新 2023 0419
连接不到服务器,显示以下错误:
Failed to parse remote port from server output
可以重启docker中的ssh服务,利用以下命令:
#直接启动
sudo service ssh start
0背景:
需要在本地使用服务器的gpu资源,实现远程运行代码,特此记录。
1、 vscode客户端下载(windows):
官网地址1(慢):https://code.visualstudio.com/
下载地址2(快):http://link.zhihu.com/?target=https%3A//vscode.cdn.azure.cn/stable/054a9295330880ed74ceaedda236253b4f39a335/VSCodeUserSetup-x64-1.56.2.exe
1.1 插件安装
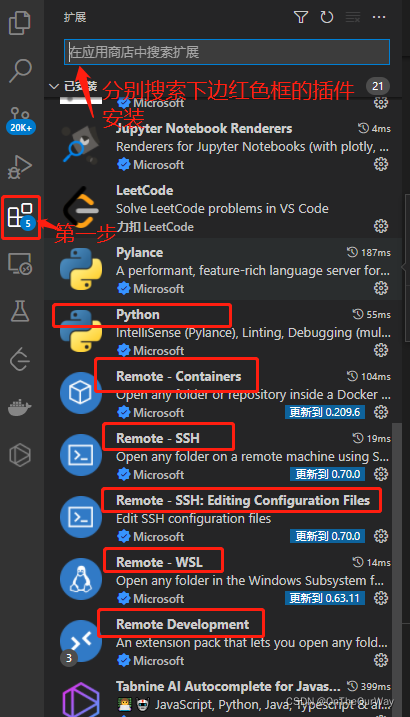
1.2 此时,已经安装了python插件,本地已经可以变成python代码了。
如下图所示,可以打开本地的项目文件夹:

1.3 接下来讲,怎么连接远程服务器,进行编程。
键盘快捷键:ctrl+shift+p
出现以下界面,输入remote-ssh,点击第一个 remote-ssh :connect to host

然后出现以下界面,点击configure这个:

然后出现以下界面,点击第一个:

然后出现一个配置文件,填写远程服务器的信息:

以上本地就配好了,接下来配置服务端。
强烈建议,创建容器至少创建两个和宿主机映射的端口,比如 -p 9910:9910 -p 9911:9911,其中9910可以作为ssh服务的端口,9911后续可以使用。
远程服务端(在服务器输入ssh,如果没有出现 ssh bash: ssh: command not found,就说明已经装好了ssh,就可以跳过2.1和2.2节了,直接看第3节)
2、安装openssh-server和openssh-client(ubuntu)
2.1执行下列命令安装客户端**
2.1.1 安装ssh
sudo apt-get install ssh
如果出现错误和底下类似,请按照下边方法,修改镜像源,如果没有错误请直接进入到
E: Failed to fetch http://archive.ubuntu.com/ubuntu/pool/universe/f/fyba/libfyba0_4.1.1-6build1_amd64.deb  Connection failed [IP: 185.125.190.39 80]
E: Failed to fetch http://archive.ubuntu.com/ubuntu/pool/universe/f/freexl/libfreexl1_1.0.5-3_amd64.deb  Connection failed [IP: 91.189.91.39 80]
E: Unable to fetch some archives, maybe run apt-get update or try with --fix-missing?
是由于ubuntu 服务在国外,国内可能安装很慢,所以可以修改镜像源,如果不需要可以不改:修改镜像源方法:
cd /etc/apt/
#备份原理的文件为001
sudo cp sources.list sources.list.001
将下列内容复制:
# 默认注释了源码镜像以提高 apt update 速度,如有需要可自行取消注释
deb https://mirrors.tuna.tsinghua.edu.cn/ubuntu/ jammy main restricted universe multiverse
# deb-src https://mirrors.tuna.tsinghua.edu.cn/ubuntu/ jammy main restricted universe multiverse
deb https://mirrors.tuna.tsinghua.edu.cn/ubuntu/ jammy-updates main restricted universe multiverse
# deb-src https://mirrors.tuna.tsinghua.edu.cn/ubuntu/ jammy-updates main restricted universe multiverse
deb https://mirrors.tuna.tsinghua.edu.cn/ubuntu/ jammy-backports main restricted universe multiverse
# deb-src https://mirrors.tuna.tsinghua.edu.cn/ubuntu/ jammy-backports main restricted universe multiverse
deb https://mirrors.tuna.tsinghua.edu.cn/ubuntu/ jammy-security main restricted universe multiverse
# deb-src https://mirrors.tuna.tsinghua.edu.cn/ubuntu/ jammy-security main restricted universe multiverse

# 预发布软件源,不建议启用
# deb https://mirrors.tuna.tsinghua.edu.cn/ubuntu/ jammy-proposed main restricted universe multiverse
# deb-src https://mirrors.tuna.tsinghua.edu.cn/ubuntu/ jammy-proposed main restricted universe multiverse
然后按以下命令进行粘贴并保存
sudo vim sources.list
然后更新apt-gt
sudo apt-get upgrade
然后重新执行:
sudo apt-get install ssh
2.1.2 生成秘钥:
安装好ssh之后,执行下列命令生成秘钥:
ssh-keygen
会生成id_rsa和id_rsa.pub文件,分别为私钥和公钥,windows下默认存在:C:\Users\zlq.ssh,linux下存储在:/home/zlq/.ssh/id_rsa
2.2将客户端的公钥加入到服务器的~./ssh/authorized_keys中
打开id_rsa.pub文件,复制其中的内容,准备在服务器端的~./ssh/authorized_keys中粘贴
ssh服务的端口默认为22,服务器的用户名默认为root
2.3、安装openssh-server
sudo apt-get install openssh-server
2.4、生成服务器的密钥和公钥:
ssh-keygen
会在~/.ssh底下,生成id_rsa和id_rsa.pub和authorized_keys三个文件,如果没有authorized_keys,需要我们自己创建这个文件,命令如下:
touch authorized_keys
chmod 600 authorized_keys
然后将2.1节中的客户端公钥的内容,复制到authorized_keys文件中,即可。
这个操作,就是使服务器给客户端授权,客户端进行登陆。
查看服务是否启动命令:
sudo ps -e|grep ssh
如果看到sshd,就说明已经启动,如果没有启动利用下边的命令启动:
sudo service ssh start
此时ssh-server已经安装好了,为了更便捷的登录,可以修改openssh的配置文件sshd-config实现。
3、ssh配置
3.1修改登录端口
默认端口是22,如果不需要改,也可以直接使用22端口。
通过修改/etc/ssh/sshd_config,可以修改ssh的登陆端口和禁止root登陆。修改前,可以先备份。
sudo cp /etc/ssh/sshd_config /etc/ssh/sshd_config.original
sudo chmod a-w /etc/ssh/sshd_config.original
vim /etc/ssh/sshd_config
修改sshd_config如下图所示:,其中的端口改为宿主机和容器映射的端口,比如,你创建容器的时候,映射了宿主机端口和容器端口为:-p 9910:9910,此时你就得修改下面文件的Port为9910,然后在本地利用宿主机ip和这个映射的端口,就可以访问容器的内容了。
#	$OpenBSD: sshd_config,v 1.101 2017/03/14 07:19:07 djm Exp $

# This is the sshd server system-wide configuration file.  See
# sshd_config(5) for more information.

# This sshd was compiled with PATH=/usr/bin:/bin:/usr/sbin:/sbin

# The strategy used for options in the default sshd_config shipped with
# OpenSSH is to specify options with their default value where
# possible, but leave them commented.  Uncommented options override the
# default value.

Port 22
#AddressFamily any
#ListenAddress 0.0.0.0
#ListenAddress ::

#HostKey /etc/ssh/ssh_host_rsa_key
#HostKey /etc/ssh/ssh_host_ecdsa_key
#HostKey /etc/ssh/ssh_host_ed25519_key

# Ciphers and keying
#RekeyLimit default none

# Logging
#SyslogFacility AUTH
#LogLevel INFO

# Authentication:

#LoginGraceTime 2m
PermitRootLogin yes
#StrictModes yes
#MaxAuthTries 6
#MaxSessions 10

#PubkeyAuthentication yes

# Expect .ssh/authorized_keys2 to be disregarded by default in future.
#AuthorizedKeysFile	.ssh/authorized_keys .ssh/authorized_keys2

#AuthorizedPrincipalsFile none

#AuthorizedKeysCommand none
#AuthorizedKeysCommandUser nobody

# For this to work you will also need host keys in /etc/ssh/ssh_known_hosts
#HostbasedAuthentication no
# Change to yes if you don't trust ~/.ssh/known_hosts for
# HostbasedAuthentication
#IgnoreUserKnownHosts no
# Don't read the user's ~/.rhosts and ~/.shosts files
#IgnoreRhosts yes

# To disable tunneled clear text passwords, change to no here!
PasswordAuthentication no
#PermitEmptyPasswords no

# Change to yes to enable challenge-response passwords (beware issues with
# some PAM modules and threads)
ChallengeResponseAuthentication no

# Kerberos options
#KerberosAuthentication no
#KerberosOrLocalPasswd yes
#KerberosTicketCleanup yes
#KerberosGetAFSToken no

# GSSAPI options
#GSSAPIAuthentication no
#GSSAPICleanupCredentials yes
#GSSAPIStrictAcceptorCheck yes
#GSSAPIKeyExchange no

# Set this to 'yes' to enable PAM authentication, account processing,
# and session processing. If this is enabled, PAM authentication will
# be allowed through the ChallengeResponseAuthentication and
# PasswordAuthentication.  Depending on your PAM configuration,
# PAM authentication via ChallengeResponseAuthentication may bypass
# the setting of "PermitRootLogin without-password".
# If you just want the PAM account and session checks to run without
# PAM authentication, then enable this but set PasswordAuthentication
# and ChallengeResponseAuthentication to 'no'.
UsePAM yes

#AllowAgentForwarding yes
#AllowTcpForwarding yes
#GatewayPorts no
X11Forwarding yes
#X11DisplayOffset 10
#X11UseLocalhost yes
#PermitTTY yes
PrintMotd no
#PrintLastLog yes
#TCPKeepAlive yes
#UseLogin no
#PermitUserEnvironment no
#Compression delayed
#ClientAliveInterval 0
#ClientAliveCountMax 3
#UseDNS no
#PidFile /var/run/sshd.pid
#MaxStartups 10:30:100
#PermitTunnel no
#ChrootDirectory none
#VersionAddendum none

# no default banner path
#Banner none

# Allow client to pass locale environment variables
AcceptEnv LANG LC_*

# override default of no subsystems
Subsystem	sftp	/usr/lib/openssh/sftp-server

# Example of overriding settings on a per-user basis
#Match User anoncvs
#	X11Forwarding no
#	AllowTcpForwarding no
#	PermitTTY no
#	ForceCommand cvs server
3.2重启ssh服务
sudo service ssh restart
3.3登陆
在windows上,打开win+r打开终端窗口,按照下图方式,就可以登陆了。
命令为:
ssh root@宿主机IP -p 宿主机映射容器中的端口号
例如,我创建容器的时候,宿主机和容器映射端口为 -p 9910:9910 ,然后在上一步修改ssh配置文件的时候,改的端口为9910,所以我可以利用下边的方式访问。
ssh root@10.8.192.45 -p 9910
然后回车输入登录容器的密码,如果没有进入容器,输入passwd,可以设置密码。
出现以下信息就说明服务端已经配置好了。

3.4 本地连接远程容器:
在1.3小节中我们已经配置好了本地的文件如下:

其中的port就是3.3小节测试的那个端口,IP是服务器也就是宿主机的ip,User默认为root,hostname随便写都行。然后就可以连接:如下图所示。
利用ctrl+shift+p命令,在出现的窗口输入:remote-ssh connect ,点击出现的第一个,来到下图的界面,会出现刚才配置好的ip,点击:

会弹出一个界面,提示输入密码,输入刚才设置的密码:


 709
709


 被折叠的 条评论
为什么被折叠?
被折叠的 条评论
为什么被折叠?
 到【灌水乐园】发言


