


1.写在前面的话,用了SpringBoot也有一年多了,是时候看看它是怎么启动的了,废话不多说,debug模式走起,对于一个菜鸟阶段的我,无疑是一段自虐的过程,至于为什么选择1.5.9.RELEASE,因为公司用的版本就是这个,平时接触的多,分析工具为sts版的eclipse,由于启动过程很漫长,其中比较重要的我会单独拿出来分析。
2. 启动类
package com.songhq.zonghe;

import org.springframework.boot.SpringApplication;
import org.springframework.boot.autoconfigure.SpringBootApplication;
import org.springframework.context.annotation.EnableAspectJAutoProxy;
@SpringBootApplication
@EnableAspectJAutoProxy(proxyTargetClass = true)
public class ZongHeApplication {

	public static void main(String[] args) {
		SpringApplication.run(ZongHeApplication.class, args);
	}

}
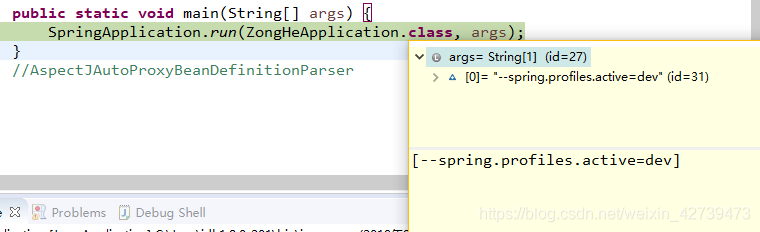
程序的入口 SpringApplication.run(ZongHeApplication.class, args);
为了完整的演示,这里的args我也传值了 ,如下图
3.进入SpringApplication 中的静态方法run
public static ConfigurableApplicationContext run(Object source, String... args) {
        return run(new Object[] { source }, args);
    }
这里的source为ZongHeApplication.class, args 为 上面传入的字符串数组
插一段,类名后面加.class是代表什么呢,这里用Object接受,那肯定也是一个对象了 ,其实就是Class对象,Class对象会记录这个类的全名和类加载器等信息
该方法的返回值是ConfigurableApplicationContext对象,那么我是否粗线的认为,springBoot启动的过程就是为了构造一个ConfigurableApplicationContext对象,
进入 ConfigurableApplicationContext,有点懵逼了,先看看作者对这个接口的解释吧
SPI interface to be implemented by most if not all application contexts. Provides facilities to configure an application context in addition to the application context client methods in the org.springframework.context.ApplicationContext interface.

Configuration and lifecycle methods are encapsulated here to avoid making them obvious to ApplicationContext client code. The present methods should only be used by startup and shutdown code.
Since:03.11.2003Author:Juergen HoellerChris Beams
解释这么少,估计句句都是精华
先看第一句 SPI interface to be implemented by most if not all application contexts
百度翻译一下 SPI接口将由大多数(如果不是所有)应用程序上下文实现
又得插一句 SPI接口 ,Service Provider Interface 服务提供接口,具体实现由实现类实现,模块之间解耦的一种方式,可以说是一种规范吧
再看剩下的大致是说 在ApplicationContext的基础上,增加了配置工具和生命周期方法,当前方法只能由启动和关闭代码使用
关于对ApplicationContext的理解一会会做详细分析
4.进入重载方法run
public static ConfigurableApplicationContext run(Object[] sources, String[] args) {
		return new SpringApplication(sources).run(args);
	}
5.进入SpringApplication的有参构造方法,再进入initialize(source)方法
    @SuppressWarnings({ "unchecked", "rawtypes" })
	private void initialize(Object[] sources) {
		if (sources != null && sources.length > 0) {
			this.sources.addAll(Arrays.asList(sources));
		}
		this.webEnvironment = deduceWebEnvironment();
		setInitializers((Collection) getSpringFactoriesInstances(
				ApplicationContextInitializer.class));
		setListeners((Collection) getSpringFactoriesInstances(ApplicationListener.class));
		this.mainApplicationClass = deduceMainApplicationClass();
	}
5.1将sources保存在 Set<Object> sources 属性中
5.2判断是否为web环境 初始化 boolean webEnvironment属性
”javax.servlet.Servlet","org.springframework.web.context.ConfigurableWebApplicationContext“这连个类都存在则为web环境
5.3 setInitializers((Collection) getSpringFactoriesInstances( ApplicationContextInitializer.class));
初始化 List<ApplicationContextInitializer<?>> initializers 属性,至于怎么获取这个值得比较复杂
5.3.1,调用 getSpringFactoriesInstances方法,获取加载器classLoader
private <T> Collection<? extends T> getSpringFactoriesInstances(Class<T> type) {
		return getSpringFactoriesInstances(type, new Class<?>[] {});
	}

	private <T> Collection<? extends T> getSpringFactoriesInstances(Class<T> type,
			Class<?>[] parameterTypes, Object... args) {
		ClassLoader classLoader = Thread.currentThread().getContextClassLoader();
		// Use names and ensure unique to protect against duplicates
		Set<String> names = new LinkedHashSet<String>(
				SpringFactoriesLoader.loadFactoryNames(type, classLoader));
		List<T> instances = createSpringFactoriesInstances(type, parameterTypes,
				classLoader, args, names);
		AnnotationAwareOrderComparator.sort(instances);
		return instances;
	}
5.3.2进入SpringFactoriesLoader.loadFactoryNames(type,classLoader)
public static List<String> loadFactoryNames(Class<?> factoryClass, ClassLoader classLoader) {
		String factoryClassName = factoryClass.getName();
		try {
			Enumeration<URL> urls = (classLoader != null ? classLoader.getResources(FACTORIES_RESOURCE_LOCATION) :
					ClassLoader.getSystemResources(FACTORIES_RESOURCE_LOCATION));
			List<String> result = new ArrayList<String>();
			while (urls.hasMoreElements()) {
				URL url = urls.nextElement();
				Properties properties = PropertiesLoaderUtils.loadProperties(new UrlResource(url));
				String factoryClassNames = properties.getProperty(factoryClassName);
				result.addAll(Arrays.asList(StringUtils.commaDelimitedListToStringArray(factoryClassNames)));
			}
			return result;
		}
		catch (IOException ex) {
			throw new IllegalArgumentException("Unable to load [" + factoryClass.getName() +
					"] factories from location [" + FACTORIES_RESOURCE_LOCATION + "]", ex);
		}
	}
factoryClassName的值是 org.springframework.context.ApplicationContextInitializer
classLoader 是 sun.misc.Launcher$AppClassLoader@18b4aac2
回去加载META-INF/spring.factories中的类,比如在遍历urls,其中的一次url为
jar:file:/D:/songhaiqiang/code/repository/org/springframework/boot/spring-boot/1.5.9.RELEASE/spring-boot-1.5.9.RELEASE.jar!/META-INF/spring.factories,
接下来就是读这个文件,该文件的内容如下,\是换行符
# PropertySource Loaders
org.springframework.boot.env.PropertySourceLoader=\
org.springframework.boot.env.PropertiesPropertySourceLoader,\
org.springframework.boot.env.YamlPropertySourceLoader

# Run Listeners
org.springframework.boot.SpringApplicationRunListener=\
org.springframework.boot.context.event.EventPublishingRunListener

# Application Context Initializers
org.springframework.context.ApplicationContextInitializer=\
org.springframework.boot.context.ConfigurationWarningsApplicationContextInitializer,\
org.springframework.boot.context.ContextIdApplicationContextInitializer,\
org.springframework.boot.context.config.DelegatingApplicationContextInitializer,\
org.springframework.boot.context.embedded.ServerPortInfoApplicationContextInitializer

# Application Listeners
org.springframework.context.ApplicationListener=\
org.springframework.boot.ClearCachesApplicationListener,\
org.springframework.boot.builder.ParentContextCloserApplicationListener,\
org.springframework.boot.context.FileEncodingApplicationListener,\
org.springframework.boot.context.config.AnsiOutputApplicationListener,\
org.springframework.boot.context.config.ConfigFileApplicationListener,\
org.springframework.boot.context.config.DelegatingApplicationListener,\
org.springframework.boot.liquibase.LiquibaseServiceLocatorApplicationListener,\
org.springframework.boot.logging.ClasspathLoggingApplicationListener,\
org.springframework.boot.logging.LoggingApplicationListener

# Environment Post Processors
org.springframework.boot.env.EnvironmentPostProcessor=\
org.springframework.boot.cloud.CloudFoundryVcapEnvironmentPostProcessor,\
org.springframework.boot.env.SpringApplicationJsonEnvironmentPostProcessor

# Failure Analyzers
org.springframework.boot.diagnostics.FailureAnalyzer=\
org.springframework.boot.diagnostics.analyzer.BeanCurrentlyInCreationFailureAnalyzer,\
org.springframework.boot.diagnostics.analyzer.BeanNotOfRequiredTypeFailureAnalyzer,\
org.springframework.boot.diagnostics.analyzer.BindFailureAnalyzer,\
org.springframework.boot.diagnostics.analyzer.ConnectorStartFailureAnalyzer,\
org.springframework.boot.diagnostics.analyzer.NoUniqueBeanDefinitionFailureAnalyzer,\
org.springframework.boot.diagnostics.analyzer.PortInUseFailureAnalyzer,\
org.springframework.boot.diagnostics.analyzer.ValidationExceptionFailureAnalyzer

# FailureAnalysisReporters
org.springframework.boot.diagnostics.FailureAnalysisReporter=\
org.springframework.boot.diagnostics.LoggingFailureAnalysisReporter
properties的内容如下
{org.springframework.boot.diagnostics.FailureAnalyzer=org.springframework.boot.diagnostics.analyzer.BeanCurrentlyInCreationFailureAnalyzer,org.springframework.boot.diagnostics.analyzer.BeanNotOfRequiredTypeFailureAnalyzer,org.springframework.boot.diagnostics.analyzer.BindFailureAnalyzer,org.springframework.boot.diagnostics.analyzer.ConnectorStartFailureAnalyzer,org.springframework.boot.diagnostics.analyzer.NoUniqueBeanDefinitionFailureAnalyzer,org.springframework.boot.diagnostics.analyzer.PortInUseFailureAnalyzer,org.springframework.boot.diagnostics.analyzer.ValidationExceptionFailureAnalyzer, org.springframework.boot.env.EnvironmentPostProcessor=org.springframework.boot.cloud.CloudFoundryVcapEnvironmentPostProcessor,org.springframework.boot.env.SpringApplicationJsonEnvironmentPostProcessor, org.springframework.boot.SpringApplicationRunListener=org.springframework.boot.context.event.EventPublishingRunListener, org.springframework.context.ApplicationContextInitializer=org.springframework.boot.context.ConfigurationWarningsApplicationContextInitializer,org.springframework.boot.context.ContextIdApplicationContextInitializer,org.springframework.boot.context.config.DelegatingApplicationContextInitializer,org.springframework.boot.context.embedded.ServerPortInfoApplicationContextInitializer, org.springframework.boot.env.PropertySourceLoader=org.springframework.boot.env.PropertiesPropertySourceLoader,org.springframework.boot.env.YamlPropertySourceLoader, org.springframework.context.ApplicationListener=org.springframework.boot.ClearCachesApplicationListener,org.springframework.boot.builder.ParentContextCloserApplicationListener,org.springframework.boot.context.FileEncodingApplicationListener,org.springframework.boot.context.config.AnsiOutputApplicationListener,org.springframework.boot.context.config.ConfigFileApplicationListener,org.springframework.boot.context.config.DelegatingApplicationListener,org.springframework.boot.liquibase.LiquibaseServiceLocatorApplicationListener,org.springframework.boot.logging.ClasspathLoggingApplicationListener,org.springframework.boot.logging.LoggingApplicationListener, org.springframework.boot.diagnostics.FailureAnalysisReporter=org.springframework.boot.diagnostics.LoggingFailureAnalysisReporter}
然后是从中取org.springframework.context.ApplicationContextInitializer得值,可见factoryClassNames为org.springframework.boot.context.ConfigurationWarningsApplicationContextInitializer,org.springframework.boot.context.ContextIdApplicationContextInitializer,org.springframework.boot.context.config.DelegatingApplicationContextInitializer,org.springframework.boot.context.embedded.ServerPortInfoApplicationContextInitializer
第二次遍历的时候又读到jar:file:/D:/songhaiqiang/code/repository/org/springframework/boot/spring-boot-autoconfigure/1.5.9.RELEASE/spring-boot-autoconfigure-1.5.9.RELEASE.jar!/META-INF/spring.factories
第三次遍历的时候读到jar:file:/D:/songhaiqiang/code/repository/org/springframework/spring-beans/4.3.13.RELEASE/spring-beans-4.3.13.RELEASE.jar!/META-INF/spring.factories
结束遍历返回result
5.3.3 Set<String> names 得到刚才去重的org.springframework.context.ApplicationContextInitializer在所有spring.factory文件的值
5.3.4 难道names之后自然获取创建这些对象,看createSpringFactoriesInstances方法
@SuppressWarnings("unchecked")
	private <T> List<T> createSpringFactoriesInstances(Class<T> type,
			Class<?>[] parameterTypes, ClassLoader classLoader, Object[] args,
			Set<String> names) {
		List<T> instances = new ArrayList<T>(names.size());
		for (String name : names) {
			try {
				Class<?> instanceClass = ClassUtils.forName(name, classLoader);
				Assert.isAssignable(type, instanceClass);
				Constructor<?> constructor = instanceClass
						.getDeclaredConstructor(parameterTypes);
				T instance = (T) BeanUtils.instantiateClass(constructor, args);
				instances.add(instance);
			}
			catch (Throwable ex) {
				throw new IllegalArgumentException(
						"Cannot instantiate " + type + " : " + name, ex);
			}
		}
		return instances;
	}
这里没有什么好说的通过反射,实例化这些对象
List<T> instances 的值为[org.springframework.boot.context.ConfigurationWarningsApplicationContextInitializer@3ecd23d9, org.springframework.boot.context.ContextIdApplicationContextInitializer@22eeefeb, org.springframework.boot.context.config.DelegatingApplicationContextInitializer@17d0685f, org.springframework.boot.context.embedded.ServerPortInfoApplicationContextInitializer@3891771e, org.springframework.boot.autoconfigure.SharedMetadataReaderFactoryContextInitializer@78ac1102, org.springframework.boot.autoconfigure.logging.AutoConfigurationReportLoggingInitializer@2de8284b]
5.3.5,对List<T> instances进行排序AnnotationAwareOrderComparator.sort(instances);
public static void sort(List<?> list) {
		if (list.size() > 1) {
			Collections.sort(list, INSTANCE);
		}
	}
这里用到了Collections.sort(a,b)方法,排序的字段为AnnotationAwareOrderComparator这个对象是为了使用支持@Order注解,
排序后的instances为[org.springframework.boot.context.config.DelegatingApplicationContextInitializer@17d0685f, org.springframework.boot.context.ContextIdApplicationContextInitializer@22eeefeb, org.springframework.boot.context.ConfigurationWarningsApplicationContextInitializer@3ecd23d9, org.springframework.boot.context.embedded.ServerPortInfoApplicationContextInitializer@3891771e, org.springframework.boot.autoconfigure.SharedMetadataReaderFactoryContextInitializer@78ac1102, org.springframework.boot.autoconfigure.logging.AutoConfigurationReportLoggingInitializer@2de8284b],顺序的确发生了变化
至此 SpringApplication 中private List<ApplicationContextInitializer<?>> initializers初始化成功,
5.4 同理 初始化private List<ApplicationListener<?>> listeners;这个属性同样,只不过这次从spring.factory找的键为org.springframework.context.ApplicationListener
5.5 找到main方法所在的类,并赋值给private Class<?> mainApplicationClass; 这里的值为 class com.songhq.zonghe.ZongHeApplication
至此 SpringApplication的类初始化任务完成,接下可以到实例化后的run()方法,也就是相当于准备工作做完了,各属性如下
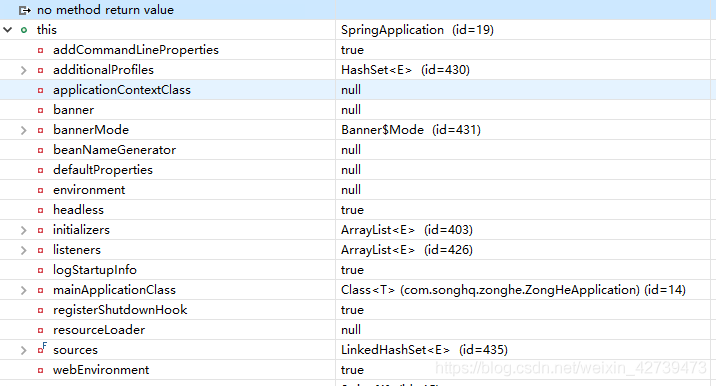
粘出来如下
addCommandLineProperties true
additionalProfiles HashSet<E> (id=430)
applicationContextClass null
banner null
bannerMode Banner$Mode (id=431)
beanNameGenerator null
defaultProperties null
environment null
headless true
initializers ArrayList<E> (id=403)
listeners ArrayList<E> (id=426)
logStartupInfo true
mainApplicationClass Class<T> (com.songhq.zonghe.ZongHeApplication) (id=14)
registerShutdownHook true
resourceLoader null
sources LinkedHashSet<E> (id=435)
webEnvironment true
这里一一梳理一下,其中
addCommandLineProperties private boolean addCommandLineProperties = true;直接赋值的
additionalProfiles 为[] 还没有赋值private Set<String> additionalProfiles = new HashSet<String>();
applicationContextClass p rivate Class<? extends ConfigurableApplicationContext> applicationContextClass;为null
banner private Banner banner; 为null
bannerMode private Banner.Mode bannerMode = Banner.Mode.CONSOLE; 为CONSOLE
beanNameGenerator private BeanNameGenerator beanNameGenerator; 为null
defaultProperties private Map<String, Object> defaultProperties; 为null
environment private ConfigurableEnvironment environment; 为null
headless private boolean headless = true; 为 true
initializers private List<ApplicationContextInitializer<?>> initializers;上面重点介绍了
listeners private List<ApplicationListener<?>> listeners; 同initializers
logStartupInfo private boolean logStartupInfo = true; 为 true
mainApplicationClass private Class<?> mainApplicationClass; 为Class<T> (com.songhq.zonghe.ZongHeApplication)
registerShutdownHook private boolean registerShutdownHook = true; 为 true
resourceLoader private ResourceLoader resourceLoader; null
sources private final Set<Object> sources = new LinkedHashSet<Object>(); LinkedHashSet<E> (id=435) 这个前面也初始化
webEnvironment private boolean webEnvironment; true 这个也初始化了
小节:new SpringApplication(sources) 初始化了标记为红色的五个属性,至此控制台没有任何信息打印出来
6.进入实例化方法public ConfigurableApplicationContext run(String... args)
public ConfigurableApplicationContext run(String... args) {
		StopWatch stopWatch = new StopWatch();
		stopWatch.start();
		ConfigurableApplicationContext context = null;
		FailureAnalyzers analyzers = null;
		configureHeadlessProperty();
		SpringApplicationRunListeners listeners = getRunListeners(args);
		listeners.starting();
		try {
			ApplicationArguments applicationArguments = new DefaultApplicationArguments(
					args);
			ConfigurableEnvironment environment = prepareEnvironment(listeners,
					applicationArguments);
			Banner printedBanner = printBanner(environment);
			context = createApplicationContext();
			analyzers = new FailureAnalyzers(context);
			prepareContext(context, environment, listeners, applicationArguments,
					printedBanner);
			refreshContext(context);
			afterRefresh(context, applicationArguments);
			listeners.finished(context, null);
			stopWatch.stop();
			if (this.logStartupInfo) {
				new StartupInfoLogger(this.mainApplicationClass)
						.logStarted(getApplicationLog(), stopWatch);
			}
			return context;
		}
		catch (Throwable ex) {
			handleRunFailure(context, listeners, analyzers, ex);
			throw new IllegalStateException(ex);
		}
	}
一看这方法,也不长啊,心中暗喜,不过一会就不好受了,由于某些方法分析起来比较长,对于复杂的方法,我会专门写一篇文章介绍
6.1 StopWatch stopWatch = new StopWatch();
stopWatch.start();
ConfigurableApplicationContext context = null;
FailureAnalyzers analyzers = null;
这几行代码很简单 ,StopWatch 是几率整个代码耗时的,从start() 到stop(),ConfigurableApplicationContext context = null;
FailureAnalyzers analyzers = null; 是声明几个局部变量名的
6.2 进入 configureHeadlessProperty()
private void configureHeadlessProperty() {
		System.setProperty(SYSTEM_PROPERTY_JAVA_AWT_HEADLESS, System.getProperty(
				SYSTEM_PROPERTY_JAVA_AWT_HEADLESS, Boolean.toString(this.headless)));
	}
是设置系统参数java.awt.headless的值,如果系统有,则用系统的,如果没有将他的值设为this.headless的值 为true
Headless模式是在缺少显示屏、键盘或者鼠标是的系统配置也比较简单
6.3进入SpringApplicationRunListeners listeners = getRunListeners(args);
private SpringApplicationRunListeners getRunListeners(String[] args) {
		Class<?>[] types = new Class<?>[] { SpringApplication.class, String[].class };
		return new SpringApplicationRunListeners(logger, getSpringFactoriesInstances(
				SpringApplicationRunListener.class, types, this, args));
	}
如何实例化spring.factory中的 org.springframework.boot.SpringApplicationRunListener对应的值,与前面的ApplicationContextInitializer流程一样,只不过,这次调用的不是无参构造,而是有参构造方法,

public EventPublishingRunListener(SpringApplication application, String[] args) {
        this.application = application;
        this.args = args;
        this.initialMulticaster = new SimpleApplicationEventMulticaster();
        for (ApplicationListener<?> listener : application.getListeners()) {
            this.initialMulticaster.addApplicationListener(listener);
        }
    }
有个小插曲com.sun.jdi.ObjectCollectedException occurred while retrieving value 在调试的时候,对象被gc回收了,导致eclipse
报错,这里有点懵主要是因为SpringApplicationRunListeners 和 SpringApplicationRunListener 我靠,能不能区别再小点
SpringApplicationRunListeners 是类, SpringApplicationRunListener 是接口
而且在 SpringApplicationRunListeners 有这样一个属性private final List<SpringApplicationRunListener> listeners;
而 那个EventPublishingRunListener 是 SpringApplicationRunListener的一个实现类,刚才那个有参构造就是在初始化这个类
刚开始我也纳闷啊,前面initializers 和listeners 的实现类初始化的时候都反射的是无参构造 ,而这个EventPublishingRunListener 初始化的时候要lprivate SpringApplication application;private final String[] args;这两个参数干嘛
原来在为初始化private final SimpleApplicationEventMulticaster initialMulticaster;这个属性用的,将springApplication的listeners
传递给他来初始化这个属性
SimpleApplicationEventMulticaster 这个类是干嘛的呢
看SimpleApplicationEventMulticaster 类的介绍
Simple implementation of the ApplicationEventMulticaster interface.
Multicasts all events to all registered listeners, leaving it up to the listeners to ignore events that they are not interested in. Listeners will usually perform corresponding instanceof checks on the passed-in event object.
By default, all listeners are invoked in the calling thread. This allows the danger of a rogue listener blocking the entire application, but adds minimal overhead. Specify an alternative task executor to have listeners executed in different threads, for example from a thread pool
简单的翻译一下:
广播所有事件到所有注册的侦听器,让侦听器忽略他们不感兴趣的事件。侦听器通常会对传入的事件对象执行相应的InstanceOf检查。
默认情况下,在调用线程中调用所有侦听器。这允许恶意侦听器阻塞整个应用程序的危险,但增加的开销最小。指定另一个任务执行器,使侦听器在不同的线程中执行,例如从线程池执行
下面的代码就应该是将已经注册过的listeners与SimpleApplicationEventMulticast关联起来
@Override
	public void addApplicationListener(ApplicationListener<?> listener) {
		synchronized (this.retrievalMutex) {
			// Explicitly remove target for a proxy, if registered already,
			// in order to avoid double invocations of the same listener.
			Object singletonTarget = AopProxyUtils.getSingletonTarget(listener);
			if (singletonTarget instanceof ApplicationListener) {
				this.defaultRetriever.applicationListeners.remove(singletonTarget);
			}
			this.defaultRetriever.applicationListeners.add(listener);
			this.retrieverCache.clear();
		}
	}
这里的梳理一下就是SpringApplicationRunListeners中有SpringApplicationRunListener 的实现类 EventPublishingRunListener,
EventPublishingRunListener 中有 SimpleApplicationEventMulticaster ,SimpleApplicationEventMulticaster 有ListenerRetriever
ListenerRetriever有Set<ApplicationListener<?>> applicationListeners,这个applicationListeners即为 先前在构造Listeners初始化的
6.3进入listeners.starting();其实就是调用 SpringApplicationRunListener 的starting方法
public void starting() {
		for (SpringApplicationRunListener listener : this.listeners) {
			listener.starting();
		}
	}
进入实现类中的starting方法,进而调用的SimpleApplicationEventMulticaster 中的multicastEvent方法
@Override
	@SuppressWarnings("deprecation")
	public void starting() {
		this.initialMulticaster
				.multicastEvent(new ApplicationStartedEvent(this.application, this.args));
	}
进入下面的方法ApplicationStartedEvent说是被弃用 而应该使用ApplicationStartingEvent 这个事件,说是启用了你还自己用,不知道你怎么想的
@Override
	public void multicastEvent(ApplicationEvent event) {
		multicastEvent(event, resolveDefaultEventType(event));
	}
进入multicastEvent(final ApplicationEvent event, ResolvableType eventType)方法
@Override
	public void multicastEvent(final ApplicationEvent event, ResolvableType eventType) {
		ResolvableType type = (eventType != null ? eventType : resolveDefaultEventType(event));
		for (final ApplicationListener<?> listener : getApplicationListeners(event, type)) {
			Executor executor = getTaskExecutor();
			if (executor != null) {
				executor.execute(new Runnable() {
					@Override
					public void run() {
						invokeListener(listener, event);
					}
				});
			}
			else {
				invokeListener(listener, event);
			}
		}
	}
其中调用了父类的getApplicationListeners方法
protected Collection<ApplicationListener<?>> getApplicationListeners(
			ApplicationEvent event, ResolvableType eventType) {

		Object source = event.getSource();
		Class<?> sourceType = (source != null ? source.getClass() : null);
		ListenerCacheKey cacheKey = new ListenerCacheKey(eventType, sourceType);

		// Quick check for existing entry on ConcurrentHashMap...
		ListenerRetriever retriever = this.retrieverCache.get(cacheKey);
		if (retriever != null) {
			return retriever.getApplicationListeners();
		}

		if (this.beanClassLoader == null ||
				(ClassUtils.isCacheSafe(event.getClass(), this.beanClassLoader) &&
						(sourceType == null || ClassUtils.isCacheSafe(sourceType, this.beanClassLoader)))) {
			// Fully synchronized building and caching of a ListenerRetriever
			synchronized (this.retrievalMutex) {
				retriever = this.retrieverCache.get(cacheKey);
				if (retriever != null) {
					return retriever.getApplicationListeners();
				}
				retriever = new ListenerRetriever(true);
				Collection<ApplicationListener<?>> listeners =
						retrieveApplicationListeners(eventType, sourceType, retriever);
				this.retrieverCache.put(cacheKey, retriever);
				return listeners;
			}
		}
		else {
			// No ListenerRetriever caching -> no synchronization necessary
			return retrieveApplicationListeners(eventType, sourceType, null);
		}
	}
这里着重看 retrieveApplicationListeners(eventType, sourceType, retriever); 这个方法
private Collection<ApplicationListener<?>> retrieveApplicationListeners(
			ResolvableType eventType, Class<?> sourceType, ListenerRetriever retriever) {

		LinkedList<ApplicationListener<?>> allListeners = new LinkedList<ApplicationListener<?>>();
		Set<ApplicationListener<?>> listeners;
		Set<String> listenerBeans;
		synchronized (this.retrievalMutex) {
			listeners = new LinkedHashSet<ApplicationListener<?>>(this.defaultRetriever.applicationListeners);
			listenerBeans = new LinkedHashSet<String>(this.defaultRetriever.applicationListenerBeans);
		}
		for (ApplicationListener<?> listener : listeners) {
			if (supportsEvent(listener, eventType, sourceType)) {
				if (retriever != null) {
					retriever.applicationListeners.add(listener);
				}
				allListeners.add(listener);
			}
		}
		if (!listenerBeans.isEmpty()) {
			BeanFactory beanFactory = getBeanFactory();
			for (String listenerBeanName : listenerBeans) {
				try {
					Class<?> listenerType = beanFactory.getType(listenerBeanName);
					if (listenerType == null || supportsEvent(listenerType, eventType)) {
						ApplicationListener<?> listener =
								beanFactory.getBean(listenerBeanName, ApplicationListener.class);
						if (!allListeners.contains(listener) && supportsEvent(listener, eventType, sourceType)) {
							if (retriever != null) {
								retriever.applicationListenerBeans.add(listenerBeanName);
							}
							allListeners.add(listener);
						}
					}
				}
				catch (NoSuchBeanDefinitionException ex) {
					// Singleton listener instance (without backing bean definition) disappeared -
					// probably in the middle of the destruction phase
				}
			}
		}
		AnnotationAwareOrderComparator.sort(allListeners);
		return allListeners;
	}
这个方法从注册的listener中获取对当前事件感兴趣的listener集合,是否感兴趣的判断在supportsEvent(listener, eventType, sourceType)方法中
protected boolean supportsEvent(ApplicationListener<?> listener, ResolvableType eventType, Class<?> sourceType) {
		GenericApplicationListener smartListener = (listener instanceof GenericApplicationListener ?
				(GenericApplicationListener) listener : new GenericApplicationListenerAdapter(listener));
		return (smartListener.supportsEventType(eventType) && smartListener.supportsSourceType(sourceType));
	}
后来又会调用 GenericApplicationListener 中的 smartListener.supportsEventType(eventType)和smartListener.supportsSourceType(sourceType)方法,而GenericApplicationListener为接口,即调用实用类中两种方法
比如这里的实现类为org.springframework.boot.context.config.ConfigFileApplicationListener其中的两个的方法如下
@Override
	public boolean supportsEventType(Class<? extends ApplicationEvent> eventType) {
		return ApplicationEnvironmentPreparedEvent.class.isAssignableFrom(eventType)
				|| ApplicationPreparedEvent.class.isAssignableFrom(eventType);
	}

	@Override
	public boolean supportsSourceType(Class<?> aClass) {
		return true;
	}
很明显它只关心 ApplicationEnvironmentPreparedEvent和ApplicationPreparedEvent这连个事件
org.springframework.boot.logging.LoggingApplicationListener就对该事件感兴趣
最终筛选,对ApplicationStartedEvent事件敢兴趣的有这些listeners
[org.springframework.boot.logging.LoggingApplicationListener@18ce0030, org.springframework.boot.autoconfigure.BackgroundPreinitializer@45b9a632, org.springframework.boot.context.config.DelegatingApplicationListener@25d250c6, org.springframework.boot.liquibase.LiquibaseServiceLocatorApplicationListener@54c562f7]
获取监听事件的listener后,就是要执行事件方法了,spring默认启动多线线程去调用不同的listener中的事件方法,因为
Executor executor = getTaskExecutor();的executor的值为null
进入doInvokeListener(listener, event);方法
@SuppressWarnings({"unchecked", "rawtypes"})
	private void doInvokeListener(ApplicationListener listener, ApplicationEvent event) {
		try {
			listener.onApplicationEvent(event);
		}
		catch (ClassCastException ex) {
			String msg = ex.getMessage();
			if (msg == null || msg.startsWith(event.getClass().getName())) {
				// Possibly a lambda-defined listener which we could not resolve the generic event type for
				Log logger = LogFactory.getLog(getClass());
				if (logger.isDebugEnabled()) {
					logger.debug("Non-matching event type for listener: " + listener, ex);
				}
			}
			else {
				throw ex;
			}
		}
	}
最终调用的是listener中的onApplicationEvent(event)方法,比如 LoggingApplicationListener监听ApplicationSatartingEvent事件就是初始化日志的
@Override
	public void onApplicationEvent(ApplicationEvent event) {
		if (event instanceof ApplicationStartingEvent) {
			onApplicationStartingEvent((ApplicationStartingEvent) event);
		}
		else if (event instanceof ApplicationEnvironmentPreparedEvent) {
			onApplicationEnvironmentPreparedEvent(
					(ApplicationEnvironmentPreparedEvent) event);
		}
		else if (event instanceof ApplicationPreparedEvent) {
			onApplicationPreparedEvent((ApplicationPreparedEvent) event);
		}
		else if (event instanceof ContextClosedEvent && ((ContextClosedEvent) event)
				.getApplicationContext().getParent() == null) {
			onContextClosedEvent();
		}
		else if (event instanceof ApplicationFailedEvent) {
			onApplicationFailedEvent();
		}
	}

private void onApplicationStartingEvent(ApplicationStartingEvent event) {
		this.loggingSystem = LoggingSystem
				.get(event.getSpringApplication().getClassLoader());
		this.loggingSystem.beforeInitialize();
	}
大致看了一下,其他三个listener基本什么事情都没干
至此listeners.starting();执行完毕,大致也就LoggingApplicationListener干了点事
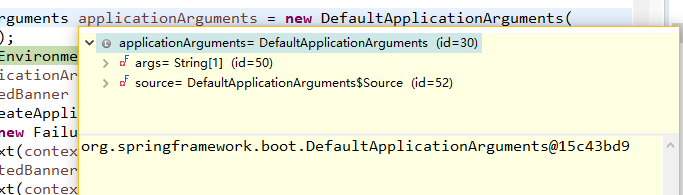
6.4 ApplicationArguments applicationArguments = new DefaultApplicationArguments(args);
这行代码也比较简单 构造一个DefaultApplicationArguments 对象 ,这个对象就两个属性, args 和source
6.5 ConfigurableEnvironment environment = prepareEnvironment(listeners,applicationArguments);这个方法要注意的是listeners并非SpringApplication中listener ,而是SpringApplicationRunListeners,进入方法
private ConfigurableEnvironment prepareEnvironment(
			SpringApplicationRunListeners listeners,
			ApplicationArguments applicationArguments) {
		// Create and configure the environment
		ConfigurableEnvironment environment = getOrCreateEnvironment();
		configureEnvironment(environment, applicationArguments.getSourceArgs());
		listeners.environmentPrepared(environment);
		if (!this.webEnvironment) {
			environment = new EnvironmentConverter(getClassLoader())
					.convertToStandardEnvironmentIfNecessary(environment);
		}
		return environment;
	}
6.5.1 进入getOrCreateEnvironment 方法,很明显 走的是 new StandardServletEnviroment()方法
private ConfigurableEnvironment getOrCreateEnvironment() {
		if (this.environment != null) {
			return this.environment;
		}
		if (this.webEnvironment) {
			return new StandardServletEnvironment();
		}
		return new StandardEnvironment();
	}
StandardServletEnvironment extends StandardEnvironment 而StandardEnvironment extends AbstractEnvironment
由于子类构造时,会掉父类的构造方法 ,会掉AbstractEnvironment中的构造方法,而在调用customizePropertySources方法时又会调用子类的customizePropertySources方法,即StandardServletEnvironment中的customizePropertySources的方法,
该方法又调用了super.customizePropertySources (),即会调用直接父类中的StandardEnvironment中的customizePropertySources的方法
	public AbstractEnvironment() {
		customizePropertySources(this.propertySources);
		if (logger.isDebugEnabled()) {
			logger.debug("Initialized " + getClass().getSimpleName() + " with PropertySources " + this.propertySources);
		}
	}
@Override
protected void customizePropertySources(MutablePropertySources propertySources) {
propertySources.addLast(new StubPropertySource(SERVLET_CONFIG_PROPERTY_SOURCE_NAME));
propertySources.addLast(new StubPropertySource(SERVLET_CONTEXT_PROPERTY_SOURCE_NAME));
if (JndiLocatorDelegate.isDefaultJndiEnvironmentAvailable()) {
propertySources.addLast(new JndiPropertySource(JNDI_PROPERTY_SOURCE_NAME));
}
super.customizePropertySources(propertySources);
}environment 至此初始化完成

6.5.2 configureEnvironment(environment, applicationArguments.getSourceArgs());刚才是初始化环境,现在才是配置环境了
protected void configureEnvironment(ConfigurableEnvironment environment,
			String[] args) {
		configurePropertySources(environment, args);
		configureProfiles(environment, args);
	}
没什么好讲的,进入configurePropertySources方法和configureProfiles方法
protected void configurePropertySources(ConfigurableEnvironment environment,
String[] args) {
MutablePropertySources sources = environment.getPropertySources();
if (this.defaultProperties != null && !this.defaultProperties.isEmpty()) {
sources.addLast(
new MapPropertySource("defaultProperties", this.defaultProperties));
}
if (this.addCommandLineProperties && args.length > 0) {
String name = CommandLinePropertySource.COMMAND_LINE_PROPERTY_SOURCE_NAME;
if (sources.contains(name)) {
PropertySource<?> source = sources.get(name);
CompositePropertySource composite = new CompositePropertySource(name);
composite.addPropertySource(new SimpleCommandLinePropertySource(
name + "-" + args.hashCode(), args));
composite.addPropertySource(source);
sources.replace(name, composite);
}
else {
sources.addFirst(new SimpleCommandLinePropertySource(args));
}
}
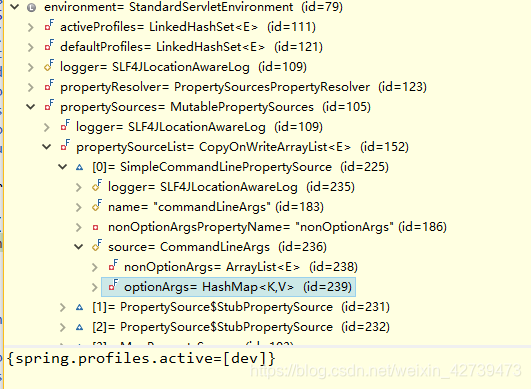
}其中会走 source.addFirst()方法去,这里new SimpleCommandLinePropertySource(args) 最终会调用一下方法
public CommandLineArgs parse(String... args) {
		CommandLineArgs commandLineArgs = new CommandLineArgs();
		for (String arg : args) {
			if (arg.startsWith("--")) {
				String optionText = arg.substring(2, arg.length());
				String optionName;
				String optionValue = null;
				if (optionText.contains("=")) {
					optionName = optionText.substring(0, optionText.indexOf("="));
					optionValue = optionText.substring(optionText.indexOf("=")+1, optionText.length());
				}
				else {
					optionName = optionText;
				}
				if (optionName.isEmpty() || (optionValue != null && optionValue.isEmpty())) {
					throw new IllegalArgumentException("Invalid argument syntax: " + arg);
				}
				commandLineArgs.addOptionArg(optionName, optionValue);
			}
			else {
				commandLineArgs.addNonOptionArg(arg);
			}
		}
		return commandLineArgs;
	}
终于知道--spring.profiles.active=dev是怎么读进去的了,最终的效果如图,添加了一个SimpleCommandLinePropertySource
再进入configureProfiles方法
protected void configureProfiles(ConfigurableEnvironment environment, String[] args) {
		environment.getActiveProfiles(); // ensure they are initialized
		// But these ones should go first (last wins in a property key clash)
		Set<String> profiles = new LinkedHashSet<String>(this.additionalProfiles);
		profiles.addAll(Arrays.asList(environment.getActiveProfiles()));
		environment.setActiveProfiles(profiles.toArray(new String[profiles.size()]));
	}
environment.getActiveProfiles(); 为激活spring.profiles.active=dev的配置,后面这三行代码是读取所有的profiles.active,包括实例化中的springApplication的this.addtionalProfiles
6.5.3 进入listeners.environmentPrepared(environment);方法,再进入listener.environmentPrepared
public void environmentPrepared(ConfigurableEnvironment environment) {
		for (SpringApplicationRunListener listener : this.listeners) {
			listener.environmentPrepared(environment);
		}
	}
下面的方法在EventPublishingRunListener,很熟悉吧,之前starting()也调用这个类中的方法,很明显,它又要对外广播事件
这次广播的事件为ApplicationEnvironmentPreparedEvent,字面的意思是环境准备好了,并把环境也传递了过去
@Override
	public void environmentPrepared(ConfigurableEnvironment environment) {
		this.initialMulticaster.multicastEvent(new ApplicationEnvironmentPreparedEvent(
				this.application, this.args, environment));
	}
我们这里选择一个listener的onApplicationEvent方法解读,这个listener就是 ConfigFileApplicationListener,很明显会进入到
onApplicationEnvironmentPreparedEvent方法
@Override
	public void onApplicationEvent(ApplicationEvent event) {
		if (event instanceof ApplicationEnvironmentPreparedEvent) {
			onApplicationEnvironmentPreparedEvent(
					(ApplicationEnvironmentPreparedEvent) event);
		}
		if (event instanceof ApplicationPreparedEvent) {
			onApplicationPreparedEvent(event);
		}
	}
下面是具体的方法
private void onApplicationEnvironmentPreparedEvent(
			ApplicationEnvironmentPreparedEvent event) {
		List<EnvironmentPostProcessor> postProcessors = loadPostProcessors();
		postProcessors.add(this);
		AnnotationAwareOrderComparator.sort(postProcessors);
		for (EnvironmentPostProcessor postProcessor : postProcessors) {
			postProcessor.postProcessEnvironment(event.getEnvironment(),
					event.getSpringApplication());
		}
	}
6.5.3.1 分析 List<EnvironmentPostProcessor> postProcessors = loadPostProcessors();这个方法
首次接触PostProcessor这个词,是不是很兴奋,好像后面还有什么BeanPostProcessor,第一次遇到,就把他弄清楚一点
EnvironmentPostProcessor,就是个接口,代码比较少,就全部粘过来了
/*
 * Copyright 2012-2016 the original author or authors.
 *
 * Licensed under the Apache License, Version 2.0 (the "License");
 * you may not use this file except in compliance with the License.
 * You may obtain a copy of the License at
 *
 *      http://www.apache.org/licenses/LICENSE-2.0
 *
 * Unless required by applicable law or agreed to in writing, software
 * distributed under the License is distributed on an "AS IS" BASIS,
 * WITHOUT WARRANTIES OR CONDITIONS OF ANY KIND, either express or implied.
 * See the License for the specific language governing permissions and
 * limitations under the License.
 */

package org.springframework.boot.env;

import org.springframework.boot.SpringApplication;
import org.springframework.core.env.ConfigurableEnvironment;
import org.springframework.core.env.Environment;

/**
 * Allows for customization of the application's {@link Environment} prior to the
 * application context being refreshed.
 * <p>
 * EnvironmentPostProcessor implementations have to be registered in
 * {@code META-INF/spring.factories}, using the fully qualified name of this class as the
 * key.
 * <p>
 * {@code EnvironmentPostProcessor} processors are encouraged to detect whether Spring's
 * {@link org.springframework.core.Ordered Ordered} interface has been implemented or if
 * the @{@link org.springframework.core.annotation.Order Order} annotation is present and
 * to sort instances accordingly if so prior to invocation.
 *
 * @author Andy Wilkinson
 * @author Stephane Nicoll
 * @since 1.3.0
 */
public interface EnvironmentPostProcessor {

	/**
	 * Post-process the given {@code environment}.
	 * @param environment the environment to post-process
	 * @param application the application to which the environment belongs
	 */
	void postProcessEnvironment(ConfigurableEnvironment environment,
			SpringApplication application);

}
大致的意思是说他可以对环境进行后处理,我的理解就是,初始化的环境将由EnvironmentPostProcessor的实现类进行后处理
继续ConfigFileApplicationListener同时也实现了EnvironmentPostProcessor这个接口,至此postProcessors 的值为[org.springframework.boot.env.SpringApplicationJsonEnvironmentPostProcessor@6c64cb25, org.springframework.boot.cloud.CloudFoundryVcapEnvironmentPostProcessor@6ae5aa72, org.springframework.boot.context.config.ConfigFileApplicationListener@309e345f]
然后是遍历这几个EnvironmentPostProcessor的实现类执行里面的postProcessEnvironment方法
这里以SpringApplicationJsonEnvironmentPostProcessor为例
@Override
	public void postProcessEnvironment(ConfigurableEnvironment environment,
			SpringApplication application) {
		String json = environment.resolvePlaceholders(
				"${spring.application.json:${SPRING_APPLICATION_JSON:}}");
		if (StringUtils.hasText(json)) {
			processJson(environment, json);
		}
	}
CloudFoundryVcapEnvironmentPostProcessor 中的postProcessEnvironment也没有干什么事,因为没有启用spring cloud
ConfigFileApplicationListener中的postProcessEnvironment,等等,我差点要跳过了,原来这个EnvironmentPostProcessor才是加载配置文件的关键
@Override
	public void postProcessEnvironment(ConfigurableEnvironment environment,
			SpringApplication application) {
		addPropertySources(environment, application.getResourceLoader());
		configureIgnoreBeanInfo(environment);
		bindToSpringApplication(environment, application);
	}
好,我打算单独写一篇了 ,地址我都想了 ,嘿嘿 https://blog.csdn.net/weixin_42739473/article/details/98883399
对于ApplicationEnvironmentPreparedEvent这个事件 接下来还有好几listener AnsiOutputApplicationListener, LoggingApplicationListener
这里再看一个LoggingApplicationListener的onApplicationEnviromentPreparedEvent方法
private void onApplicationEnvironmentPreparedEvent(
			ApplicationEnvironmentPreparedEvent event) {
		if (this.loggingSystem == null) {
			this.loggingSystem = LoggingSystem
					.get(event.getSpringApplication().getClassLoader());
		}
		initialize(event.getEnvironment(), event.getSpringApplication().getClassLoader());
	}
再而进入 initialize()
protected void initialize(ConfigurableEnvironment environment,
			ClassLoader classLoader) {
		new LoggingSystemProperties(environment).apply();
		LogFile logFile = LogFile.get(environment);
		if (logFile != null) {
			logFile.applyToSystemProperties();
		}
		initializeEarlyLoggingLevel(environment);
		initializeSystem(environment, this.loggingSystem, logFile);
		initializeFinalLoggingLevels(environment, this.loggingSystem);
		registerShutdownHookIfNecessary(environment, this.loggingSystem);
	}
在 initializeFinalLoggingLevels(environment, this.loggingSystem);得到了控制台的首次打印日志
因为我在application.properties中设置了logging.level.root=level,就是通过这个方法得到的
终于使用日志打印了,但是是报错误日志
javax.management.InstanceNotFoundException: java.nio:type=Endpoint,name=beansEndpoint,而且还一直打印,影响我走debug啊
具体原因也不太清楚,后来百度好像解决了,解决方法是在java目录下 jre\lib\security中,在java.policy文件添加
permission javax.management.MBeanTrustPermission "register";
接下来的listener是ClasspathLoggingApplicationListener BackgroundPreinitializer DelegatingApplicationListener FileEncodingApplicationListener
这里再分析一下 FileEncodingApplicationListener,if (resolver.containsProperty("mandatoryFileEncoding"))都没进去不用分析了
@Override
	public void onApplicationEvent(ApplicationEnvironmentPreparedEvent event) {
		RelaxedPropertyResolver resolver = new RelaxedPropertyResolver(
				event.getEnvironment(), "spring.");
		if (resolver.containsProperty("mandatoryFileEncoding")) {
			String encoding = System.getProperty("file.encoding");
			String desired = resolver.getProperty("mandatoryFileEncoding");
			if (encoding != null && !desired.equalsIgnoreCase(encoding)) {
				logger.error("System property 'file.encoding' is currently '" + encoding
						+ "'. It should be '" + desired
						+ "' (as defined in 'spring.mandatoryFileEncoding').");
				logger.error("Environment variable LANG is '" + System.getenv("LANG")
						+ "'. You could use a locale setting that matches encoding='"
						+ desired + "'.");
				logger.error("Environment variable LC_ALL is '" + System.getenv("LC_ALL")
						+ "'. You could use a locale setting that matches encoding='"
						+ desired + "'.");
				throw new IllegalStateException(
						"The Java Virtual Machine has not been configured to use the "
								+ "desired default character encoding (" + desired
								+ ").");
			}
		}
	}
至此,所有的监听SpringEnvironmentPreparedEvent的listener中的onApplicationEvent方法都执行过了,终于可以返回主方法了。
6.6 Banner printedBanner = printBanner(environment);进入printBanner方法。
	private Banner printBanner(ConfigurableEnvironment environment) {
		if (this.bannerMode == Banner.Mode.OFF) {
			return null;
		}
		ResourceLoader resourceLoader = this.resourceLoader != null ? this.resourceLoader
				: new DefaultResourceLoader(getClassLoader());
		SpringApplicationBannerPrinter bannerPrinter = new SpringApplicationBannerPrinter(
				resourceLoader, this.banner);
		if (this.bannerMode == Mode.LOG) {
			return bannerPrinter.print(environment, this.mainApplicationClass, logger);
		}
		return bannerPrinter.print(environment, this.mainApplicationClass, System.out);
	}
6.6.1进入print方法
public Banner print(Environment environment, Class<?> sourceClass, PrintStream out) {
        Banner banner = getBanner(environment, this.fallbackBanner);
        banner.printBanner(environment, sourceClass, out);
        return new PrintedBanner(banner, sourceClass);
    }
期间会去取environment中的 banner.location banner.text和 banner.image.location属性,还会调用这个方法
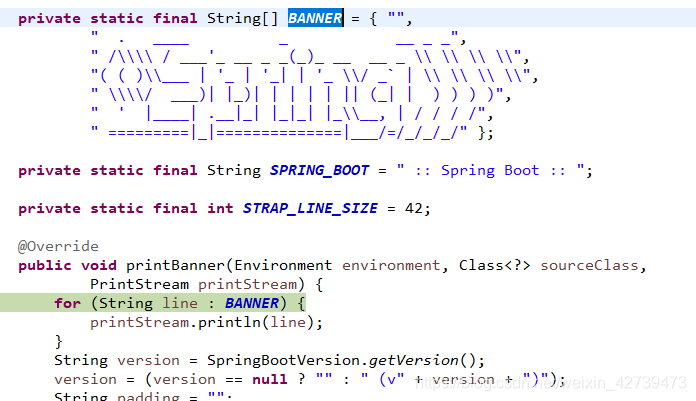
public void printBanner(Environment environment, Class<?> sourceClass,
			PrintStream printStream) {
		for (String line : BANNER) {
			printStream.println(line);
		}
		String version = SpringBootVersion.getVersion();
		version = (version == null ? "" : " (v" + version + ")");
		String padding = "";
		while (padding.length() < STRAP_LINE_SIZE
				- (version.length() + SPRING_BOOT.length())) {
			padding += " ";
		}

		printStream.println(AnsiOutput.toString(AnsiColor.GREEN, SPRING_BOOT,
				AnsiColor.DEFAULT, padding, AnsiStyle.FAINT, version));
		printStream.println();
	}
以下是SpringBootBanner中的代码截图,是不是很熟悉,哈哈,原来他也是一行行的拼接出来的呢
这里想到自己可以自定义banner.txt文件来取代默认的打印图案,所以这里我想一探究竟,这次调试在src/mian/resoures目录下我添加了banner.txt ,再次debug,进入下面的关键方法
String location = environment.getProperty(BANNER_LOCATION_PROPERTY,
				DEFAULT_BANNER_LOCATION);
enviroment.getProperty(a,b);这个方法就是根据a找值,若找不到就返回b,而这里的b就是“banner.txt”,而且里面还支持${}这种站位符读取数据具体就不分析了,核心方法在PropertyPlaceholderHelper这个类中,至此关于banner分析就到这里了
6.7 进入context = createApplicationContext();,一看这方法就很关键
protected ConfigurableApplicationContext createApplicationContext() {
		Class<?> contextClass = this.applicationContextClass;
		if (contextClass == null) {
			try {
				contextClass = Class.forName(this.webEnvironment
						? DEFAULT_WEB_CONTEXT_CLASS : DEFAULT_CONTEXT_CLASS);
			}
			catch (ClassNotFoundException ex) {
				throw new IllegalStateException(
						"Unable create a default ApplicationContext, "
								+ "please specify an ApplicationContextClass",
						ex);
			}
		}
		return (ConfigurableApplicationContext) BeanUtils.instantiate(contextClass);
	}
由于这里是web环境,spring使用的是AnnotationConfigEmbeddedWebApplicationContext这个上下文的clazz,
return clazz.newInstance();就这样调用无参构造方法创建ApplicationContext,到这就结束了
6.7 analyzers = new FailureAnalyzers(context);这个是FailureAnalyzers中的构造方法,注意是带s的而FailureAnalyzer是一个接口,其中loadFailureAnalyzers类似于从spring.factory中读取Listeners一样,只不过这个键为org.springframework.boot.diagnostics.FailureAnalyzer,读到之后根据AnnotationAwareOrderComparator.sort(analyzers);排序,原来spring一贯如此。
FailureAnalyzers(ConfigurableApplicationContext context, ClassLoader classLoader) {
		Assert.notNull(context, "Context must not be null");
		this.classLoader = (classLoader == null ? context.getClassLoader() : classLoader);
		this.analyzers = loadFailureAnalyzers(this.classLoader);
		prepareFailureAnalyzers(this.analyzers, context);
	}
这里我们看一下prepareFailureAnalyzers这个方法
private void prepareFailureAnalyzers(List<FailureAnalyzer> analyzers,
			ConfigurableApplicationContext context) {
		for (FailureAnalyzer analyzer : analyzers) {
			prepareAnalyzer(context, analyzer);
		}
	}
其中入参analyzers为[org.springframework.boot.diagnostics.analyzer.BeanCurrentlyInCreationFailureAnalyzer@16150369, org.springframework.boot.diagnostics.analyzer.BeanNotOfRequiredTypeFailureAnalyzer@6b09fb41, org.springframework.boot.diagnostics.analyzer.BindFailureAnalyzer@624ea235, org.springframework.boot.diagnostics.analyzer.ConnectorStartFailureAnalyzer@3932c79a, org.springframework.boot.diagnostics.analyzer.NoUniqueBeanDefinitionFailureAnalyzer@782859e, org.springframework.boot.diagnostics.analyzer.PortInUseFailureAnalyzer@23f5b5dc, org.springframework.boot.diagnostics.analyzer.ValidationExceptionFailureAnalyzer@34bde49d, org.springframework.boot.autoconfigure.diagnostics.analyzer.NoSuchBeanDefinitionFailureAnalyzer@1b1cfb87, org.springframework.boot.autoconfigure.jdbc.DataSourceBeanCreationFailureAnalyzer@821330f, org.springframework.boot.autoconfigure.jdbc.HikariDriverConfigurationFailureAnalyzer@6f43c82]
context为org.springframework.boot.context.embedded.AnnotationConfigEmbeddedWebApplicationContext@4b45a2f5: startup date [Thu Jan 01 08:00:00 CST 1970]; root of context hierarchy,就是刚才我们初始化的AnnotationConfigEmbeddedWebApplicationContext,这里想必是这些FailureAnalyzer要对context进行处理
private void prepareAnalyzer(ConfigurableApplicationContext context,
			FailureAnalyzer analyzer) {
		if (analyzer instanceof BeanFactoryAware) {
			((BeanFactoryAware) analyzer).setBeanFactory(context.getBeanFactory());
		}
	}
这里有个BeanFactoryAware接口,如果FailureAnalyzer的实现类也实现了这个接口,就把这个context中的beanfactory赋值给这个这个类
context.getBeanFactory()方法可见context中有beanFactory属性,就是context包含beanFactory
这里的beanFactory为org.springframework.beans.factory.support.DefaultListableBeanFactory,这个prepareAnalyzer就是将初始化的context中的beanFactory与实现BeanFactoryAware的FailureAnalyzer绑定
6.8 prepareContext(context, environment, listeners, applicationArguments,printedBanner); 这个方法很复杂,就单独整理一篇吧
链接地址 https://blog.csdn.net/weixin_42739473/article/details/99290375
6.9 refreshContext(context);,这个方法看书很短,但是极其重要文章地址为 https://blog.csdn.net/weixin_42739473/article/details/99689335


 2613
2613


 被折叠的 条评论
为什么被折叠?
被折叠的 条评论
为什么被折叠?
 到【灌水乐园】发言


