


1.标准输入流System.in/标准输出流System.out
System.in : 标准的输入流,默认从键盘输入
System.out: 标准的输出流,默认从显示器输出(理解为控制台输出)
System.setOut()方法和 System.setIn()方法(结合下面介绍的打印流举例)
2.打印流
实现将基本数据类型的数据格式转化为字符串输出。
打印流:PrintStream 和 PrintWriter
如果并不想从键盘输入,也不想从显示器读出,换言之,比如想要
“从一个文件A读取信息,进行处理后再将信息写入一个文件B”
可以通过调用如下的方法,修改输入流和输出流的位置:
- 将信息输入内存 格式为
setIn(InputStream in)
举个例子,比如
setIn(InputStream is)表示输入的data来源是InputStream类型名叫is的对象,而不是传统思维上的键盘。
- 将信息从内存抛出 格式为
setOut(PrintStream out)
举例一,比如
setOut(PrintStream ps)表示输出的data去了PrintStream类型名叫ps的对象,而不是传统思维上的屏幕。
举例二,比如创建一个新的PrintStream对象,它将输出写入到文件out.txt
FileOutputStream fos = new FileOutputStream(“out.txt”);
System.setOut(new PrintStream(fos));
可以用下面这句话重新恢复默认输出流
System.setOut(System.out);
示例:使用 System.setOut() 将输出数据写进一个具体的文件。
import java.io.*;

public class PrintIO {

        public static void main(String[] args) {

            try {
                // 创建一个新的 PrintStream 对象,它将输出写入到文件
                FileOutputStream fos = new FileOutputStream("output666.txt");
                System.setOut(new PrintStream(fos));

                // 现在,System.out.println() 的输出将写入到 output666.txt 文件中
                System.out.println("哈哈!This will be written to output666.txt");

            } catch (IOException e) {
                e.printStackTrace();
            } finally {
                // 恢复原始的标准输出流(可选)
                System.setOut(System.out);
            }
        }
    }
运行完毕,系统生成了一个文件,叫做 output666.txt,并且往文件里填充了一句话
哈哈!This will be written to output666.txt"
System.setOut在段落中出现的具体行数其实不太影响写入的文件内容,注意一旦遇见ps.close()也就是PrintStream.close()关闭了想要写入的那个文件,那么在这一行之后出现的data就真的写不进去了。
- 示例1
将几行data写入一个固定的文件,注意观察,文件close再想写入语句,写不进去了。System.setOut(ps)在程序中的位置,无法调控写入或者不写本行data。
package IOTest;

import org.junit.Test;

import java.io.*;

public class PrintIO {
    @Test
    public void PrintStream1() throws FileNotFoundException {
    //public static void main(String[] args) throws FileNotFoundException {
        PrintStream ps = new PrintStream("io.txt");

        ps.println("hello, how are you?");
        ps.println(666);
        ps.println(1.5);
        System.setOut(ps);

        System.out.println("!“£¥%……&*(");


        System.out.println("我是写在setOut后面的句子");//写在setOut后面的句子并不影响输入进文件,但是close后面的就不会再进入文件了
        ps.close();
        ps.println("hi this is Polly");//ps.close()后面添加的的语句是不会被写进文件的
    }


}
下面是写好的io.txt文件内容:
hello, how are you?
666
1.5
!“£¥%……&*(
我是写在setOut后面的句子
- 示例2 使用PrintStream向一个文件内写入自动数据,要求写入0-255,每到50就换行
程序示例
package IOTest;

import org.junit.Test;

import java.io.*;

public class PrintIO {
    @Test public void test2() throws FileNotFoundException {

        FileOutputStream fos = new FileOutputStream(new File("printIOtest.txt"));
        PrintStream ps= new PrintStream(fos,true);//true表示自动刷新

        if(ps != null){
            System.setOut(ps);
        }
        for (int i = 0; i < 255; i++) { //输出0-255可以是数字或者是字符
            //System.out.print((char) i);//也可用来输出ASCII字符
            System.out.print(i+"\t");//输出数字
            if(i%50 ==0){
                System.out.println(); //每50个换行
            }
        }
        ps.close();
    }


}
程序输出显示每到50一换行:
0
1	2	3	4	5	6	7	8	9	10	11	12	13	14	15	16	17	18	19	20	21	22	23	24	25	26	27	28	29	30	31	32	33	34	35	36	37	38	39	40	41	42	43	44	45	46	47	48	49	50
51	52	53	54	55	56	57	58	59	60	61	62	63	64	65	66	67	68	69	70	71	72	73	74	75	76	77	78	79	80	81	82	83	84	85	86	87	88	89	90	91	92	93	94	95	96	97	98	99	100
101	102	103	104	105	106	107	108	109	110	111	112	113	114	115	116	117	118	119	120	121	122	123	124	125	126	127	128	129	130	131	132	133	134	135	136	137	138	139	140	141	142	143	144	145	146	147	148	149	150
151	152	153	154	155	156	157	158	159	160	161	162	163	164	165	166	167	168	169	170	171	172	173	174	175	176	177	178	179	180	181	182	183	184	185	186	187	188	189	190	191	192	193	194	195	196	197	198	199	200
201	202	203	204	205	206	207	208	209	210	211	212	213	214	215	216	217	218	219	220	221	222	223	224	225	226	227	228	229	230	231	232	233	234	235	236	237	238	239	240	241	242	243	244	245	246	247	248	249	250
251	252	253	254
example 3: 创建一个打印流,这个打印流会向规定的文件输入一些log,这些log显示了当前的时间和一些其他文本,由程序员自定义。
参考程序
package IOTest;

import org.junit.Test;

import java.io.File;
import java.io.FileNotFoundException;
import java.io.FileOutputStream;
import java.io.PrintStream;
import java.text.SimpleDateFormat;
import java.util.Date;

public class Logger {
    public static void log(String msg) throws FileNotFoundException {

            //建立一个准备写入的文件,准备好打印流
            //FileOutputStream fos = new FileOutputStream(new File("log666.txt"),true); //写法1:true表示data不覆盖,直接自动向后添加
            FileOutputStream fos = new FileOutputStream("log666.txt",true); //写法2:true表示保留原有data,直接向后继续添加
            PrintStream ps= new PrintStream(fos,true); //自动刷新

            //为准备好的打印流提供输出方向(准备好的那个file)
            System.setOut(ps);

            //写法3 将前面的三行合成两行,实现功能是一模一样的
        // PrintStream ps = new PrintStream(new FileOutputStream("log666.txt",true));
        //System.setOut(ps);

            //准备写入文件的内容:
            Date nowTime = new Date();
            SimpleDateFormat sdf = new SimpleDateFormat("yyyy-MM-dd HH:mm:ss");
            String strTime = sdf.format(nowTime);

            System.out.println(strTime+": "+msg);


        ps.close();


    }
}
对上面的方法进行调用,主程序如下:
package IOTest;

import org.junit.Test;

import java.io.*;
import java.text.SimpleDateFormat;
import java.util.Date;

public class PrintIO {

@Test
    public void test_log() throws FileNotFoundException {
    Logger.log("this is log message 1");
    Logger.log("this is log message 2");
    Logger.log("this is log message 3");
}

}
生成的文档文件名为log666.txt,内容如下:
2024-05-12 16:20:21: this is log message 3
2024-05-12 16:21:58: this is log message 1
2024-05-12 16:21:59: this is log message 2
2024-05-12 16:21:59: this is log message 3
知识补充 - native关键字
使用native关键字声明的特殊方法在Java代码中并没有具体的实现,而是由其他语言(如C、C++)实现的,并通过Java Native Interface (JNI) 与Java虚拟机(JVM)进行交互。
- 综合练习:从键盘输入字符,要求将读取到的整行字符串转成大写输出,然后进行输出操作。直至当输入“e”或者“exit”时候停止
package IOTest;

import java.io.*;
import java.util.Scanner;

public class UpperCaseConv {
    //从键盘输入字符,要求将读取到的整行字符串转成大写输出,然后进行输出操作。
    //直至当输入“e”或者“exit”时候停止

    //方法一:
    public static void main(String[] args) {
        System.out.println("pls enter any Strings want to conv into UpperCase(e or exit to stop): ");
        Scanner x = new Scanner(System.in);
        String str1;
        while ((str1 = x.next())!= null) {
            {System.out.println("to Upper case:  " + str1.toUpperCase());
                if (str1.endsWith("e") || str1.endsWith("exit")) {
                    System.out.println("final results: " + str1.toUpperCase());
                    System.out.println("------->");
                    break;
                }
            }
        }
    }
}


// 方法二
/*
*
*
    public static void main(String[] args) throws IOException {
        System.out.println("请输入信息(退出输入e或者exit):");
        BufferedReader br = new BufferedReader(new InputStreamReader(System.in));
        String s;
        while((s=br.readLine())!= null){
            if(s.equals('e') || s.equals("exit") ){
                break;
            }
            System.out.println("--->"+s.toUpperCase());
            System.out.println("请继续输入:");
        }
    }
}
*
*
*
* */
方法一输出显示:
pls enter any Strings want to conv into UpperCase(e or exit to stop):
ok
to Upper case:  OK
good
to Upper case:  GOOD
fine
to Upper case:  FINE
final results:FINE
------->

Process finished with exit code 0
方法二输出显示:
请输入信息(退出输入e或者exit):
haha
--->HAHA
请继续输入:
yes
--->YES
请继续输入:
fine
--->FINE
请继续输入:
exit

Process finished with exit code 0
总结:对于从键盘上输入信息,可以使用下面的代码完成和Scanner一样的功能:
BufferedReader br = new BufferedReader(new InputStreamReader(System.in));
String str = br.readLine();
从键盘上读取用户输入的信息。对应的Scanner获取键盘输入内容的程序如下:
  Scanner x = new Scanner(System.in);
  String str = x.next();
  System.out.println(str);
- 练习:Create a program nemaed MyInput java: Contain the methods for reading int, double,float,boolean,short,byte and String values from the keyboard.
参考程序
package IOTest;

import java.io.BufferedReader;
import java.io.IOException;
import java.io.InputStreamReader;
import java.util.Scanner;

public class Def_Scan {

    //Create a program nemaed MyInput java:
    // Contain the methods for reading int, double,float,boolean,short,byte and String values from the keyboard.

    //方式一:

    /*
    *
    *

    public static void main(String[] args) {
        Scanner x = new Scanner(System.in);
        String str = x.next();
        System.out.println(str);
    }
}
 *
 * */


    //方式2:
    public static void main(String[] args) throws IOException {

        System.out.println(readString());
        System.out.println(readInt());
        System.out.println(readDouble());
        System.out.println(readFloat());
        System.out.println(readBoolean());
        System.out.println(readByte());
        System.out.println(readShort());

    }

    public static String readString() {
        System.out.println("请输入:");
        BufferedReader br = new BufferedReader(new InputStreamReader(System.in));
        String str = "";
        try {
            str = br.readLine();
        } catch (IOException e) {
            //throw new RuntimeException
            System.out.println(e);
        }
        return str;
    }

    public static int readInt() throws IOException {
        return Integer.parseInt(readString());
    }

    public static double readDouble() throws IOException {
        return Double.parseDouble(readString());
    }

    public static float readFloat() throws IOException {
        return Float.parseFloat(readString());
    }


    public static boolean readBoolean() throws IOException {
        return Boolean.parseBoolean(readString());
    }

    public static byte readByte() throws IOException {
        return Byte.parseByte(readString());
    }

    public static short readShort() throws IOException {
        return Short.parseShort(readString());
    }

}
复习 Scanner
从键盘上输入一些数据,自动写进文件里:
参考程序(注意这个程序不能用import org.junit.Test;建立的@Test来测试,结果会不正确)
package IOTest;

import java.io.*;
import java.util.Scanner;

public class TestScanner2 {
    public static void main(String[] args) throws IOException {

        Scanner x = new Scanner(System.in);
        PrintStream ps = new PrintStream(new FileOutputStream("scanner1.txt"));

        while (true) {
            System.out.println("请输入:");
            String str = x.nextLine();
            //if(str.equals("stop")){
            if (("stop".equals(str)) || (str.equals("exit"))) {
                break;
            }
            ps.println(str);


        }
        System.setOut(ps);
        // System.setOut(ps);这一句就直接把后续的全部信息输出导向scanner1.txt文件了。
        // 后面步骤计算得到9,也不会在屏幕显示9,它会把这个9自动写进scanner1.txt文件里

        //ps.close(); //如果这一步执行了,那么下面的System.out.println(3+6)就不会写入文件了,因为打印流都关闭了
        x.close();
        System.out.println(3+6);

    }

}
IDEA控制台console的内容如下:
请输入:
apple
请输入:
pear
请输入:
banana
请输入:
oh lots of yummy food
请输入:
stop

Process finished with exit code 0
scanner1.txt 文档最终内容如下:
apple
pear
banana
oh lots of yummy food
9
举例:从现存文件里读取文件的内容,显示在屏幕上:
package IOTest;

import java.io.*;
import java.util.Scanner;

public class TestScanner2 {
//从文件读取信息,显示在屏幕上:

    public static void main(String[] args) throws IOException{
        Scanner x = new Scanner(new FileInputStream("scanner1.txt"));
        while(x.hasNextLine()){
           String str = x.nextLine();
            System.out.println(str);
        }
        x.close();
    }
}
结果显示:文件包含的内容被正确的读出并显示到了屏幕上。
- apache-common包的使用
IO技术开发中代码量很大且重复,Apache软件基金会开发了IO技术的工具类commonsIO,·简化了IO开发。要使用这种第三方的开发工具,需要添加jar包(由class文件编译后产生)。在导入jar包之后,内部的API都可以使用。
知识点
下载文件的类型选择:
Source Distribution 和 Binary Distribution。Source 是源代码版,需要自己编译成可执行软件。
Binaries是可执行版,直接下载解压就可以拿来用的,已经编译好了版本。
通常直接下载Binaries中的jar支持包使用即可(本例中,ubuntu系统下载了commons-io-2.16.1-bin.zip然后本地解压,得到了commons-io-2.16.jar文件)。
安装jar包:
尝试安装commons-io-2.5.jar(实际下载的是commons-io-2.16.1-bin.zip文件)
- 下载地址:
https://commons.apache.org/proper/commons-io/
或者
https://commons.apache.org/io/download_io.cgi - 导入包步骤:
下载包,本例采用文件commons-io-2.16.1-bin.zip(文件解压后里面有jar包)
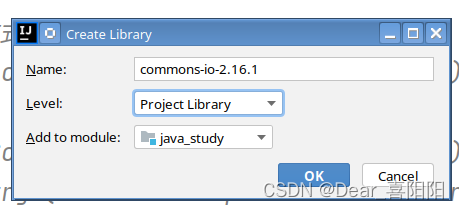
- 第一种方式
点击IDEA里面的File>Project Structure,在展开的页面,找到Libraries的TAB,然后点击 +
得到一个页面(选择想要放置jar包的位置)
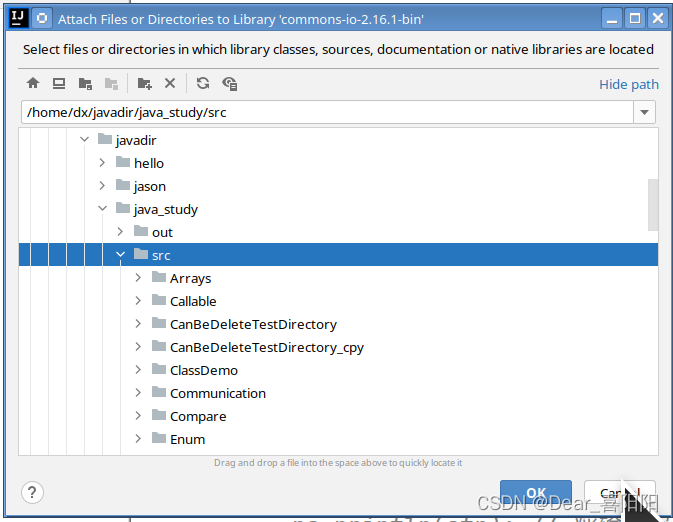
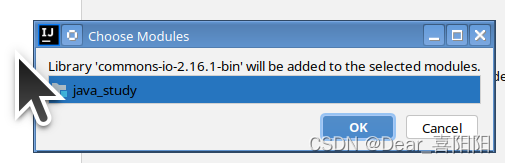
系统可能会询问这是什么文件夹(选择这是一个jar包)

jar包就安装进项目文件里了。
- 第二种方式
自建lib
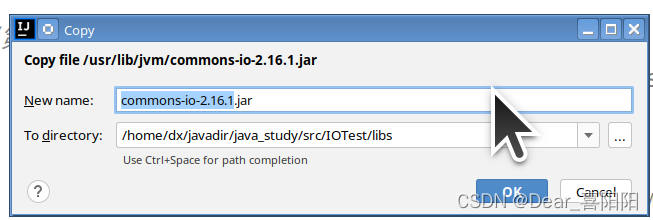
直接Ctrl+V 文件commons-io-2.5.jar
在IDEA左侧Project处下拉的项目工程内,找到当前项目的目录(比如IOTest项目),点击右键新建Package,起名叫做lib(或者libs)。将commons-io-2.6.jar拷贝到刚才新建的lib目录下(copy文件commons-io-2.5.jar 然后再在lib目录处使用Ctrl+V即可)
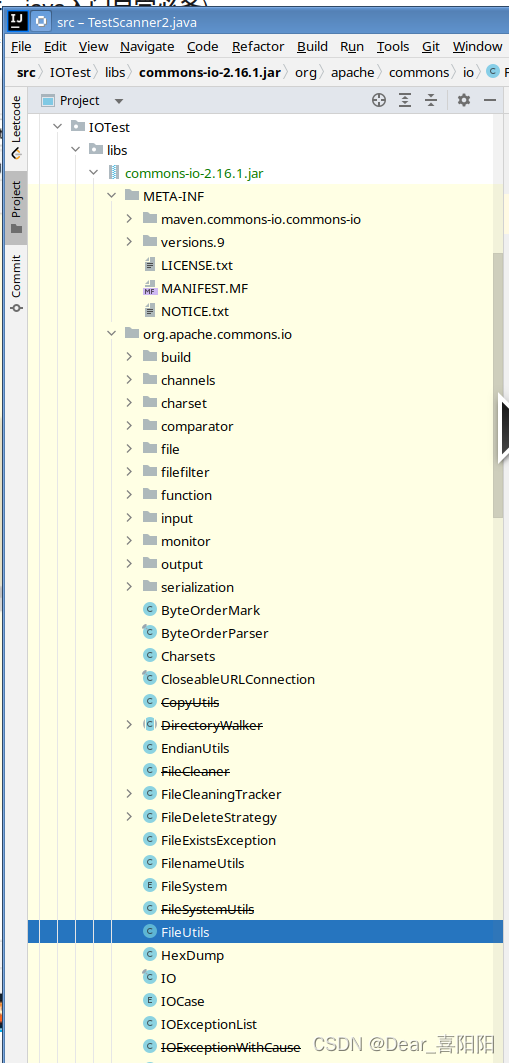
此时jar包已经成功copy进项目,但图标显示两条竖线,无法详细打开jar包具体内容。
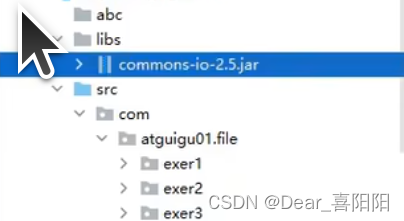
再次在Project下面当前项目处点击右键,选择Add as Library。添加成功后jar包也可以打开。
添加完成。
jar包的使用举例
举例:IOUtils类的使用,如图所示安装后的jar包可以在项目列表里找到,比如想要使用FileUtils里面的copyFile方法copy一个图片,代码如下:
import java.io.*;
import org.apache.commons.io.FileUtils;
import org.junit.Test;

public class jartest {

  @Test
  public void test01() throws IOException {
    File srcFile = new File("test_photo1.jpeg");
    File desFile = new File("del_copy_test_photo1.jpeg");

    FileUtils.copyFile(srcFile, desFile);
    System.out.println("复制完毕");
  }

}
运行结果(图片被成功的copy了):
复制完毕

Process finished with exit code 0


 1768
1768


 被折叠的 条评论
为什么被折叠?
被折叠的 条评论
为什么被折叠?
 到【灌水乐园】发言


