


一、详谈applicationContext.xml与springMVC.xml
1.1、spring最全约束文档
<?xml version="1.0" encoding="utf-8"?>

<beans xmlns="http://www.springframework.org/schema/beans"
xmlns:xsi="http://www.w3.org/2001/XMLSchema-instance"
xmlns:context="http://www.springframework.org/schema/context"
xmlns:aop="http://www.springframework.org/schema/aop"
xmlns:tx="http://www.springframework.org/schema/tx"
xsi:schemaLocation="http://www.springframework.org/schema/beans
http://www.springframework.org/schema/beans/spring-beans.xsd
http://www.springframework.org/schema/context
http://www.springframework.org/schema/context/spring-context.xsd
http://www.springframework.org/schema/aop
http://www.springframework.org/schema/aop/spring-aop.xsd
http://www.springframework.org/schema/tx
http://www.springframework.org/schema/tx/spring-tx.xsd">

</beans>
- 如上:依次引入了context、aop、tx事务的约束
<beans xmlns="http://www.springframework.org/schema/beans"
       xmlns:xsi="http://www.w3.org/2001/XMLSchema-instance"
       xsi:schemaLocation="http://www.springframework.org/schema/beans http://www.springframework.org/schema/beans/spring-beans.xsd">


</beans>
- 上述是spring.xml文件的基本约束,不可改变
1.2、springmvc最全约束文档
<?xml version="1.0" encoding="UTF-8"?>
<beans xmlns="http://www.springframework.org/schema/beans"
        xmlns:xsi="http://www.w3.org/2001/XMLSchema-instance"
        xmlns:context="http://www.springframework.org/schema/context"
        xmlns:aop="http://www.springframework.org/schema/aop"
        xmlns:tx="http://www.springframework.org/schema/tx"
        xmlns:mvc="http://www.springframework.org/schema/mvc"
        xsi:schemaLocation="http://www.springframework.org/schema/beans
        http://www.springframework.org/schema/beans/spring-beans.xsd
        http://www.springframework.org/schema/context
        http://www.springframework.org/schema/context/spring-context.xsd
        http://www.springframework.org/schema/aop
        http://www.springframework.org/schema/aop/spring-aop.xsd
        http://www.springframework.org/schema/tx
        http://www.springframework.org/schema/tx/spring-tx.xsd
        http://www.springframework.org/schema/mvc
        http://www.springframework.org/schema/mvc/spring-mvc.xsd">
</beans>
- 在spring最全约束文档的基础下加入了两个mvc需要使用的约束,将这两个约束文档引入xml文件中后,我们就可以使用spring与springmvc的所有组件配置了。
1.3、applicationContext.xml与springMVC.xml的区别
- 背景:springmvc工程内有两个spring的容器配置,springmvc.xml和applicationContext.xml这两个均是我自定义的xml配置文件;
applicationContext.xml是spring全局配置文件,springmvc.xml是springmvc的配置文件,放入根目录下。
<display-name>Archetype Created Web Application</display-name>
  <listener>
    <listener-class>org.springframework.web.context.ContextLoaderListener</listener-class>
  </listener>
  <!--指定spring全局根路径配置文件的位置-->
  <context-param>
    <param-name>contextConfigLocation</param-name>
    <param-value>classpath:applicationContext.xml</param-value>
  </context-param>

  <!--配置前端控制器-->
  <servlet>
    <servlet-name>springmvc</servlet-name>
    <servlet-class>org.springframework.web.servlet.DispatcherServlet</servlet-class>
    <!--指定springmvc配置的加载位置;
        如果不指定则默认加载WEB-INF/[DispatcherServlet 的Servlet 名字]-servlet.xml-->
    <init-param>
      <param-name>contextConfigLocation</param-name>
      <param-value>classpath:springMVC.xml</param-value>
    </init-param>
    <!--设置前端控制器随服务一起启动-->
    <load-on-startup>1</load-on-startup>
  </servlet>
  <servlet-mapping>
    <servlet-name>springmvc</servlet-name>
    <!--将所有的.action结尾的请求交给前端控制器处理-->
    <url-pattern>/</url-pattern>
  </servlet-mapping>
- 二者区别
1、applicationContext.xml是父容器,springmvc.xml是子容器,可以看成父容器的大圆包含这个mvc子容器的小圆,父容器不能访问子容器,而子容器可以访问父容器;
2、springmvc.xml子容器中主要扫描控制层controller的@controller标签类,注意:如果父容器扫描了控制层,那么子容器就找不到这个处理器;
3、从上可知,springmvc.xml扫描控制层,applicationContext.xml扫描业务和dao层,父容器不能访问子容器,而子容器可以访问父容器;所以我们可以使用@Autowired在控制层注入service和dao,但是不能在service和dao中使用@Autowired注入controller;
4、不要applicationContext.xml配置文件,所有的bean均在springmvc.xml配置文件中扫描,则service、dao、controller层之间可以使用@Autowired互相注入;之所以要applicationContext.xml,只是因为方便拓展,如果很多东西都在一个容器配置,就很麻烦。
二、第一个注解式springmvc项目
2.1、springmvc.xml文件配置
<context:component-scan base-package="com.chuan.annotation.controller"/>
<!--注册处理器映射器和处理器适配器-->
<mvc:annotation-driven/>
<!--<!–注解映射器 –>-->
<!--<bean class="org.springframework.web.servlet.mvc.method.annotation.RequestMappingHandlerMapping"/>-->
<!--<!–注解适配器 –>-->
<!--<bean class="org.springframework.web.servlet.mvc.method.annotation.RequestMappingHandlerAdapter"/>-->
<!--注册视图解析器-->
<bean class="org.springframework.web.servlet.view.InternalResourceViewResolver">
<property name="suffix" value=".jsp"/>
<property name="prefix" value="/WEB-INF/jsp/"/>
</bean>
- context:component-scan:扫描controller控制层目录下的处理器@controller
-
- 注册映射器和适配器:
<!--注解映射器 -->
    <bean class="org.springframework.web.servlet.mvc.method.annotation.RequestMappingHandlerMapping"/>
    <!--注解适配器 -->
    <bean class="org.springframework.web.servlet.mvc.method.annotation.RequestMappingHandlerAdapter"/>
上述xml配置与mvc:annotation-driven的作用等价,都是注册注解映射器和适配器
- 注册视图解析器
2.2、自定义TestController
@Controller
@RequestMapping("/test")
public class TestController {
@RequestMapping("/first")
public ModelAndView doFirst(){
ModelAndView modelAndView = new ModelAndView();
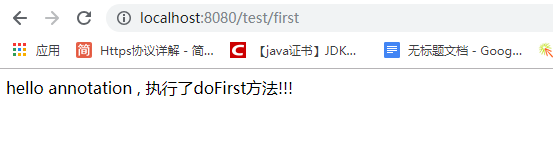
modelAndView.addObject("msg","hello annotation , 执行了doFirst方法!!!");
modelAndView.setViewName("home");
return modelAndView;
}
@RequestMapping(value={"/second1","/second2"})
public ModelAndView doSecond(){
ModelAndView modelAndView = new ModelAndView();
modelAndView.addObject("msg","hello annotation , 执行了doSecond方法!!!");
modelAndView.setViewName("home");
return modelAndView;
}
}
- @Controller:声明这个类是一个处理器类
-
- @RequestMapping:请求到处理器功能方法的映射规则,即请求路径, value值可以同时设置多个。
2.3、home.jsp
<%@ page contentType="text/html;charset=UTF-8" language="java" isELIgnored="false" %>
<html>
<head>
    <title>Title</title>
</head>
<body>
    ${msg}
</body>
</html>
2.4、测试结果
2.5、URL映射规则:根路径+子路径
- 根路径:类名上边的@RequestMapping的值
@RequestMapping("/test")
public class TestController {
- 子路径:方法名上的@RequestMapping的值
 @RequestMapping("/first")
    public ModelAndView doFirst(){
三、@RequestMapping基础详解
3.1、请求提交方式的定义
@Controller
@RequestMapping("/test")
public class TestController {

    @RequestMapping(value = "/first",method = RequestMethod.POST)
    public ModelAndView doFirst(){
- 访问doFirst方法的请求只能是post请求
3.2、@RequestMapping通配符匹配规则
 @RequestMapping(value = "/*third")//必须以third为后缀才能访问
    public ModelAndView doThird(){
        ModelAndView modelAndView = new ModelAndView();
        modelAndView.addObject("msg","hello annotation , 执行了doThird方法!!!");
        modelAndView.setViewName("home");
        return modelAndView;
    }

    @RequestMapping("/forth*")//必须以forth为前缀才能访问
    public ModelAndView doForth(){
        ModelAndView modelAndView = new ModelAndView();
        modelAndView.addObject("msg","hello annotation , 执行了doForth方法!!!");
        modelAndView.setViewName("home");
        return modelAndView;
    }

    @RequestMapping(value = "/*/fifth")
    public ModelAndView doFifth(){
        ModelAndView modelAndView = new ModelAndView();
        modelAndView.addObject("msg","hello annotation , 执行了doFifth方法!!!");
        modelAndView.setViewName("home");
        return modelAndView;
    }

    @RequestMapping("/**/six")
    public ModelAndView doSix(){
        ModelAndView modelAndView = new ModelAndView();
        modelAndView.addObject("msg","hello annotation , 执行了doSix方法!!!");
        modelAndView.setViewName("home");
        return modelAndView;
    }
@RequestMapping取值:
- /*third:必须以third为后缀才能访问;
- /forth*:必须以forth为前缀才能访问;
- /*/fifth:可匹配/aaa/fifth、/bbb/fifth、不能匹配 /aaa/bbb/fifth 和 /fifth;
-
- /**/six:可匹配/aaa/six、/aaaa/xxx/bbb/six、/six、/ccc/bbb/six、/six。
3.3、请求参数处理问题
@RequestMapping(value = {"/second1","/second2"},params = {"name=zs","!age"})
    public ModelAndView doSecond(){
        ModelAndView modelAndView = new ModelAndView();
- 上述代码中params 的意思是:前台请求参数的name值必须为zs,且请求参数中不能包含age这个参数


 1625
1625


 被折叠的 条评论
为什么被折叠?
被折叠的 条评论
为什么被折叠?
 到【灌水乐园】发言


