


一、WebSocket 是什么?
WebSocket 是 HTML5 一种新的协议。它实现了浏览器与服务器全双工通信,能更好的节省服务器资源和带宽并达到实时通讯,它建立在 TCP 之上,同 HTTP 一样通过 TCP 来传输数据,
但是它和 HTTP 最大不同是:
WebSocket 是一种双向通信协议,在建立连接后,WebSocket 服务器和 Browser/Client Agent 都能主动的向对方发送或接收数据,就像 Socket 一样;
WebSocket 需要类似 TCP 的客户端和服务器端通过握手连接,连接成功后才能相互通信。
二、整合过程(项目使用的是ruoyi分离版)
1.引入依赖
代码如下(示例):
     <!-- websocket -->
     <dependency>
         <groupId>org.springframework.boot</groupId>
         <artifactId>spring-boot-starter-websocket</artifactId>
     </dependency>
2.创建配置类
通过配置类 启用WebSocket的支持
package com.ruoyi.framework.config;

import org.springframework.context.annotation.Bean;
import org.springframework.context.annotation.Configuration;
import org.springframework.web.socket.server.standard.ServerEndpointExporter;

@Configuration
public class WebSocketConfig {
    /**
     * 	注入ServerEndpointExporter,
     * 	这个bean会自动注册使用了@ServerEndpoint注解声明的Websocket endpoint
     */
    @Bean
    public ServerEndpointExporter serverEndpointExporter() {
        return new ServerEndpointExporter();
    }

}
3.webSocket 实现
package com.ruoyi.web.controller.tool;
import com.ruoyi.common.core.domain.entity.SysDictType;
import com.ruoyi.system.service.ISysDictTypeService;
import org.slf4j.Logger;
import org.slf4j.LoggerFactory;
import org.springframework.beans.factory.annotation.Autowired;
import org.springframework.stereotype.Component;
import javax.websocket.*;
import javax.websocket.server.PathParam;
import javax.websocket.server.ServerEndpoint;
import java.util.concurrent.ConcurrentHashMap;
import java.util.concurrent.CopyOnWriteArraySet;
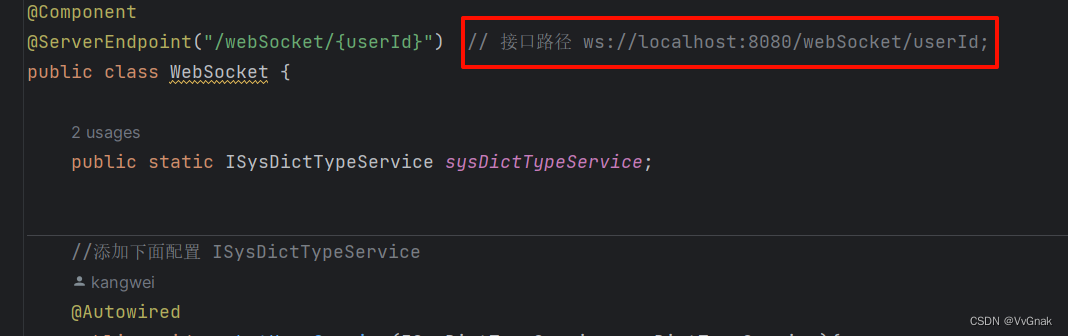
@Component
@ServerEndpoint("/webSocket/{userId}") // 接口路径 ws://localhost:8080/webSocket/userId;
public class WebSocket {
// 某接口实现 用来对接收到客户端消息后保存入库
public static ISysDictTypeService sysDictTypeService;
//添加下面配置 ISysDictTypeService
@Autowired
public void socketUserService(ISysDictTypeService sysDictTypeService){
WebSocket.sysDictTypeService = sysDictTypeService;
}
private static final Logger log = LoggerFactory.getLogger(WebSocket.class);
// 与某个客户端的连接会话,需要通过它来给客户端发送数据
private Session session;
/**
* 用户ID 用来区分连接的客户端
*/
private String userId;
// concurrent包的线程安全Set,用来存放每个客户端对应的MyWebSocket对象。
// 虽然@Component默认是单例模式的,但springboot还是会为每个websocket连接初始化一个bean,
所以可以用一个静态set保存起来。
// 注:底下WebSocket是当前类名
private static CopyOnWriteArraySet<WebSocket> webSockets =new CopyOnWriteArraySet<>();
// 用来存在线连接用户信息
private static ConcurrentHashMap<String,Session> sessionPool = new ConcurrentHashMap<String,Session>();
/**
* 链接成功调用的方法
*/
@OnOpen
public void onOpen(Session session, @PathParam(value="userId")String userId) {
try {
this.session = session;
this.userId = userId;
webSockets.add(this);
sessionPool.put(userId, session);
log.info("【websocket消息】有新的连接,总数为:"+webSockets.size());
} catch (Exception e) {
}
}
/**
* 链接关闭调用的方法
*/
@OnClose
public void onClose() {
try {
webSockets.remove(this);
sessionPool.remove(this.userId);
log.info("【websocket消息】连接断开,总数为:"+webSockets.size());
} catch (Exception e) {
}
}
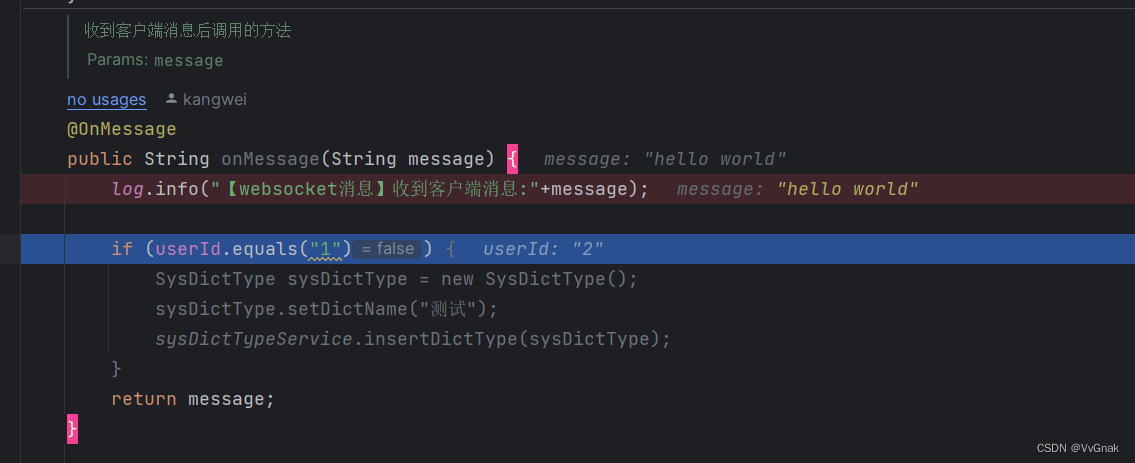
/**
* 收到客户端消息后调用的方法
* @param message
*/
@OnMessage
public String onMessage(String message) {
log.info("【websocket消息】收到客户端消息:"+message);
//插入用户id为1的客户端数据
if (userId.equals("1")) {
SysDictType sysDictType = new SysDictType();
sysDictType.setDictName("测试");
sysDictTypeService.insertDictType(sysDictType);
}
return message;
}
/** 发送错误时的处理
* @param session
* @param error
*/
@OnError
public void onError(Session session, Throwable error) {
log.error("用户错误,原因:"+error.getMessage());
error.printStackTrace();
}
// 此为广播消息
public void sendAllMessage(String message) {
log.info("【websocket消息】广播消息:"+message);
for(WebSocket webSocket : webSockets) {
try {
if(webSocket.session.isOpen()) {
webSocket.session.getAsyncRemote().sendText(message);
}
} catch (Exception e) {
e.printStackTrace();
}
}
}
// 此为单点消息
public void sendOneMessage(String userId, String message) {
Session session = sessionPool.get(userId);
if (session != null&&session.isOpen()) {
try {
log.info("【websocket消息】 单点消息:"+message);
session.getAsyncRemote().sendText(message);
} catch (Exception e) {
e.printStackTrace();
}
}
}
// 此为单点消息(多人)
public void sendMoreMessage(String[] userIds, String message) {
for(String userId:userIds) {
Session session = sessionPool.get(userId);
if (session != null&&session.isOpen()) {
try {
log.info("【websocket消息】 单点消息:"+message);
session.getAsyncRemote().sendText(message);
} catch (Exception e) {
e.printStackTrace();
}
}
}
}
}
4.调用接口发送消息
package com.ruoyi.web.controller.system;
import com.alibaba.fastjson.JSONObject;
import com.ruoyi.web.controller.tool.WebSocket;
import org.springframework.web.bind.annotation.GetMapping;
import org.springframework.web.bind.annotation.RequestMapping;
import org.springframework.web.bind.annotation.RestController;
import javax.annotation.Resource;
@RestController
@RequestMapping("WebSocketTest")
public class WebSocketTest {
@Resource
private WebSocket webSocket;
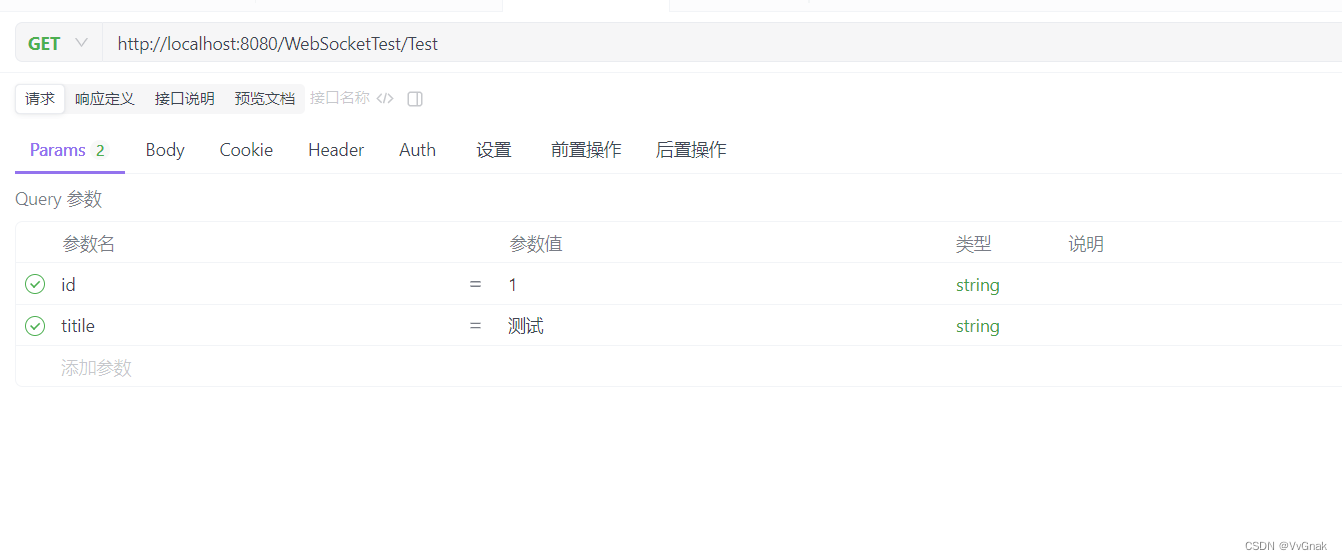
@GetMapping("Test")
public void Test(String id,String titile) {
//创建业务消息信息
JSONObject obj = new JSONObject();
obj.put("cmd", "topic");//业务类型
obj.put("msgId", id);//消息id
obj.put("msgTxt", titile);//消息内容
//全体发送
//webSocket.sendAllMessage(obj.toJSONString());
//单个用户发送 (userId为用户id)
webSocket.sendOneMessage("1", obj.toJSONString());
//多个用户发送 (userIds为多个用户id,逗号‘,’分隔)
//String [] strings = {"88","99","100","92"};
//webSocket.sendMoreMessage(strings,obj.toJSONString());
}
}
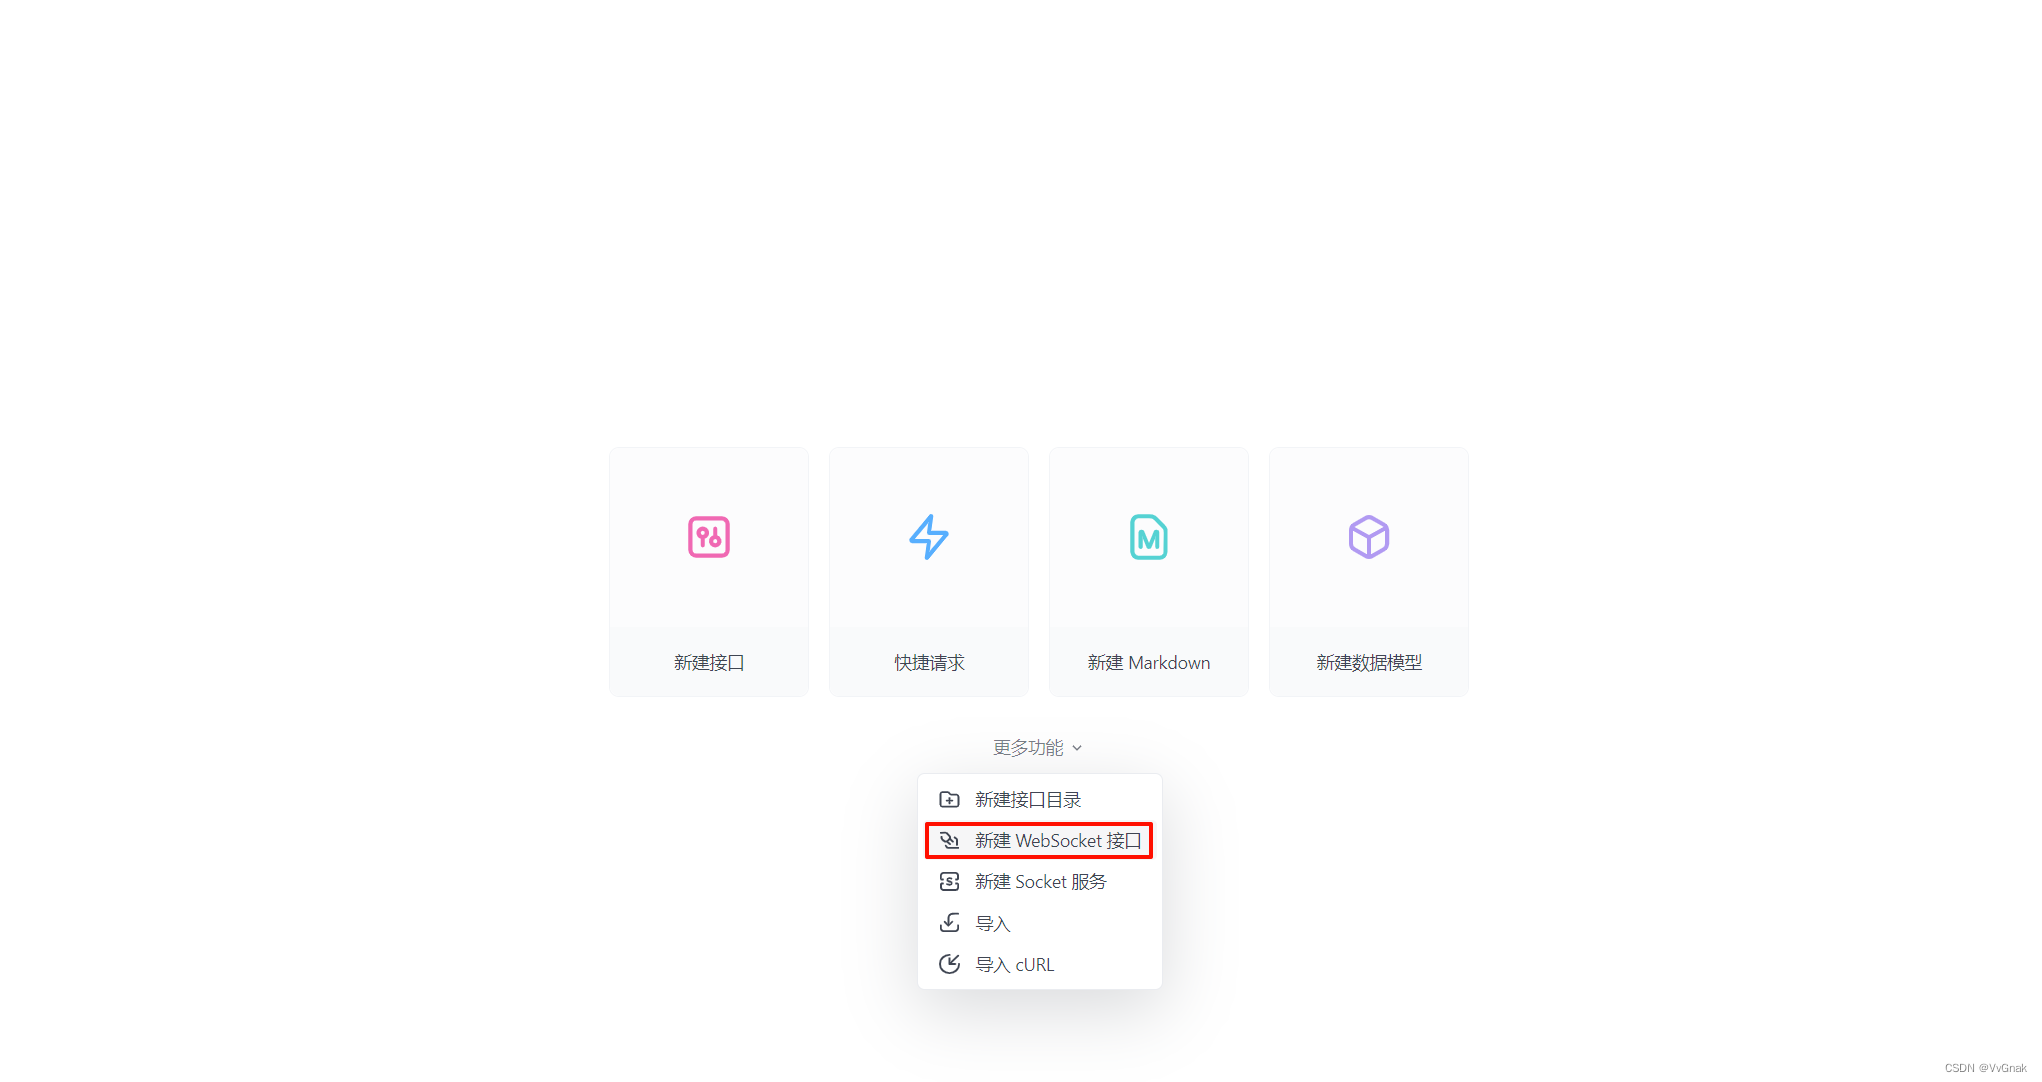
三、webSocket测试(测试工具使用Apifox)
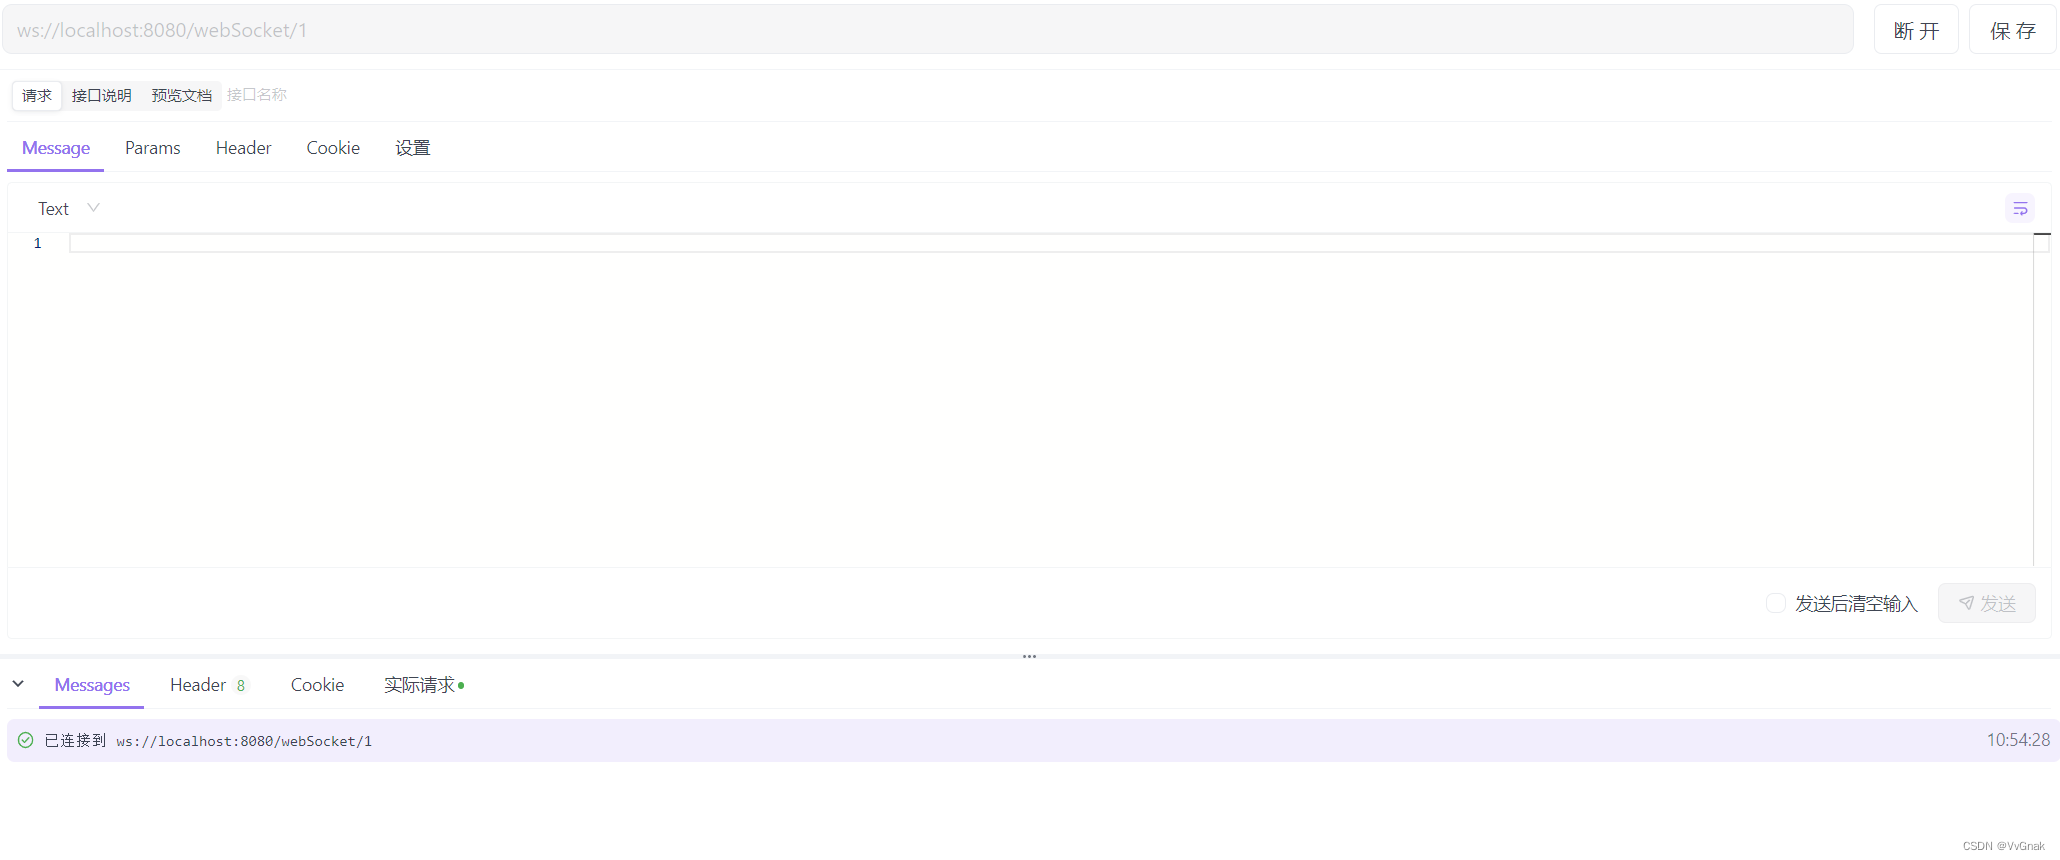
1.客户端连接
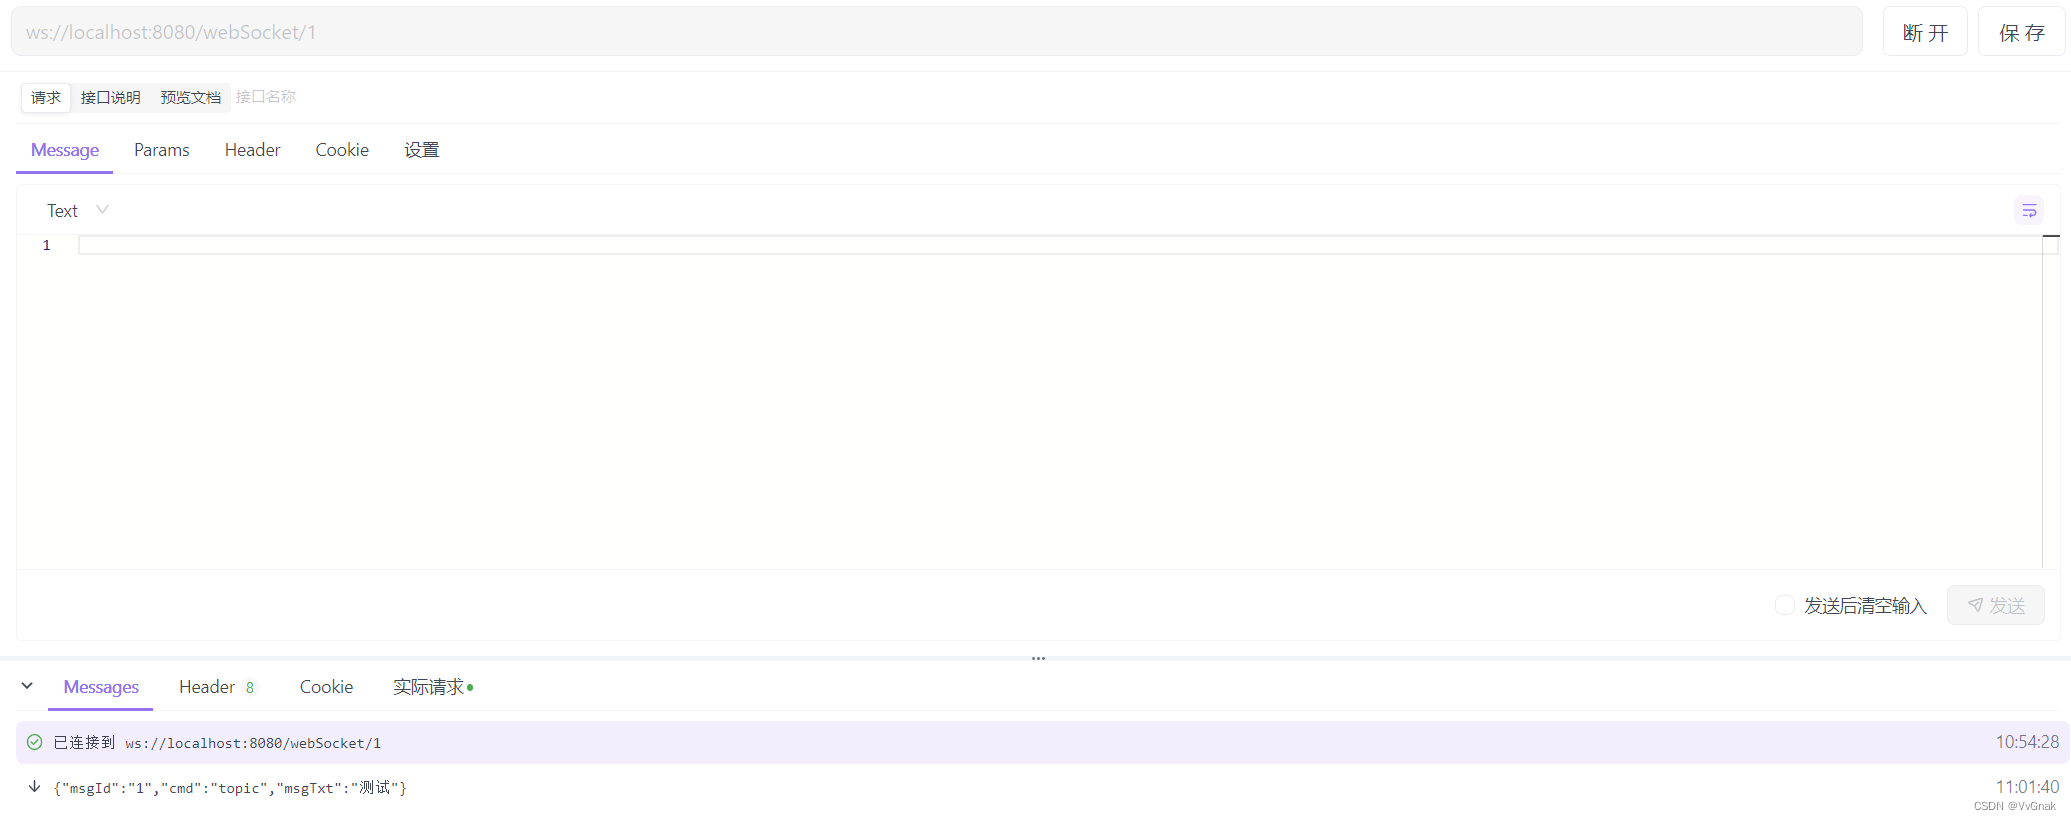
链接地址为:ws://localhost:8080/webSocket/1
2.使用Apifox新建webSocket接口测试
3.连接成功
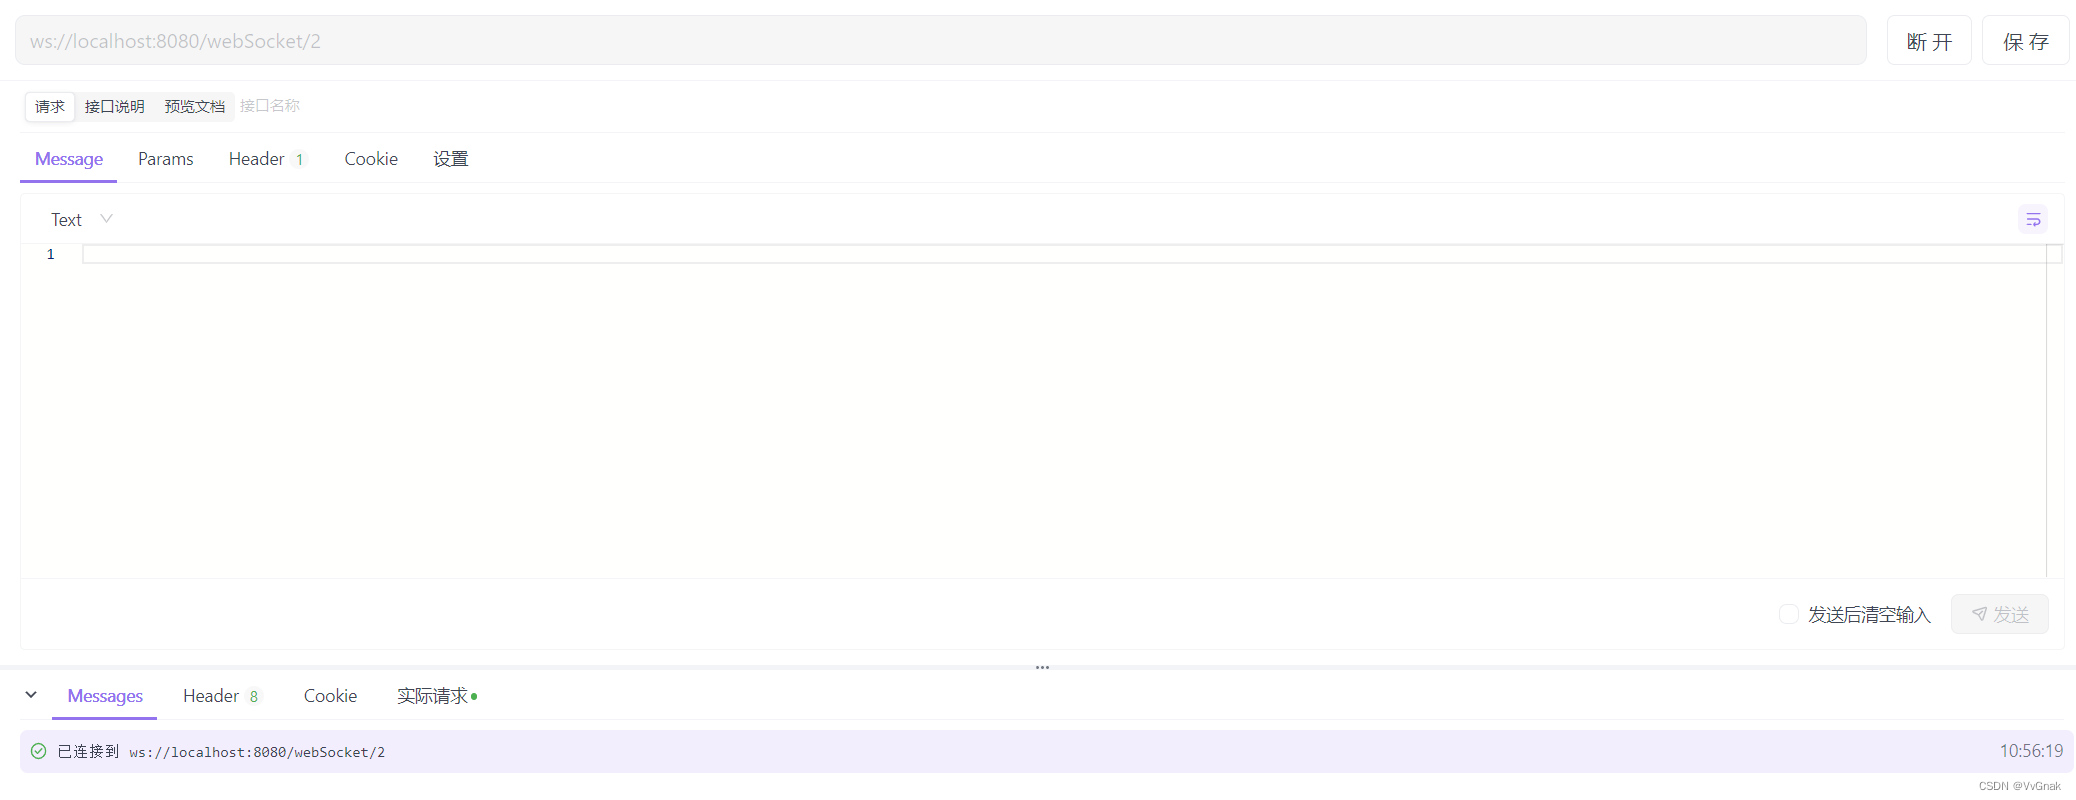
4.可以连接多个(userId不同)
5.使用客户端向服务端发送消息
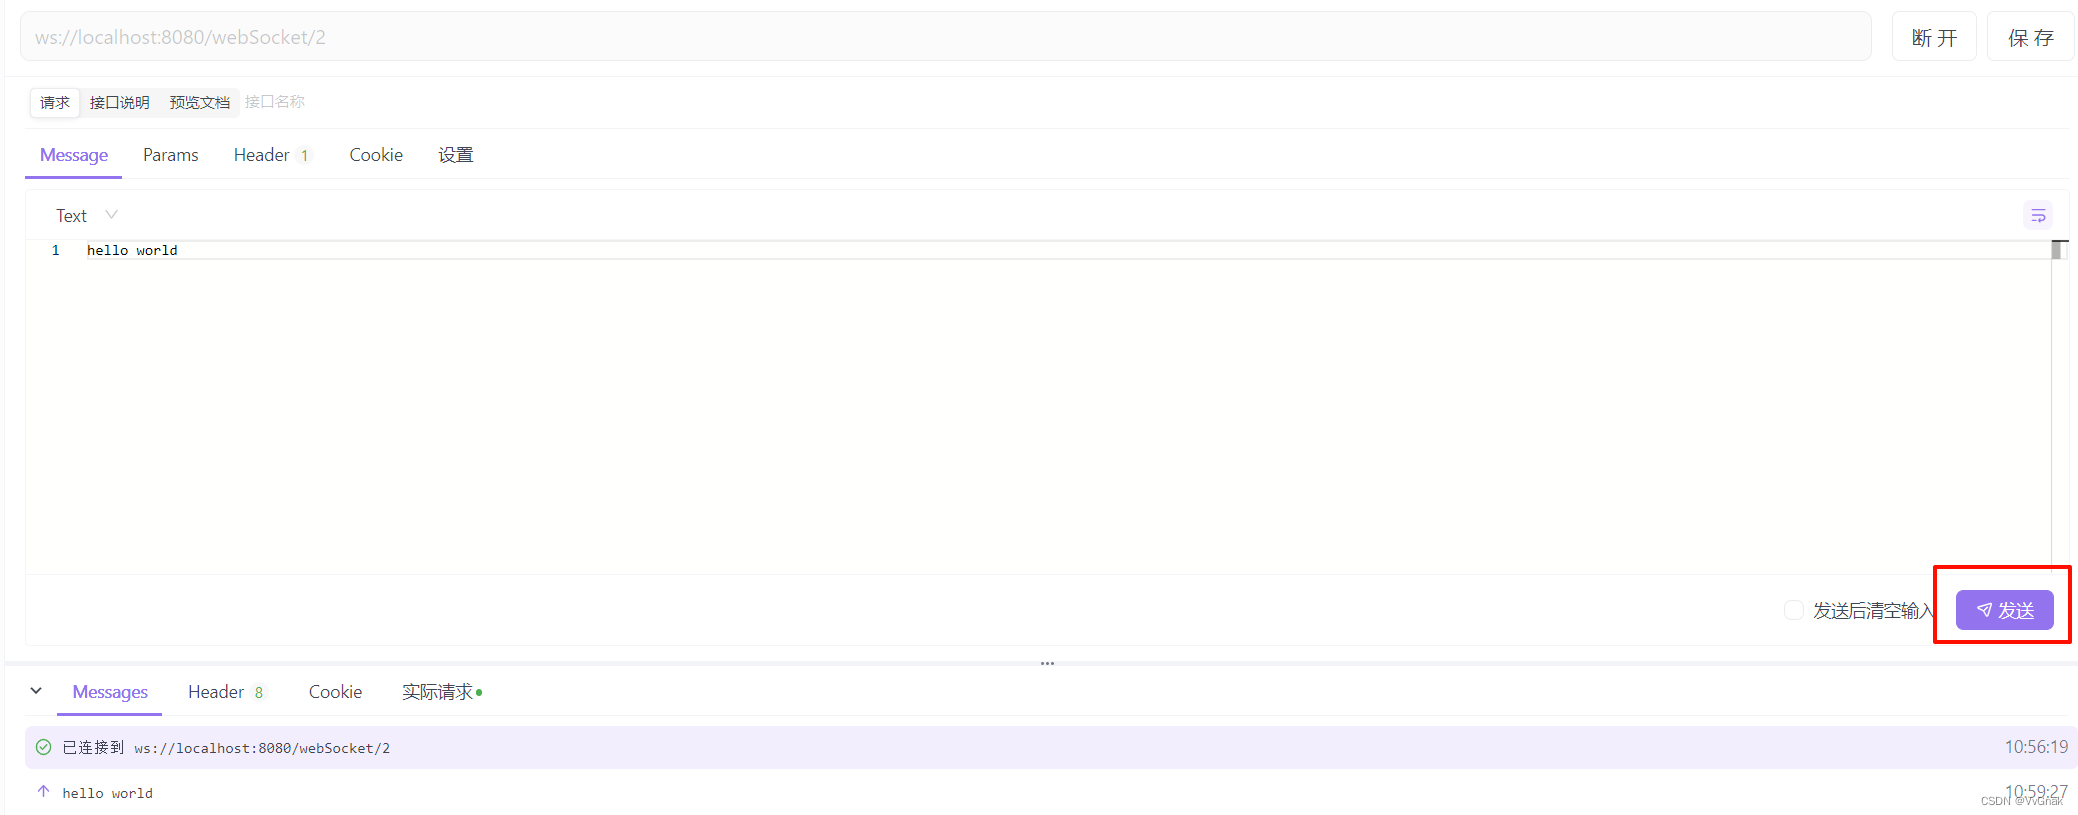
6.收到客户端消息
7.服务端调用接口给客户端发送消息
8.客户端收到消息
总结
这就完成了webSocket的整合


 3万+
3万+


 被折叠的 条评论
为什么被折叠?
被折叠的 条评论
为什么被折叠?
 到【灌水乐园】发言


