


 本文介绍了使用Xamarin.Android通过WebView与JavaScript交互,完成数据库的CRUD操作。首先,展示了如何在Android应用中嵌入WebView加载HTML页面。然后,详细阐述了如何从C#调用JavaScript函数,以及反过来从JavaScript调用C#方法。最后,通过示例解释了如何利用SQLite进行数据管理。文章特别强调了权限配置、主键设置以及方法调用的逻辑流程。
Xamarin.Android 使用初体验
本文主要通过嵌入WebView通过js与c#的互相调用,完成对数据库的CRUD
国内关于Xamarin.Android的文章比较少,应公司要求学习了一下这个Xamarin,这篇文章简单介绍一下我这个demo。其实这个demo就是个webapp,套用了Android的外壳。只是国内大多用的Android Studio,使用Xamarin.Android无非就是使用c#替换java。
我使用的工具是VS2017。至于如何搭建开发环境,这是微软的Xamarin文档里面有详细的搭建过程与注意点。话不多说上代码。
制作这个demo可以大致分为三步:
- 在Android中嵌套webview控件,通过这个webview调用一个由html、js、css制作的页面。
- 使用c#调用js中的方法,js调用c#的方法。
- js调用c#对sqlite数据库进行增删改查。
1. 在Android中嵌套webview控件,通过这个webview调用一个由html、js、css制作的页面。
1.1首先要做的事情是创建一个安卓页面。
activity_main.axml
<?xml version="1.0" encoding="utf-8"?>
<RelativeLayout xmlns:android="http://schemas.android.com/apk/res/android"
    xmlns:app="http://schemas.android.com/apk/res-auto"
    xmlns:tools="http://schemas.android.com/tools"
    android:layout_width="match_parent"
    android:layout_height="match_parent">
	<android.webkit.WebView
		android:layout_width="match_parent"
		android:layout_height="400px"
		android:minWidth="25px"
		android:minHeight="25px"
		android:id="@+id/webView1"
		/>
	<Button
		android:layout_below="@+id/webView1"
		android:text="C#调用js"
		android:layout_width="match_parent"
		android:layout_height="wrap_content"
		android:minWidth="25px"
		android:minHeight="25px"
		android:id="@+id/Button1" />
	<EditText
		android:layout_below="@+id/Button1"
		android:layout_width="match_parent"
		android:layout_height="50px"
		android:minWidth="25px"
		android:minHeight="25px"
		android:hint="username"
		android:id="@+id/userName"
	/>
	<EditText
		android:layout_below="@+id/userName"
		android:layout_width="match_parent"
		android:layout_height="50px"
		android:minWidth="25px"
		android:minHeight="25px"
		android:hint="password"
		android:id="@+id/pwd"
	/>
	<Button
		android:layout_below="@+id/pwd"
		android:text="注册"
		android:layout_width="match_parent"
		android:layout_height="wrap_content"
		android:minWidth="25px"
		android:minHeight="25px"
		android:id="@+id/btn_register" />
	<Button
		android:layout_below="@+id/btn_register"
		android:text="登录"
		android:layout_width="match_parent"
		android:layout_height="wrap_content"
		android:minWidth="25px"
		android:minHeight="25px"
		android:id="@+id/btn_login" />
	<Button
		android:layout_below="@+id/btn_login"
		android:text="删除"
		android:layout_width="match_parent"
		android:layout_height="wrap_content"
		android:minWidth="25px"
		android:minHeight="25px"
		android:id="@+id/delete" />
	<Button
		android:layout_below="@+id/delete"
		android:text="更新"
		android:layout_width="match_parent"
		android:layout_height="wrap_content"
		android:minWidth="25px"
		android:minHeight="25px"
		android:id="@+id/update" />
	<Button
		android:layout_below="@+id/update"
		android:text="查询"
		android:layout_width="match_parent"
		android:layout_height="wrap_content"
		android:minWidth="25px"
		android:minHeight="25px"
		android:id="@+id/query" />
	<Button
		android:layout_below="@+id/query"
		android:text="显示"
		android:layout_width="match_parent"
		android:layout_height="wrap_content"
		android:minWidth="25px"
		android:minHeight="25px"
		android:id="@+id/show" />
	<TextView
		android:layout_below="@+id/show"
		android:layout_width="match_parent"
		android:layout_height="match_parent"
		android:minWidth="25px"
		android:minHeight="25px"
		android:id="@+id/tv_user"
	/>
</RelativeLayout>
注:要在界面中插入一个webview。
1.2编写一个html页面放入项目中
具体做法:
在Assets目录下新建一个HTML文件夹并把页面放入该文件夹下。
WebView _webview = FindViewById<WebView>(Resource.Id.webView1);
            _webview.LoadUrl("file:///android_asset/HTML/2.html");
            //_webview.LoadUrl("");
            //启用js事件
            _webview.Settings.JavaScriptEnabled = true;
            _webview.Settings.SetSupportZoom(true);
            //启用js的dom缓存
            _webview.Settings.DomStorageEnabled = true;
            _webview.Settings.BuiltInZoomControls = true;
            _webview.Settings.UseWideViewPort = true;
            _webview.Settings.DisplayZoomControls = false;
            _webview.SetWebViewClient(new ExtWebViewClient());
通过这些配置及可以访问你的页面
注: _webview.LoadUrl(“file:///android_asset/HTML/你页面的名字.html”);只需更改你的页面的名字即可,其他无需改动,特别是android_asset无需改动,不可为Assets,否则会找不到你的文件。
到这为止第一步就算完成了,是不是很简单,别高兴太早这才一点点。
2. 使用c#调用js中的方法,js调用c#的方法。
2.1c#调用js中的方法
2.html中的js方法
 <script>
        function test() {

            alert("from c#");
        }
 </script>
MainActivity.cs中的点击事件
  Button _button = FindViewById<Button>(Resource.Id.Button1);

		 _button.Click += delegate {


      		_webview.LoadUrl("javascript:" + "test()");

            };
这样即可调用页面中的js方法了。
2.2js调用c#
首先要给主界面添加权限配置
MainActivity.cs
_webview.AddJavascriptInterface(new AndroidMethod(this), "AndroidMethod");
创建AndroidMethod这个类来存放方法。
AndroidMethod.cs
namespace dataApp1
{

    public class AndroidMethod : Java.Lang.Object//注意一定要继承java基类
    {

        public AndroidMethod(Activity activity)
        {

            _activity = activity;
        }
        /// <summary>
        /// 弹出有消息的提示框(有参无反)
        /// </summary>
        /// <param name="Message"></param>
        [Export("ShowToast")]//这个是js调用的c#类中方法名
        [JavascriptInterface]//表示这个Method是可以被js调用的
        public void ShowToast(string Message)
        {

            Toast.MakeText(_activity.ApplicationContext, Message, ToastLength.Short).Show();
        }

	}
}
2.html中的点击事件
 var message = "from js"
 function ShowToast(message) {


            javascript: AndroidMethod.ShowToast(message);
        }
这样即可使用js调用c#中代码
到这第二步即完成了。哈哈哈,到这就完成了整个demo的准备工作了,到这边已经完成了demo的30%。
3. js调用c#对sqlite数据库进行增删改查。
3.连接sqlite,创建实体类
我这边使用的是别人的框架,当然也可以直接链接sqlite,感兴趣的可以自行去研究。
需要引用sqlite-net-pcl这个包,我引用的最好引用上,特别是Mono.Android和Mono.Android.Export需要引用否则会报错。
接着是创建实体类
UserInfo.cs
namespace dataApp1
{

    [Table("UserInfo2")]
    public class UserInfo
    {

        [PrimaryKey,AutoIncrement]
        public int Id {
    get; set; }
        public string UserName {
    get; set; }
        public string Pwd {
    get; set; }

    }
}
注:[PrimaryKey,AutoIncrement]必须要有,这是设置主键的,并自动增加排序,不加的话增没有问题,后续的删、改、查都会无法实现。
2.功能的实现
因代码都比较相似,这边举例增加功能的代码。
之前js调用c#中的方法直接调用AndroidMethod.cs中的方法即可。
因为类似于 Button _button = FindViewById(Resource.Id.Button1);这些只能在主函数中书写,因此方法不能写在AndroidMethod.cs,需要AndroidMethod.cs调用MainActivity.cs中的方法。需要在MainActivity.cs添加一个getMainActivity()方法。
MainActivity.cs
public MainActivity()
        {

            mainActivity = this;
        }
        public static MainActivity getMainActivity()
        {

            return mainActivity;
        }
AndroidMethod.cs
 [Export("Register_js")]
        [JavascriptInterface]
        public void Register_js(string username ,string pwd)
        {


            Toast.MakeText(_activity.ApplicationContext, MainActivity.getMainActivity().Register_js(username, pwd), ToastLength.Short).Show();

        }
当js调用了Register_js这个方法,在AndroidMethod.cs中就调用MainActivity.cs中的Register_js方法,听起来是有点绕。画张图应该会清晰一点。
2.html中button点击----->2.html中的方法 ------>AndroidMethod.cs中的方法----->MainActivity.cs中的方法
2.html
 function Register(username, pwd)
        {

            javascript: AndroidMethod.Register_js(username, pwd);
        }
        _register.onclick = function ()
        {

            username = document.getElementById("username").value;
            pwd = document.getElementById("pwd").value;
            Register(username, pwd);
        }
MainActivity.cs
public String Register_js(string userName, string pwd)
        {

            sqliteConn = new SQLiteConnection(dbPath);
            var userInfoTable = sqliteConn.GetTableInfo(TableName);
            if (userInfoTable.Count == 0)
            {

                sqliteConn.CreateTable<UserInfo>();
            }
            UserInfo model = new UserInfo() {
    UserName = userName, Pwd = pwd };
            sqliteConn.Insert(model);
            return "注册成功";
        }
这是增加的方法,后面几种稍微有些许差别但基本相似。留给你们自己看了。
接下来是全部代码
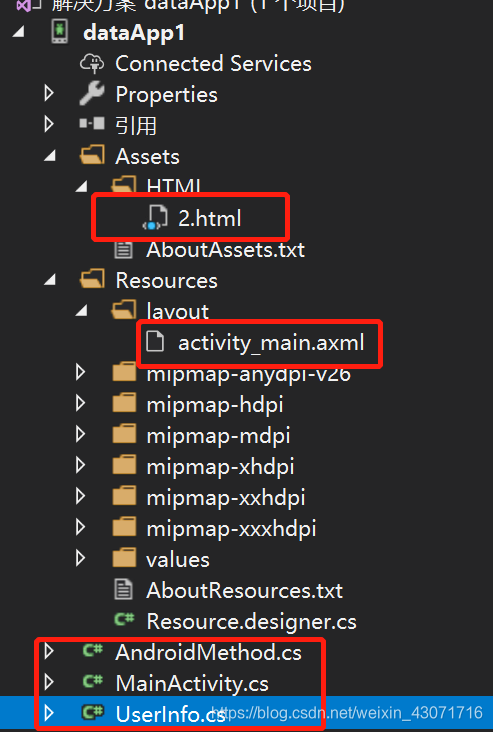
这是项目的目录
activity_main.axml
<?xml version="1.0" encoding="utf-8"?>
<RelativeLayout xmlns:android="http://schemas.android.com/apk/res/android"
    xmlns:app="http://schemas.android.com/apk/res-auto"
    xmlns:tools="http://schemas.android.com/tools"
    android:layout_width="match_parent"
    android:layout_height="match_parent">
	<android.webkit.WebView
		android:layout_width="match_parent"
		android:layout_height="400px"
		android:minWidth="25px"
		android:minHeight="25px"
		android:id="@+id/webView1"
		/>
	<Button
		android:layout_below="@+id/webView1"
		android:text="C#调用js"
		android:layout_width="match_parent"
		android:layout_height="wrap_content"
		android:minWidth="25px"
		android:minHeight="25px"
		android:id="@+id/Button1" />
	<EditText
		android:layout_below="@+id/Button1"
		android:layout_width="match_parent"
		android:layout_height="50px"
		android:minWidth="25px"
		android:minHeight="25px"
		android:hint="username"
		android:id="@+id/userName"
	/>
	<EditText
		android:layout_below="@+id/userName"
		android:layout_width="match_parent"
		android:layout_height="50px"
		android:minWidth="25px"
		android:minHeight="25px"
		android:hint="password"
		android:id="@+id/pwd"
	/>
	<Button
		android:layout_below="@+id/pwd"
		android:text="注册"
		android:layout_width="match_parent"
		android:layout_height="wrap_content"
		android:minWidth="25px"
		android:minHeight="25px"
		android:id="@+id/btn_register" />
	<Button
		android:layout_below="@+id/btn_register"
		android:text="登录"
		android:layout_width="match_parent"
		android:layout_height="wrap_content"
		android:minWidth="25px"
		android:minHeight="25px"
		android:id="@+id/btn_login" />
	<Button
		android:layout_below="@+id/btn_login"
		android:text="删除"
		android:layout_width="match_parent"
		android:layout_height="wrap_content"
		android:minWidth="25px"
		android:minHeight="25px"
		android:id="@+id/delete" />
	<Button
		android:layout_below="@+id/delete"
		android:text="更新"
		android:layout_width="match_parent"
		android:layout_height="wrap_content"
		android:minWidth="25px"
		android:minHeight="25px"
		android:id="@+id/update" />
	<Button
		android:layout_below="@+id/update"
		android:text="查询"
		android:layout_width="match_parent"
		android:layout_height="wrap_content"
		android:minWidth="25px"
		android:minHeight="25px"
		android:id="@+id/query" />
	<Button
		android:layout_below="@+id/query"
		android:text="显示"
		android:layout_width="match_parent"
		android:layout_height="wrap_content"
		android:minWidth="25px"
		android:minHeight="25px"
		android:id="@+id/show" />
	<TextView
		android:layout_below="@+id/show"
		android:layout_width="match_parent"
		android:layout_height="match_parent"
		android:minWidth="25px"
		android:minHeight="25px"
		android:id="@+id/tv_user"
	/>
</RelativeLayout>
MainActivity.cs
using Android.App;
using Android.OS;
using Android.Support.V7.App;
using Android.Runtime;
using Android.Widget;
using
最低0.47元/天 解锁文章


 2万+
2万+

 被折叠的 条评论
为什么被折叠?
被折叠的 条评论
为什么被折叠?
 到【灌水乐园】发言


